The best import export plugin for WordPress & WooCommerce.

How to Export WordPress Comments
To export WordPress comments, go to All Export › New Export and select Comments. Then, drag and drop your comment data fields to set up your export file. All relevant WordPress comment data is automatically detected.
Table of Contents
- Step 1: Create a New Comments Export
- Step 2: Select the Export Columns
- Step 3: Configure the Export Settings
- Step 4: Download the Exported Comments
Advanced Topics
Step 1: Create a New Export for WordPress Comments
Navigate to All Export › New Export, and choose to export Comments. Our software will display the number of comments to export. You can reduce this number by creating filters in the Add Filtering Options section, which is located near the bottom. Leave the export unfiltered for now.
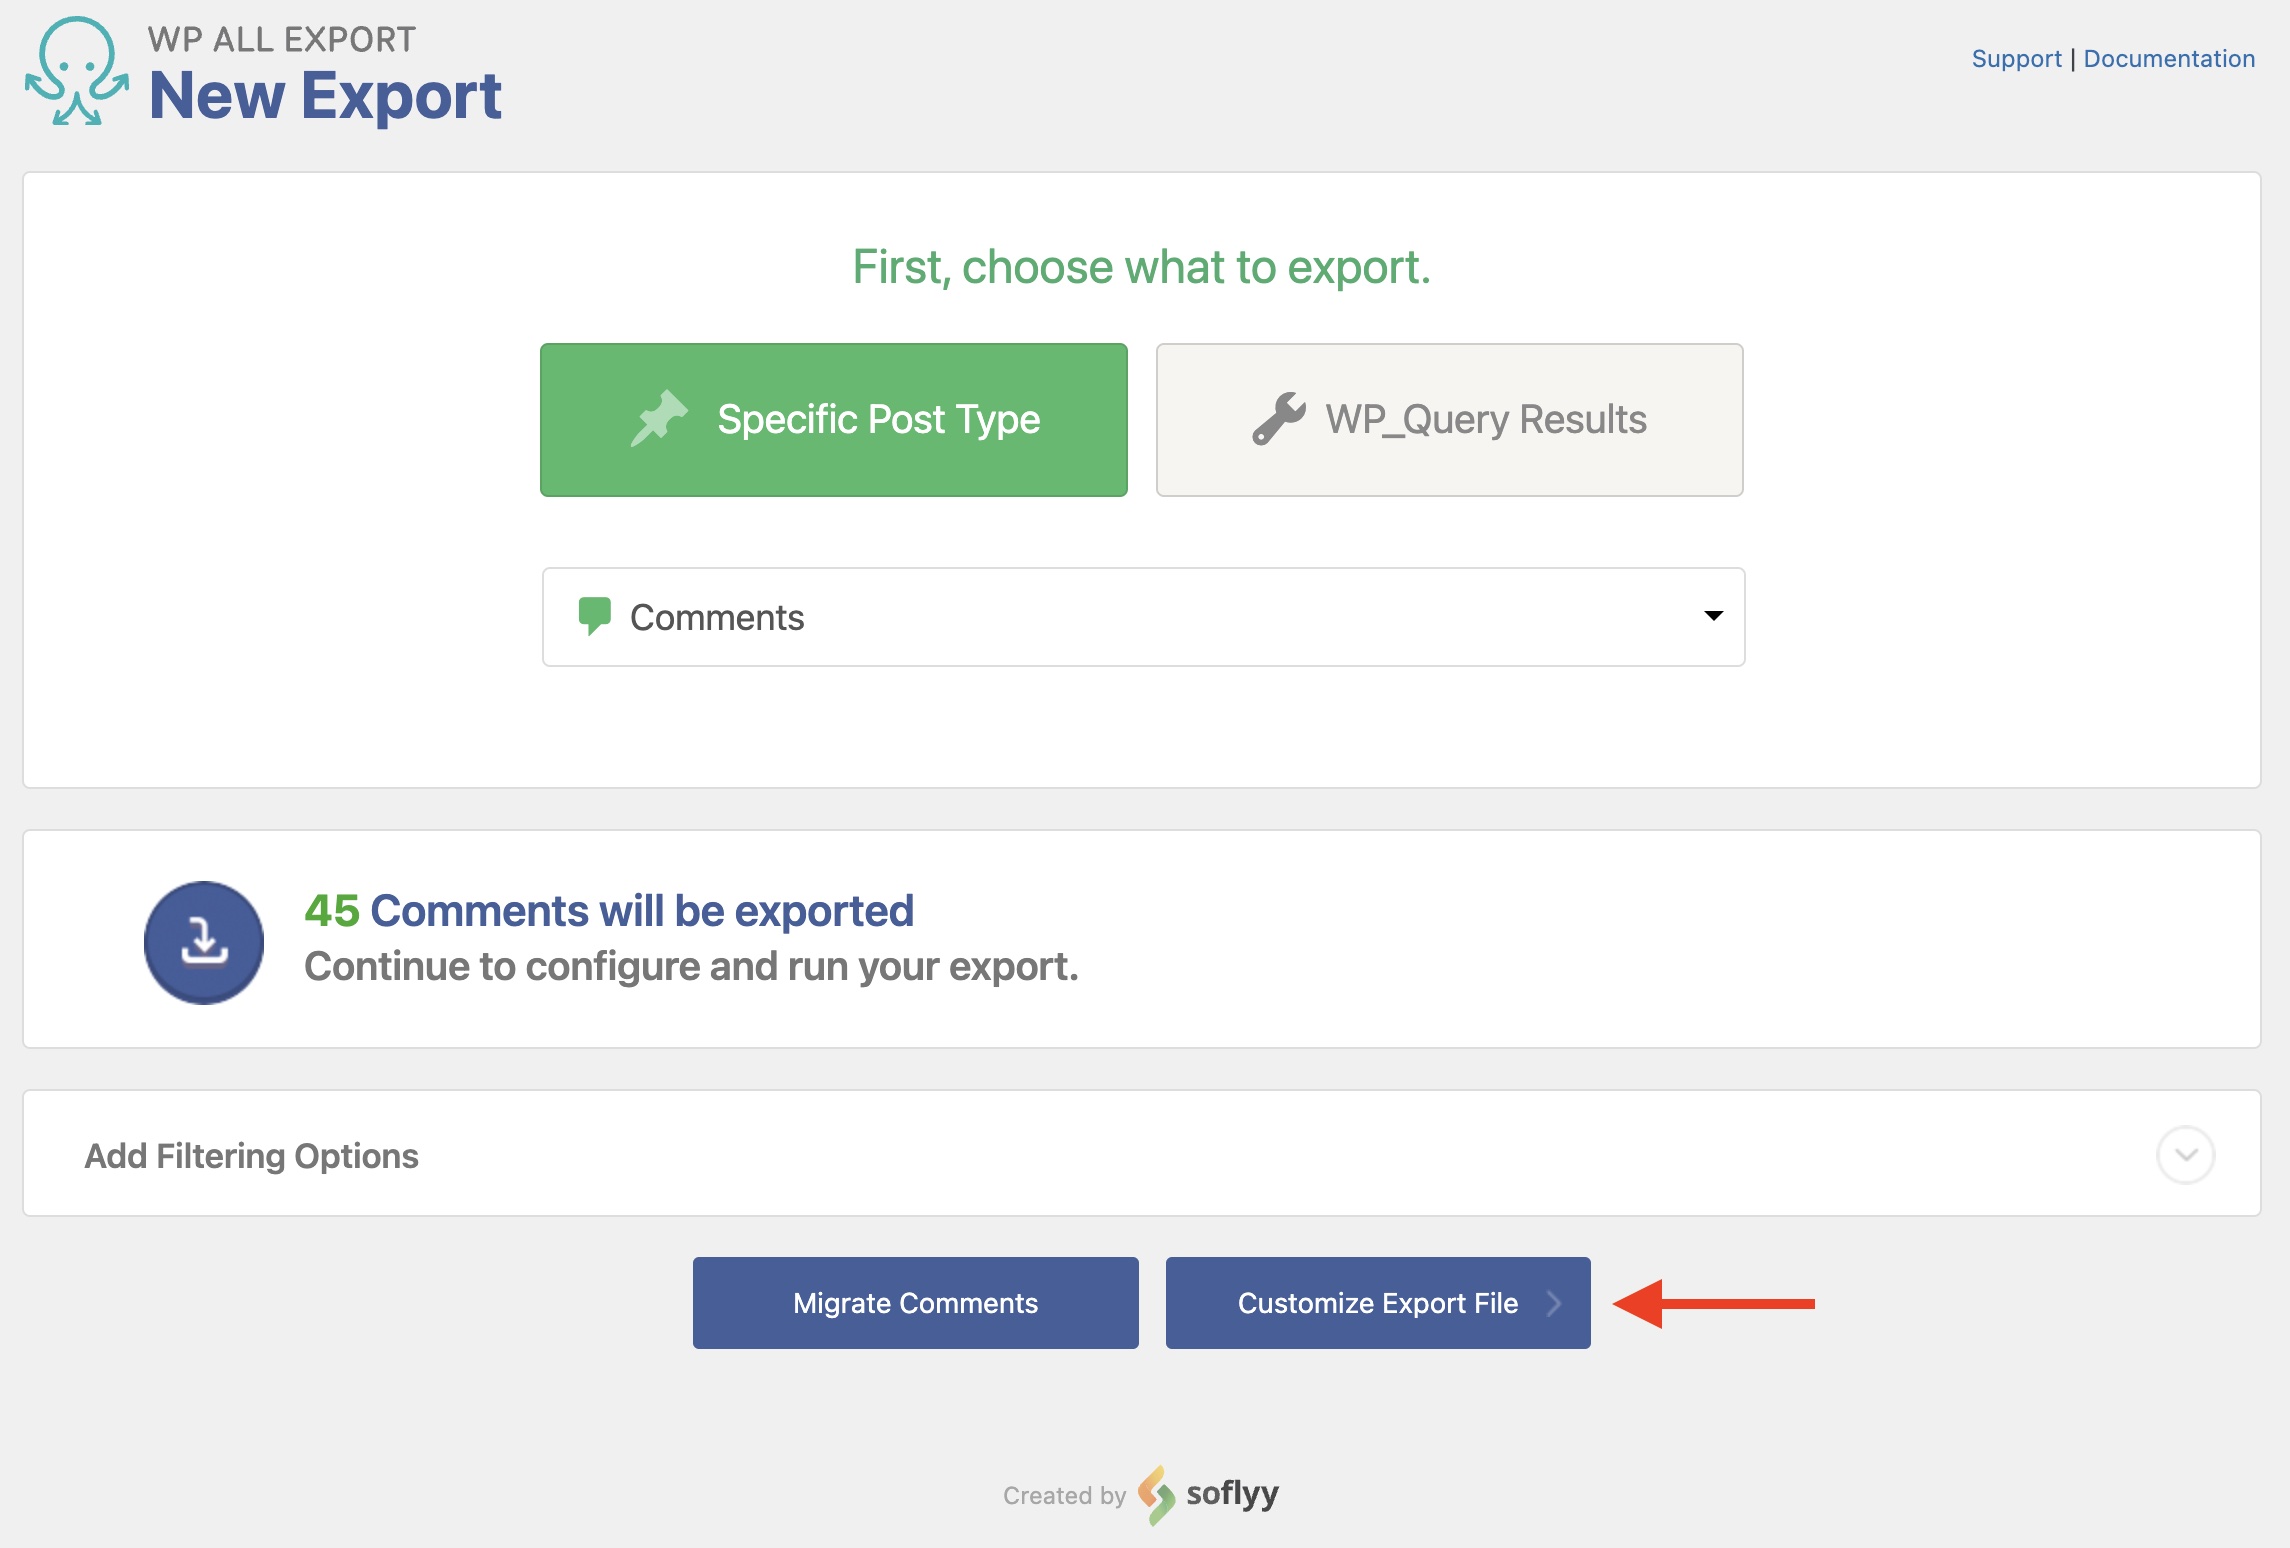
To continue, click Customize Export File.
Step 2: Select the Export Columns
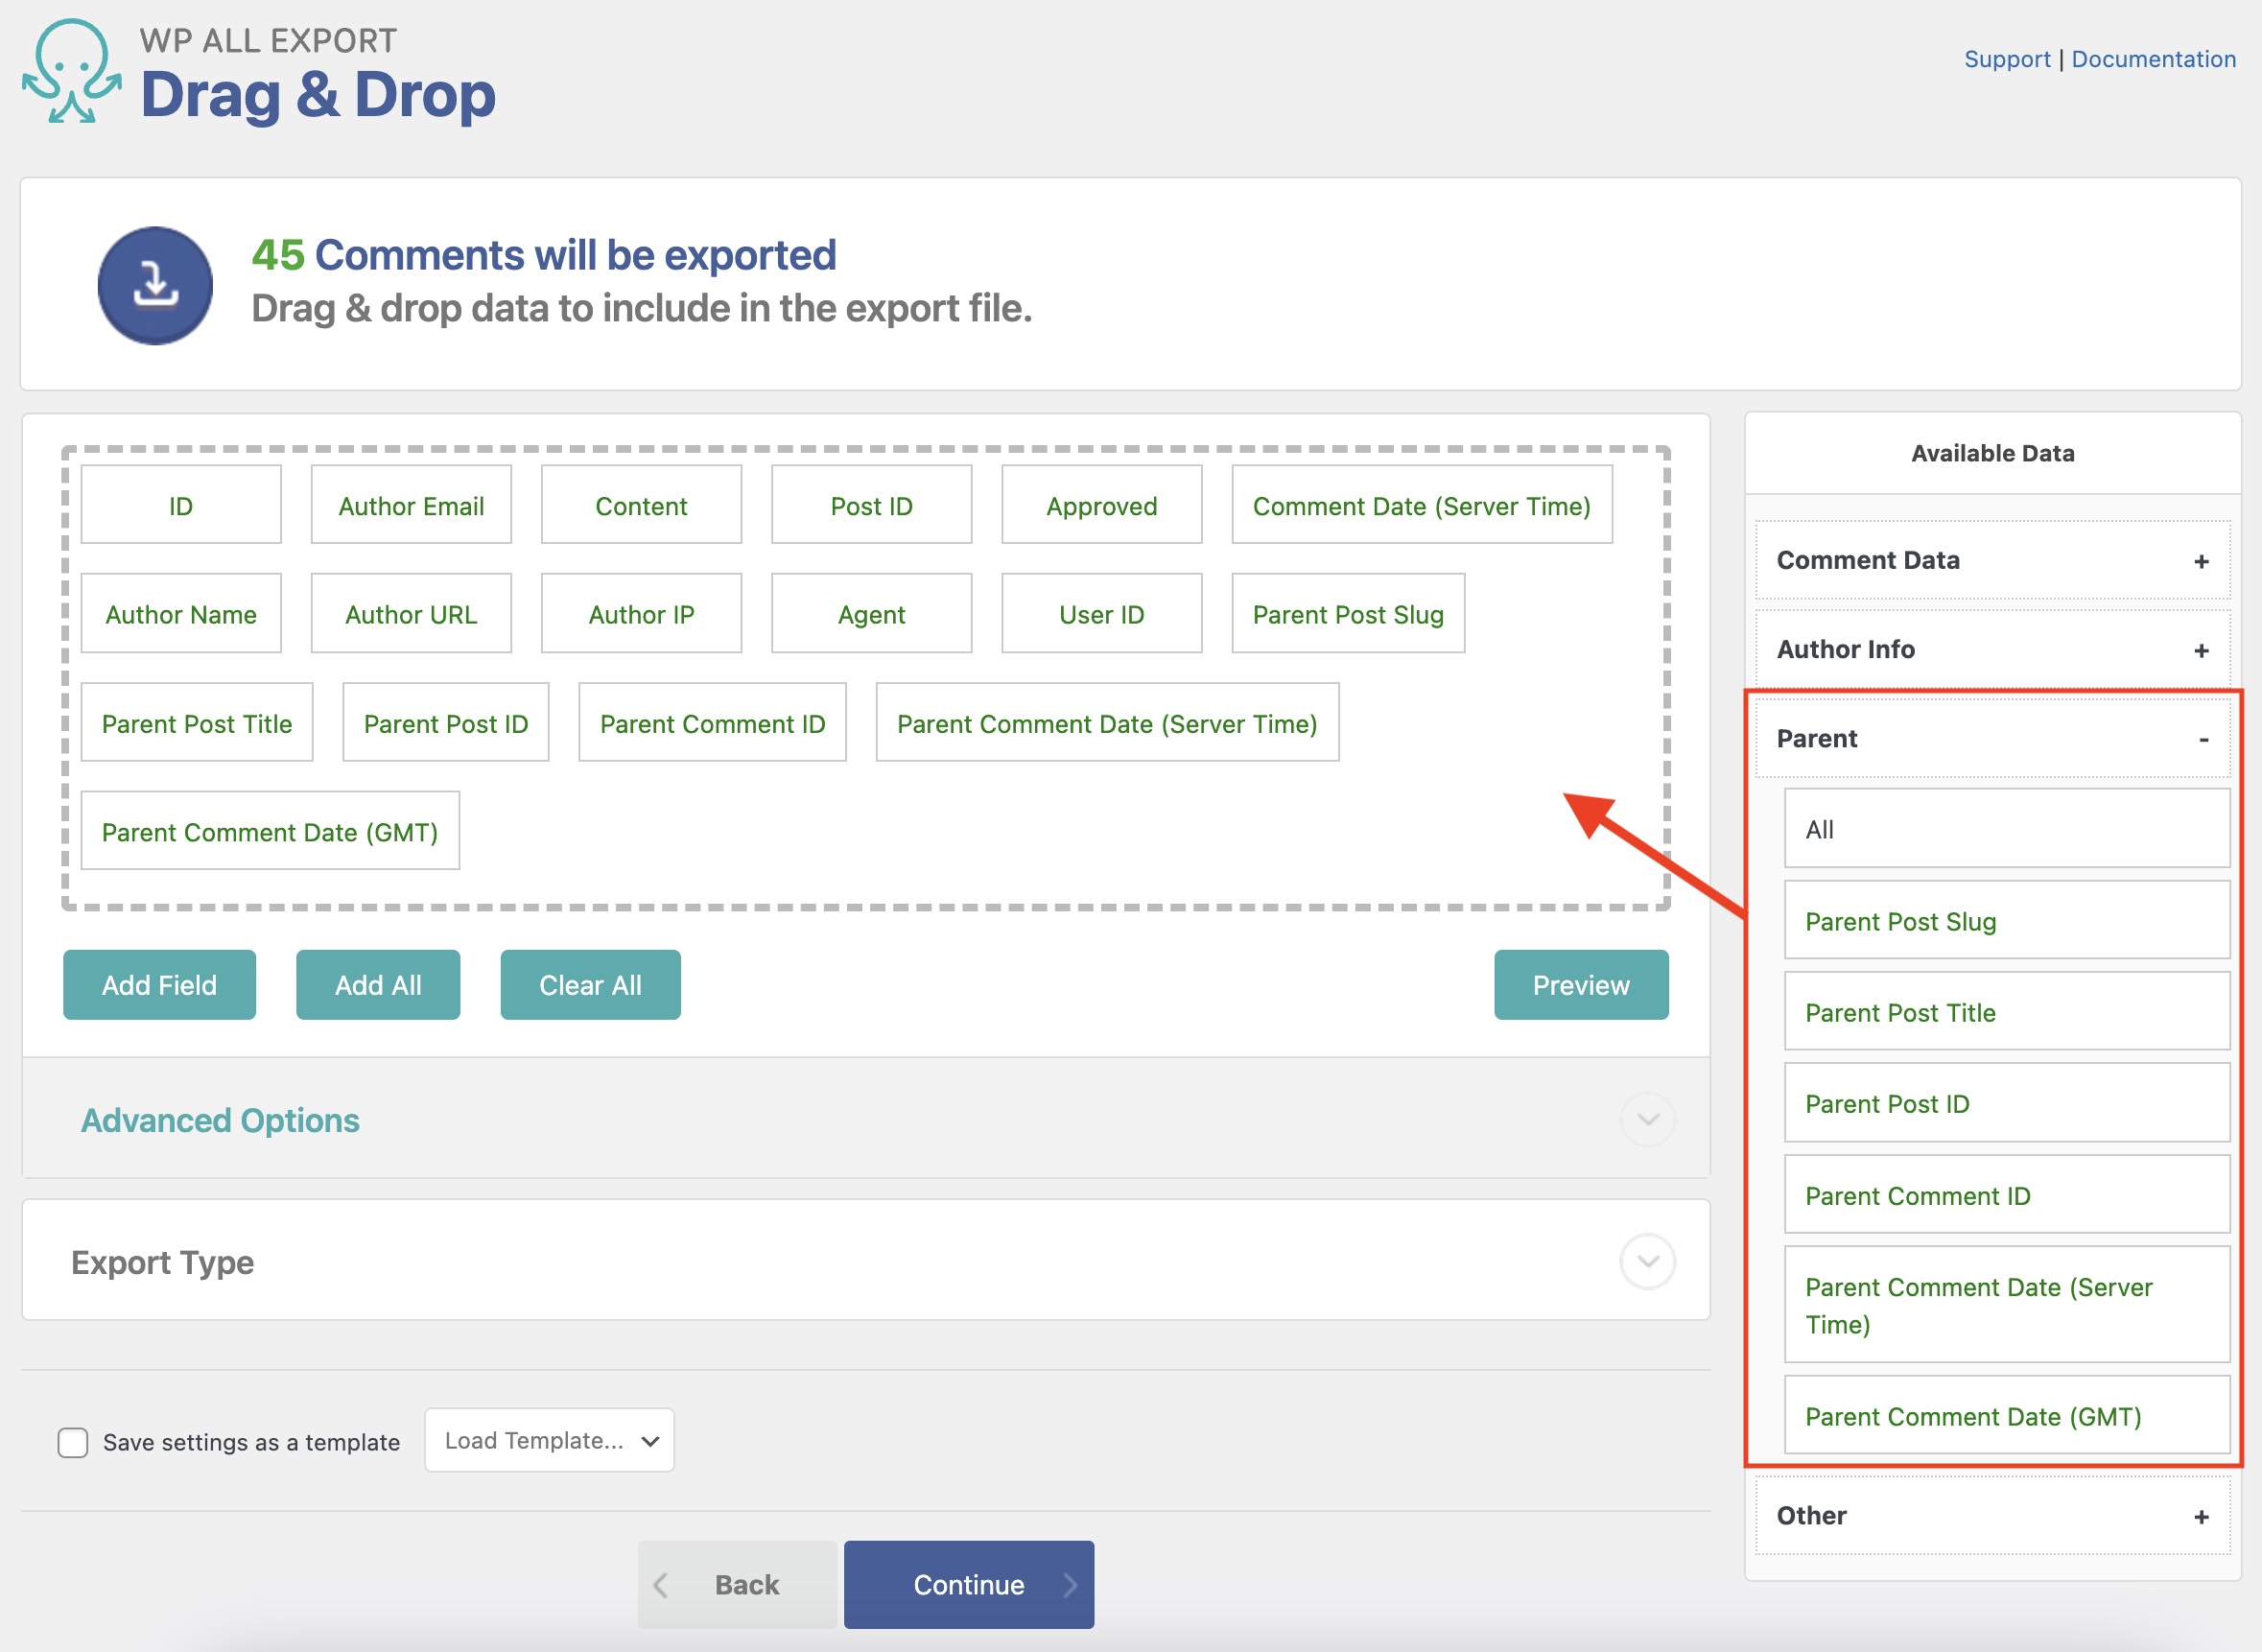
You now see the Drag & Drop screen, where you build your export file by selecting export columns. To do this, just drag the desired fields from the Available Data section on the right to the column selection area.
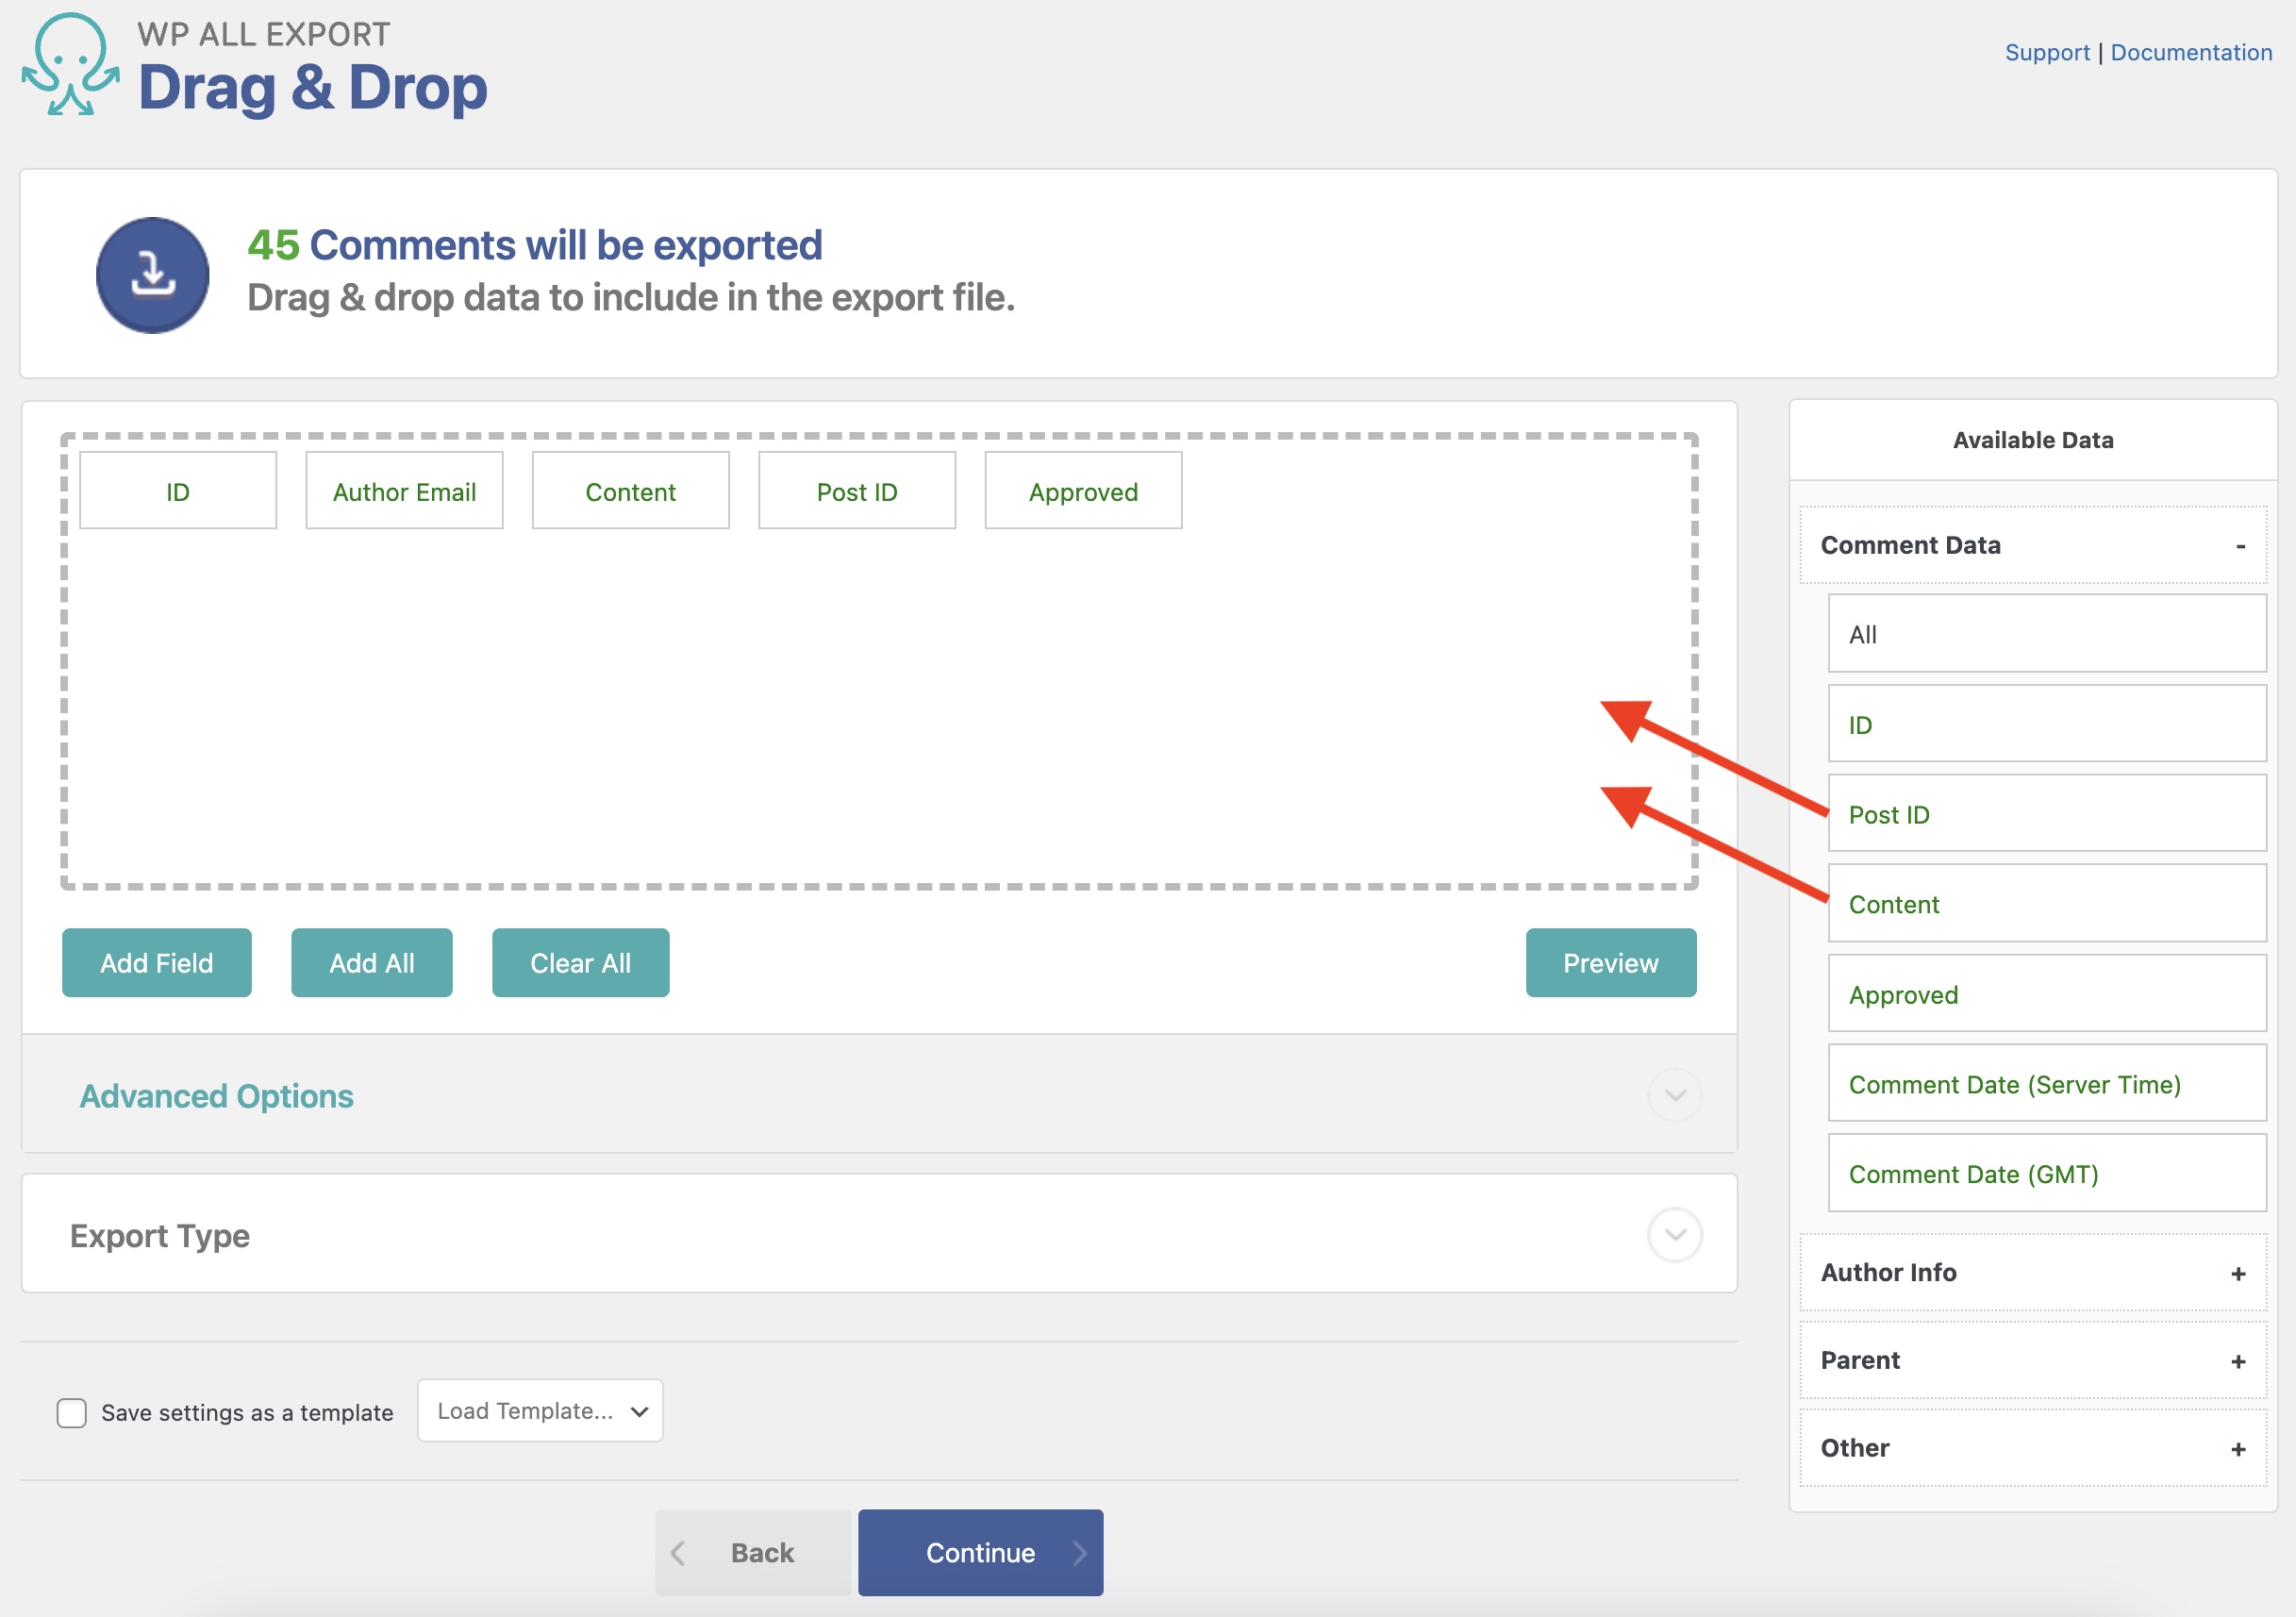
Comments data is split into four categories in the Available Data section: Comment Data, Author Info, Parent, and Other.
Comment Data
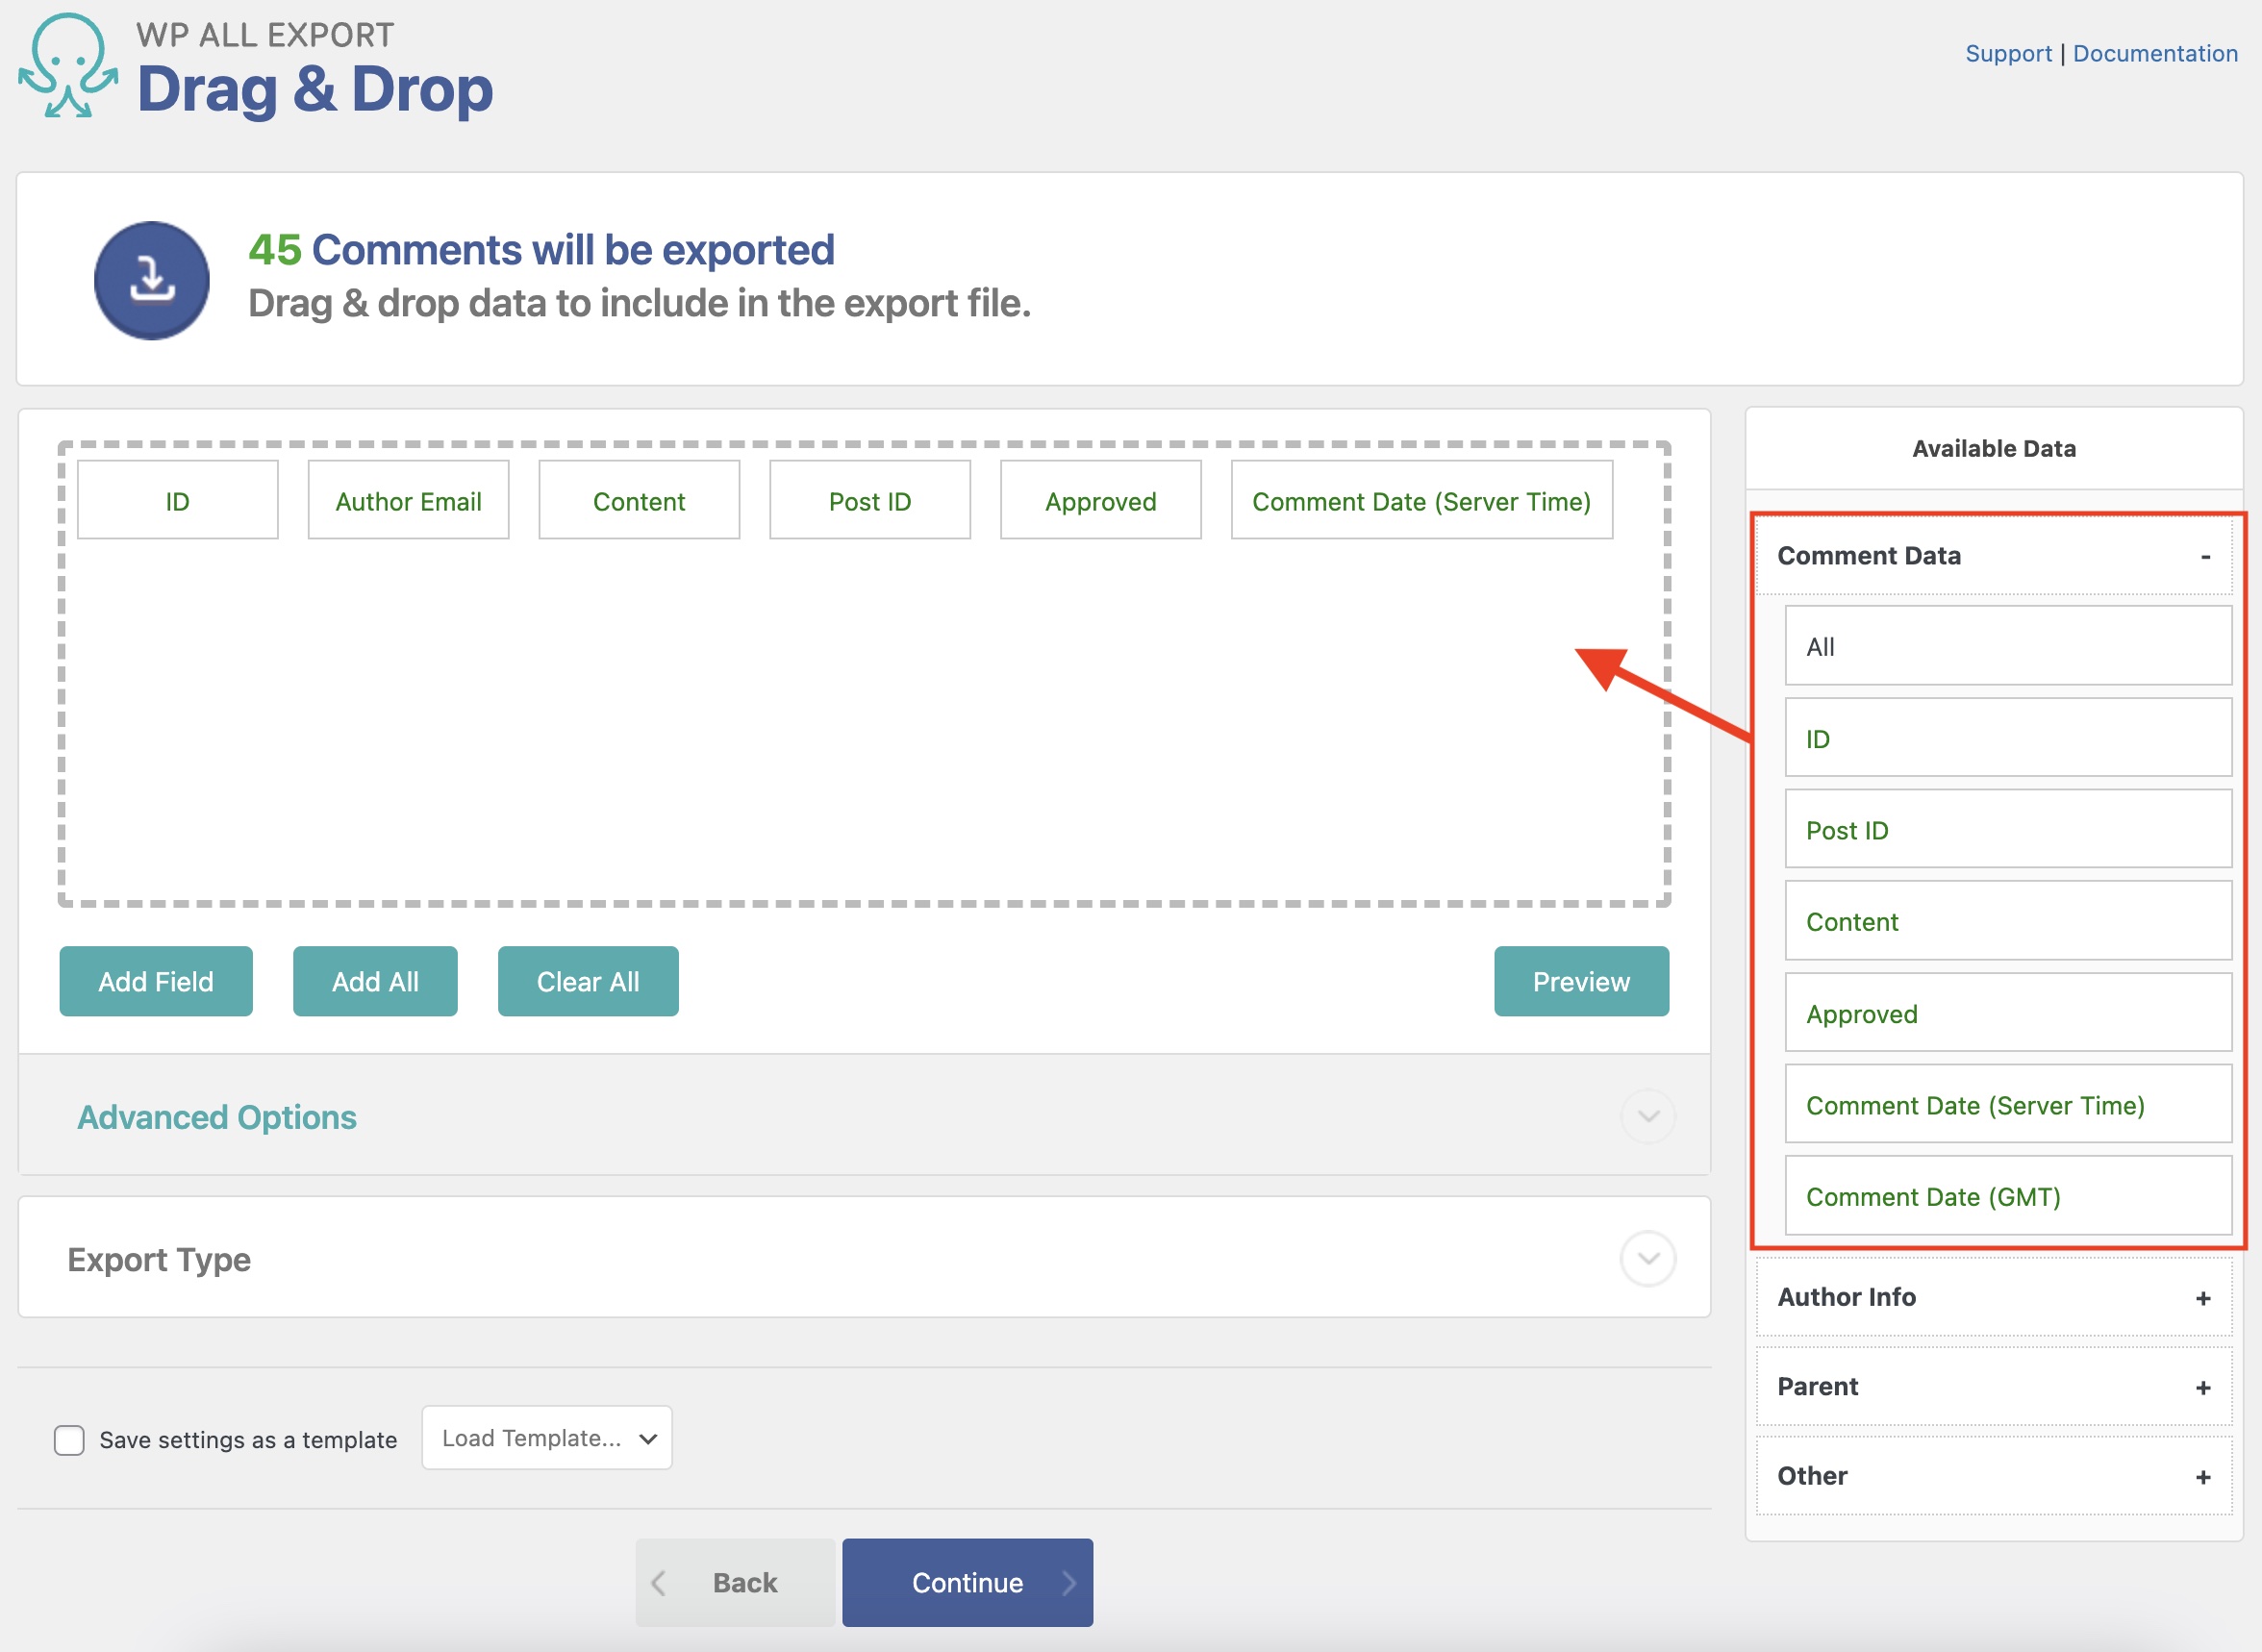
Basic, commonly used comment data is accessible in Available Data › Comment Data.
- ID: The comment ID assigned by WordPress.
- Post ID: The ID of the post where this comment was made.
- Content: The main content of the comment.
- Approved: The comment's approval status, with
1for approved and0for not approved. - Comment Date (Server Time): Date and time when the comment was made, using the timezone that your server is set to.
- Comment Date (GMT): Date and time when the comment was made, in GMT/UTC time.
Author Info
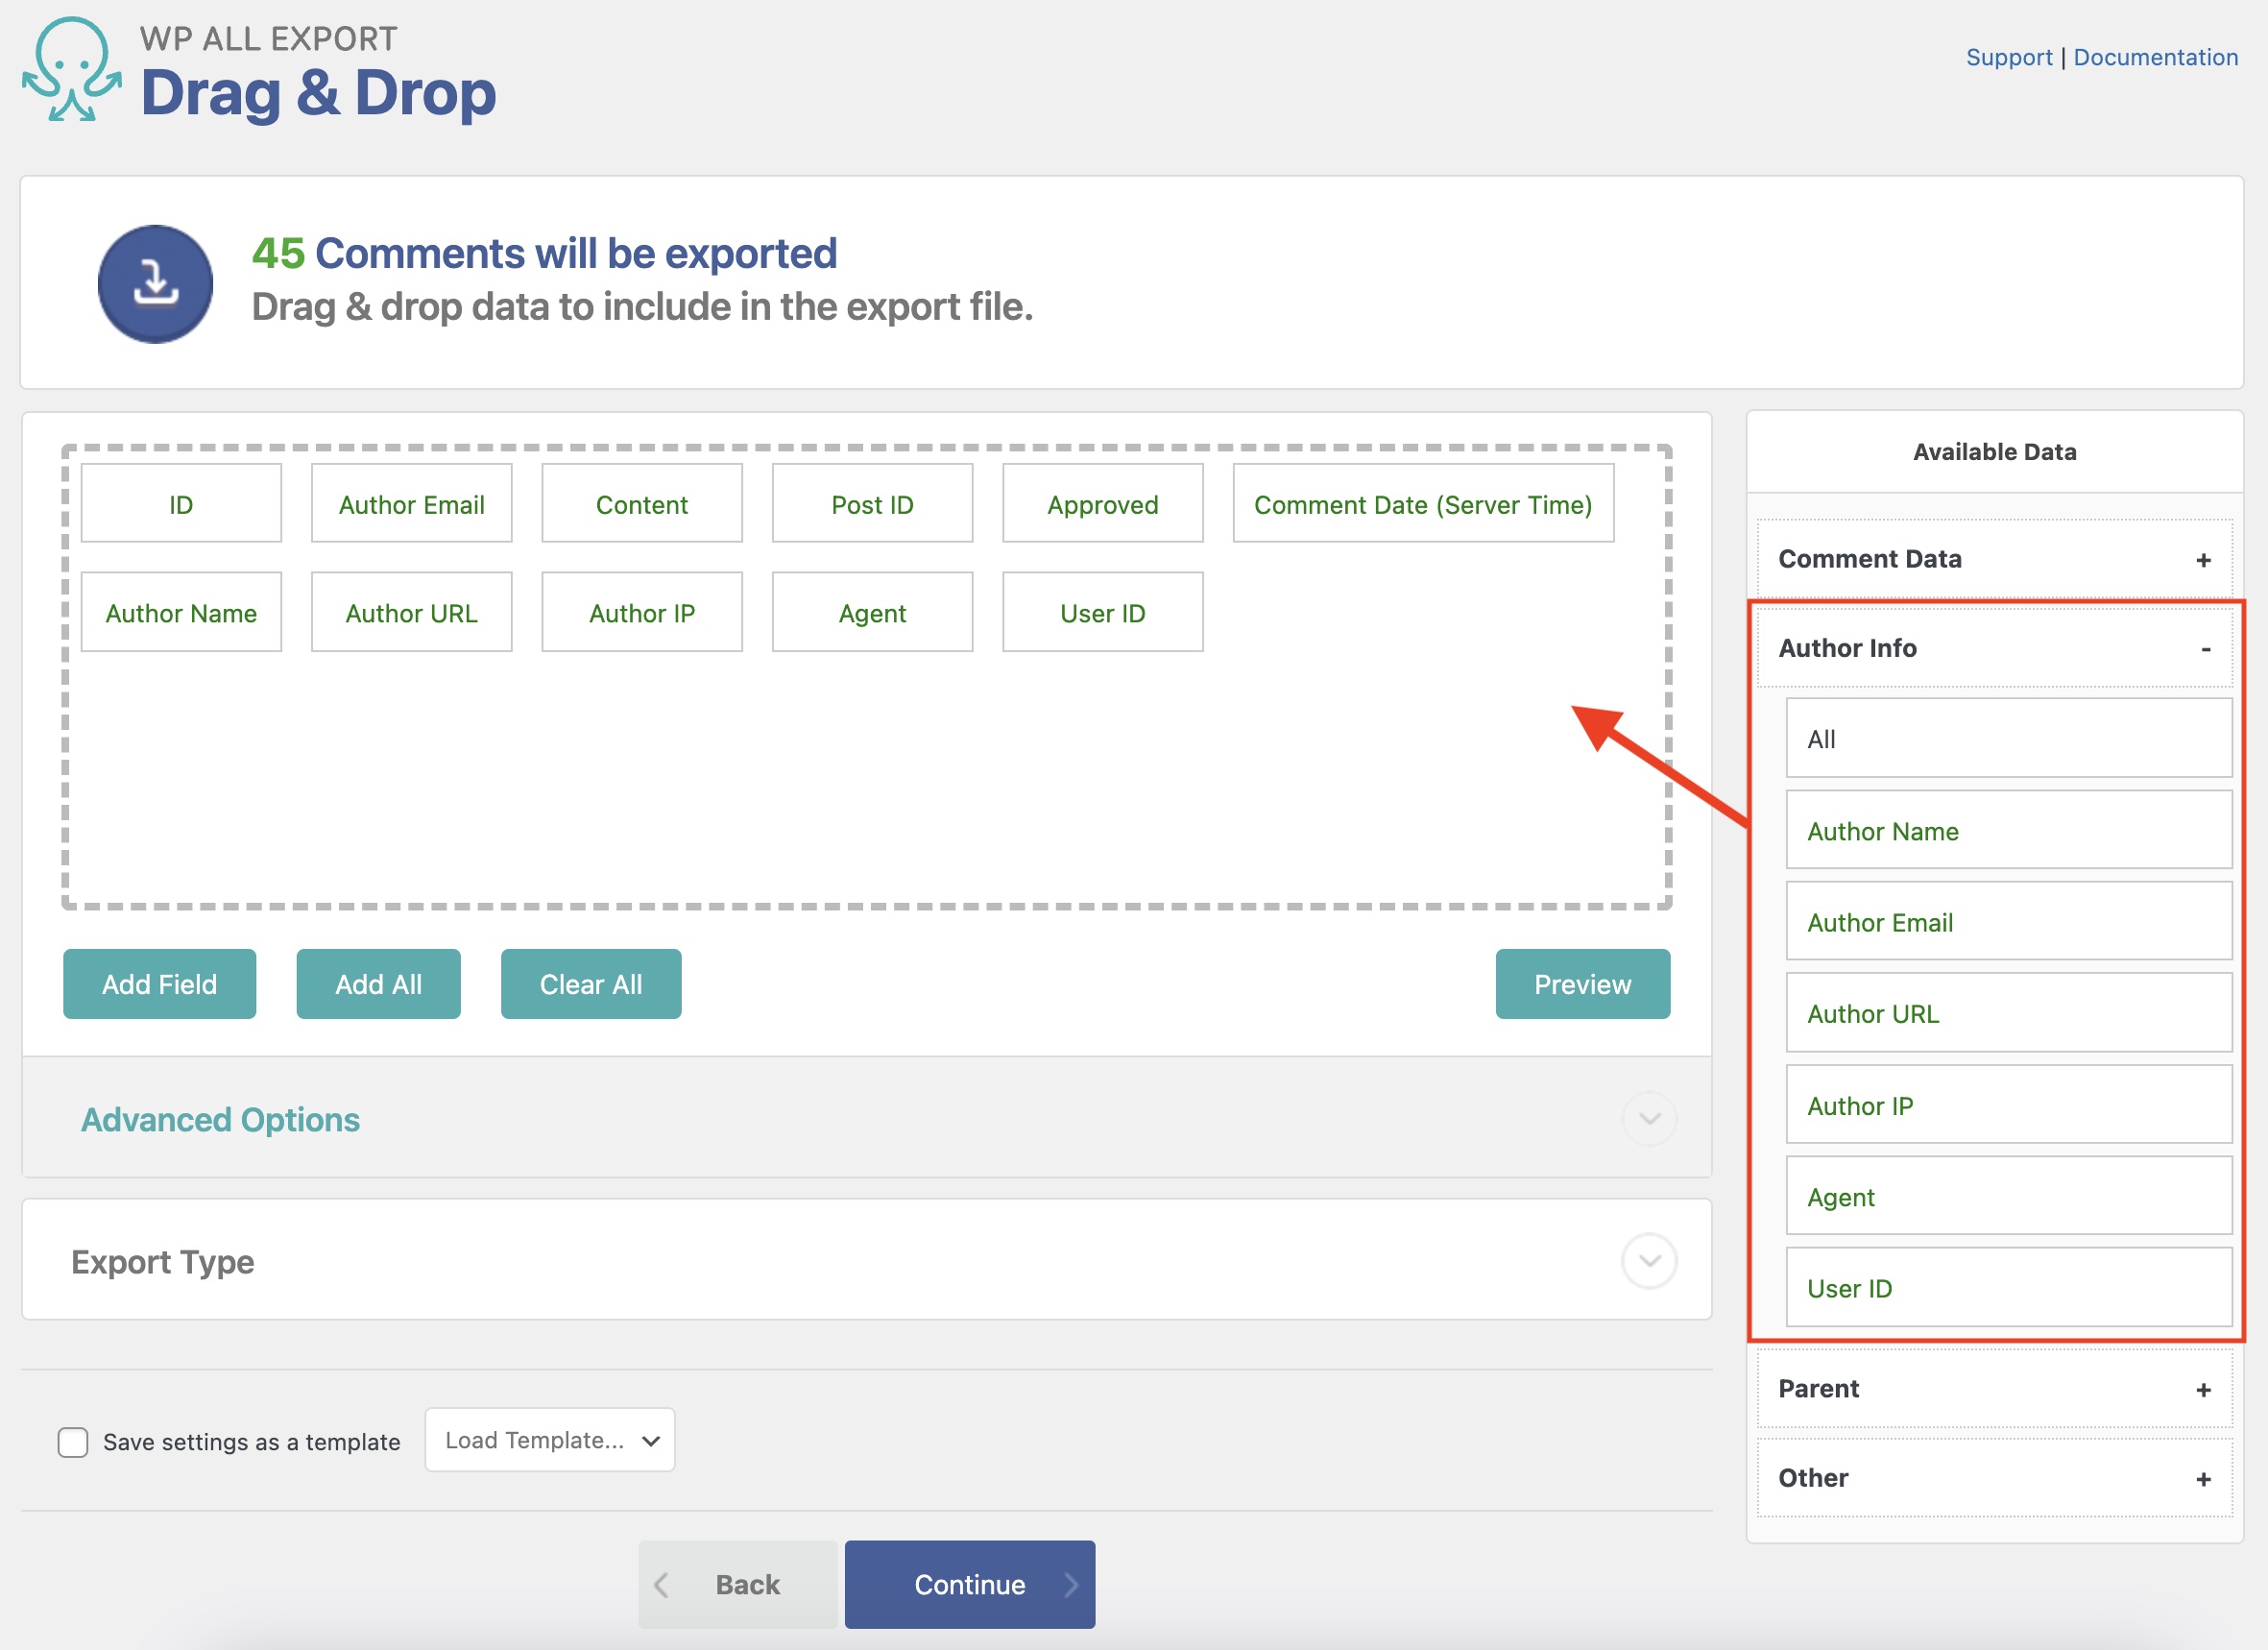
The Author Info section contains all the information and metadata related to the author of each comment.
- Author Name: The name specified by the user when they posted the comment, or the display name of the registered user account if they were logged in when the comment was made.
- Author Email: The email address specified by the user when they posted the comment, or the email address attached to the registered user account if they were logged in when the comment was made.
- Author URL: The URL of the author's website.
- Author IP: The IP address of whoever posted the comment.
- Agent: Information describing the web browser used to post the comment.
- User ID: If the author is registered on your site, this will provide that user's ID (as assigned by WordPress). Otherwise, returns
0.
Comment Replies and Parent Posts
The Parent section contains information related to the WordPress parent post where the comment was made and, if applicable, the parent comment that this comment is a reply to.
- Parent Post Slug: The slug of the parent post where the comment was made.
- Parent Post Title: The title of the parent post.
- Parent Post ID: The ID of the parent post, assigned by WordPress.
- Parent Comment ID: The comment ID of the parent that the exported comment is replying to.
- Parent Comment Date (Server Time): The date and time when the parent comment was made, using the timezone that your server is set to.
- Parent Comment Date (GMT): Date and time when the parent comment was made, in GMT/UTC time.
Other Comment Data
The Other section contains automatically detected comment data added by plugins and themes. The Karma field, no longer in wide use, is also stored here.
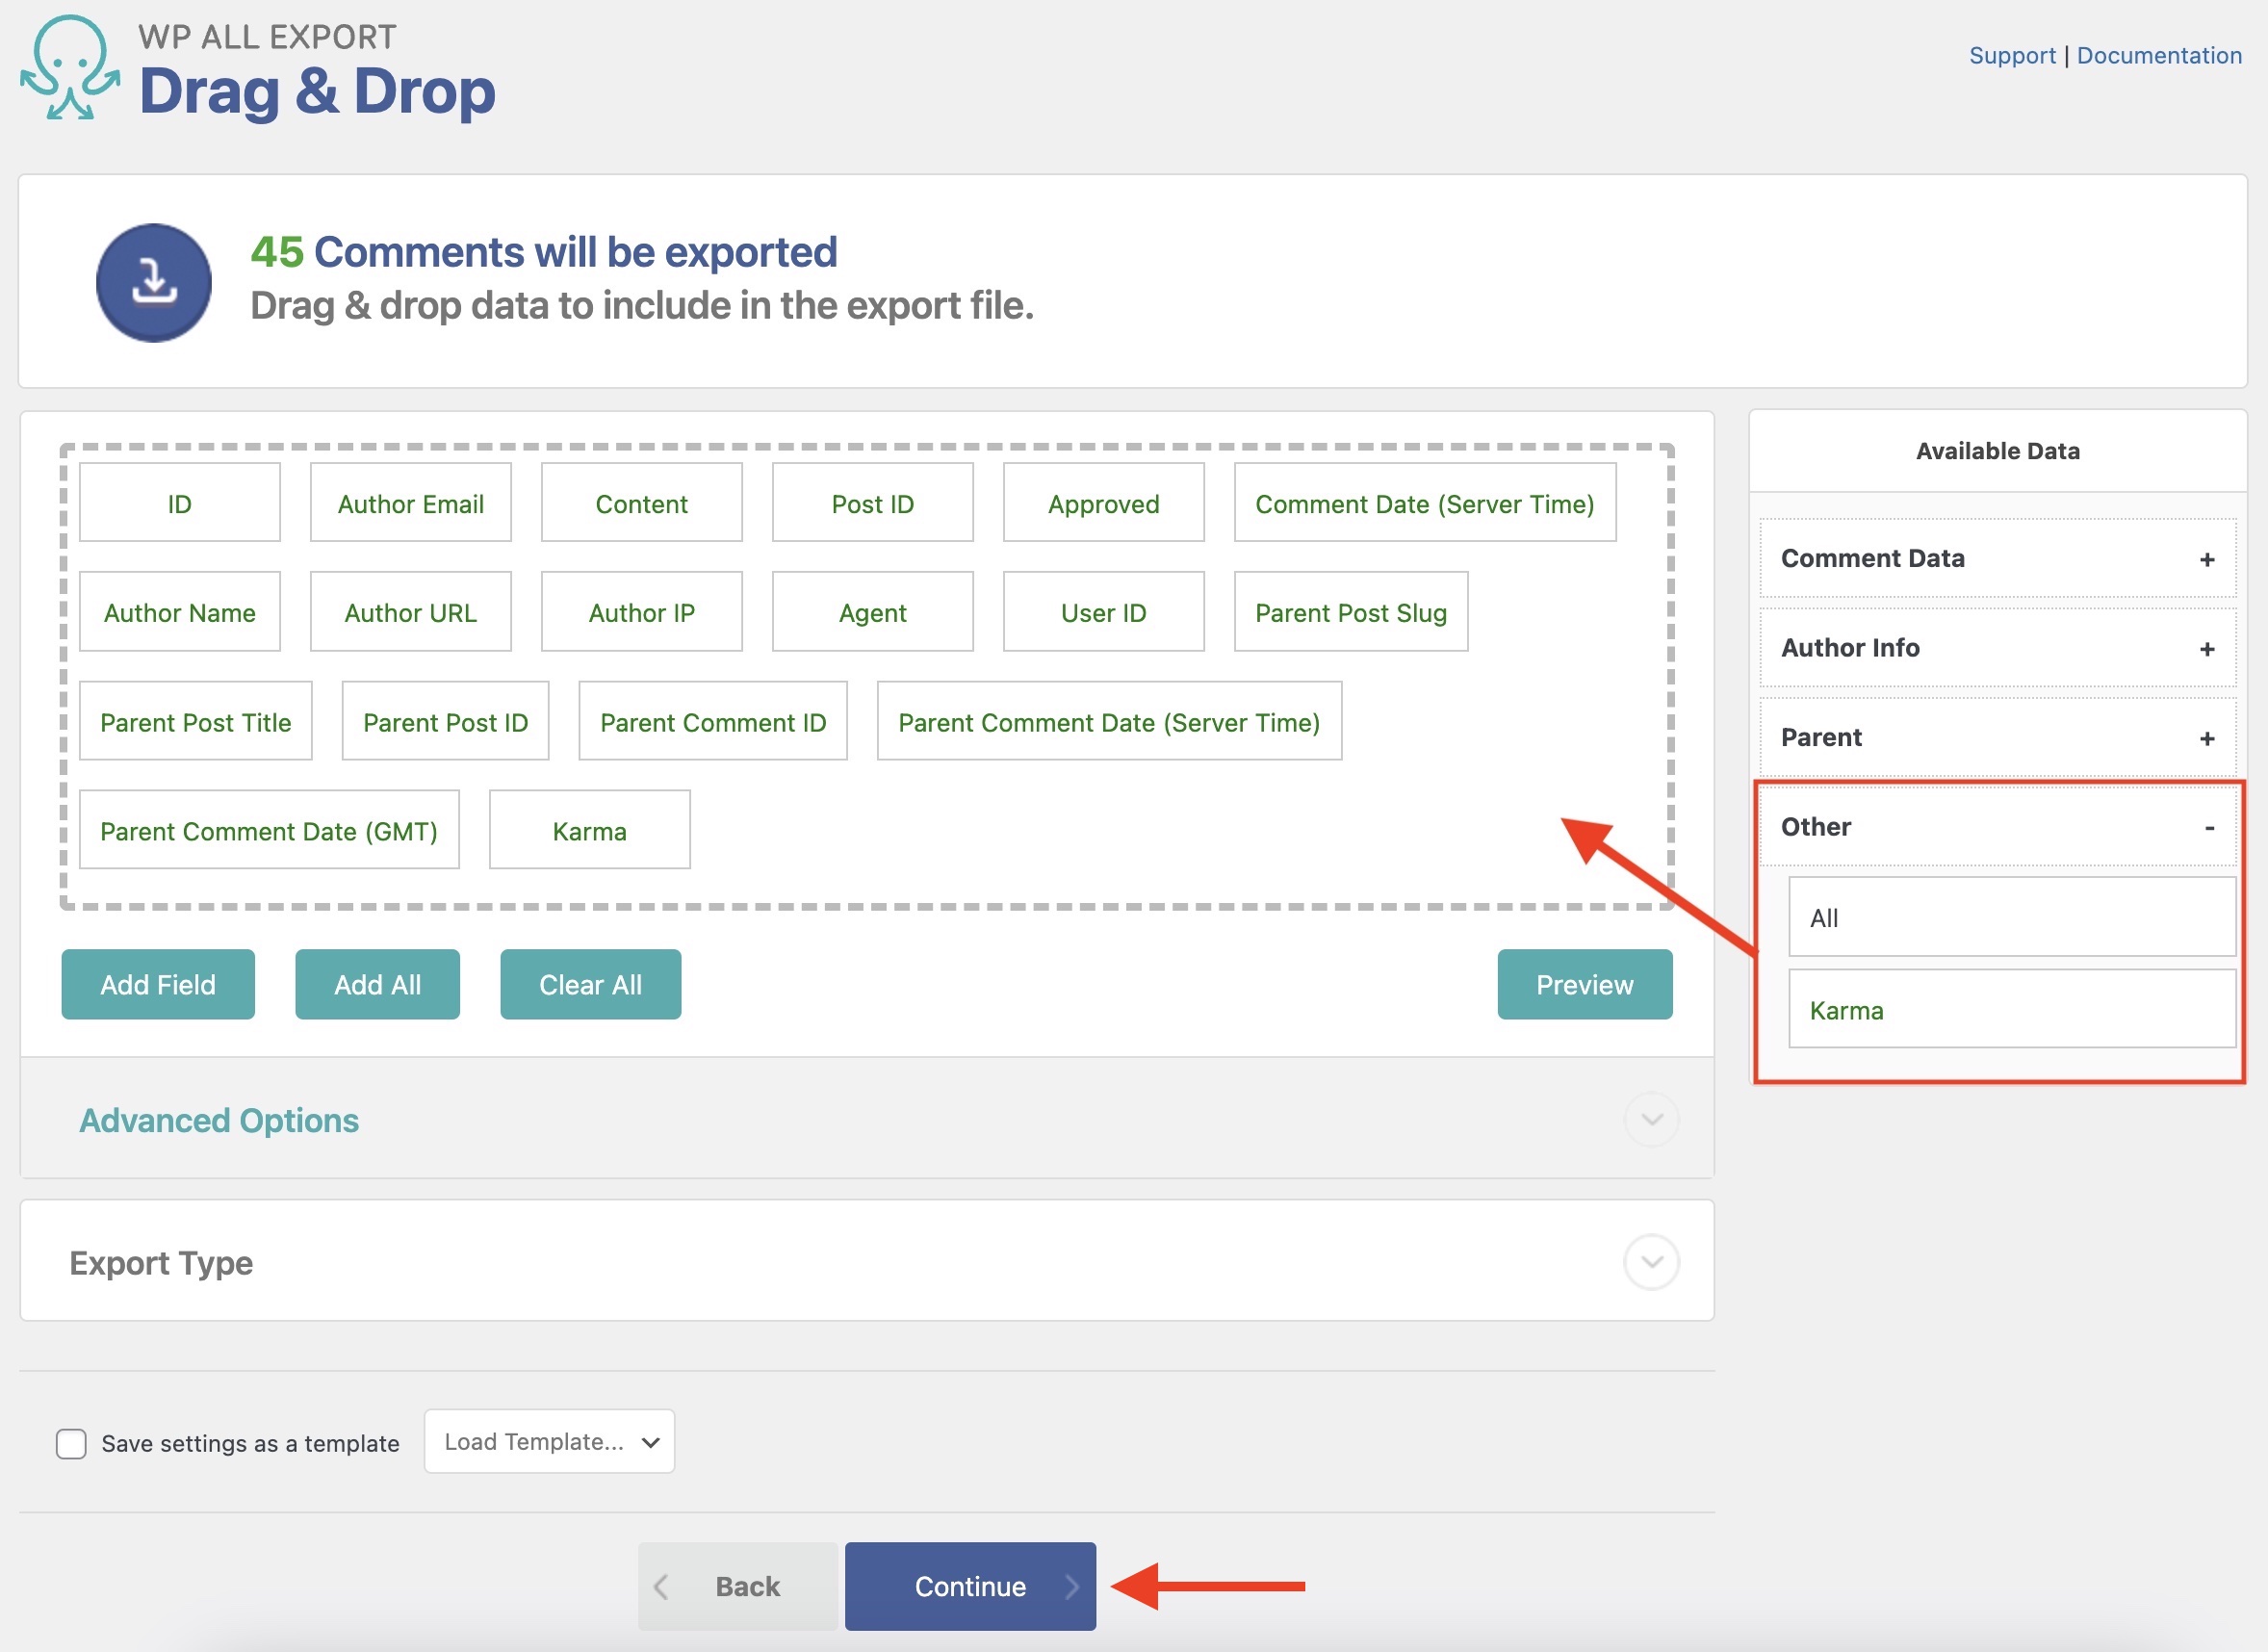
Once you've defined the export template, click Continue at the bottom.
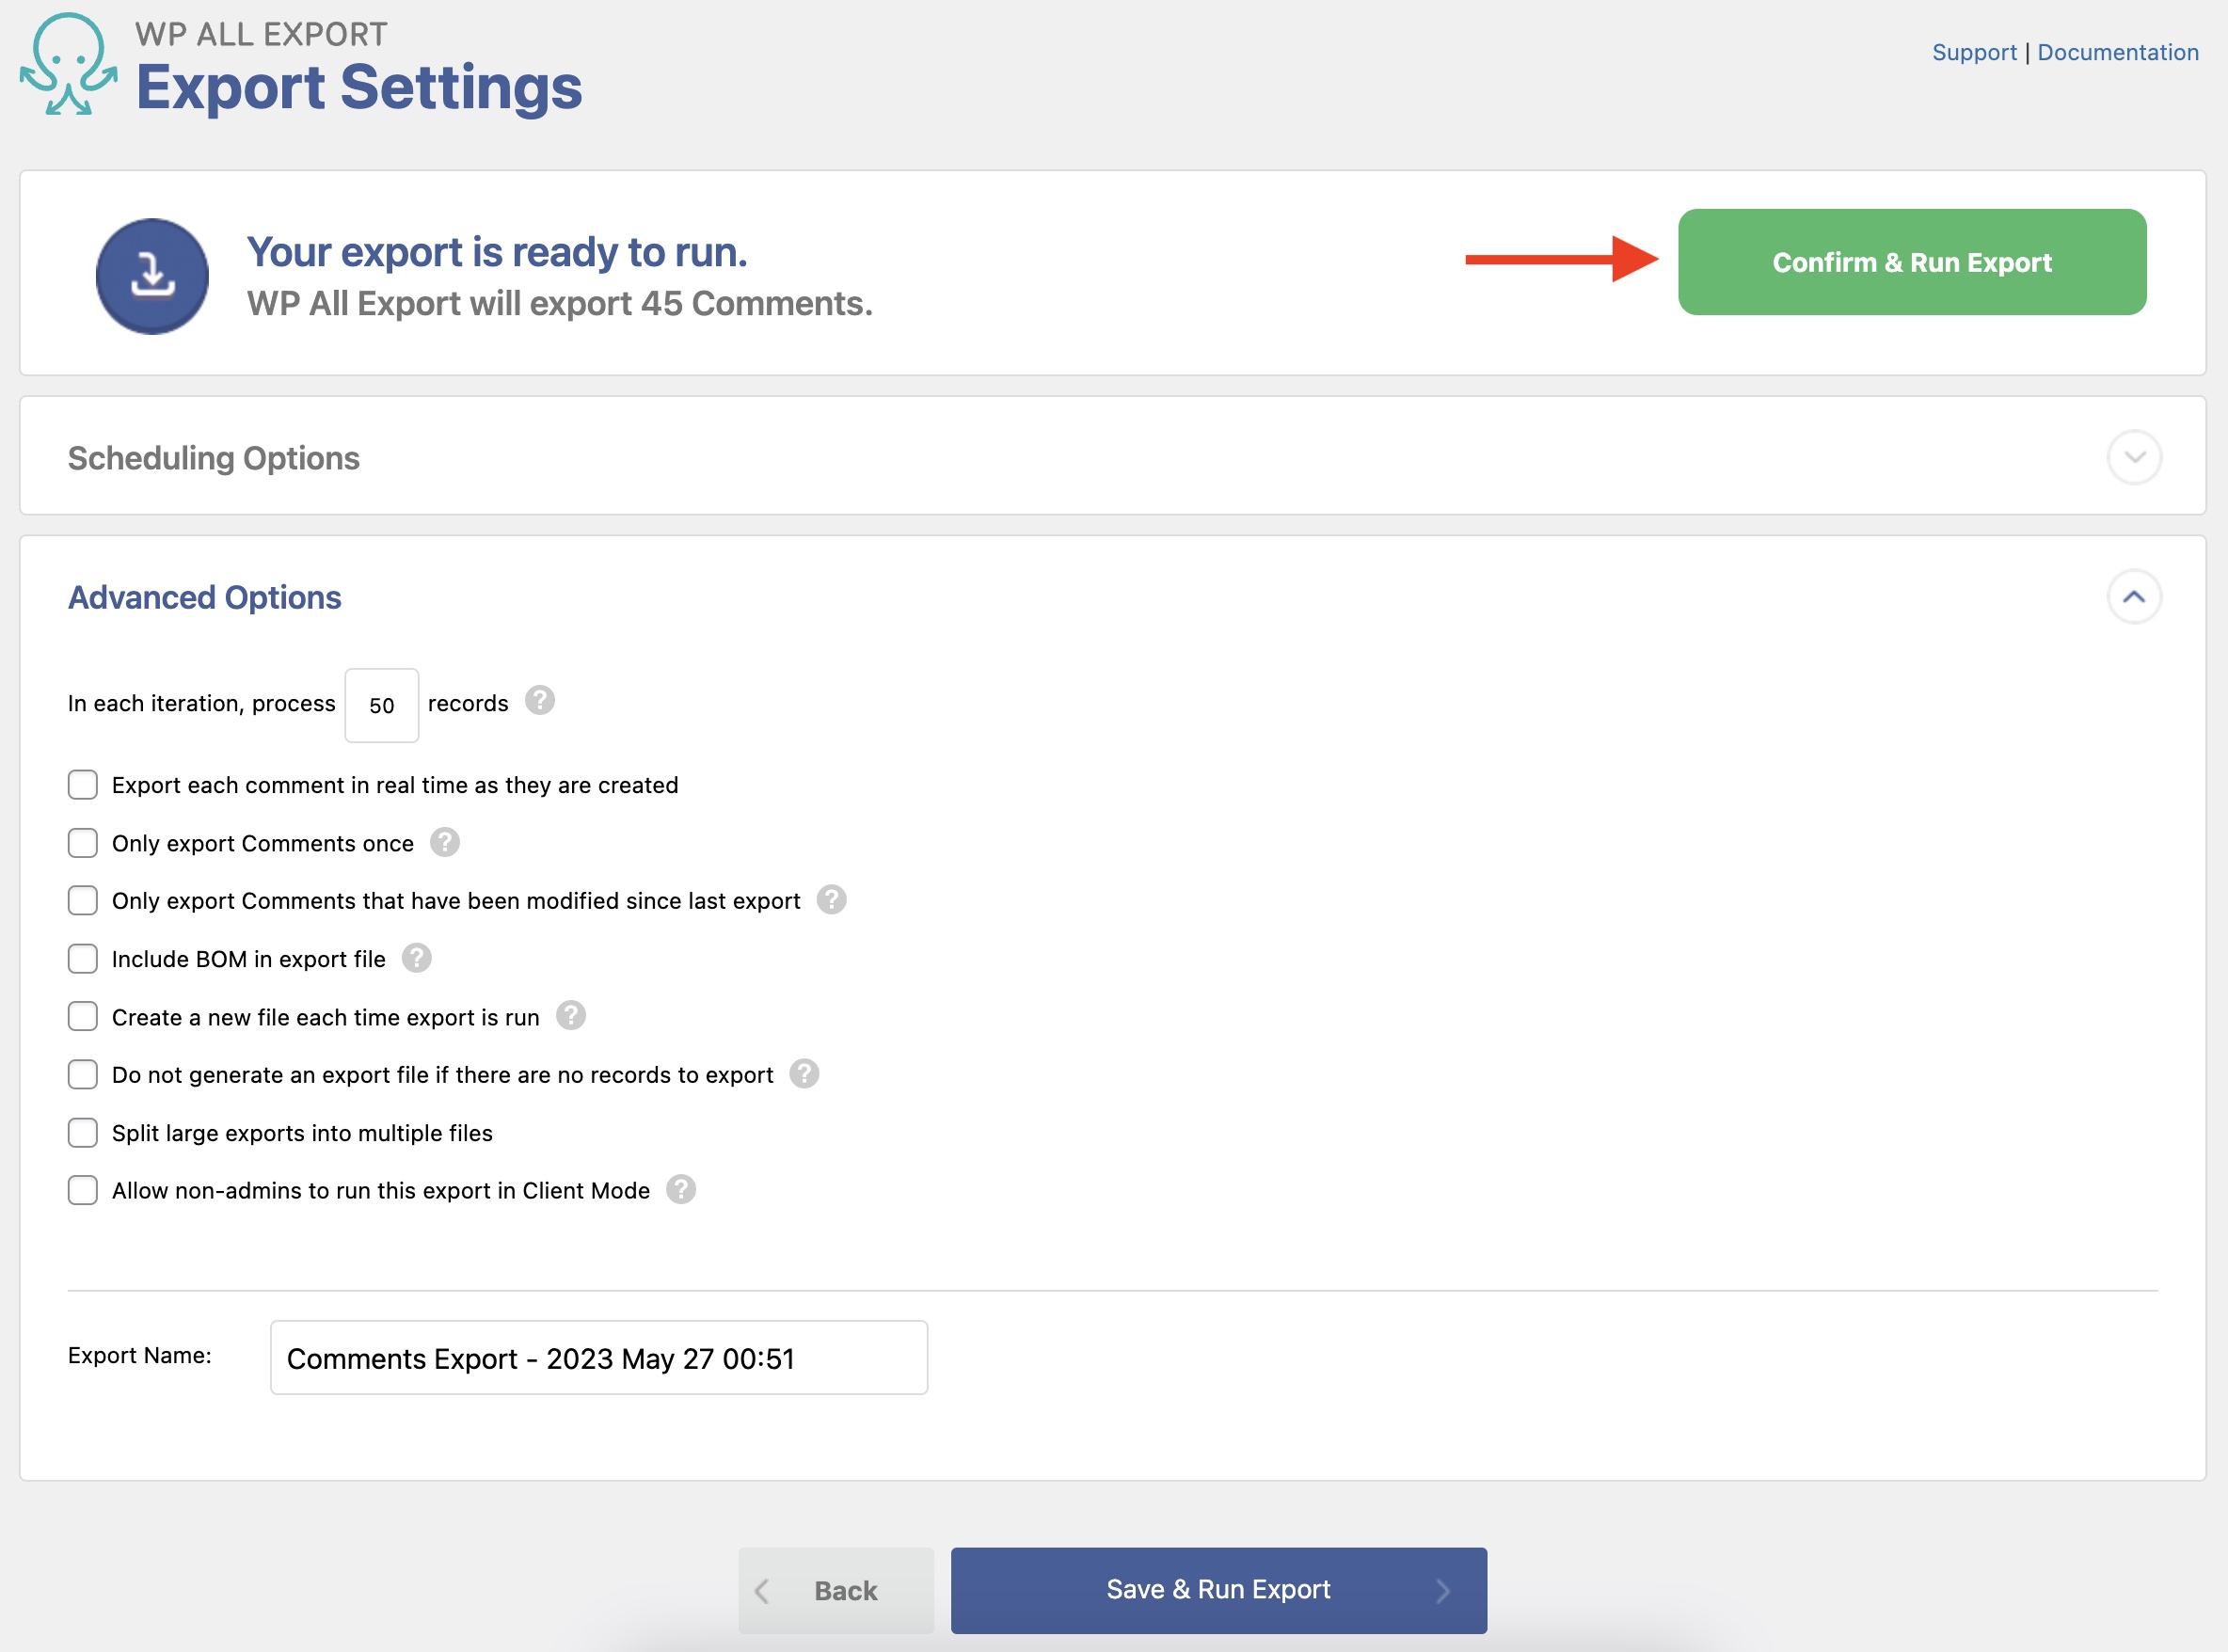
Step 3: Configure the Export Settings
The Export Settings screen appears. You can define Scheduling Options here or use Advanced Options. Leave these alone for now and click on Confirm & Run Export.
Step 4: Download the Exported Comments
Once the import finishes, you'll see the following screen where you can download the export file with your WordPress comments:
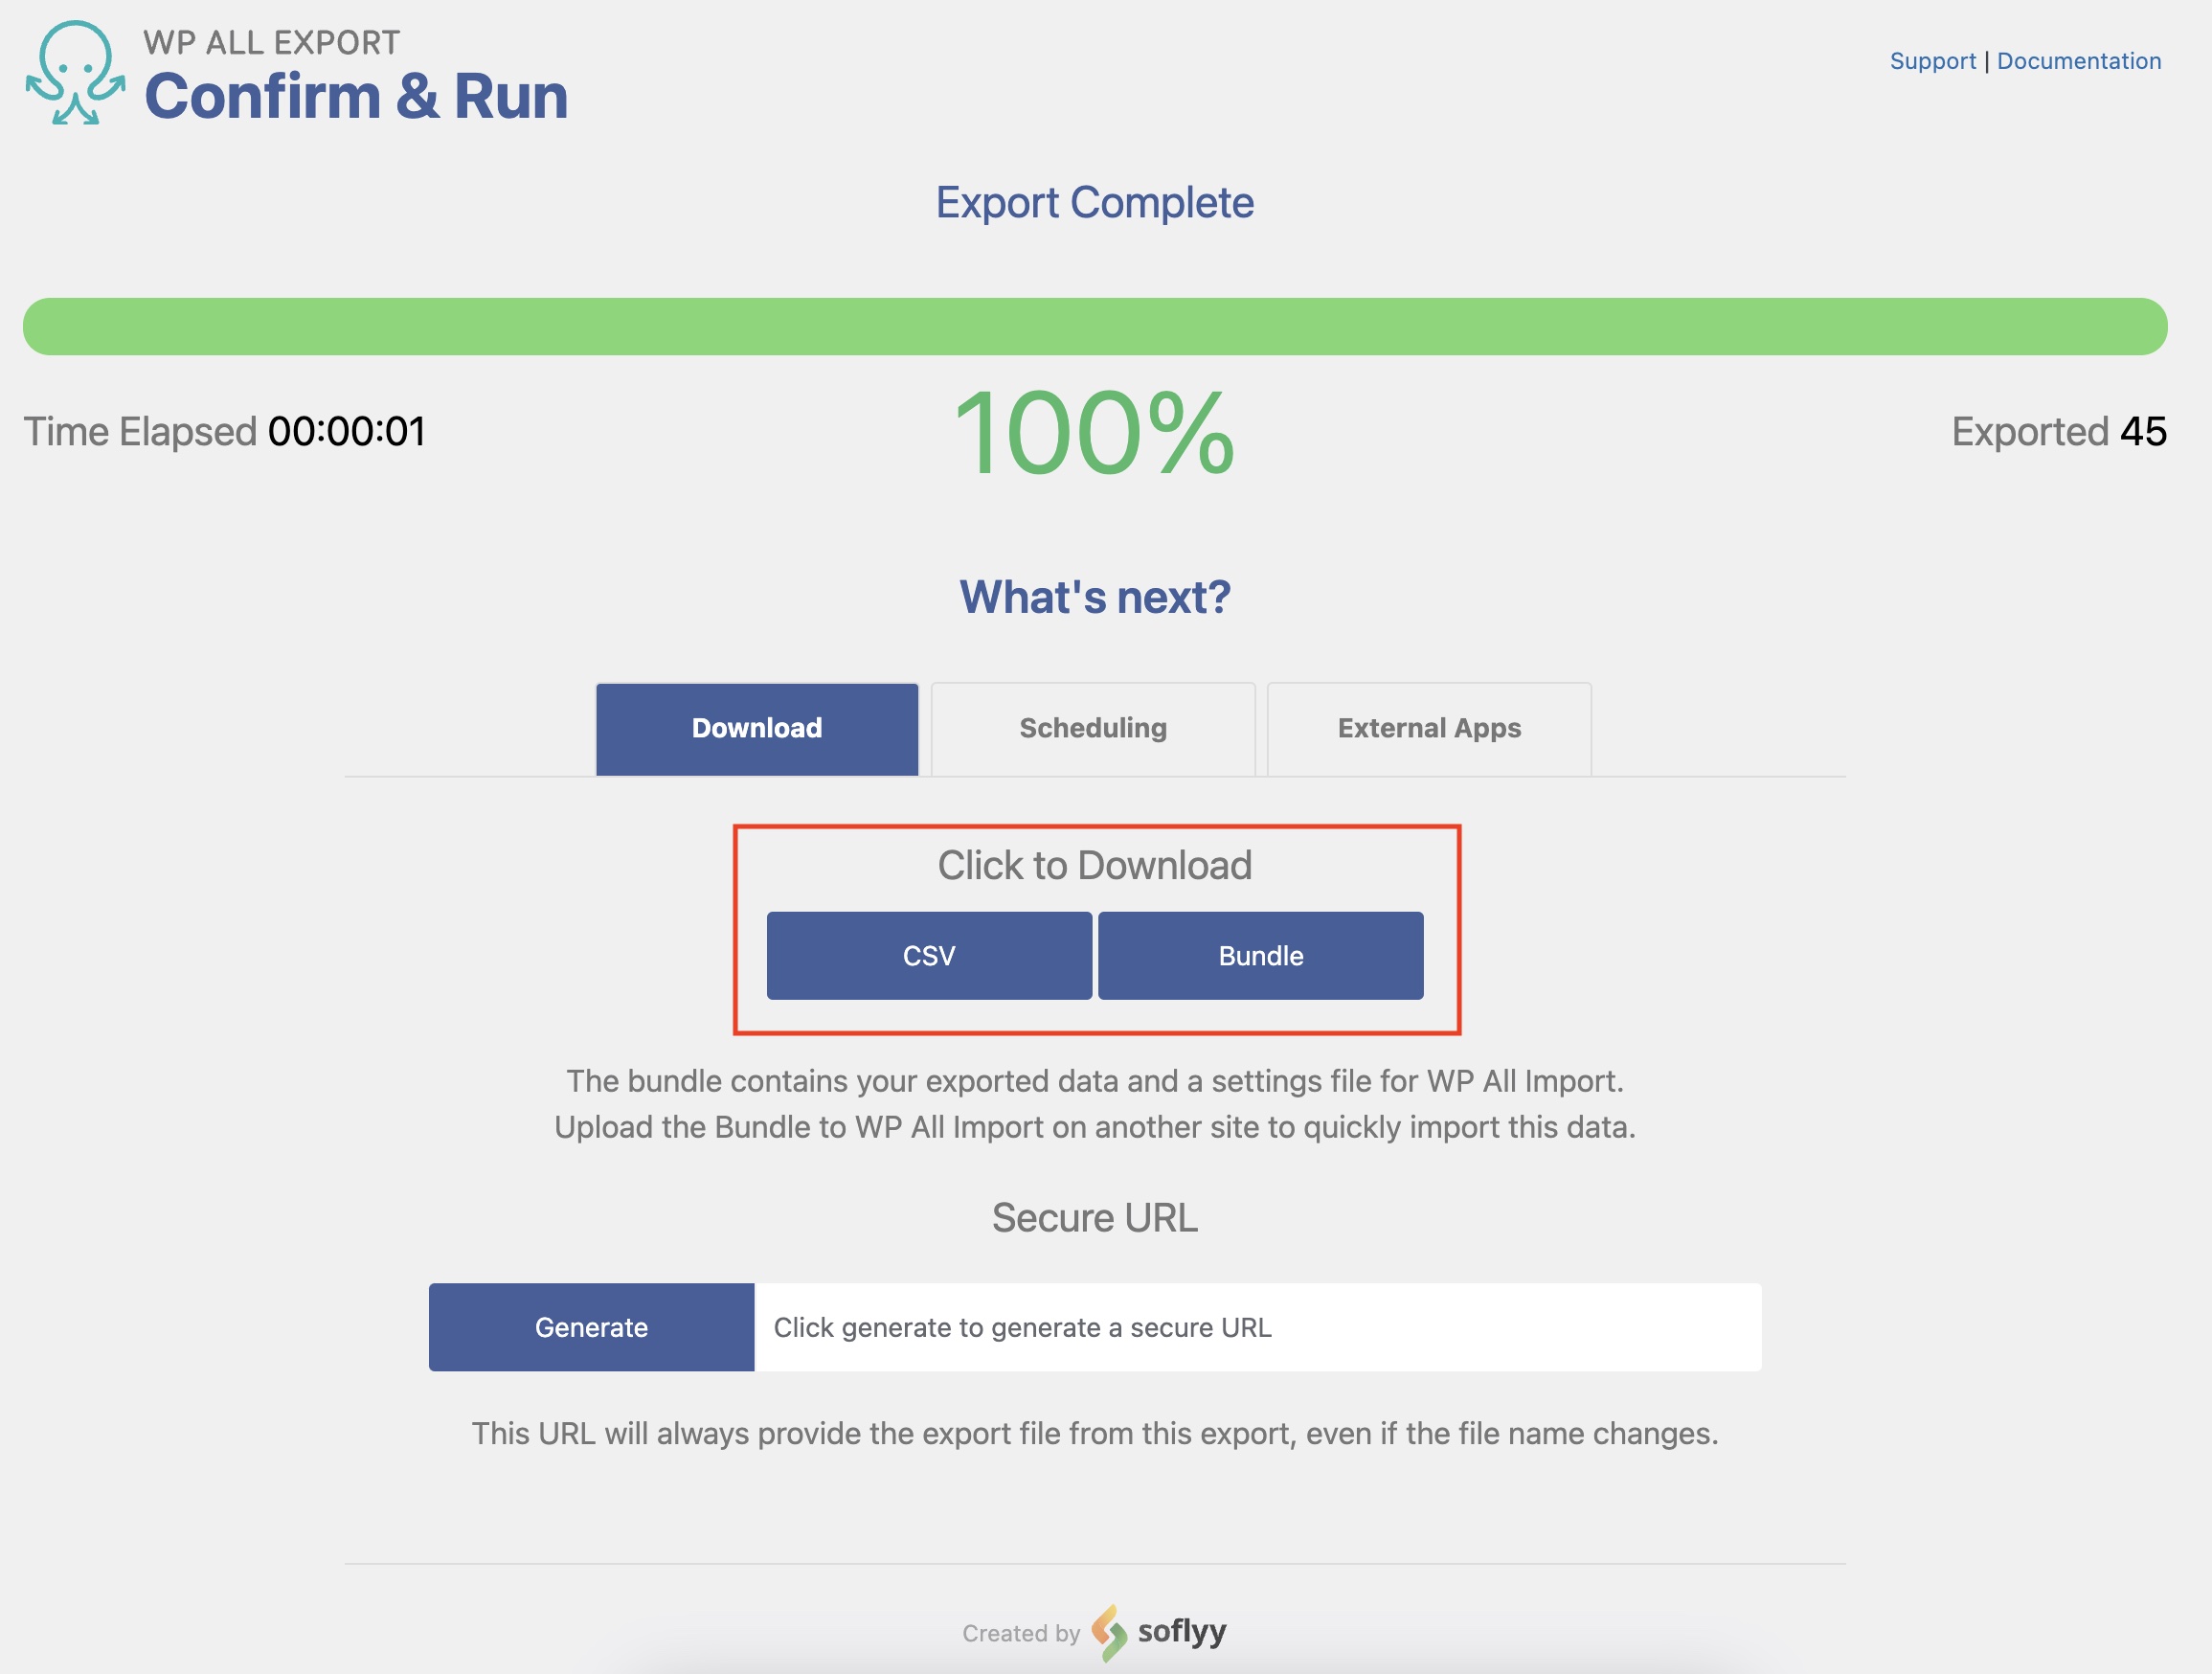
That's it! You have completed an export of WordPress comments.
Export WordPress to any CSV, XML, or Excel
- Any theme or plugin
- Images & galleries
- Custom fields
- Zapier integration
- Woo, ACF, Meta Box, JetEngine
Export WordPress Comments – Advanced Topics
Filter Exported WordPress Comments
In Step 2, you can Add Filtering Options to define which specific comments to export. A filter requires an Element, a Rule, and a Value.
For example, if you only want to export comments from a specific author, you can add a filter based on the author's email, like so:
Element: Author Email
Rule: equals
Value: The actual email to filter by
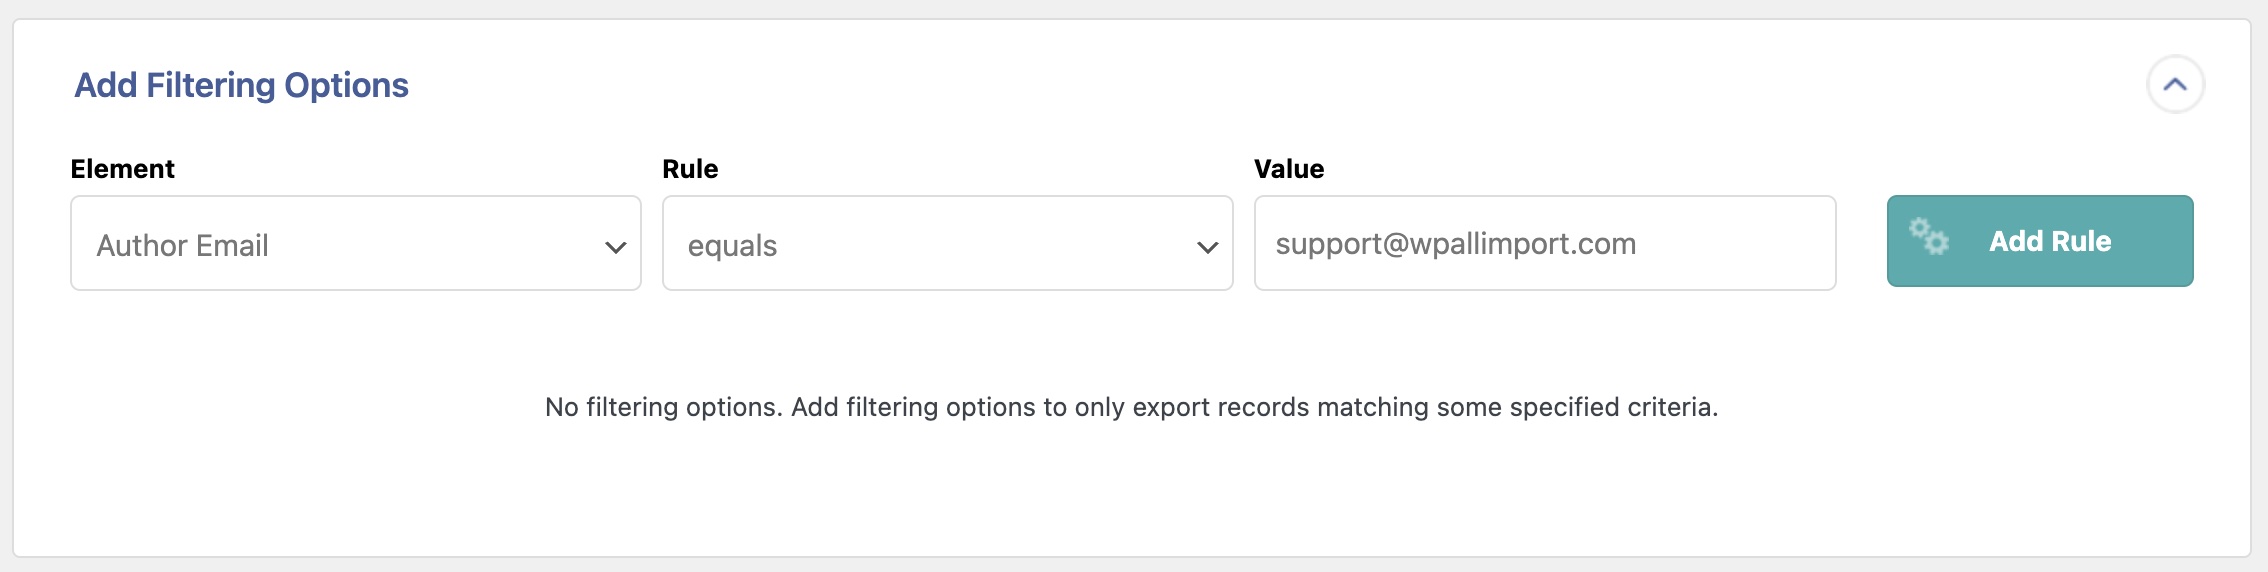
Once these three components are defined, click Add Rule. The number of records to export will be updated after this.
You can also modify an existing filter via All Export › Manage Exports › Edit Template under Filtering Options.
Send Comments to A Third-Party App Via Zapier
You can send your exported WordPress comment data to a third party using Zapier. For example, you can send the exported comments to a Google Drive or a recipient via email. Here's what you need to do to move the exported comments into Google Drive:
- Connect WP All Export and Zapier.
- Create your WordPress comments export as required.
- Create a new Zap using New Export File in WP All Export Pro.
- Create a new trigger and action to send the exported file via email.
- Test the action and turn the zap on.
After doing so, the zap will run every time that the export is executed. You can learn more about this here: How to Send Exported WordPress Data to Zapier.
Export WordPress Comments – Frequently Asked Questions
How Do I Find Comments in WordPress?
Just go to Comments in the main WordPress dashboard. The standard WordPress tabs let you see all comments, those pending, approved, etc. If you want to generate a list of comments, follow this guide and choose the columns that you want in your list.
How Do I Export All Comments in WordPress?
Follow the steps in this guide but don't apply any filters. This will export all WordPress comments. Note, this is the only way to export all comments on their own, as WordPress's built-in export tool does not output comments unless you're willing to export all of your site's content.
How Do I Import WordPress Comments?
- Go to All Import › New Import.
- Provide the import file containing the WordPress comments.
- Choose Comments from the dropdown list.
- Map the required import fields.
- Run the import.
You can learn more about this here: How to Import WordPress Comments.
How Do I Migrate Comments From One Site to Another?
You can do this using WP All Export and WP All Import. Export the comments using WP All Export, download the exported bundle file, and then use WP All Import to import the exported comments.
This process is explained in more detail here: How to Migrate WooCommerce and WordPress Data.
Is There a Way to Export Posts From WordPress?
- Go to All Export › New Export.
- Select Posts as the export type.
- Click Customize Export File.
- Build your export file as desired.
- Run the export and download the exported posts.
You can learn more about this topic here: How to Export WordPress Posts.
How Do I Export WordPress Posts to Excel?
To export WordPress posts to Excel, navigate to All Export › New Export and choose Posts as the export type. Use the Drag & Drop interface to select your export columns, then expand the Export Type section and select one of the Excel file formats. Finally, run the export and download your file.
How Do I Export User Information from WordPress?
To export user information from WordPress, navigate to All Export › New Export and select Users. Choose the export columns using our Drag & Drop interface, then run the export and download your data.
For more information, see How to Export WordPress Users to CSV, Excel, or XML.
Export WordPress Comments – Related Docs
Learn how to import WordPress comments.
Learn more about the different types of WordPress data you can export.
Drag and drop to import data into WordPress.
Export your WooCommerce Reviews using WP All Export.
Export, edit, then import back using WP All Export along with WP All Import.
Use WP All Export and WP All Import to migrate post types from one site to another.
