The best import export plugin for WordPress & WooCommerce.

How to Import WooCommerce Orders
To import WooCommerce orders, go to All Import › New Import, upload your import file, and select WooCommerce Orders from the list. Map the incoming data elements to the order fields using the Drag & Drop interface, then run the import.
Table of Contents
- Step 1: Create a New Order Import
- Step 2: Review the Order Import File
- Step 3: Map the Incoming Data
- Step 4: Configure the Import Settings
- Step 5: Run the Order Import
Advanced Topics
Step 1: Create a New WooCommerce Order Import
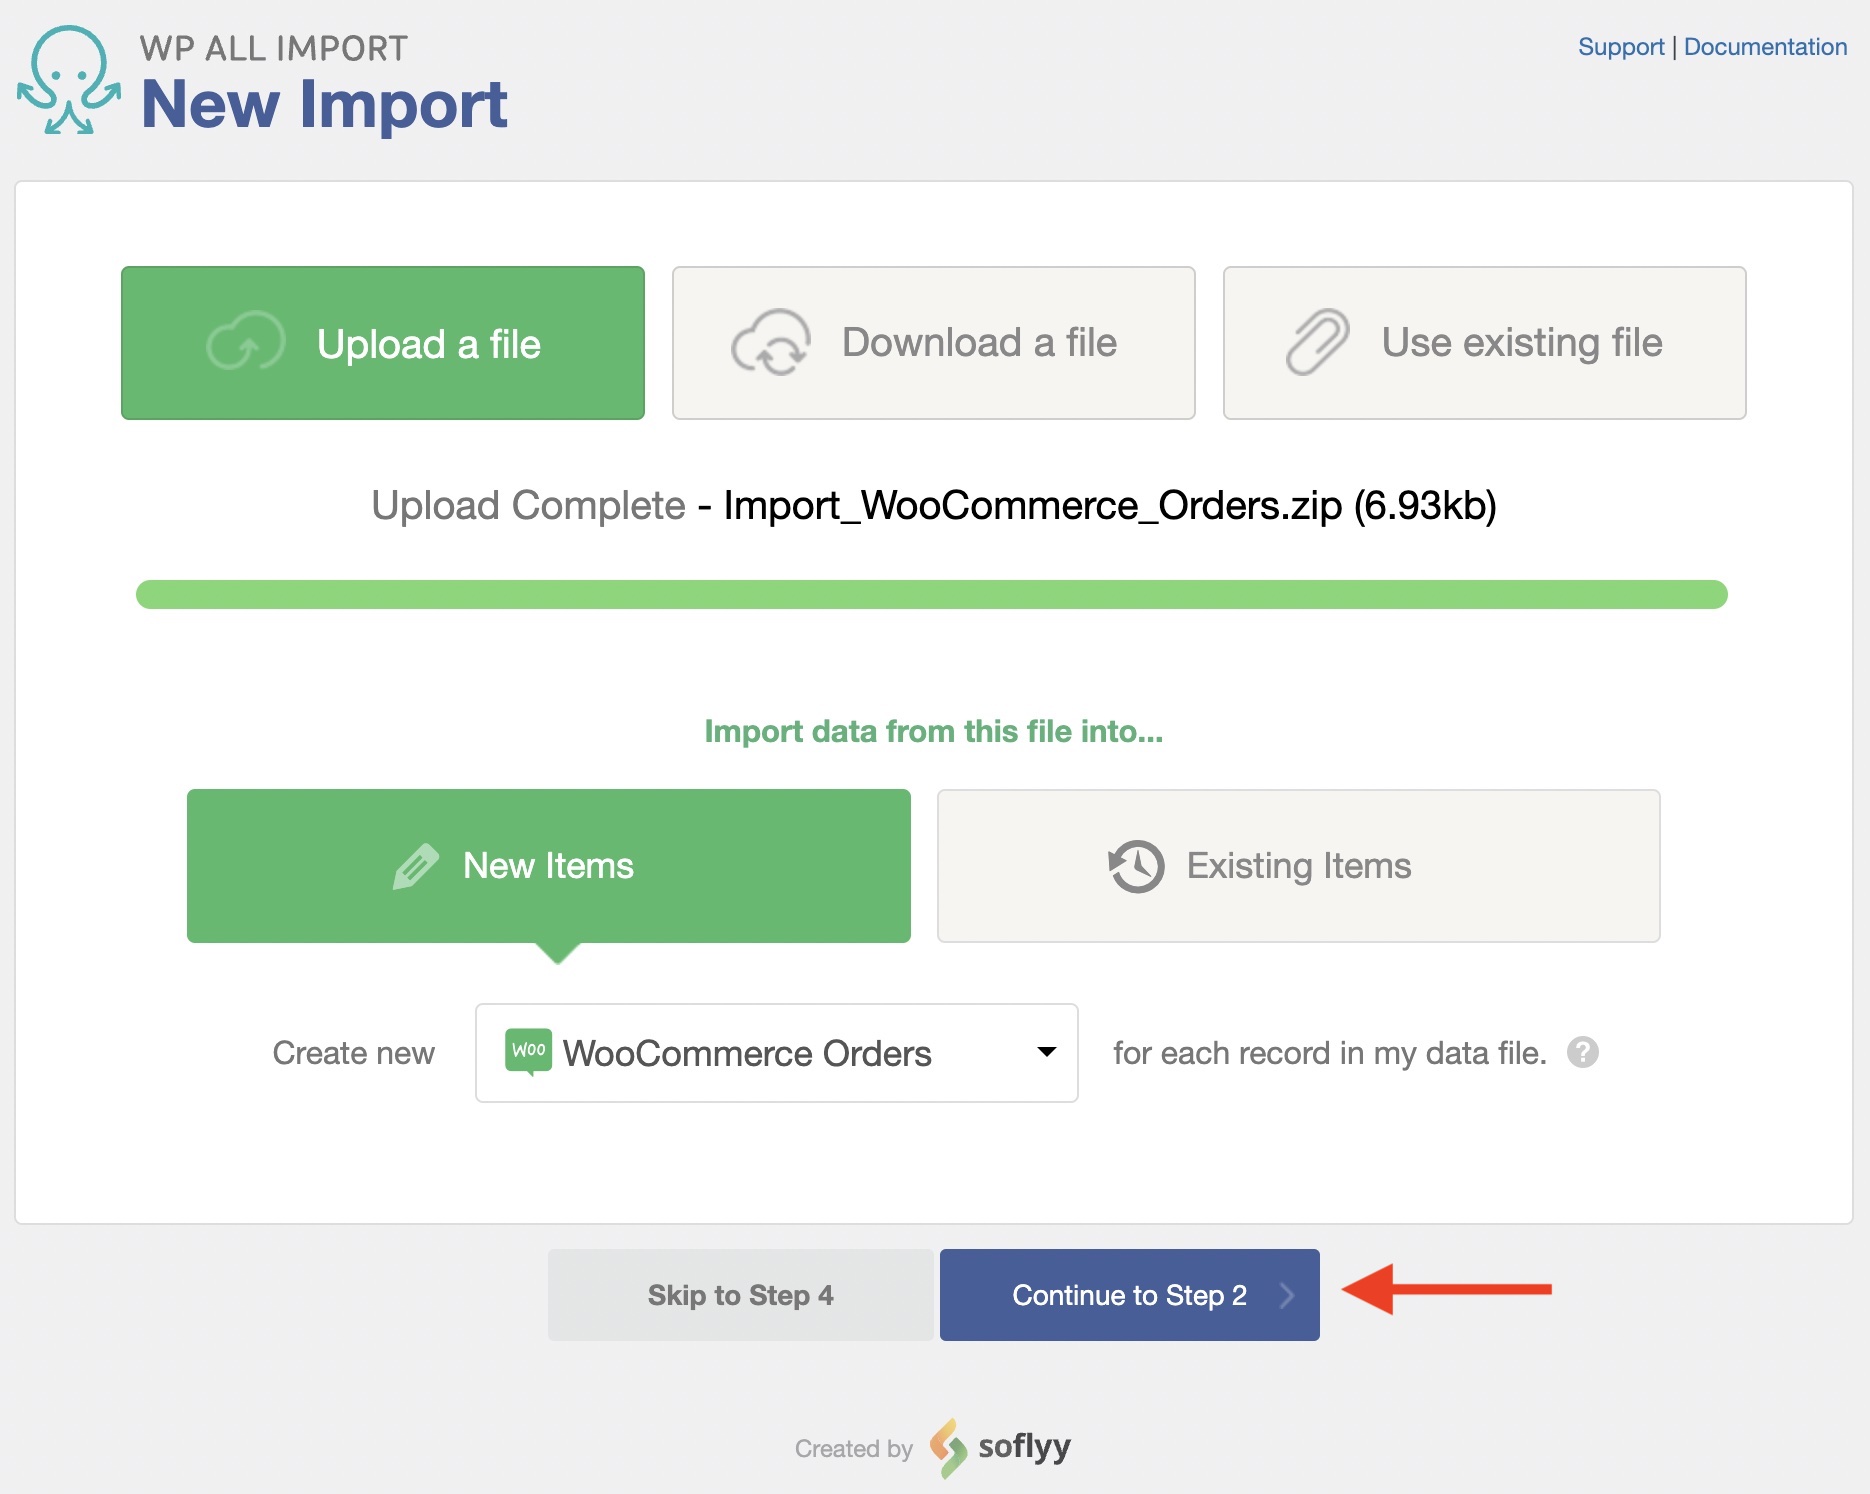
Navigate to All Import › New Import and upload your import file. Choose to import WooCommerce Orders and click Continue to Step 2.
Step 2: Review the Order Import File
The Review Import File interface will appear. This is where you can assess whether the order import data has been correctly interpreted.

Note the record count in the top section. You can use the gray arrows in the top corners of the middle section to navigate through the records.
The Manage Filtering Options section near the bottom allows you to filter which WooCommerce orders to import.
Once you confirm the import data and create any desired filters, click Continue to Step 3.
Step 3: Map the Incoming Data Elements to the Order Fields
The Drag & Drop interface now appears. Here, you can map the incoming data elements to their respective order fields. Just drag and drop the desired data elements from the panel on the right to the appropriate order fields on the left.
Easily Import WooCommerce Orders
- Supports everything in WooCommerce
- Order status
- Billing & shipping
- Taxes
- Easy order matching
Order Details Section
To import WooCommerce orders, start with the Order Details section, where you can map the Order Status and Date fields:
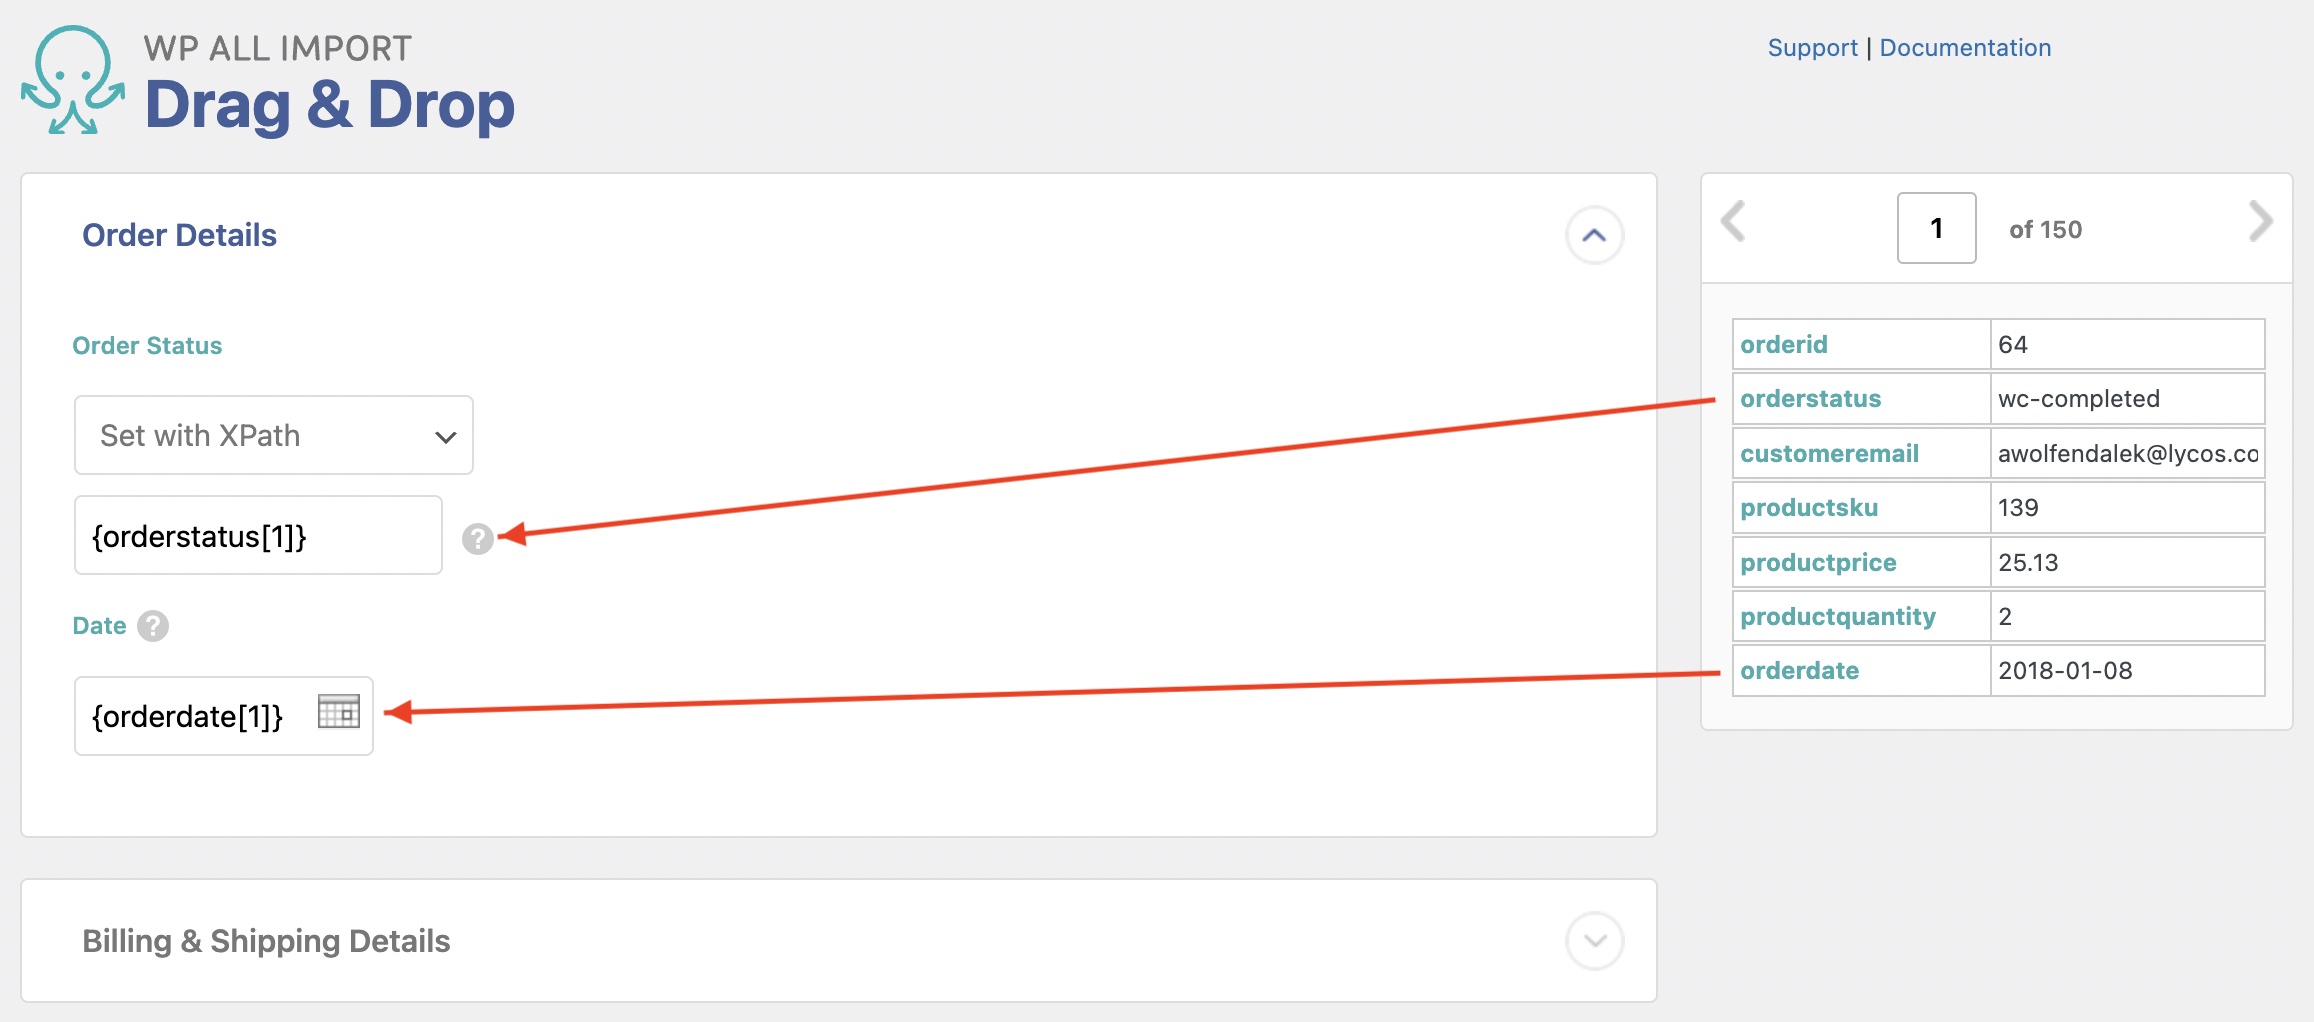
If you're not certain what to import, review the help tooltips.
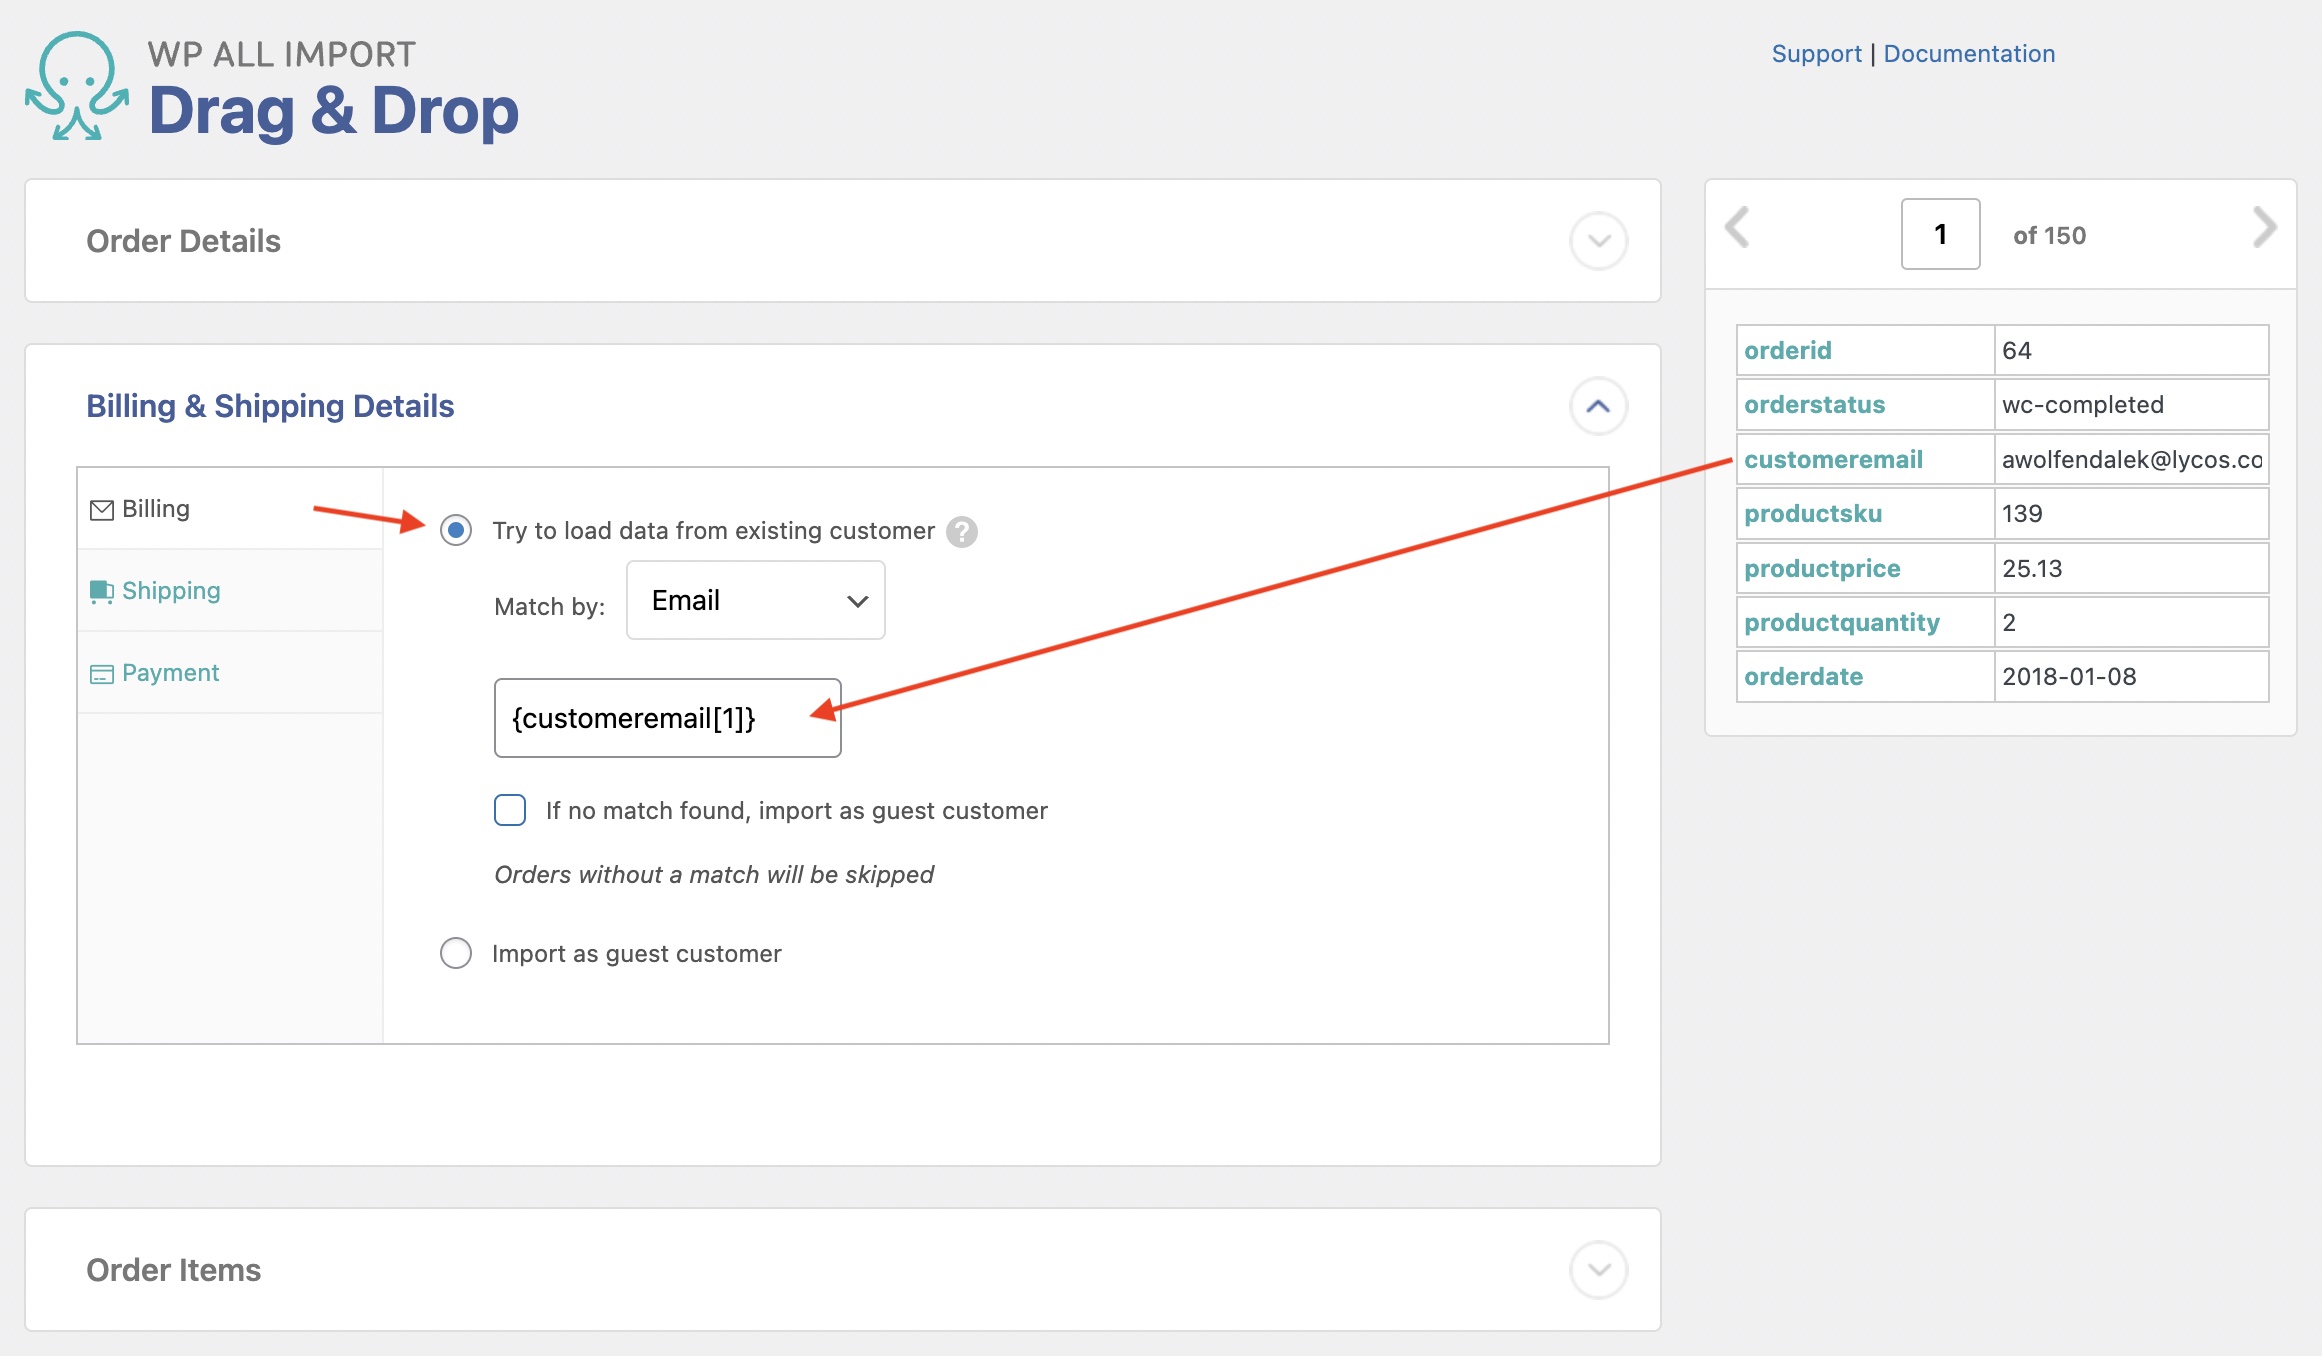
Billing & Shipping Details Section
Once you've completed the order details, proceed to the Billing & Shipping Details section, which consists of multiple tabs.
The first tab is Billing, where you can attempt to match the customer data with an existing customer from the site or import a guest customer instead. Here, we attempt to match an existing customer using an email address:
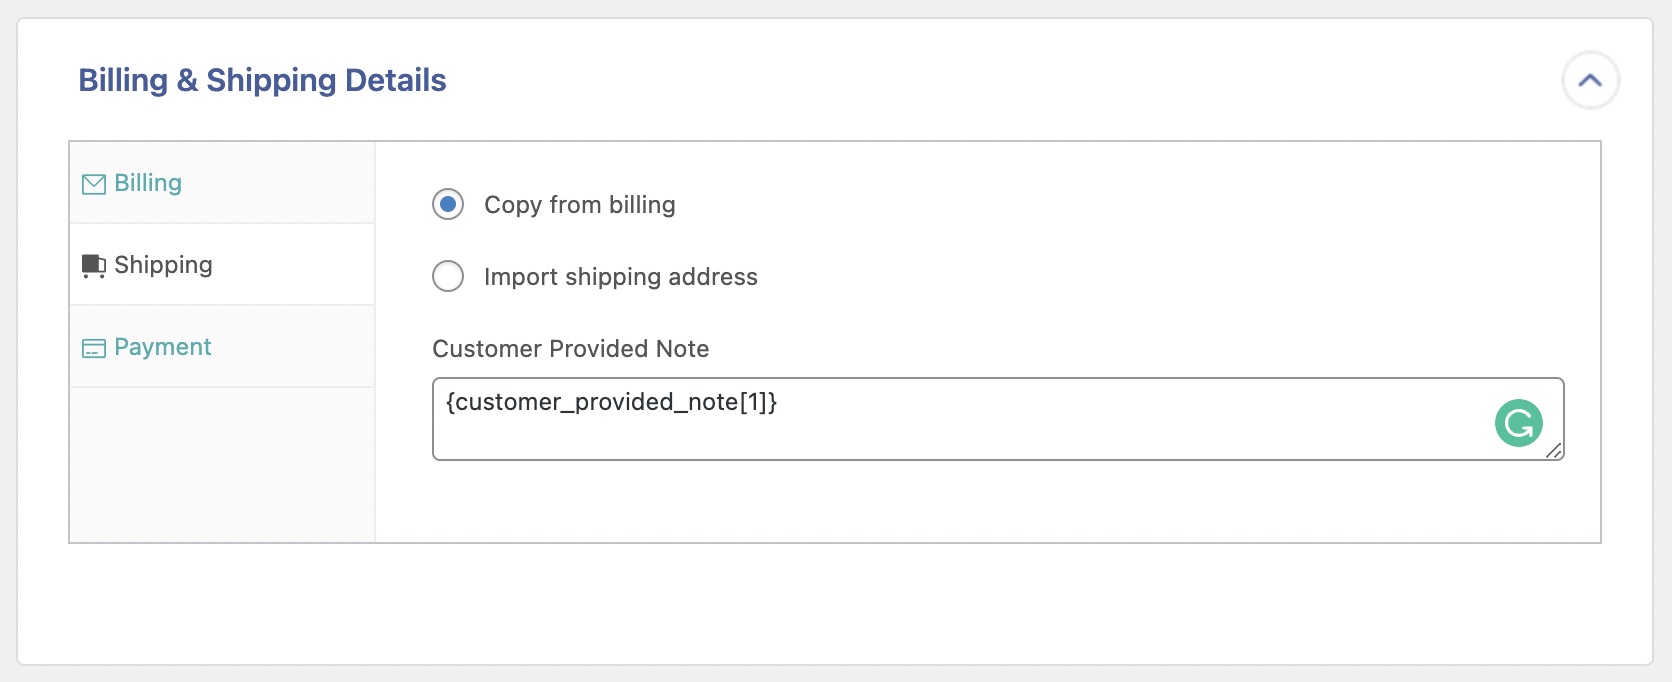
Switch to the Shipping tab. Here, you can select Copy from billing to copy the billing address as the shipping address, or select Import shipping address to import a different shipping address from one of the incoming fields.
You can also import a customer note in the Customer Provided Note field:
Finally, switch to the Payment tab, where you can select the Payment Method and assign a Payment Date along with a Transaction ID value.

Order Items Section
After the Billing and Shipping section, next up is the Order Items section, which also contains different tabs.
The first tab is Products, where you can match the product data with existing products.

To ensure that existing products are matched correctly, you can use the product SKU, ID, or Title in the Existing Product Identifier field.
If no product match is found, there will be a warning on the logs, and the product will be created inside the order but without any link to existing products.
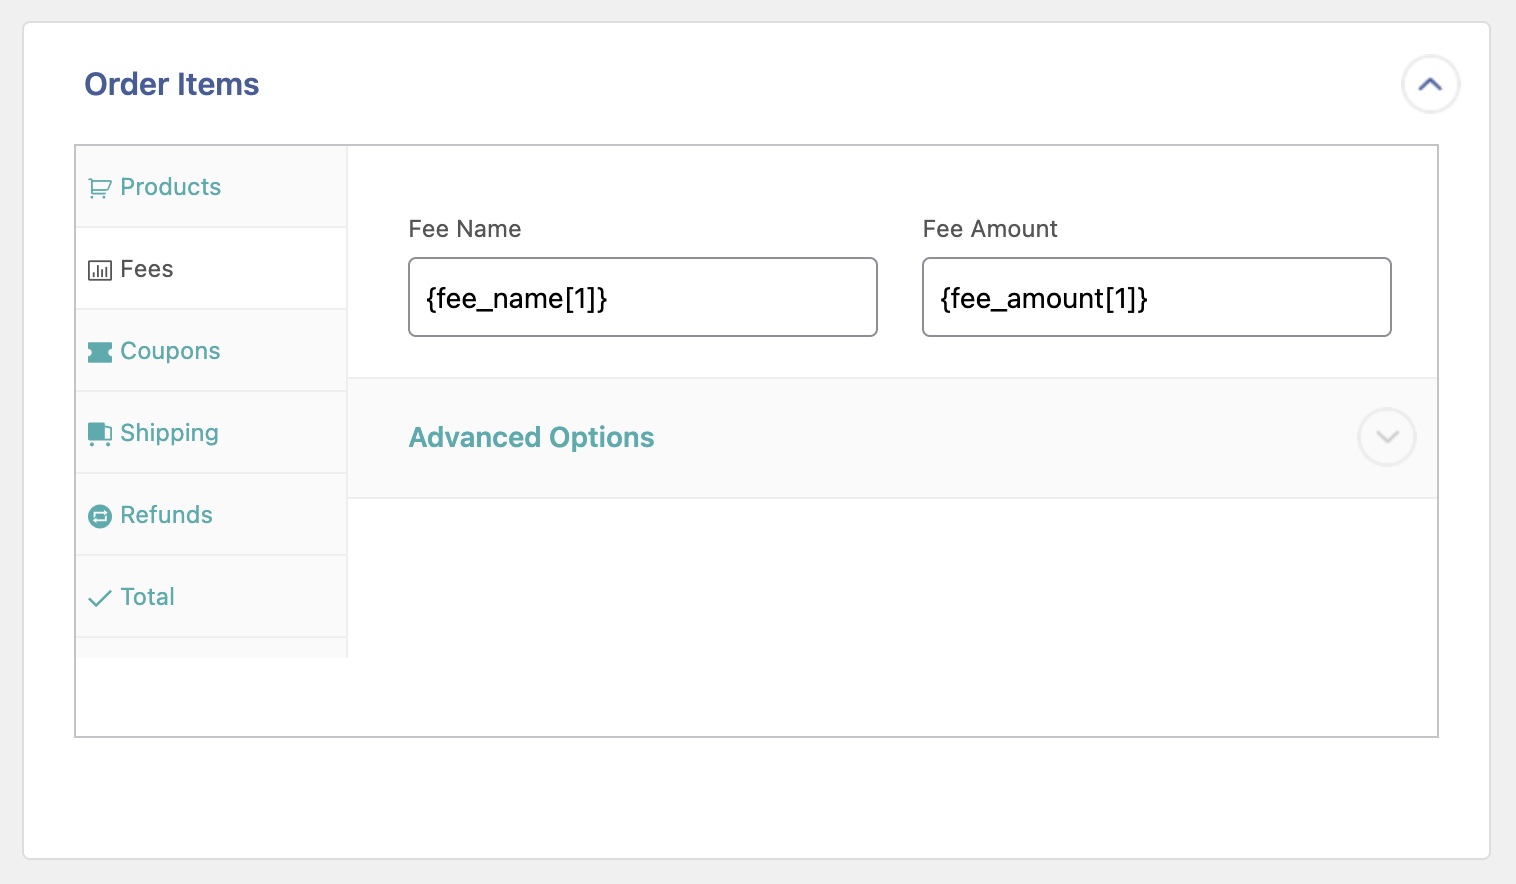
The Fees tab is where you can import any extra fee attached to the order:
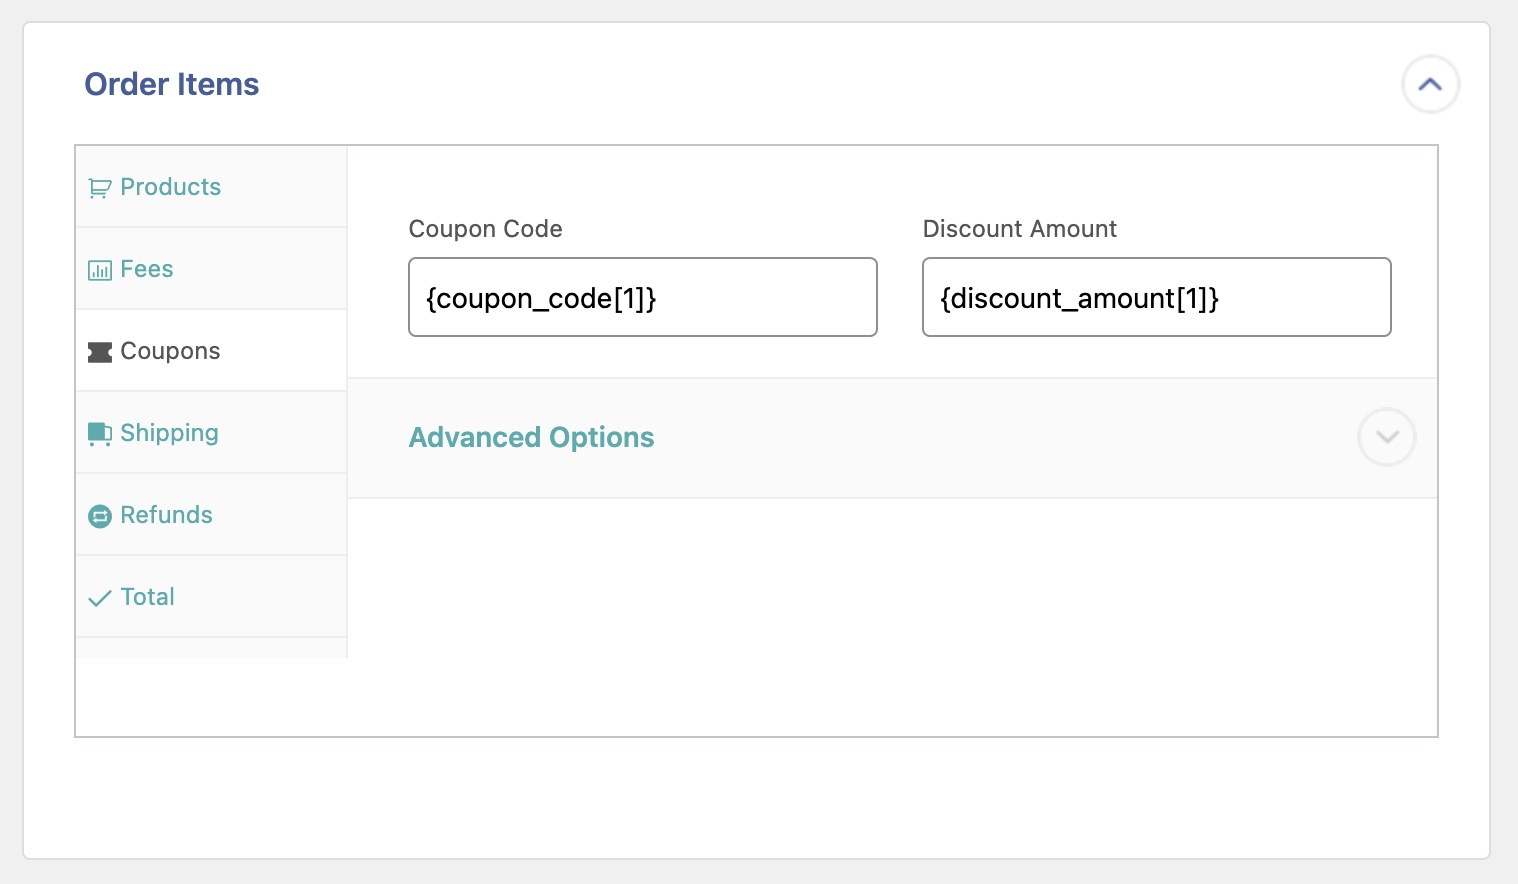
If a coupon was used in the order, you can import it in the Coupons tab:
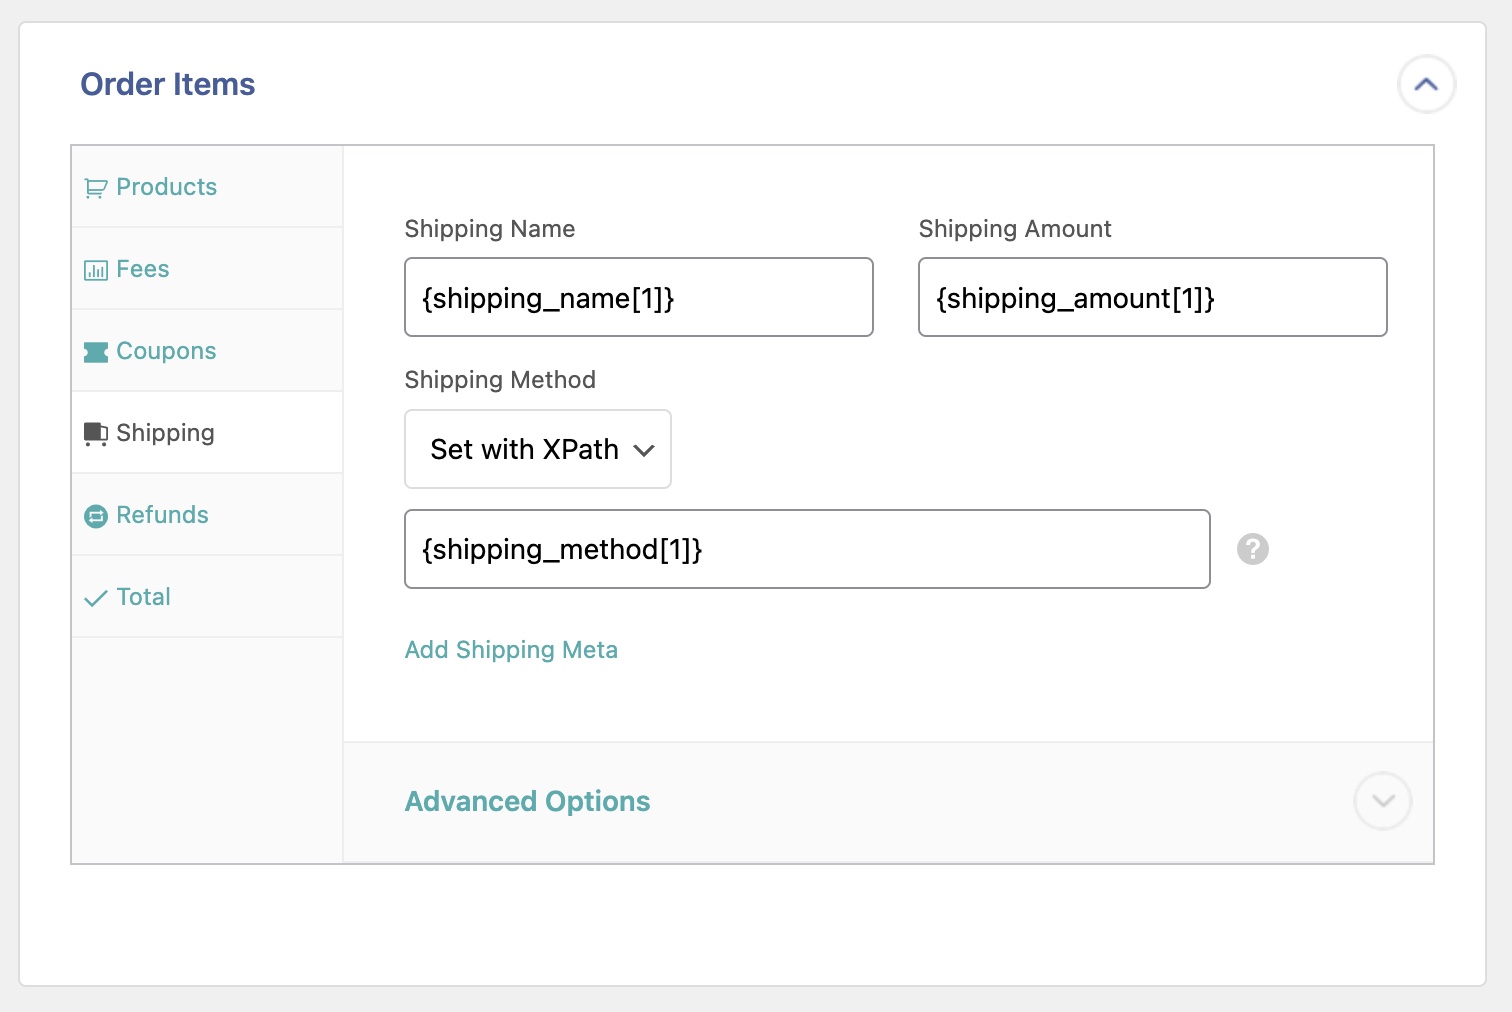
The order shipping information is imported in the Shipping tab:
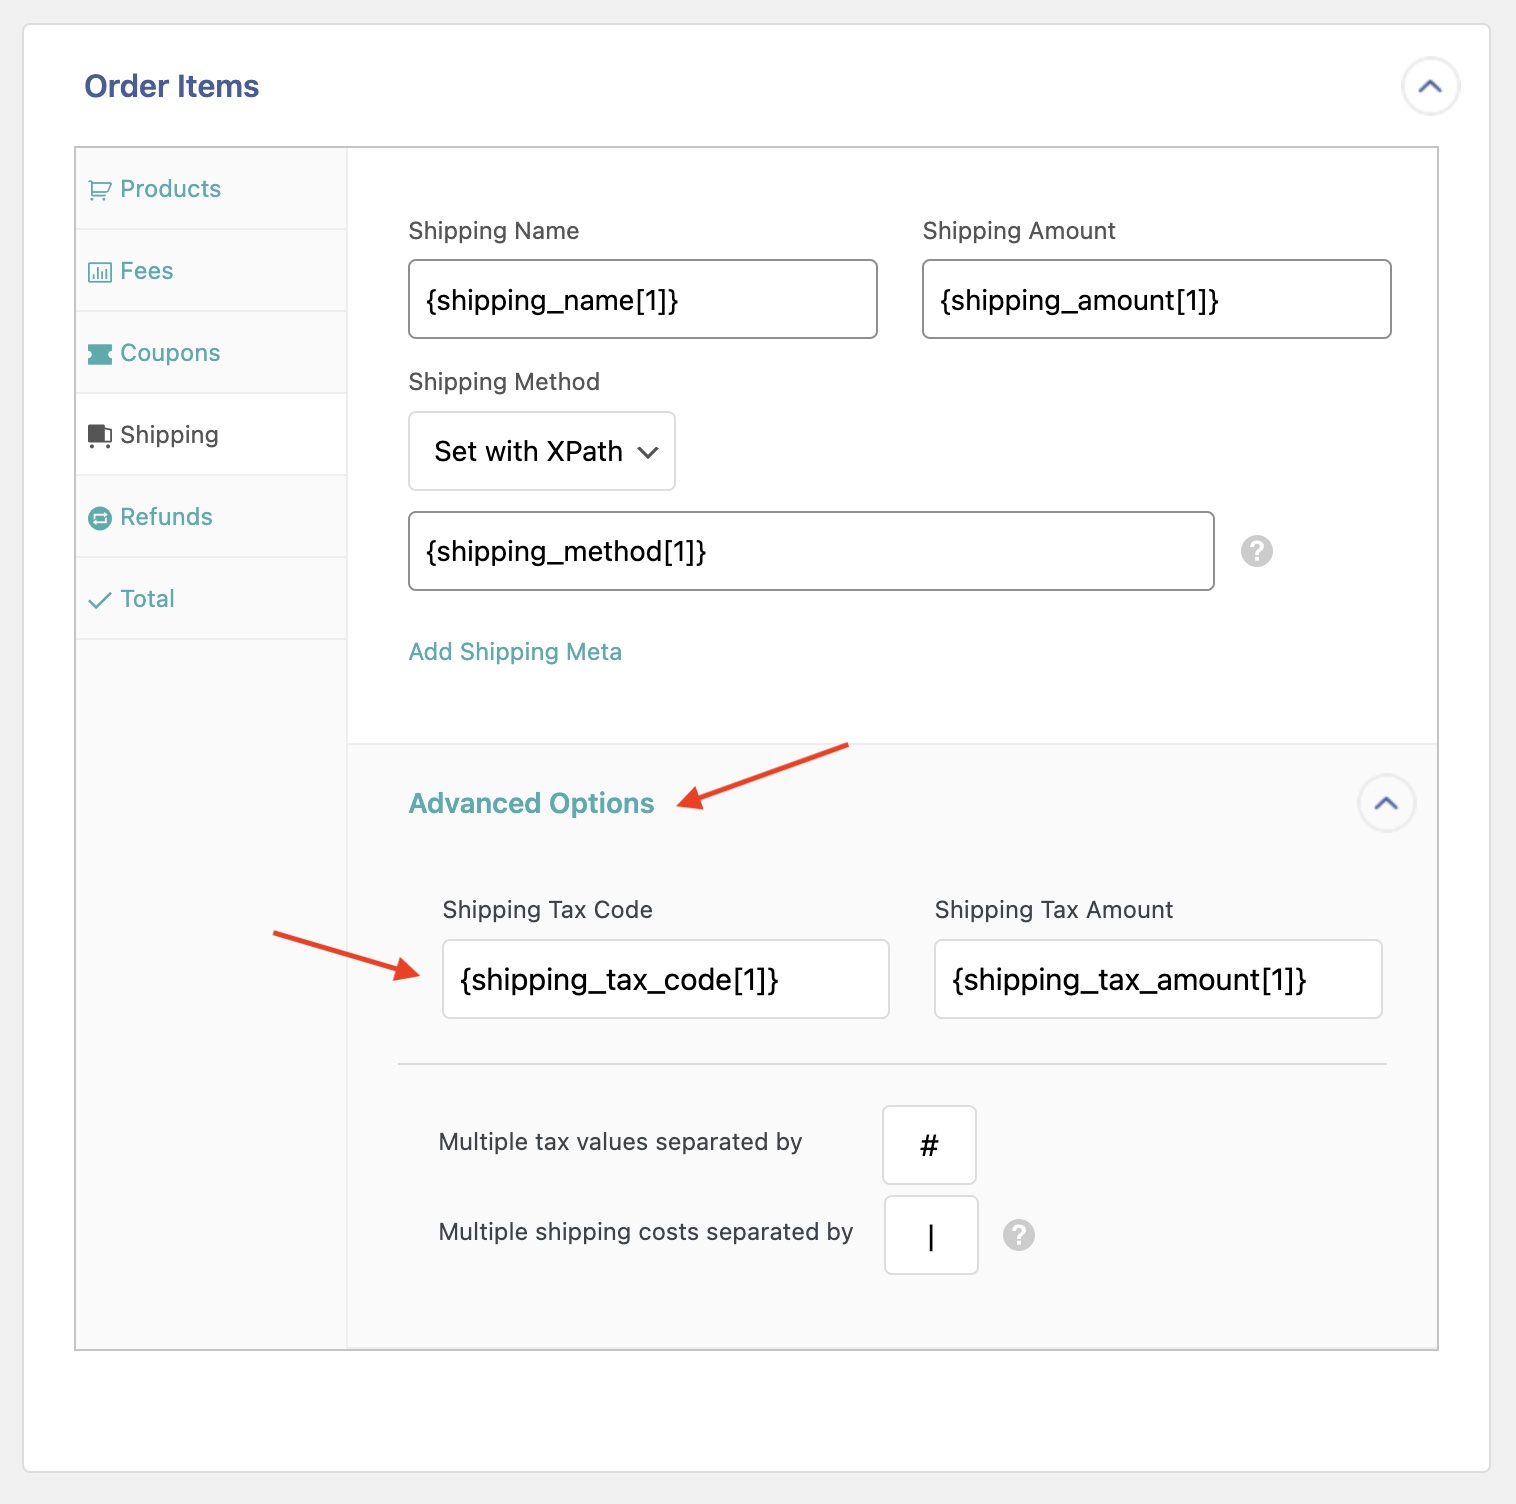
If there are any taxes associated with the order, you can map each tax separately under Advanced Options. This option is found under each one of the tabs where a tax may be required. For example, if you need to add tax to your shipping:
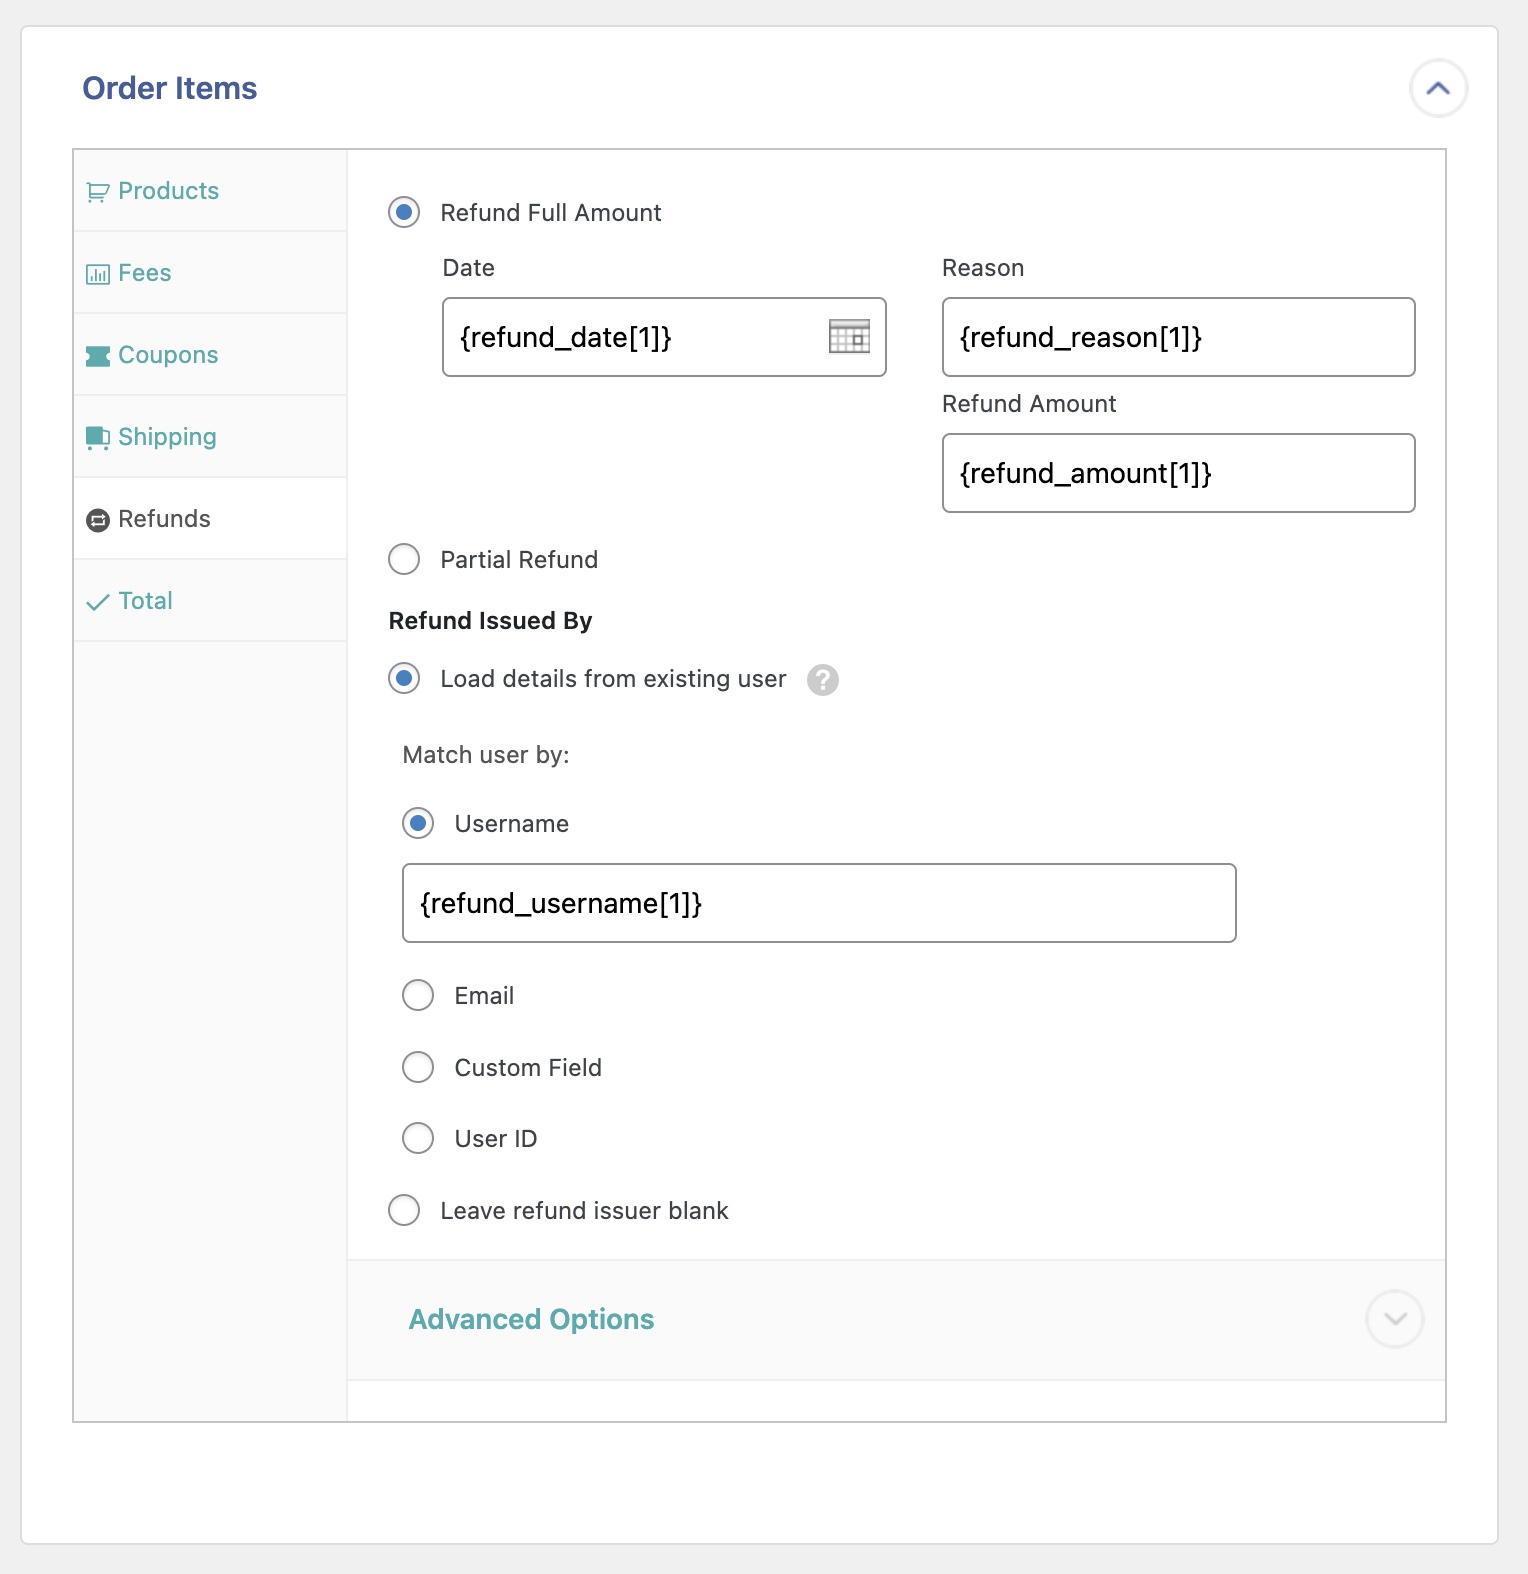
If the order contains any refund (total or partial), import it via the Refunds tab:
In the Total tab, you must set the order totals manually:
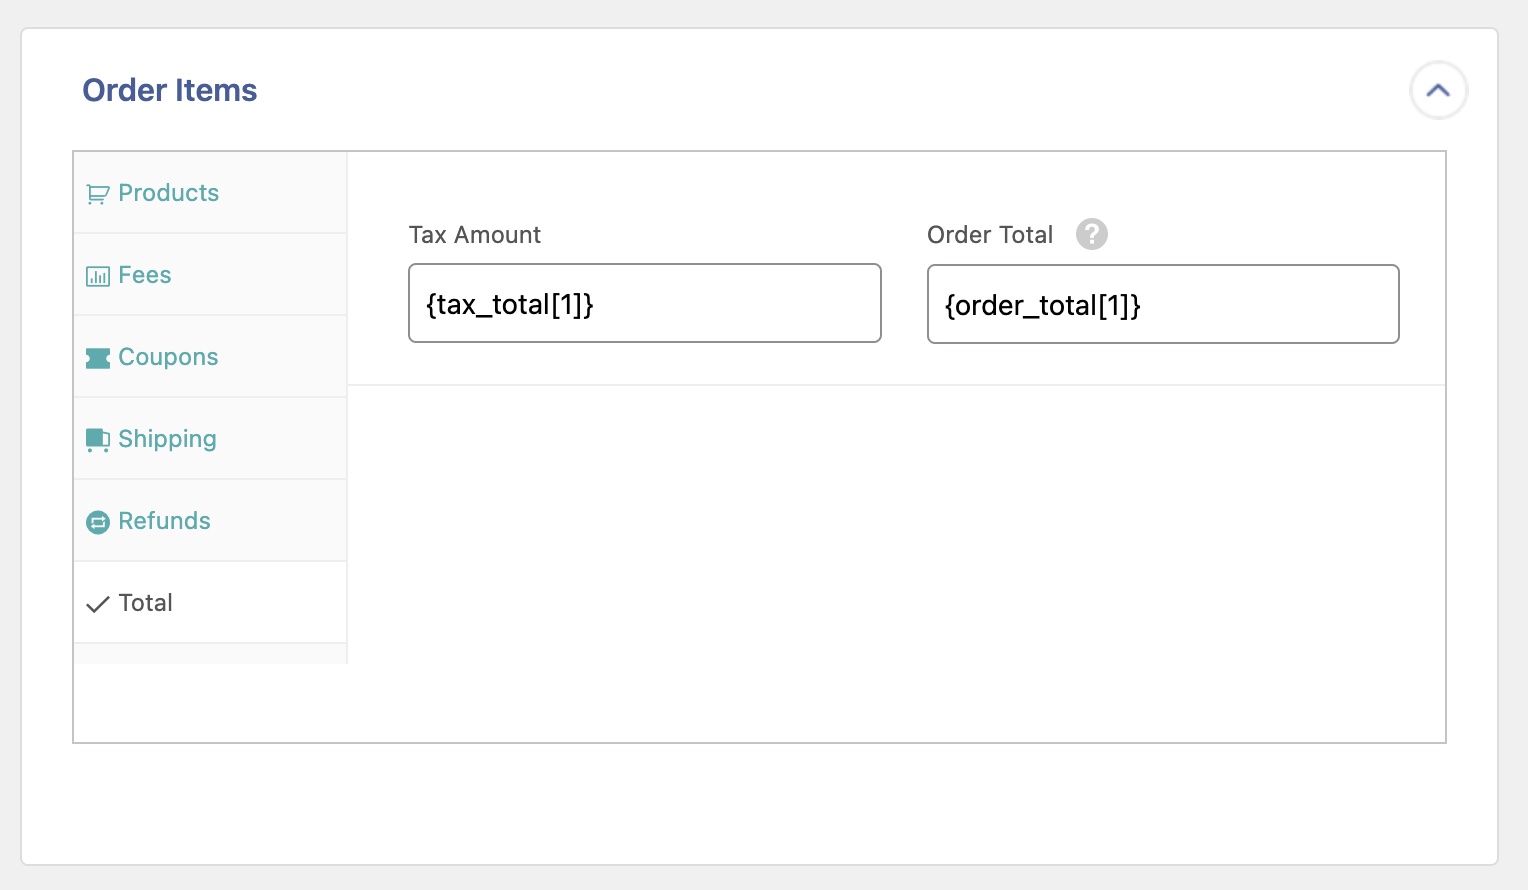
Keep in mind that nothing is automatically calculated. The import relies on whatever values are provided in these fields.
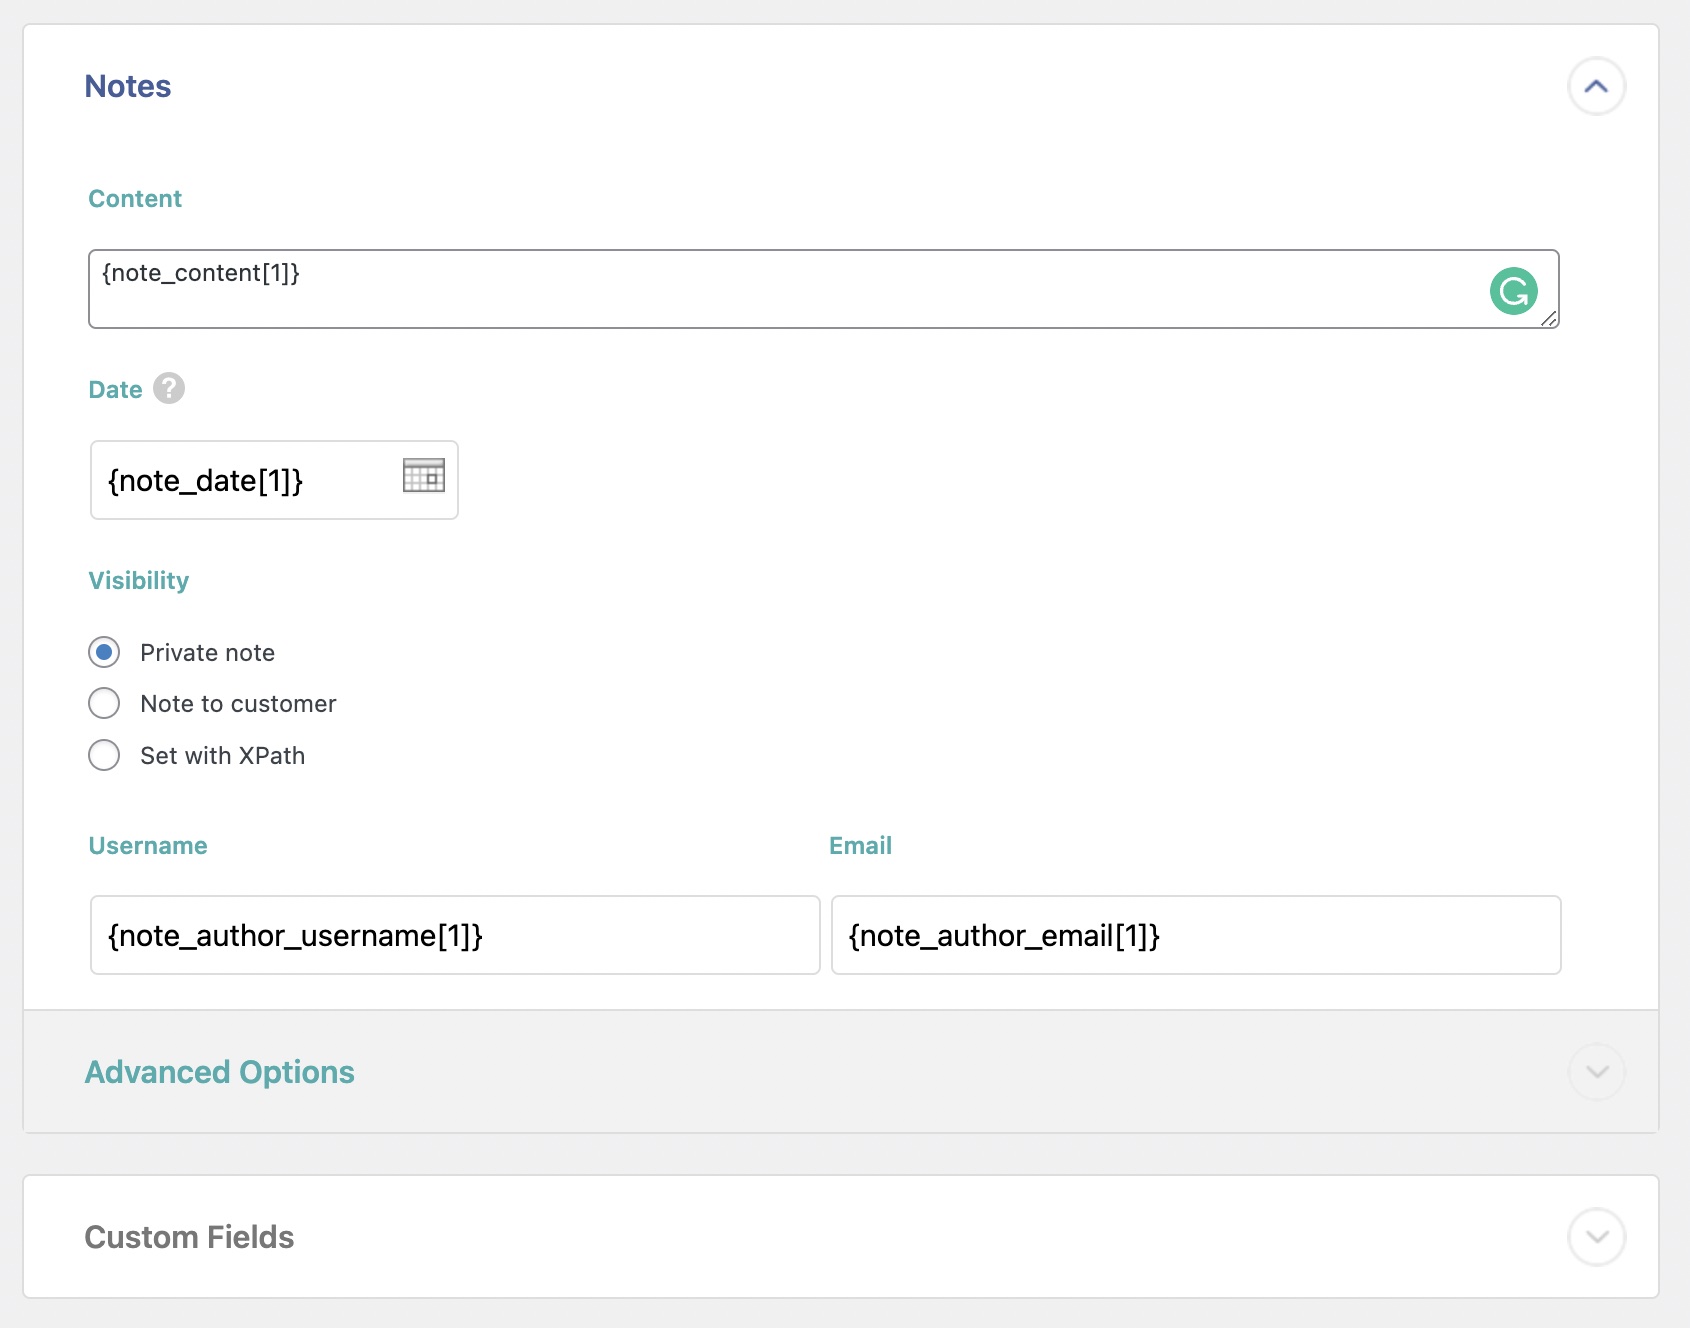
Notes Section
You can map order notes using the Notes section:
Below this section, you will see other sections, such as Advanced Options, Custom Fields, etc. Ignore these for now.
After all the data elements have been correctly mapped, click the blue Continue to Step 4 button at the bottom (not shown).
Step 4: Configure the Order Import Settings
You will now see the Import Settings screen, where you can define most of the import configurations:
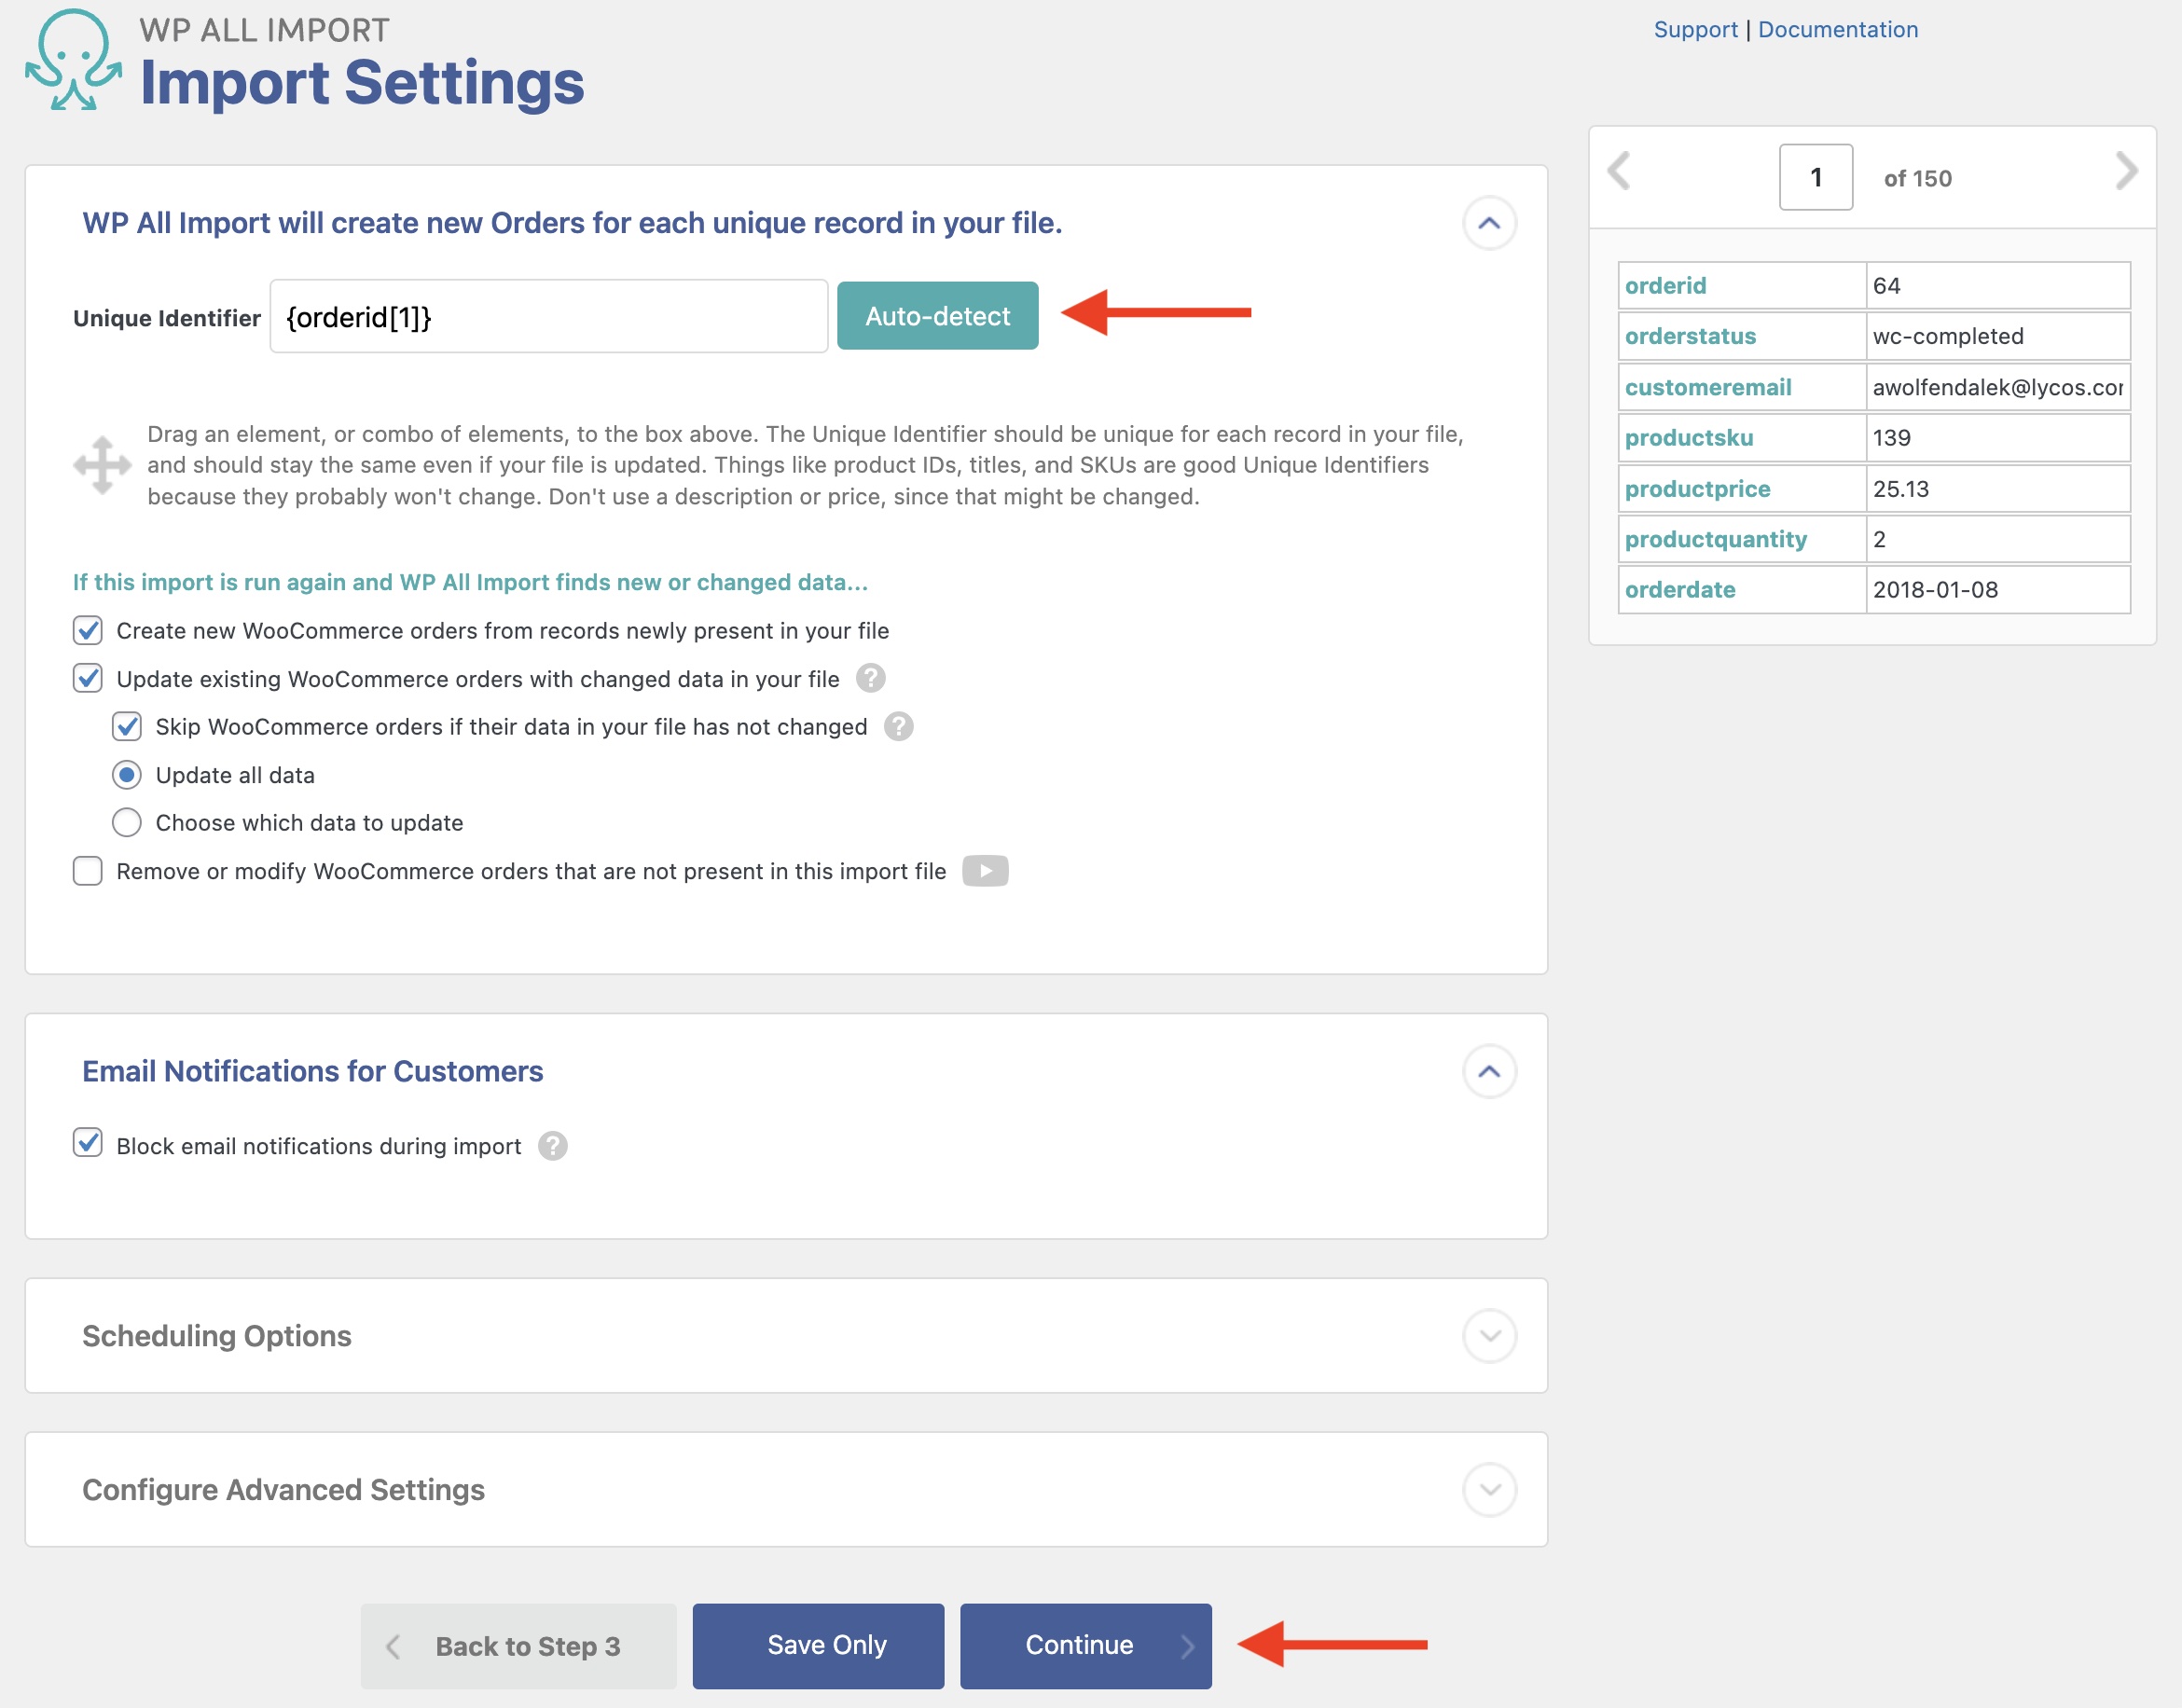
First, click on Auto-detect to automatically detect the unique identifier for each order in the import. This helps the plugin to distinguish between orders. If necessary, you can also set this manually to the order ID.
In the same panel, you can also define how the import should behave in subsequent import runs. For example, you can instruct the plugin to update existing orders with new data if the same order is encountered again, or to delete an existing order if the order is not present in the import file.
In the Email Notifications for Customers section, you can change the email notification behavior for the imported orders. While notifications are disabled out of the box, they can be enabled by unchecking the Block email notifications during import checkbox.
There are also panels for Scheduling Options and Configure Advanced Settings. We'll leave these alone for now, as they can usually be left with their default selections.
Click Continue to go to the next step.
Step 5: Run the Order Import and Verify the Results
The Confirm and Run screen allows you to review an import summary before proceeding:
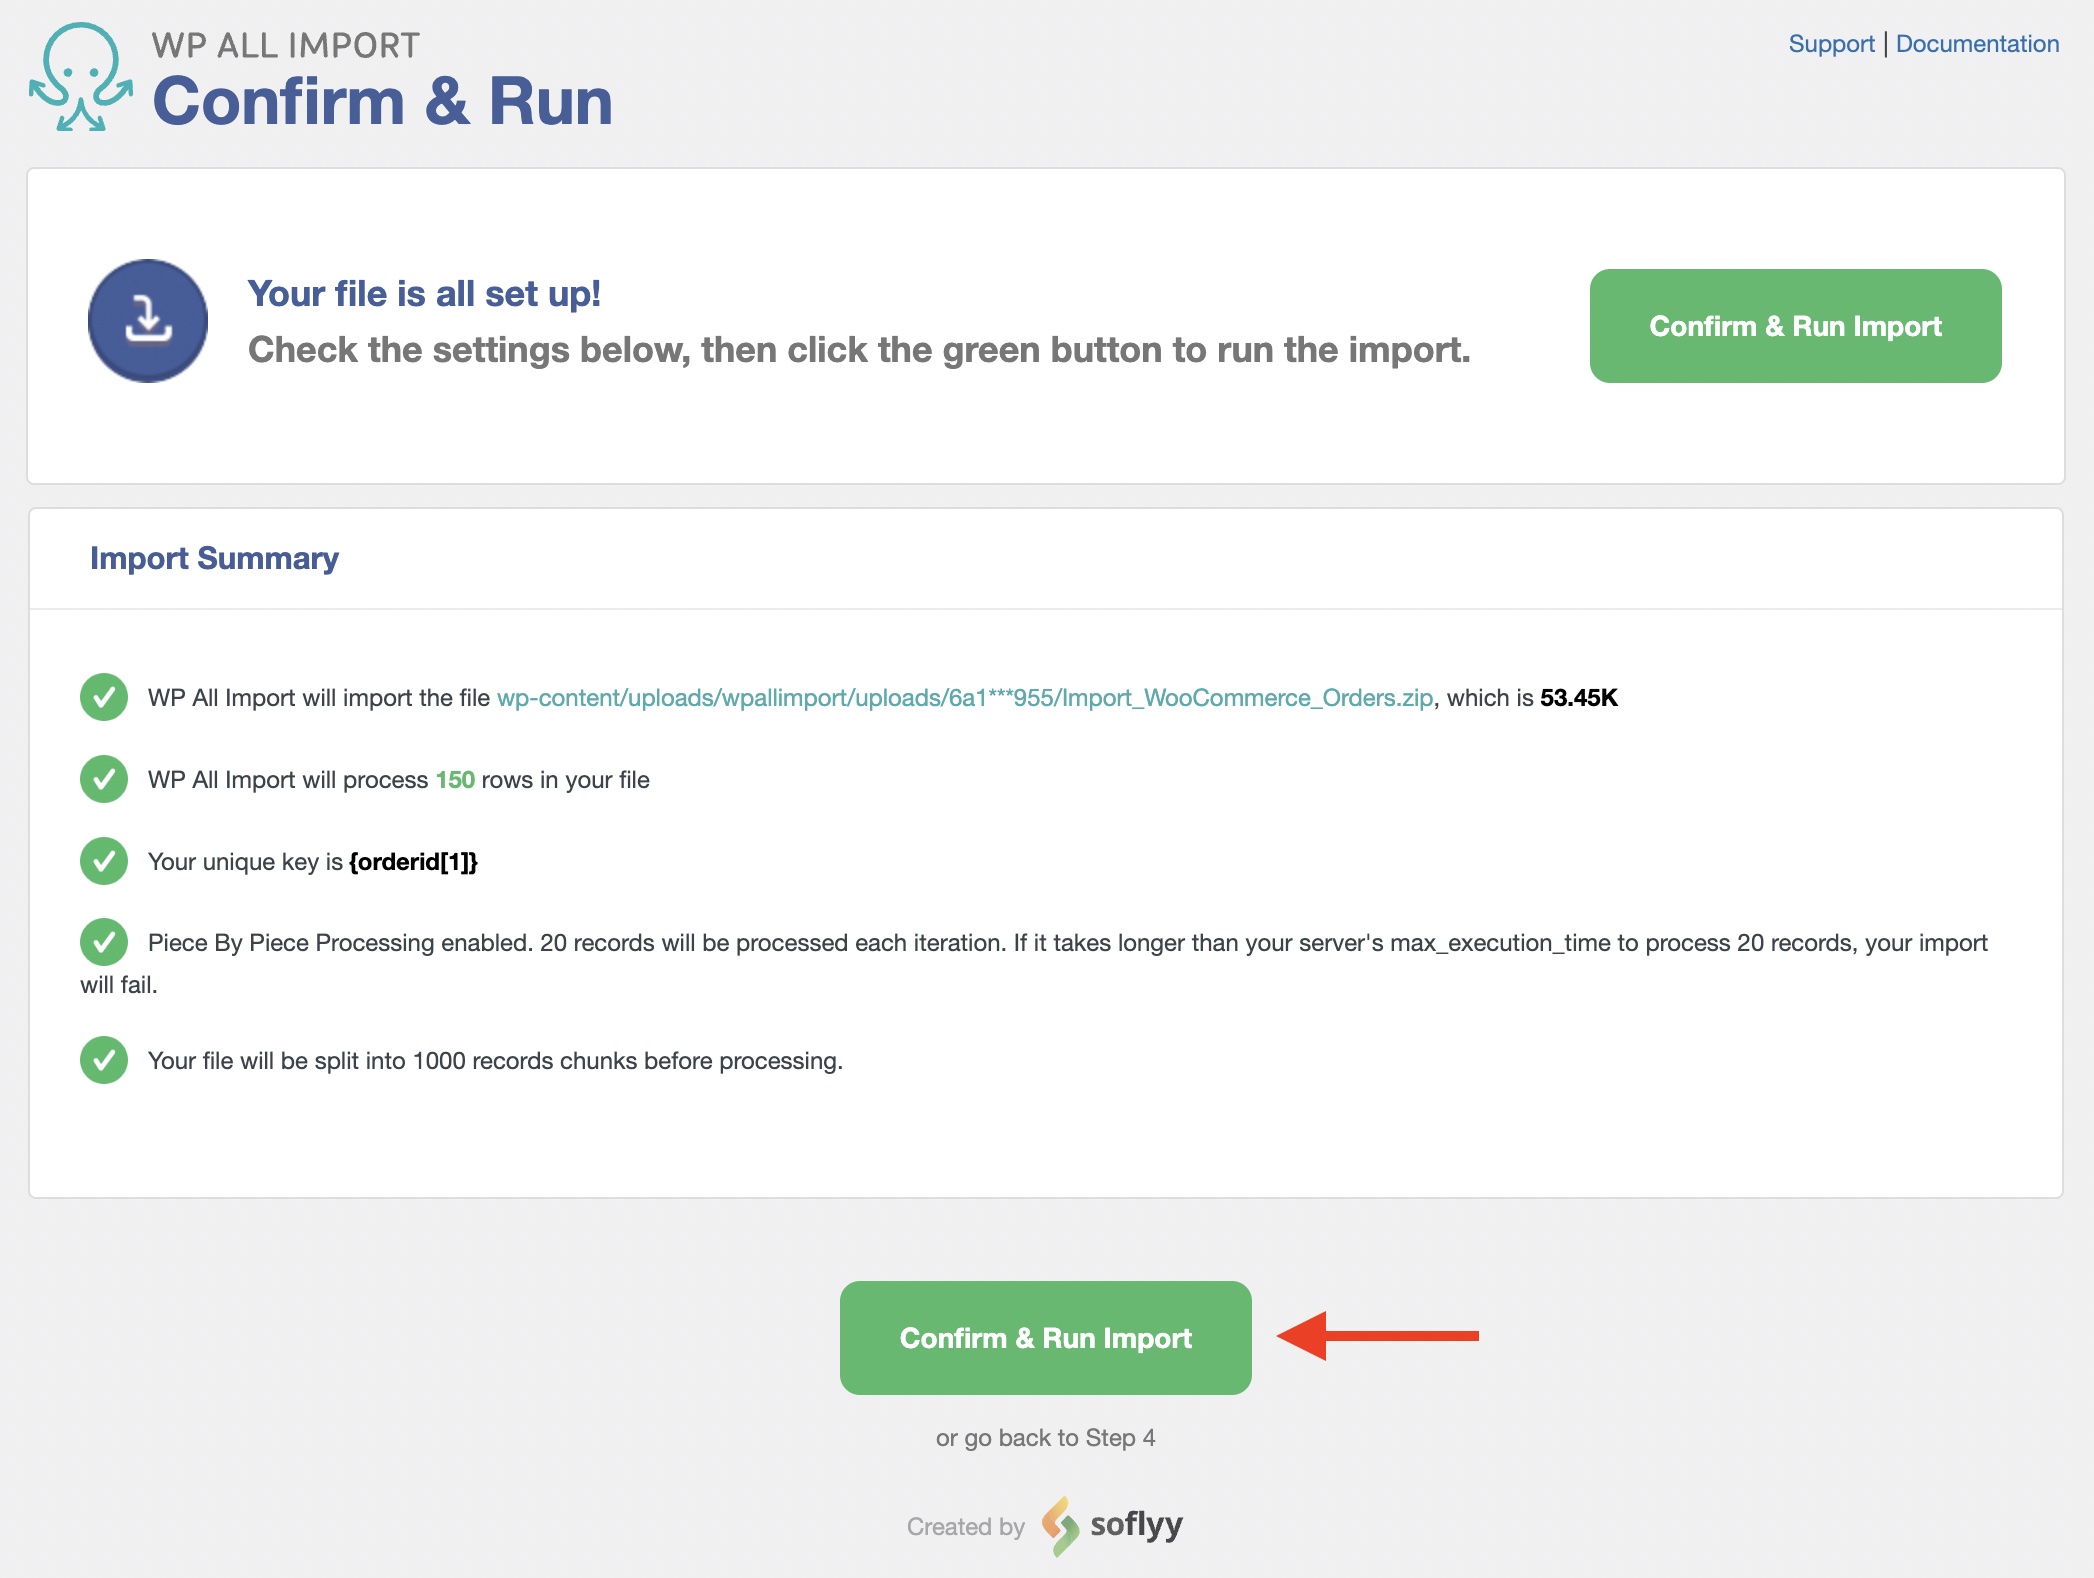
If something is not correct, go back to the previous steps to correct it.
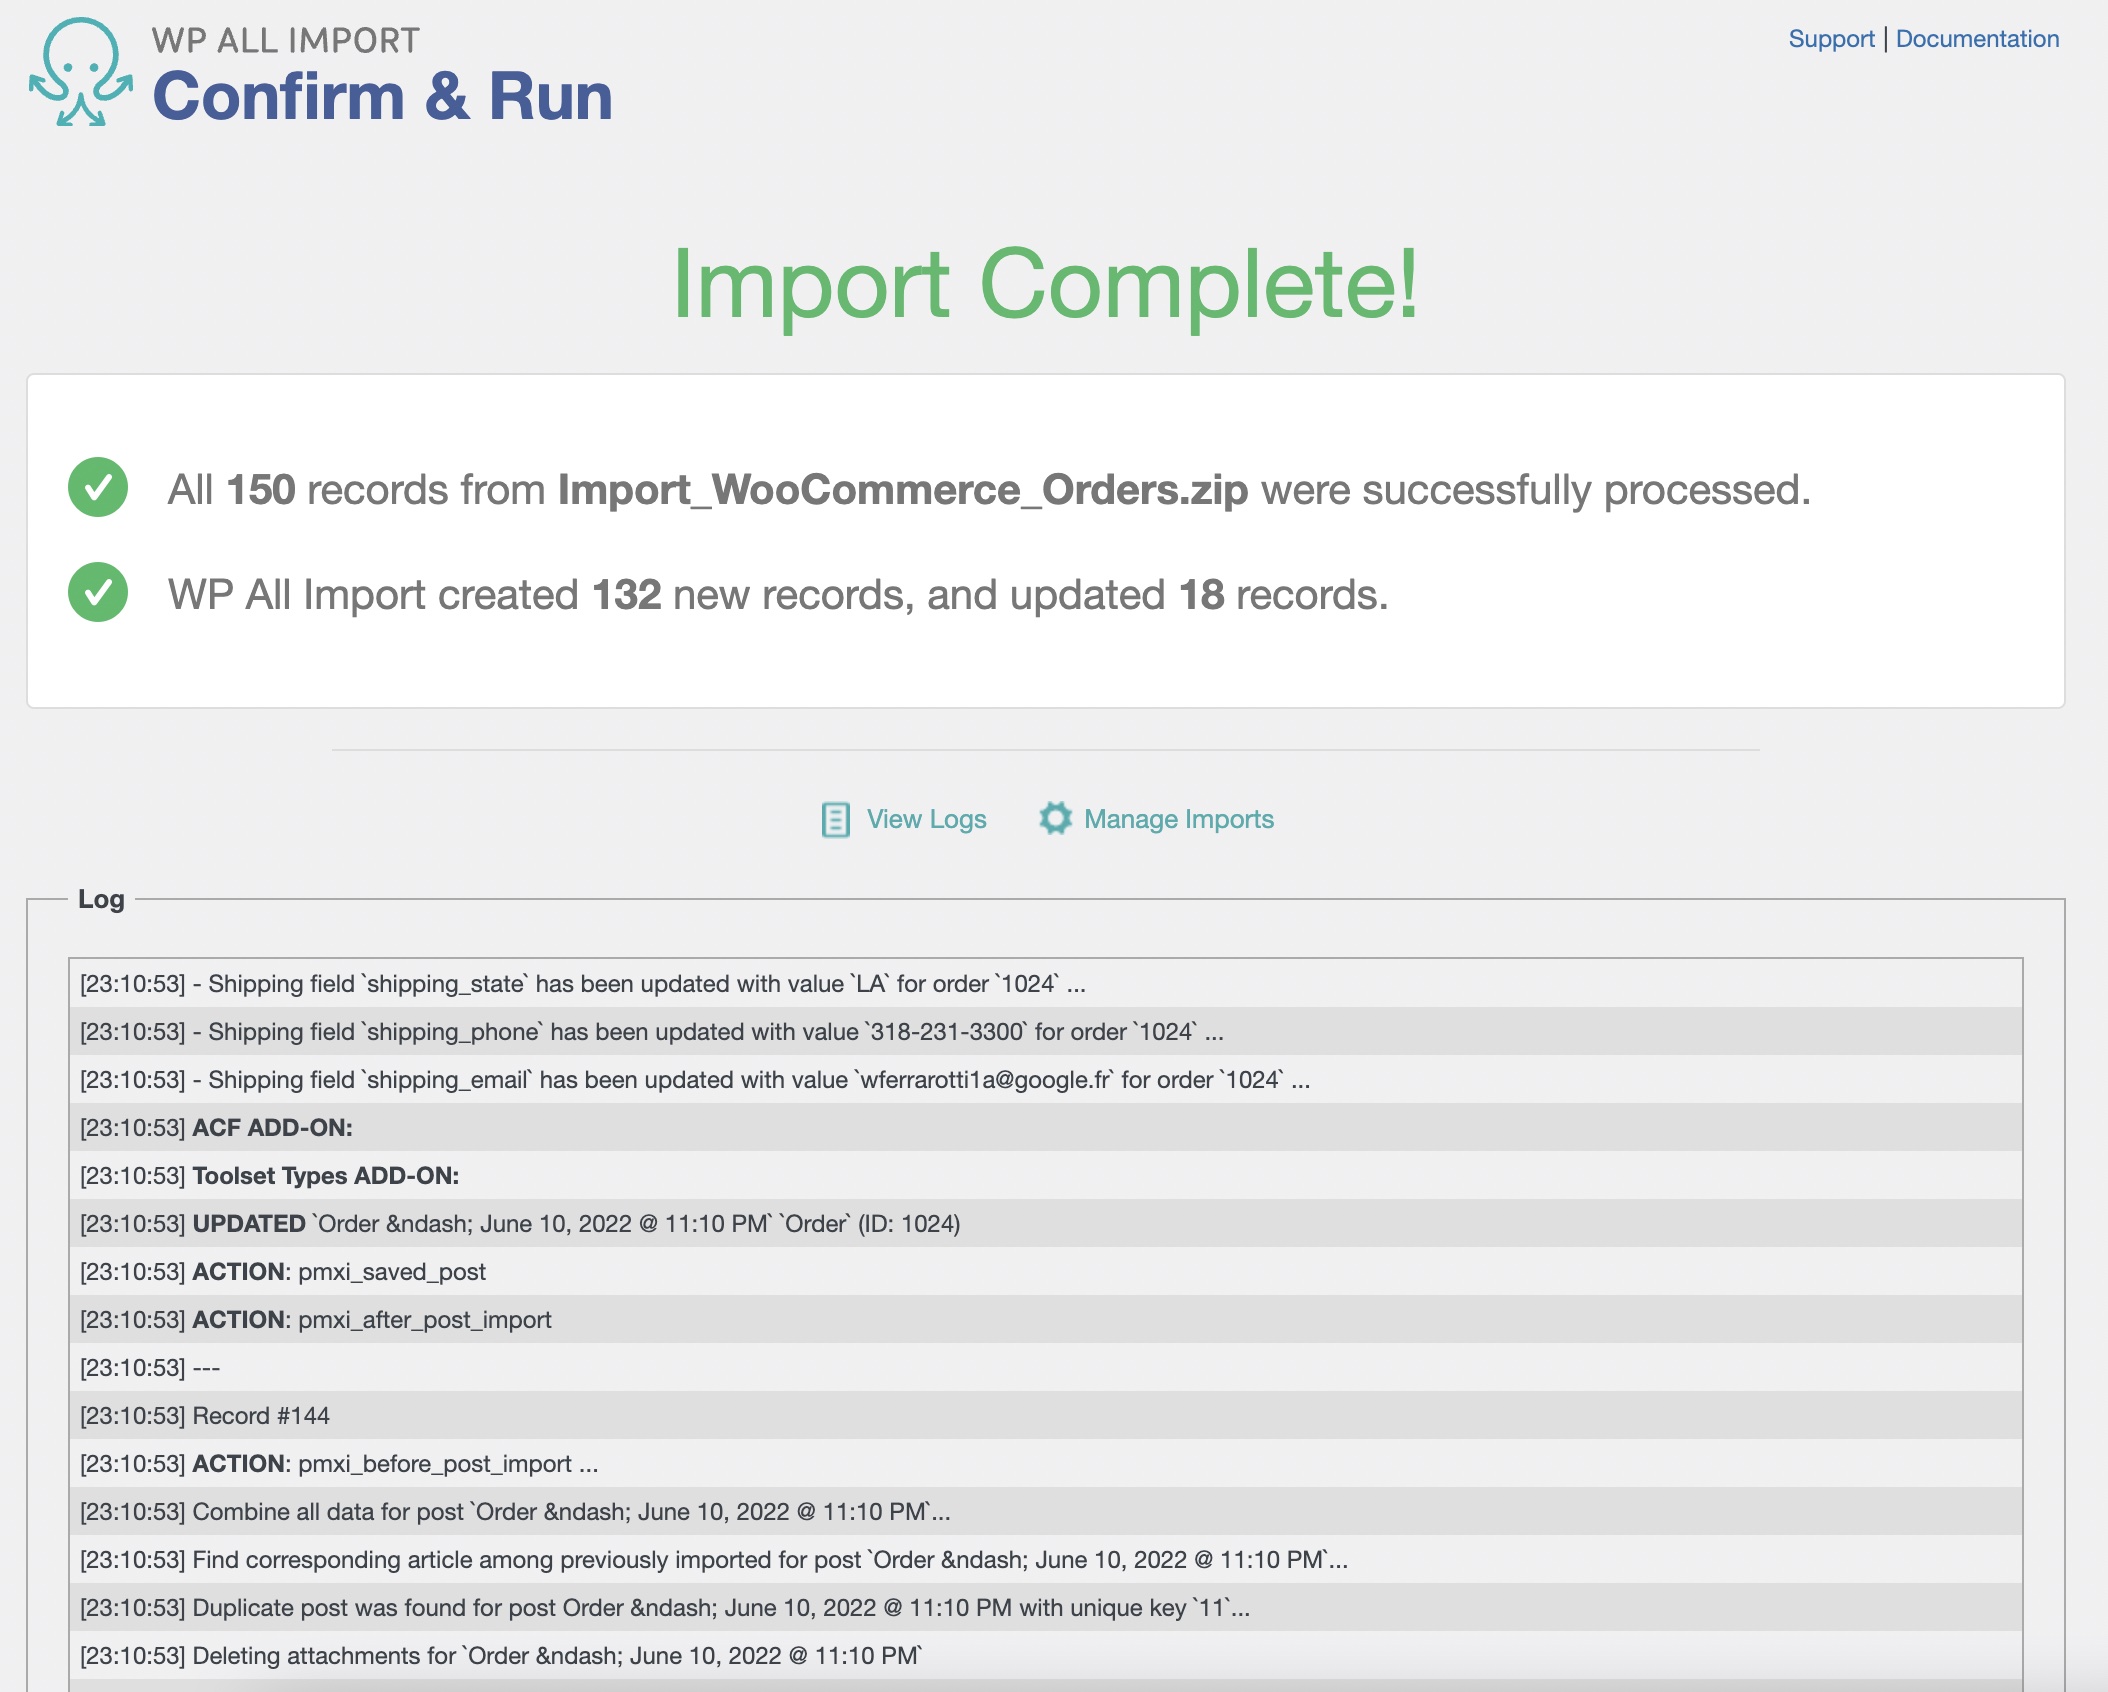
To continue, click Confirm & Run Import. Once the order import completes, you will see this screen:
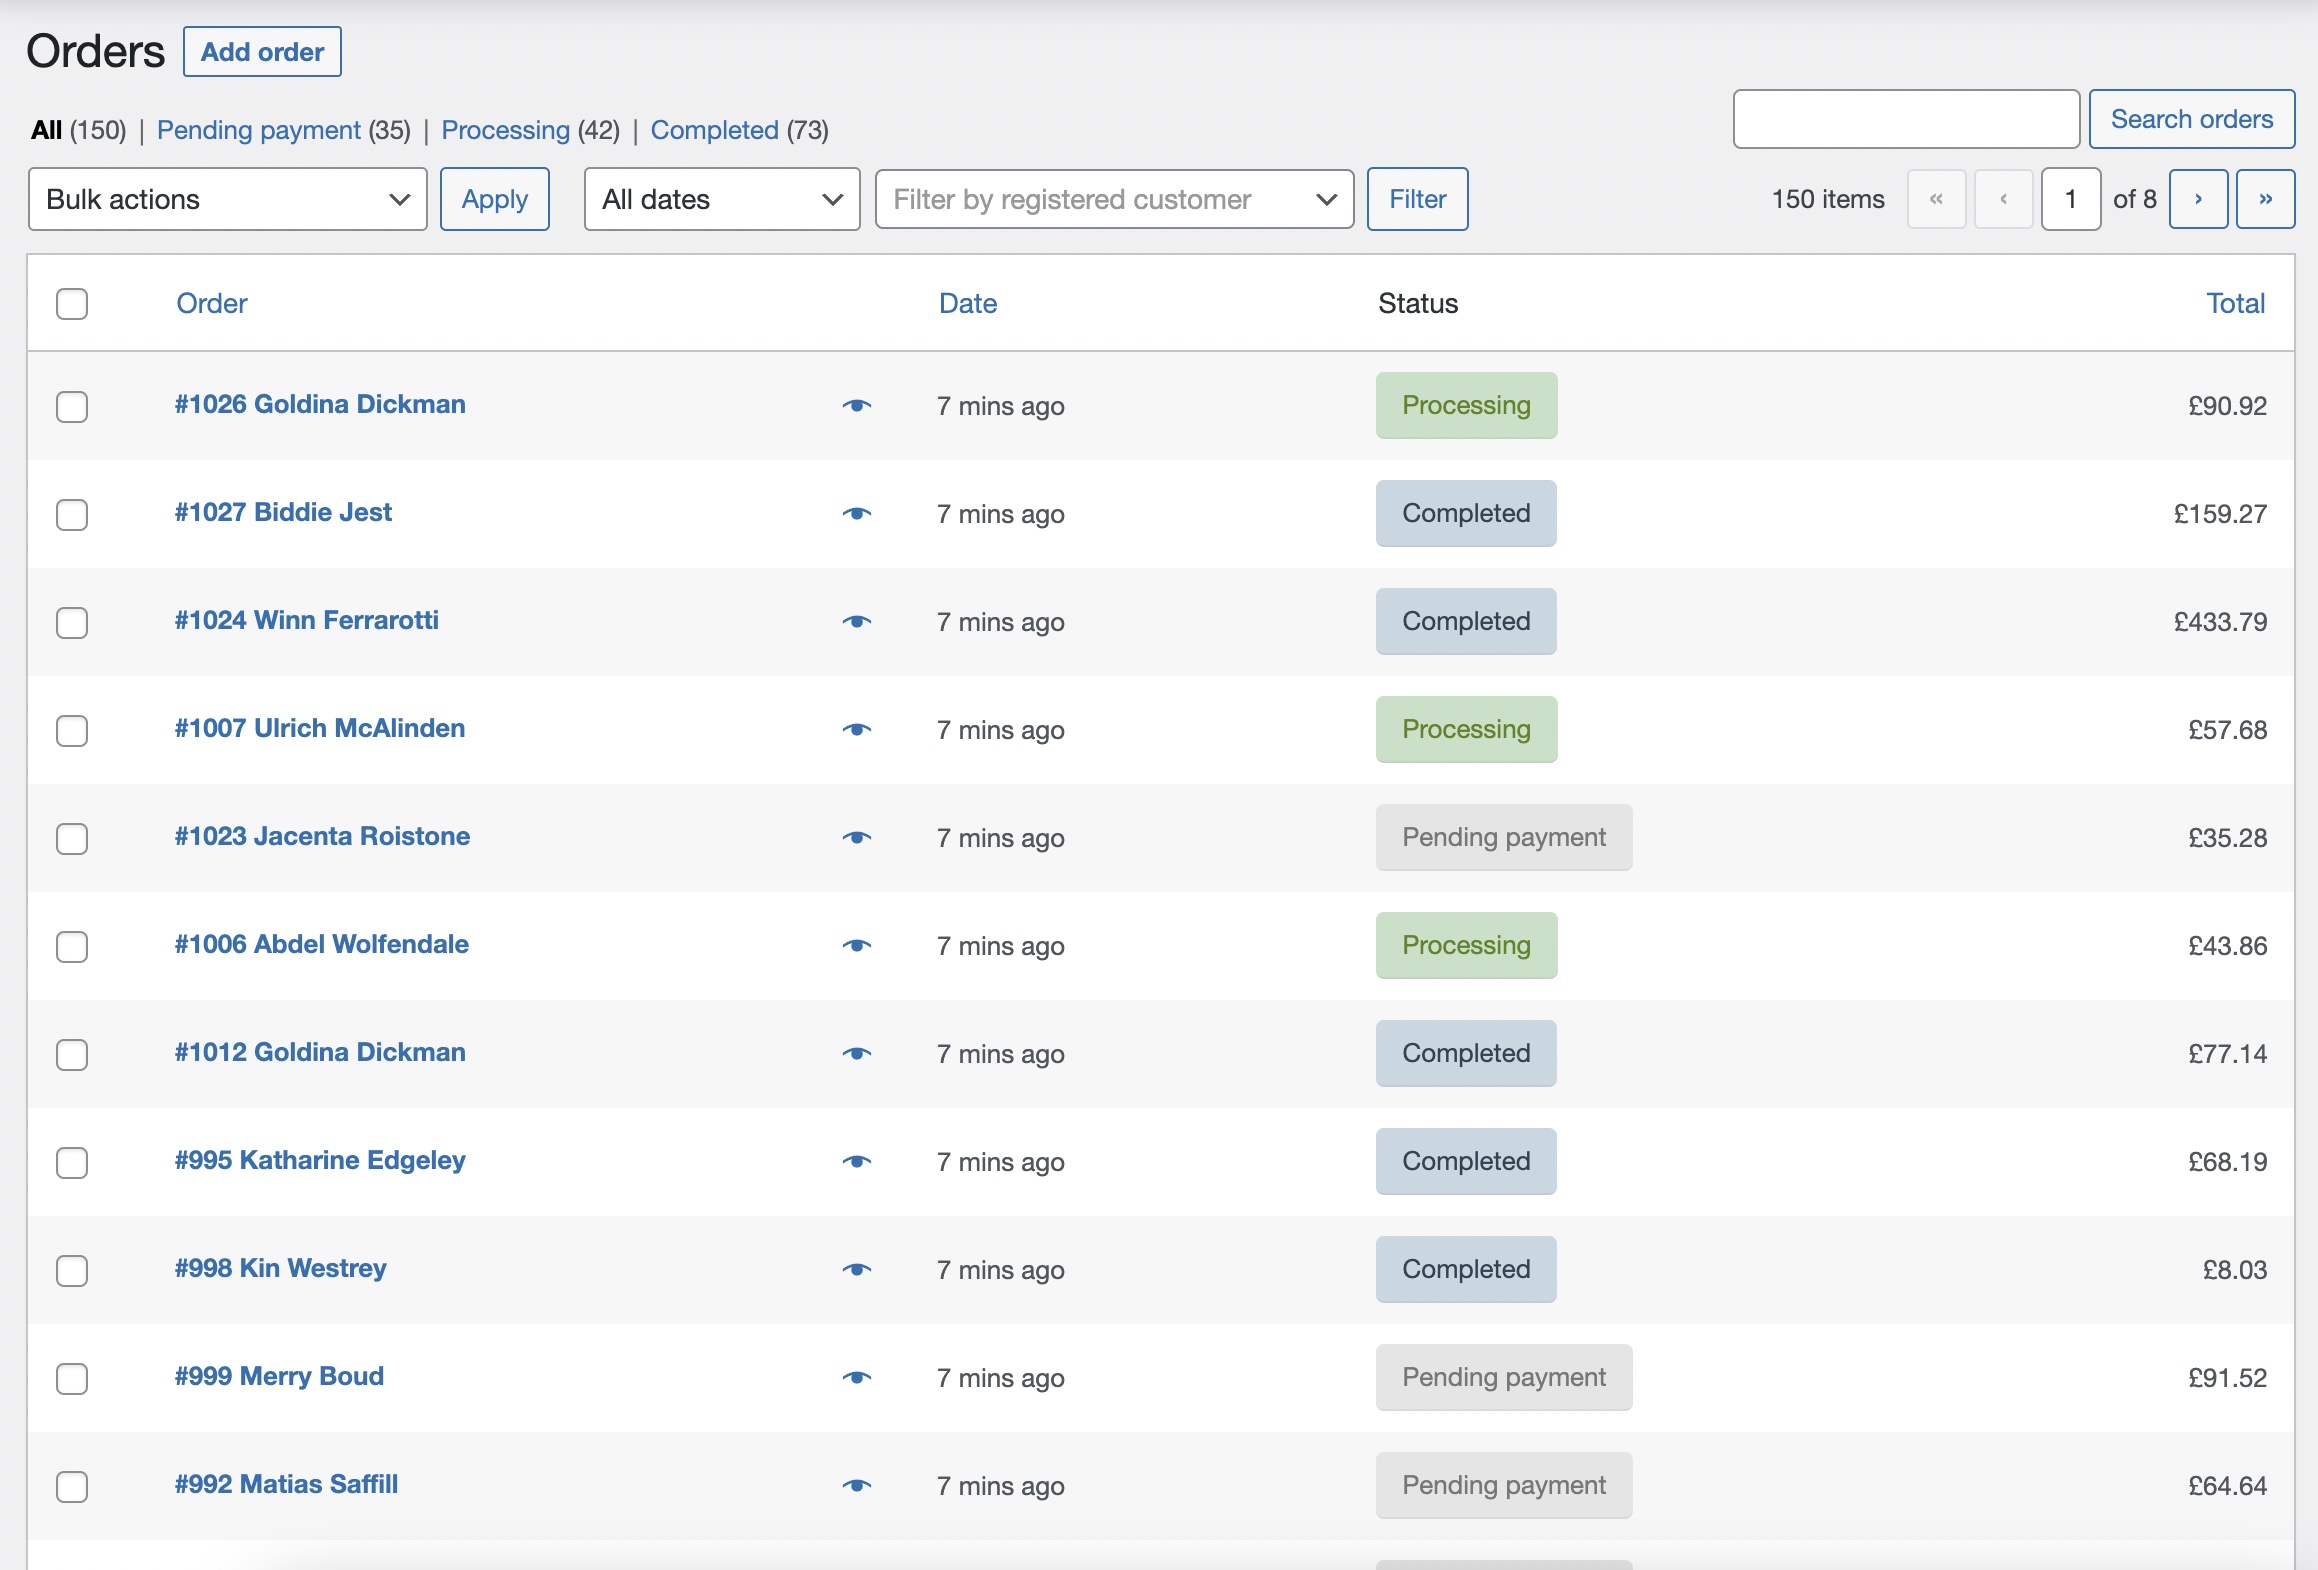
To confirm that the orders were correctly imported, go to WooCommerce › Orders in the WordPress main menu. There, you should see all of your imported orders:
Easily Import WooCommerce Orders
- Supports everything in WooCommerce
- Order status
- Billing & shipping
- Taxes
- Easy order matching
Import WooCommerce Orders – Advanced Topics
Order Skipped Due to Customer Not Found
When you import WooCommerce orders, some orders may be skipped due to not finding a customer match. If this happens, you will see a message like the following in the import History Logs:
[22:31:02] SKIPPED: Search customer by username `soflyy`. Existing customer not found for Order `Order – June 8, 2022 @ 10:31 PM`.Solve this by matching with a customer or user account that already exists on the site, or by enabling the option If no match found, import as guest customer and filling in the guest customer details:

You can also import all customers as guest customers directly, without attempting to match an existing user account, by enabling the Import as guest customer option at the bottom and filling in the required fields.
Order Taxes or Shipping Not Showing Correctly
If taxes do not appear correctly or were not imported, this can happen due to not having taxes enabled in WooCommerce. Here's how to enable WooCommerce taxes:
- Go to: WooCommerce › Settings › General.
- Select the Enable Taxes and Tax Calculations checkbox.
- Save changes.
To correctly apply the taxes to the product(s) linked and found on the site, the WooCommerce product itself needs to have a tax status and a tax class selected.
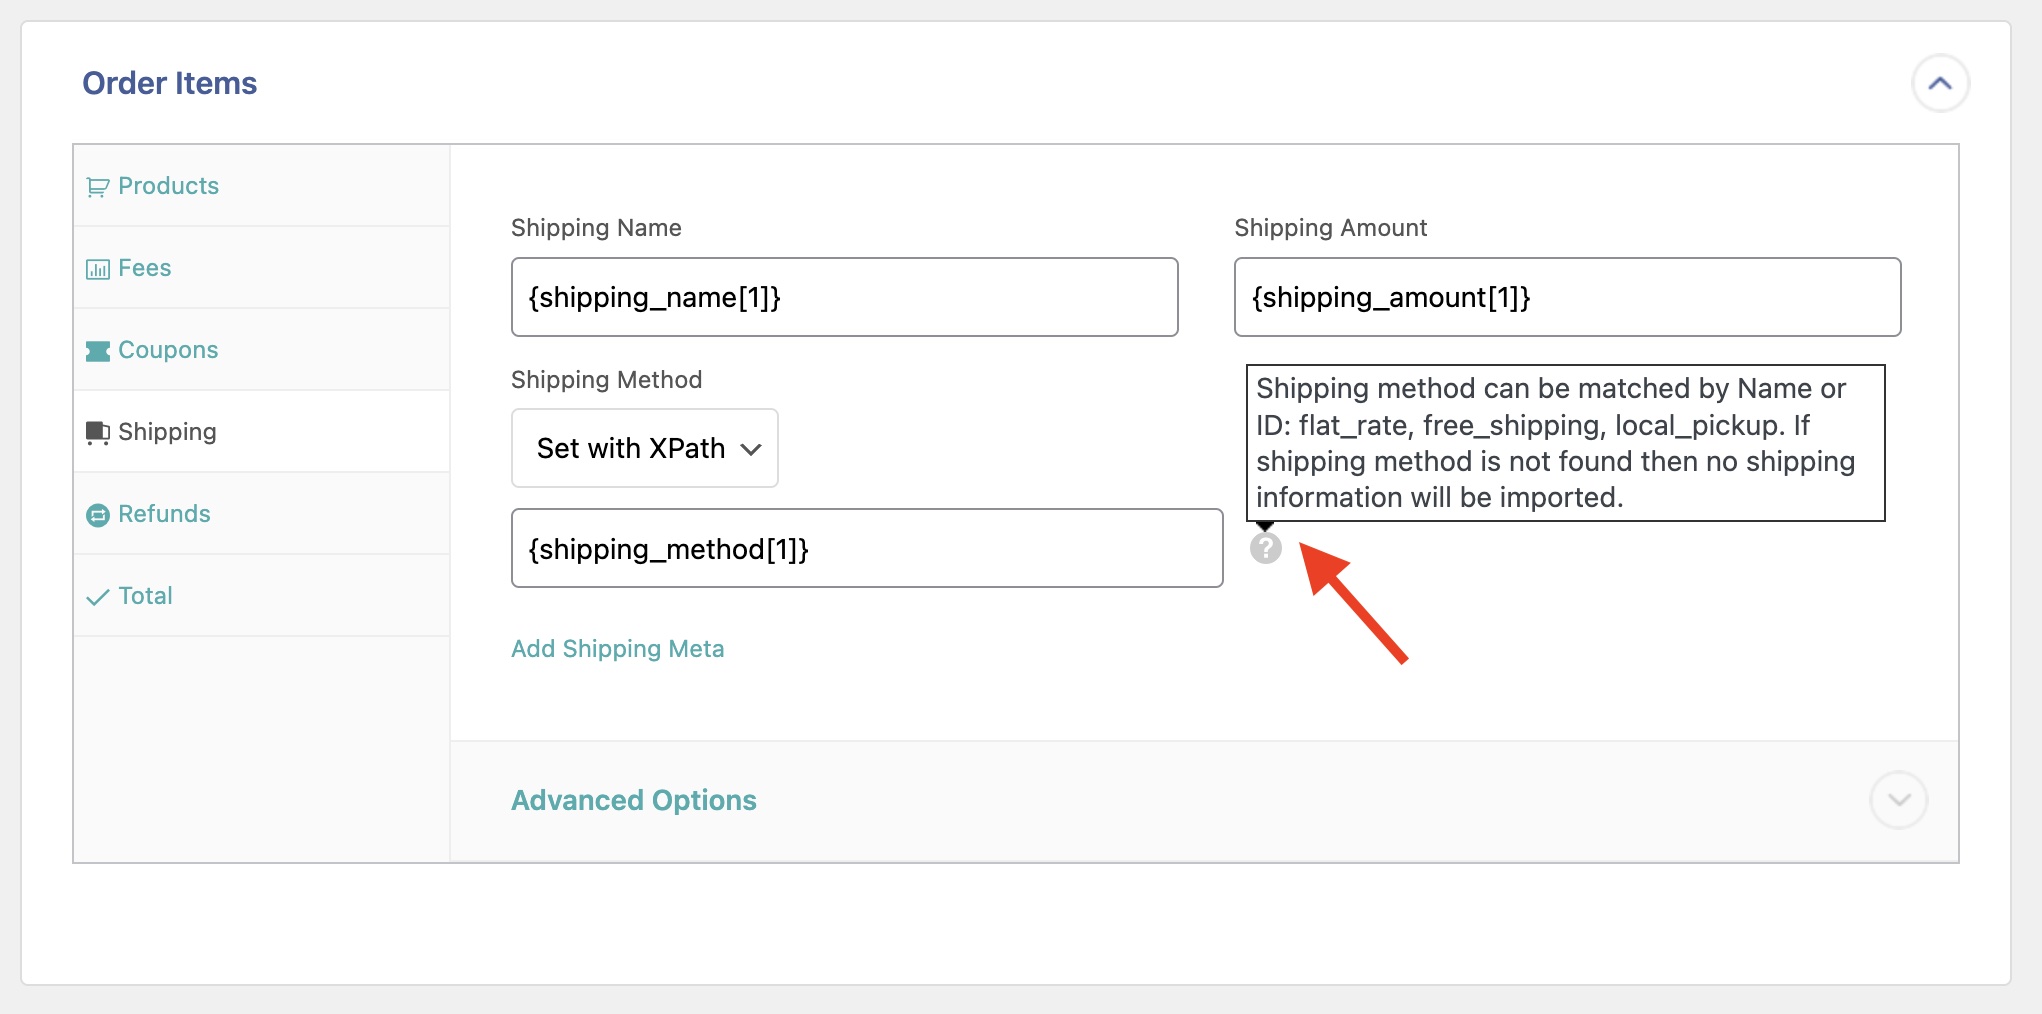
Likewise, if the shipping amount is not imported or showing correctly, this can happen because of a failure to find the correct Shipping Method on the site. To avoid this, make sure that the Shipping Method imported in the Shipping tab is valid:
Import WooCommerce Orders – Frequently Asked Questions
How to Import WooCommerce Orders Using XML?
Simply identify your XML file as the source file for your order import. Our software will automatically recognize the file type and parse the data accordingly. It can handle any XML feed regardless of its complexity.
How Do I Import a CSV File into WooCommerce?
Simply identify your CSV file as the source file for the import, as WP All Import automatically recognizes the different file types. It will even adjust the interface/tool you use to review the data. As a user, you don't need to worry about the differences in the file types.
Is There a Specific Sequence I Should Use to Import WooCommerce Data?
Yes, if you're importing multiple types of WooCommerce data, you should follow this sequence to import the data without issues:
- WooCommerce Products
- WooCommerce Customers
- WooCommerce Orders
- WooCommerce Reviews
How to Export WooCommerce Orders?
- Go to All Export › New Export and select WooCommerce Orders.
- Configure your orders export using the Drag & Drop screen.
- Run the export.
- Download your export file.
To learn more, see How to Export WooCommerce Orders to CSV, Excel, or XML.
How to Migrate WooCommerce Orders From One Site to Another?
- Create a new WooCommerce Orders export using WP All Export.
- Select Migrate Orders and download the bundle file.
- Import the bundle file via WP All Import.
- Complete the import process and verify the migrated orders.
For more information, see How to Migrate WooCommerce Orders.
What Table Stores WooCommerce Order Data?
Out of the box, WooCommerce stores orders as a custom post type in the wp_posts table. The order metadata is in wp_postmeta. WooCommerce also uses its own custom database tables for some item data, such as wp_woocommerce_order_items and wp_woocommerce_order_itemmeta.
Since WooCommerce 8.0, you can also choose to store the order data in WooCommerce's own custom database tables. This feature is called High-Performance Order Storage.
Does WP All Import Support High-Performance Order Storage (HPOS)?
Yes, in line with the changes made by WooCommerce, we support High-Performance Order Storage (HPOS) with the latest versions of WP All Import and the WooCommerce Import Add-On.
What Add-Ons Do I Need to Import WooCommerce Orders?
To import WooCommerce orders, you need to have the WooCommerce Import Add-On active on your site, along with WP All Import.
Import WooCommerce Orders – Related Docs
Export WooCommerce orders to CSV, Excel, or XML.
Migrate WooCommerce orders from one website to another.
Learn how to use cron jobs to automate your WooCommerce orders import.
Learn how to import WooCommerce customers.
Describes how to import WooCommerce products.
Describes how to import WooCommerce reviews.
