How to Run Real-Time Exports
To export posts one by one in real-time, create a new export and then enable Export each post in real time as they are completed on the Export Settings page.
Every time a new post is created, this export will run and create a new file containing only the post that was just created. You can then set up Zapier to send this data to over 5000+ apps, or create a custom solution using the WP All Export API.
Table of Contents
- Step 1: Create a New Orders Export
- Step 2: Select Your Export Columns
- Step 3: Enable Real-Time Exporting
- Step 4: Configure a Trigger Action
Advanced Topics
- How to Disable a Real-Time Export
- Access the Export File with Custom Code
- Can You Use Filtering Options With Real-Time Exports?
Step 1: Create a New Export for WooCommerce Orders
Real-time exports are available for all new and existing exports, regardless of post type. In this example, we'll set up a real-time export for WooCommerce Orders.
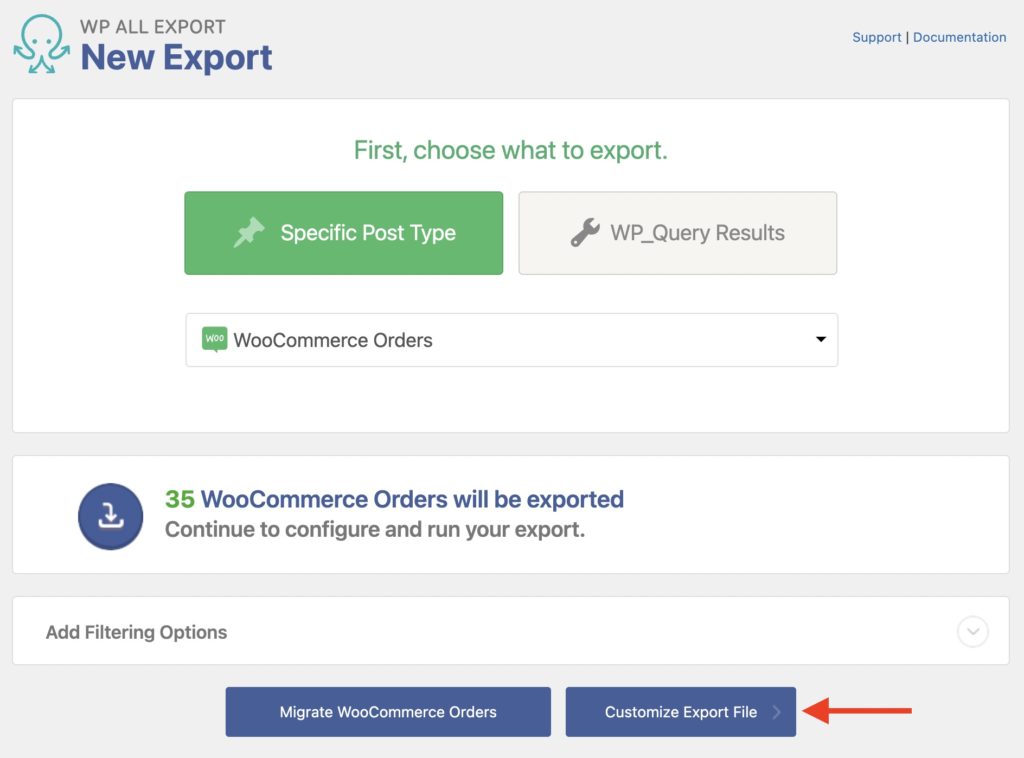
First, go to All Export › New Export and select to export WooCommerce Orders:

Click the Customize Export File button to continue.
Step 2: Select Your Export Columns
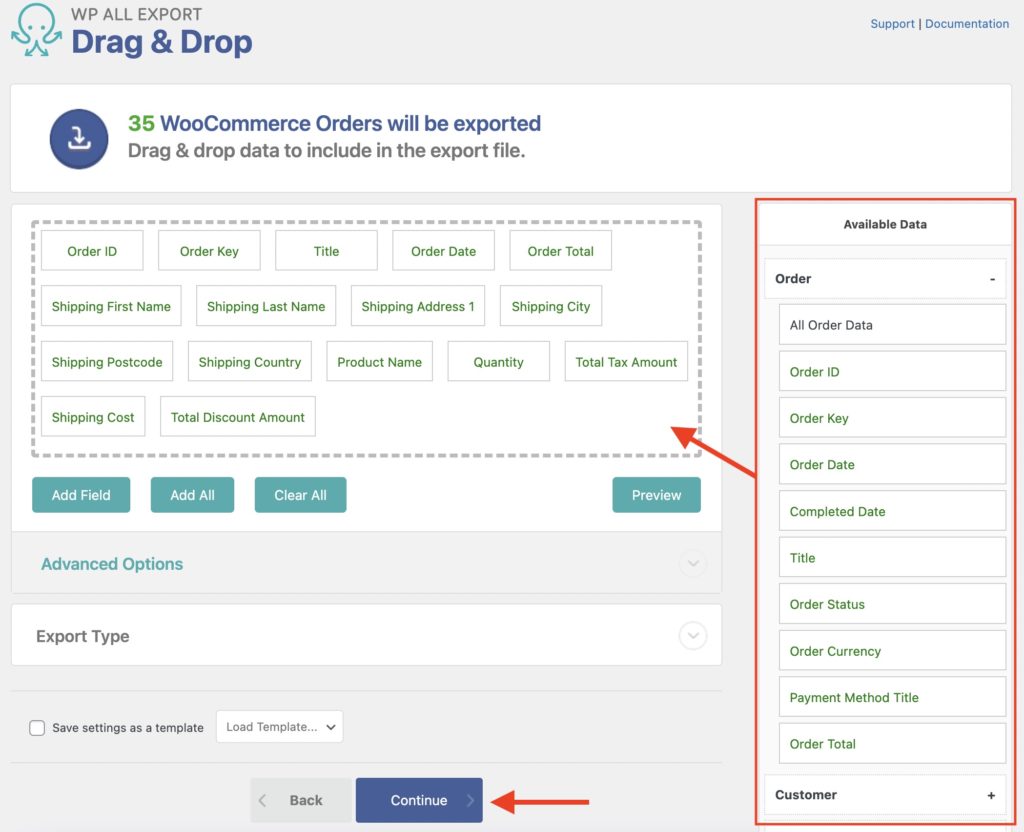
Next, you'll see the Drag & Drop screen:

In this screen, add and rearrange data columns that you wish to include in your export file.
In the Export Type section, you can choose to export any spreadsheet or XML feed.
When you're ready, click Continue.
Step 3: Enable Real-Time Exporting
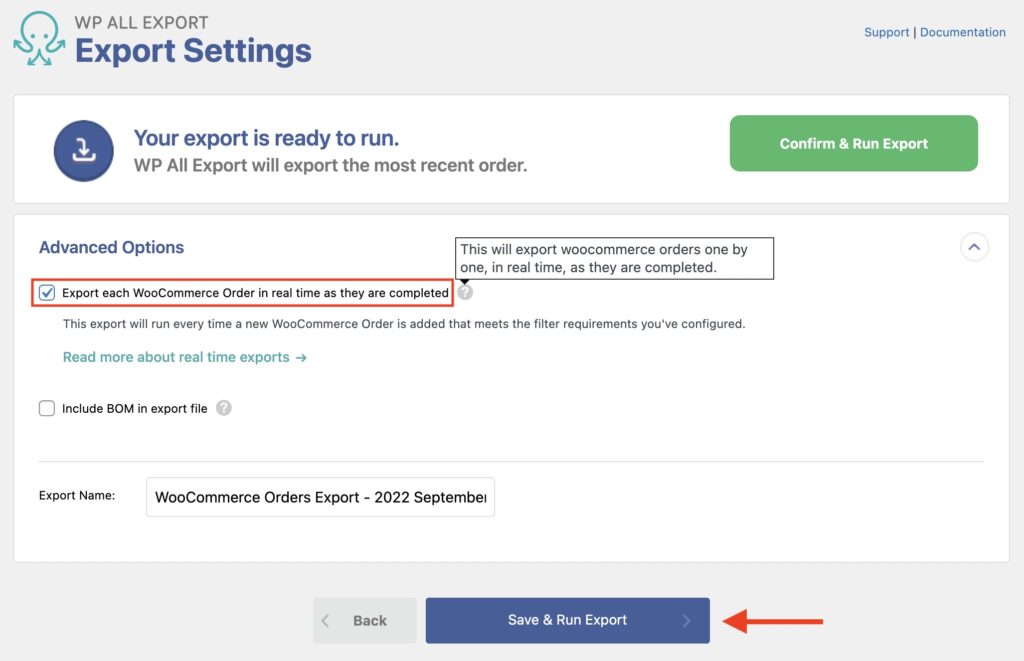
Next up is the Export Settings screen. Here, you can enable real-time exports by clicking on Export each WooCommerce Order in real time as they are completed.
Once enabled, it looks like this:

By enabling real-time exports for this order export, WP All Export will export every new order as it is created.
To finish setting up the export, just click on Save & Run Export. This will export the most recent WooCommerce order for testing purposes.
You can also switch an existing or previous WooCommerce orders export to real-time exporting. Simply navigate to All Export › Manage Exports › Settings and then enable real-time exports by checking the option Export each WooCommerce Order in real time as they are completed.
Step 4: Configure an Action to Trigger the Export
Now that we have created our real-time export, we need to configure an action to occur whenever our export runs. This can be done with Zapier or our API.
Zapier is a third-party service that can connect with WP All Export and allows sending the exported data to other services and apps. For example, you can send each exported WooCommerce Order via email, or add a new row to a Google Sheet with the order's data. Read more about Zapier here:
- Integrate Zapier with WooCommerce for Real-Time Exports
- Add Exported WordPress Data to Google Sheets using Zapier
- How to Send Exported WordPress Data to Zapier
- Send Exported WordPress Data via Email using Zapier
- Send WordPress Export File to Google Drive using Zapier
You can also use custom PHP code and our API to set up the action that will be triggered. This means that you can feed the exported data toward a custom code solution to process it in whichever way you need. Here's an example you can follow upon:

Export WordPress to any CSV, XML, or Excel
- Any theme or plugin
- Images & galleries
- Custom fields
- Zapier integration
- Woo, ACF, Meta Box, JetEngine
Real-Time Exports — Advanced Topics
How to Disable or Pause a Real-Time Export
You can disable real-time exports by unchecking that option on the Settings page for that specific export. The export will then go back to being a normal export.
You can also temporarily pause a real-time export from the All Export › Manage Exports page:

How To Access the Export File Using Custom Code
When real-time exports are enabled, a new file is created every time the export runs.
You can access the export with the pmxe_after_export filter. Also, you can access the actual export file in $exportObj->options["current_filepath"].
Learn more about using custom code in our documentation. See Custom PHP Functions. You can also review our Action Reference to learn more about the available filters.
Can You Use Filtering Options With Real-Time Exports?
Yes, you can apply filtering options when creating the export and after it's created. You can also modify existing filters via Manage Exports › Settings.
Learn more about how to apply filtering options to your export in Filter Exported WordPress Data.
Real-Time Exports — Frequently Asked Questions
What's the Difference Between a Normal Export and a Real-Time Export?
A normal export runs manually or on a schedule and will export all records available in a single export file.
A real-time export runs every time a new record is created of that post type is created. For example, as soon as a new WooCommerce Order is completed on the site.
Real-Time Exports — Related Docs
Use WP All Export to generate an export file manually, or on a schedule.
Integrate WP All Export with countless apps and services using Zapier.
How to code a custom solution for real-time exports.