How to Bulk Edit WordPress Posts
To bulk edit WordPress posts, export the posts using WP All Export, bulk edit them using your favorite spreadsheet software, and then import them back into WordPress using the Import with WP All Import option.
Table of Contents
- Step 1: Create a New Export for WordPress Posts
- Step 2: Choose Which Columns to Export
- Step 3: Download the Export File and Edit It
- Step 4: Use the Import with WP All Import Option
- Step 5: Import the Modified Posts
Advanced Topics
- Add Filters to Select WordPress Posts
- Avoid Problems with the Import File
- Migrating Versus Bulk Editing Data
Step 1: Create a New Export for WordPress Posts
Navigate to All Export › New Export and choose Posts from the dropdown list.
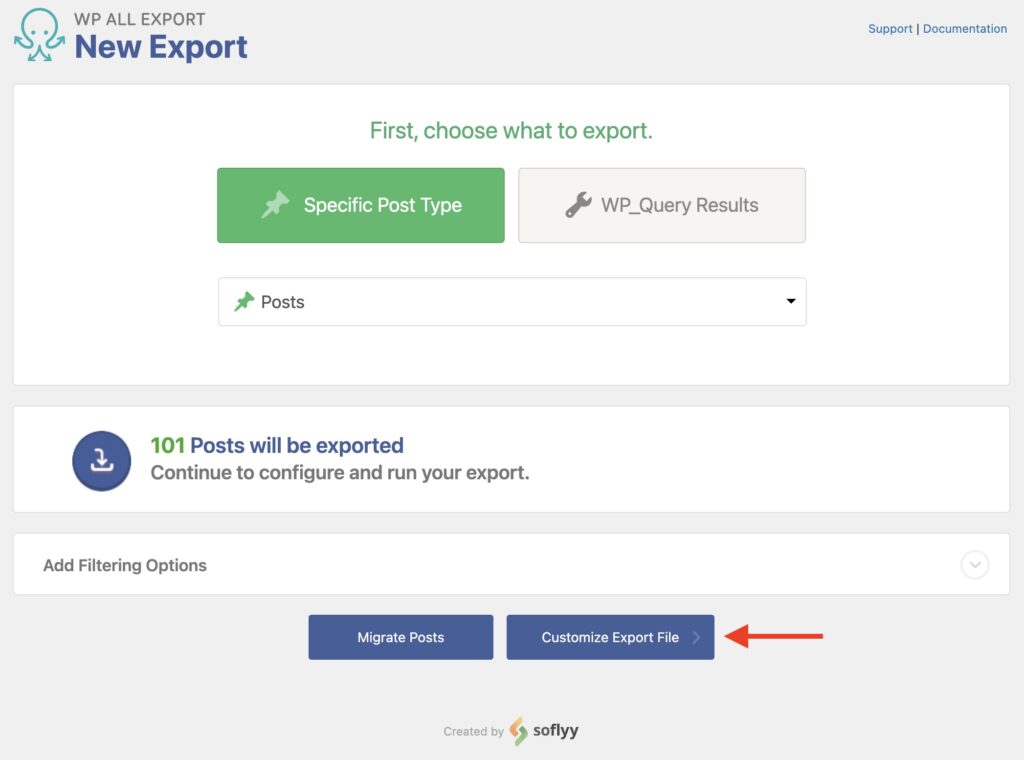
You can Add Filtering Options in this section to decide which posts to bulk edit.
To continue, click Customize Export File.
Step 2: Choose Which Data Columns to Include in the Export
The Drag & Drop screen appears, where you define which fields to include in the export. Search for the desired fields under the Available Data section on the right, and then drag and drop them into the column selection area on the left.
For example, if you want to append a paragraph to the end of all of your post's existing content, you need to include the Content column in the export (it's added by default).
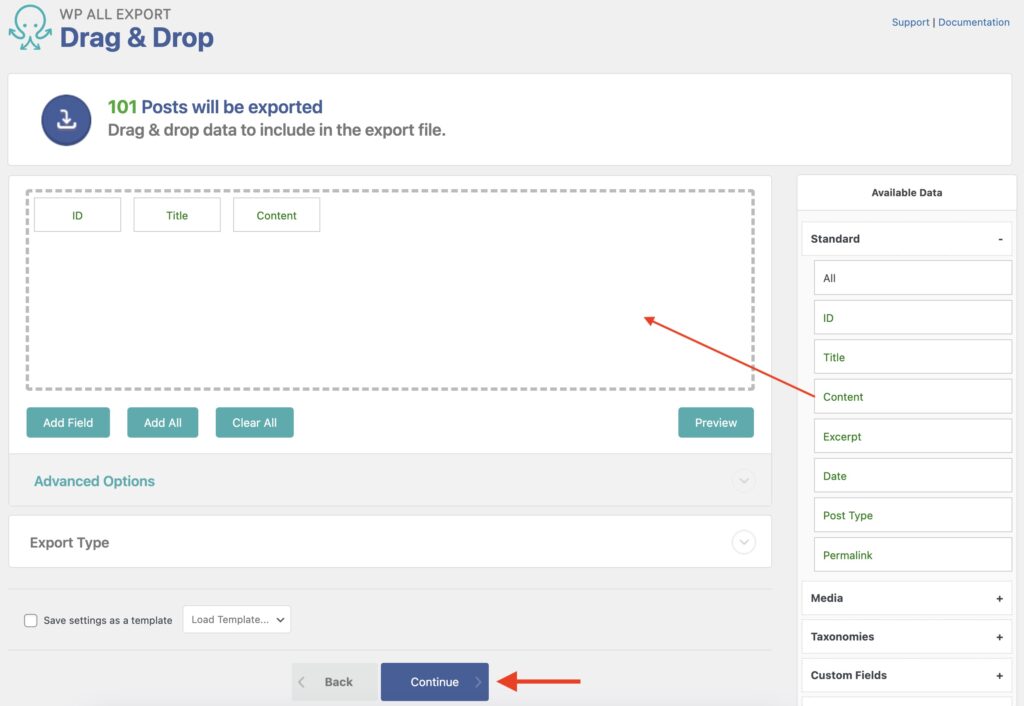
Once you've selected all the desired export columns, click the Continue button.
Next, you'll see the Export Settings screen, but you can leave all the settings here with their default selections.
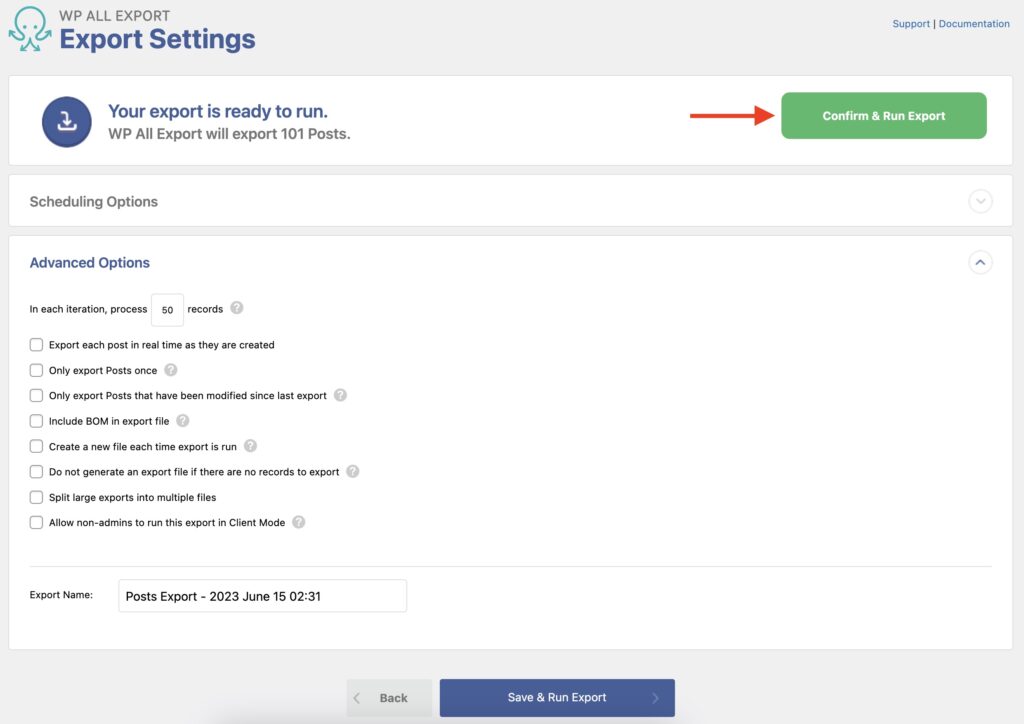
Complete the export by clicking Confirm & Run Export.
Step 3: Download the Export File and Edit It
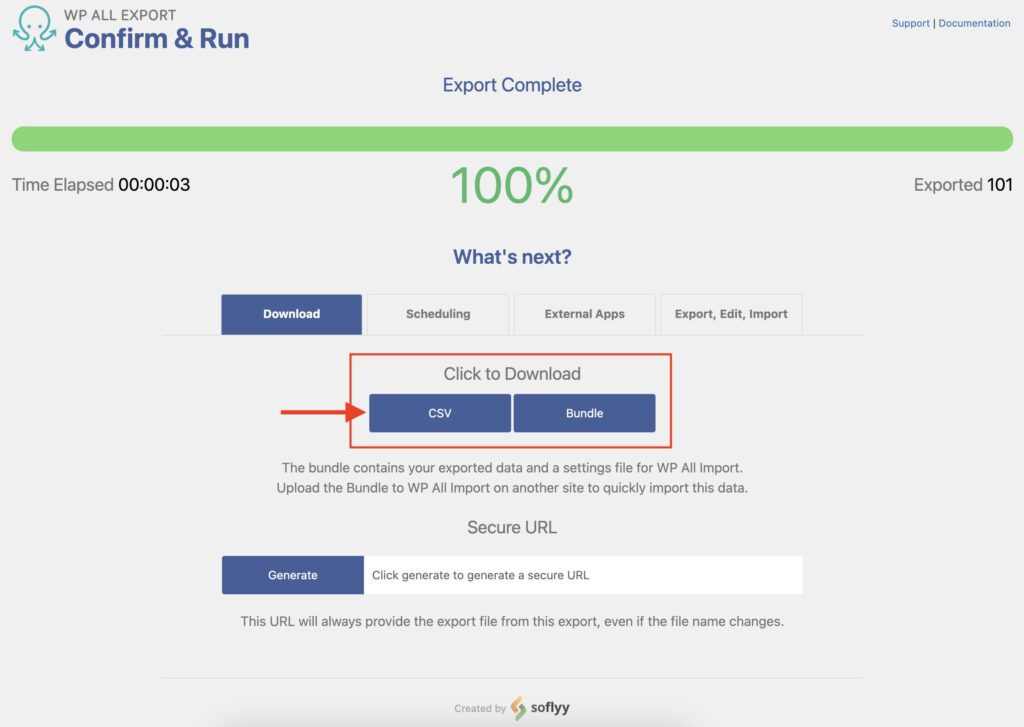
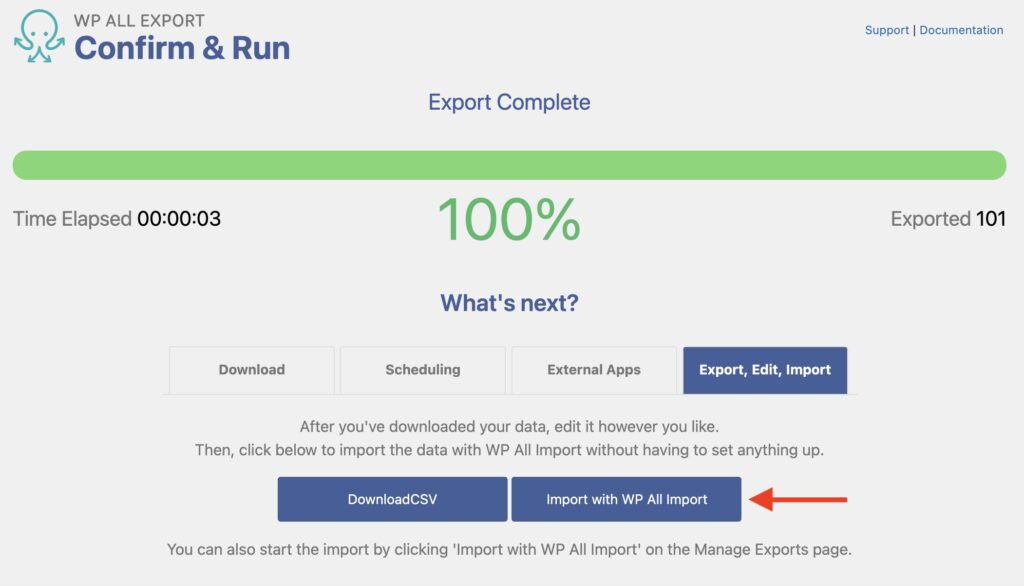
Once the export runs, you'll see the Export Complete message.
Download the export file by clicking the CSV button in the Click to Download section.
To perform the required bulk edits, open the export file in your favorite spreadsheet, such as Google Sheets, Numbers, Excel, etc. (spreadsheets make ideal bulk editors).
In this example, we use Numbers to add "– Modified by WP All Import" to all post content fields.
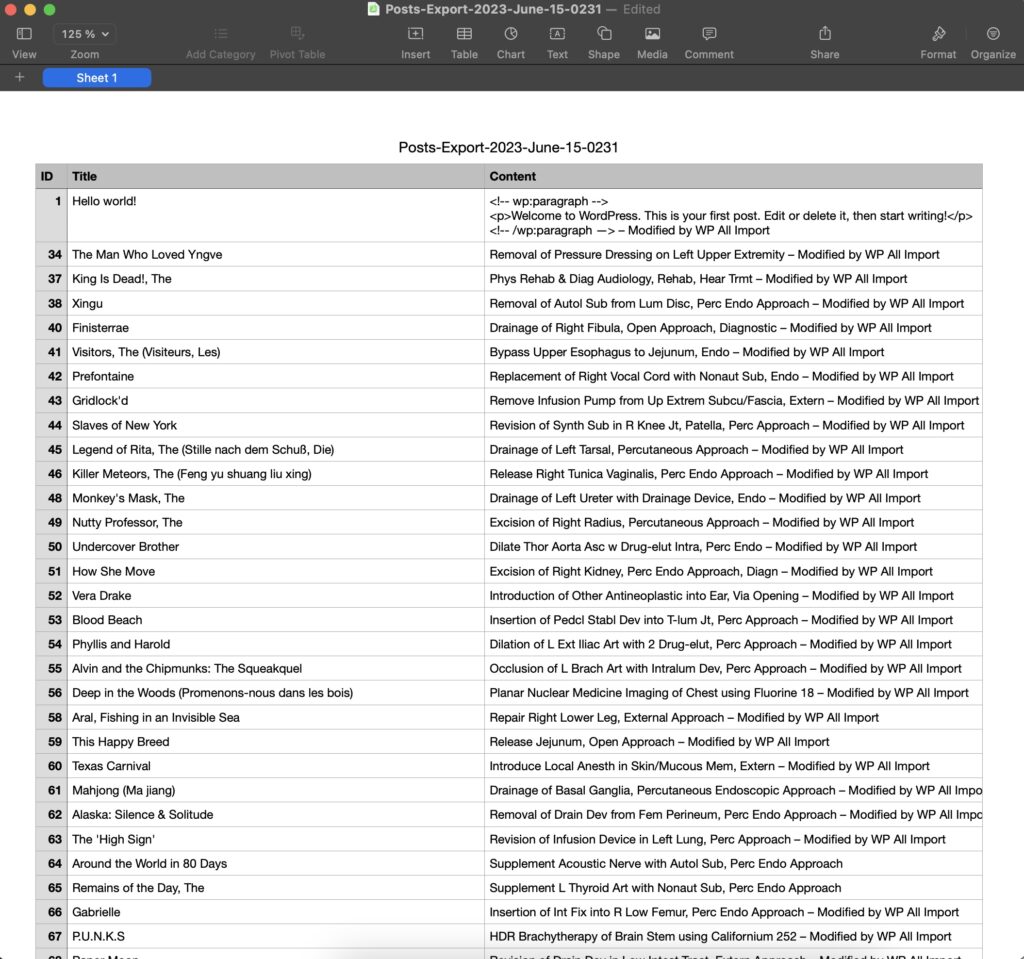
Save the modified file while retaining everything: the current headers, separator (if applicable), and the file format.
Step 4: Use the Import with WP All Import Option
Go back to WP All Export. If you're still in the same Confirm & Run screen, choose the Export, Edit, Import tab, and then click the Import with WP All Import blue button.
If you're no longer on that screen, navigate to All Export › Manage Exports, find the correct export, and then click Import with WP All Import:
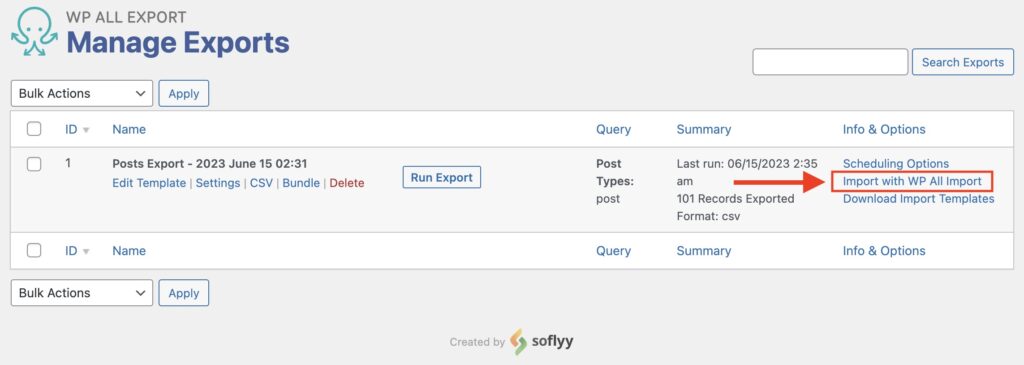
In either case, the New Import screen will appear.
Step 5: Import the Modified Posts
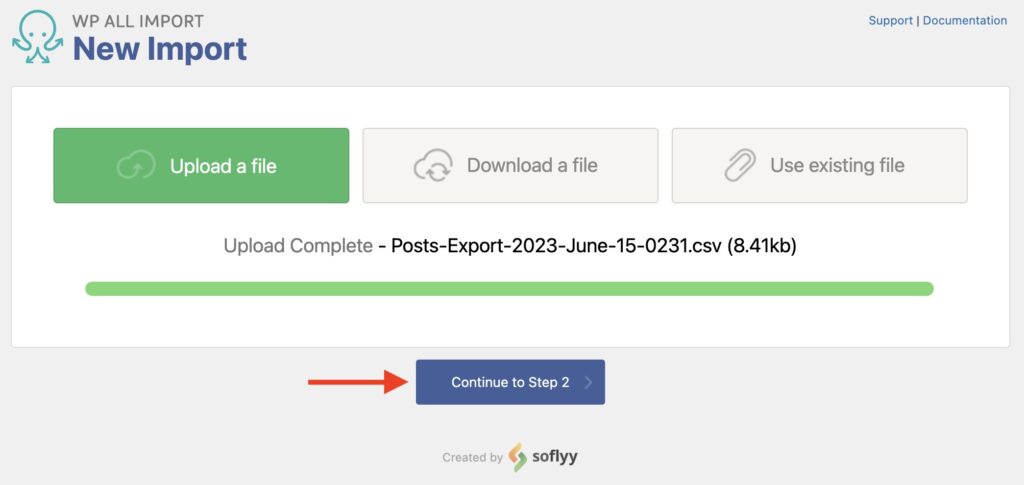
Upload the bulk edited file and then click Continue to Step 2.
Next, you'll see the Drag & Drop screen with all of its required mappings already configured:
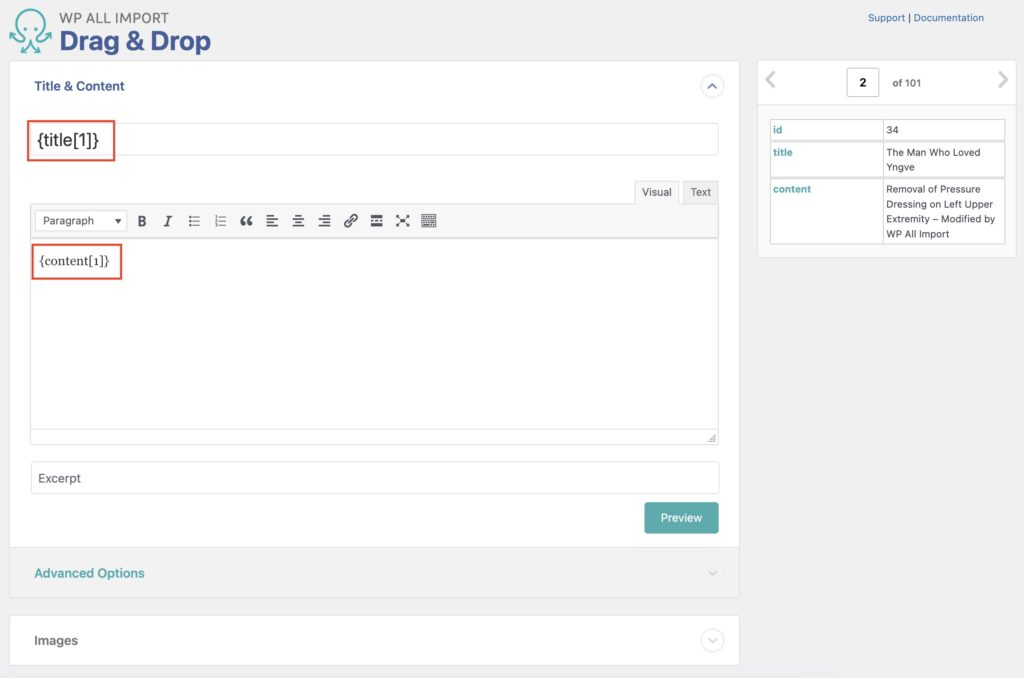
Go to the bottom of the page and click Continue to Step 4 (not shown).
In the Import Settings screen, you can define key import settings. In this example, leave everything as it is and just click Continue at the bottom (not shown).
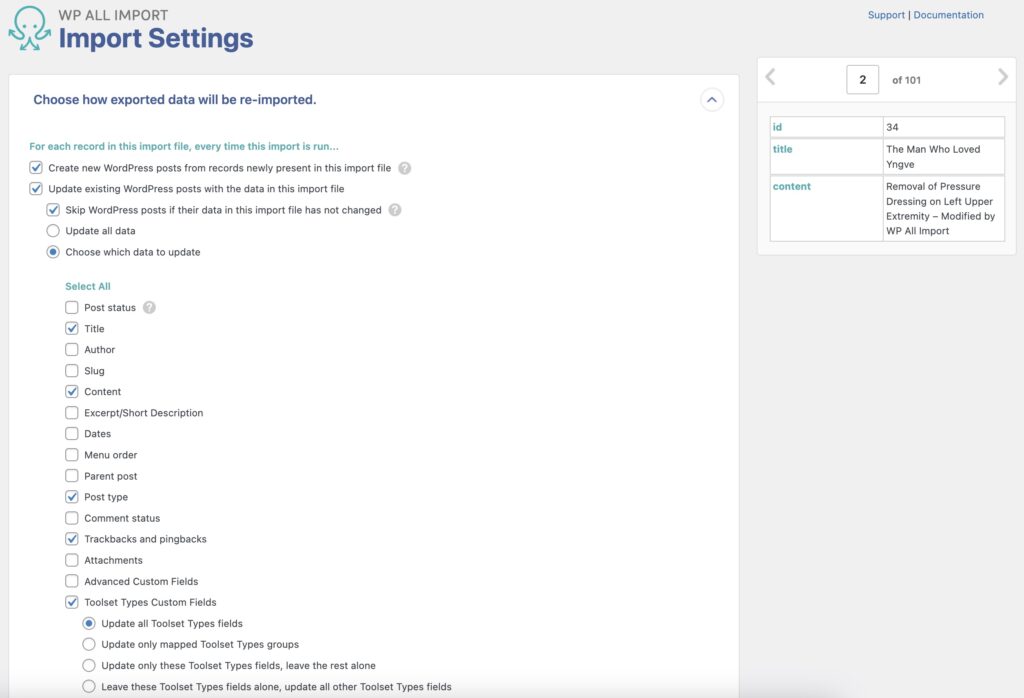
Next up, the Confirm & Run screen will display an import summary (not shown). You can review everything in this summary and then click Confirm & Run Import button to run the import.
When the Import Complete! message appears, the update is finished, and the bulk changes have been applied:
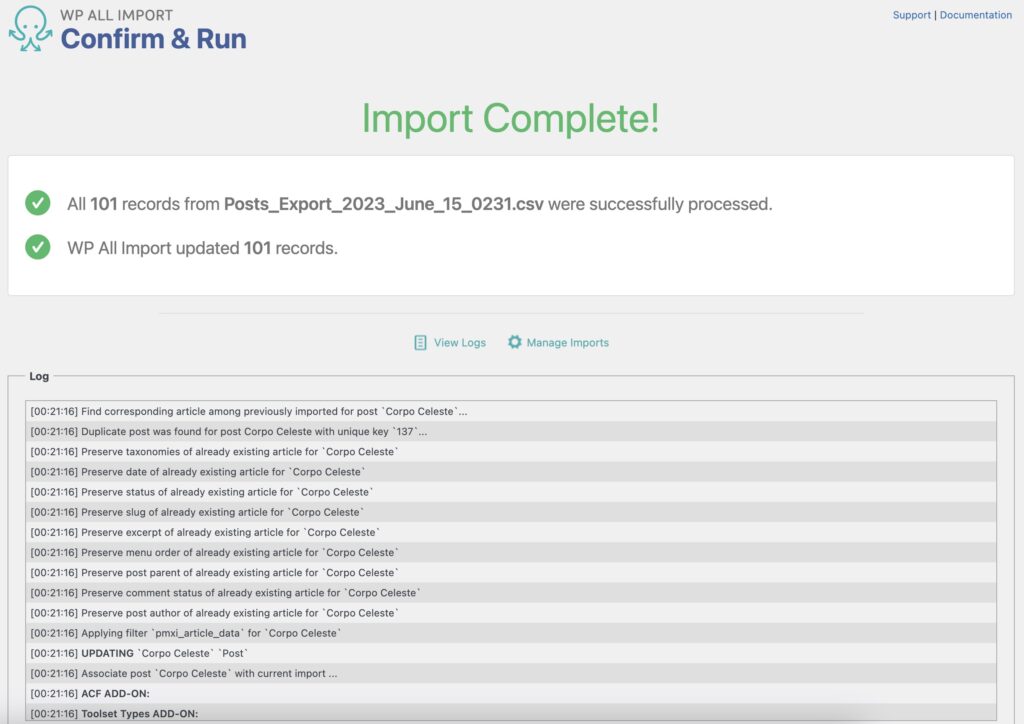
That's how you bulk edit WordPress posts!
As a precaution, you should always check the modified posts to make sure that the changes were correctly applied.

Bulk Edit WordPress Posts Data
- Drag & drop
- Bulk edit any data
- Automatically match
- Import data back
- Woo, ACF, Meta Box, JetEngine
Bulk Edit WordPress Posts – Advanced Topics
Add Filters to Selectively Bulk Edit WordPress Posts
When setting up the export, you can add filters to define which specific WordPress posts are included in the bulk edit process.
This is done in Step 1 of the export process under Add Filtering Options. For example, here's a filter to only export posts that have been published:

You can learn more about adding export filters here: Filter Exported WordPress Data.
What to Do If You Encounter the "There's a problem with your import file" Error
If you change the file columns or structure of the export file, you may receive a "There's a problem with your import file" error that won't let you continue the bulk edit process:
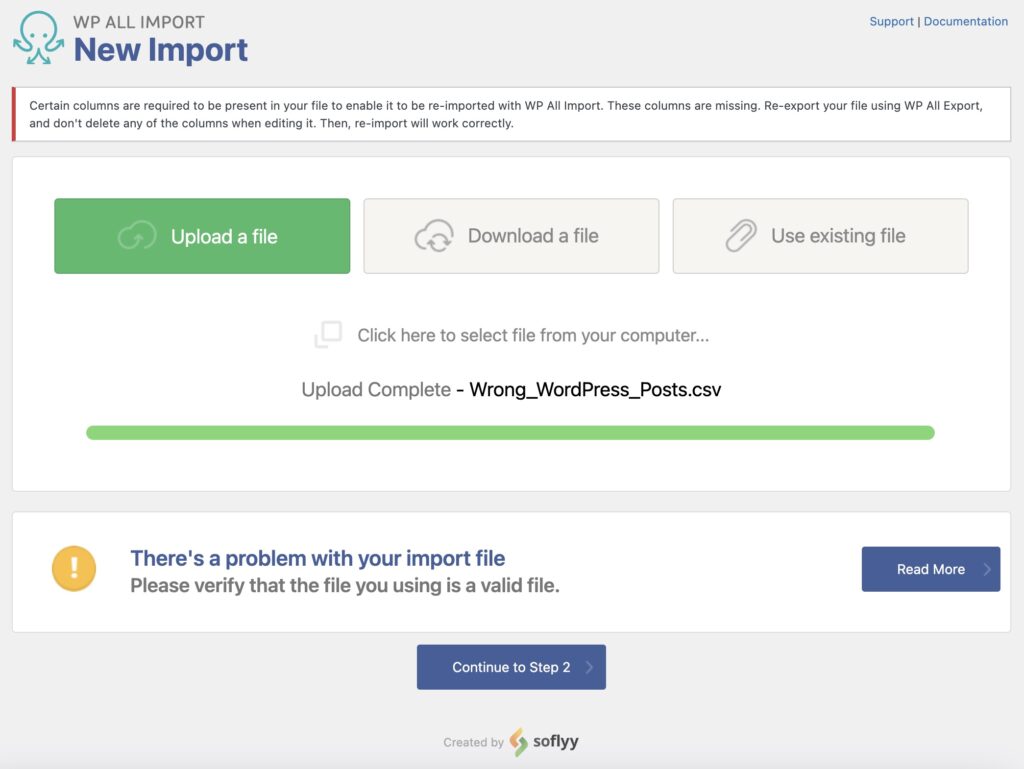
This error is solved by making sure that all column names and the file structure remain unchanged from the original export. For example, if it's a CSV file, the separator should be the same one that was exported.
If you're unable to find the culprit, download a new copy of the export file and perform the bulk edits again. The import should work once a valid file is used.
What's the Difference Between Migrating and Bulk Editing Data
The main difference is that bulk editing involves editing the data after it's exported, whereas the migration doesn't modify the data — it simply moves it from one site to another. In both cases, you need both WP All Export and WP All Import.
Bulk Edit WordPress Posts – Frequently Asked Questions
What Data Can I Bulk Edit for WordPress Posts?
You can bulk edit any data available via WP All Export when exporting WordPress posts. If some data is not available, you can use custom PHP code to retrieve it and then also use custom PHP code during the import to apply the changes.
How Do I Update All My Posts at Once in WordPress?
Just follow the steps in this guide without applying any filters. This will export all your posts. If you then bulk edit all posts and apply your changes back to WordPress, this will update all posts at once.
How Do I Update All Pages at Once in WordPress?
Just follow the steps in this guide, without applying an filters, except change your export type from Posts to Pages. If you then bulk edit all your pages and apply those changes back to WordPress, this will update all pages at once.
How Do I Bulk Edit Text In WordPress?
- Create a new export for the desired post type.
- Include the export columns with the text that you want to change.
- Run the export and download the exported file.
- Bulk edit the text.
- Import the data back using the Import with WP All Import option.
The whole process is described in the guide above. While its focus is on WordPress posts, it can be adapted for any post type or custom post type.
How Do I Bulk Edit WooCommerce Products?
- Navigate to All Export › New Export and export WooCommerce Products.
- Select the data columns that you want to edit.
- Download the exported products and modify them using spreadsheet software.
- Upload the modified products using the Import with WP All Import option.
- Review the products that were updated.
You can see the entire bulk edit process for WooCommerce products here: How to Bulk Edit WooCommerce Products.
Bulk Edit WordPress Posts – Related Docs
Shows how to export WordPress posts.
Describes how to import WordPress posts.
Explains how to migrate data using WP All Import and WP All Export.
Shows how to run inline or custom PHP code when using WP All Import.
Shows how to run custom PHP code when using WP All Export.