The best import export plugin for WordPress & WooCommerce.

How to Export WordPress to CSV, Excel, and XML
To export WordPress data to CSV, Excel, or XML, go to All Export › New Export and select the type of data you want to export. Use the Drag & Drop interface to select your export columns, then run the export and download your file.
Table of Contents
- Step 1: Select an Export Post Type
- Step 2: Choose Your Export Columns
- Step 3: Confirm and Run Your Export
- Step 4: Download Your Exported Data
Advanced Topics
- Select a Different Export Type
- Schedule Your Export
- Use PHP Code in Export
- Reuse Export Template on Multiple Exports
Step 1: Select a Post Type for Your WordPress Export
First, navigate to All Export › New Export and choose the type of data that you want to export.
WordPress separates data into different post types like posts, pages, WooCommerce products, real estate properties, etc. You can export any custom post type or taxonomy by selecting it here.
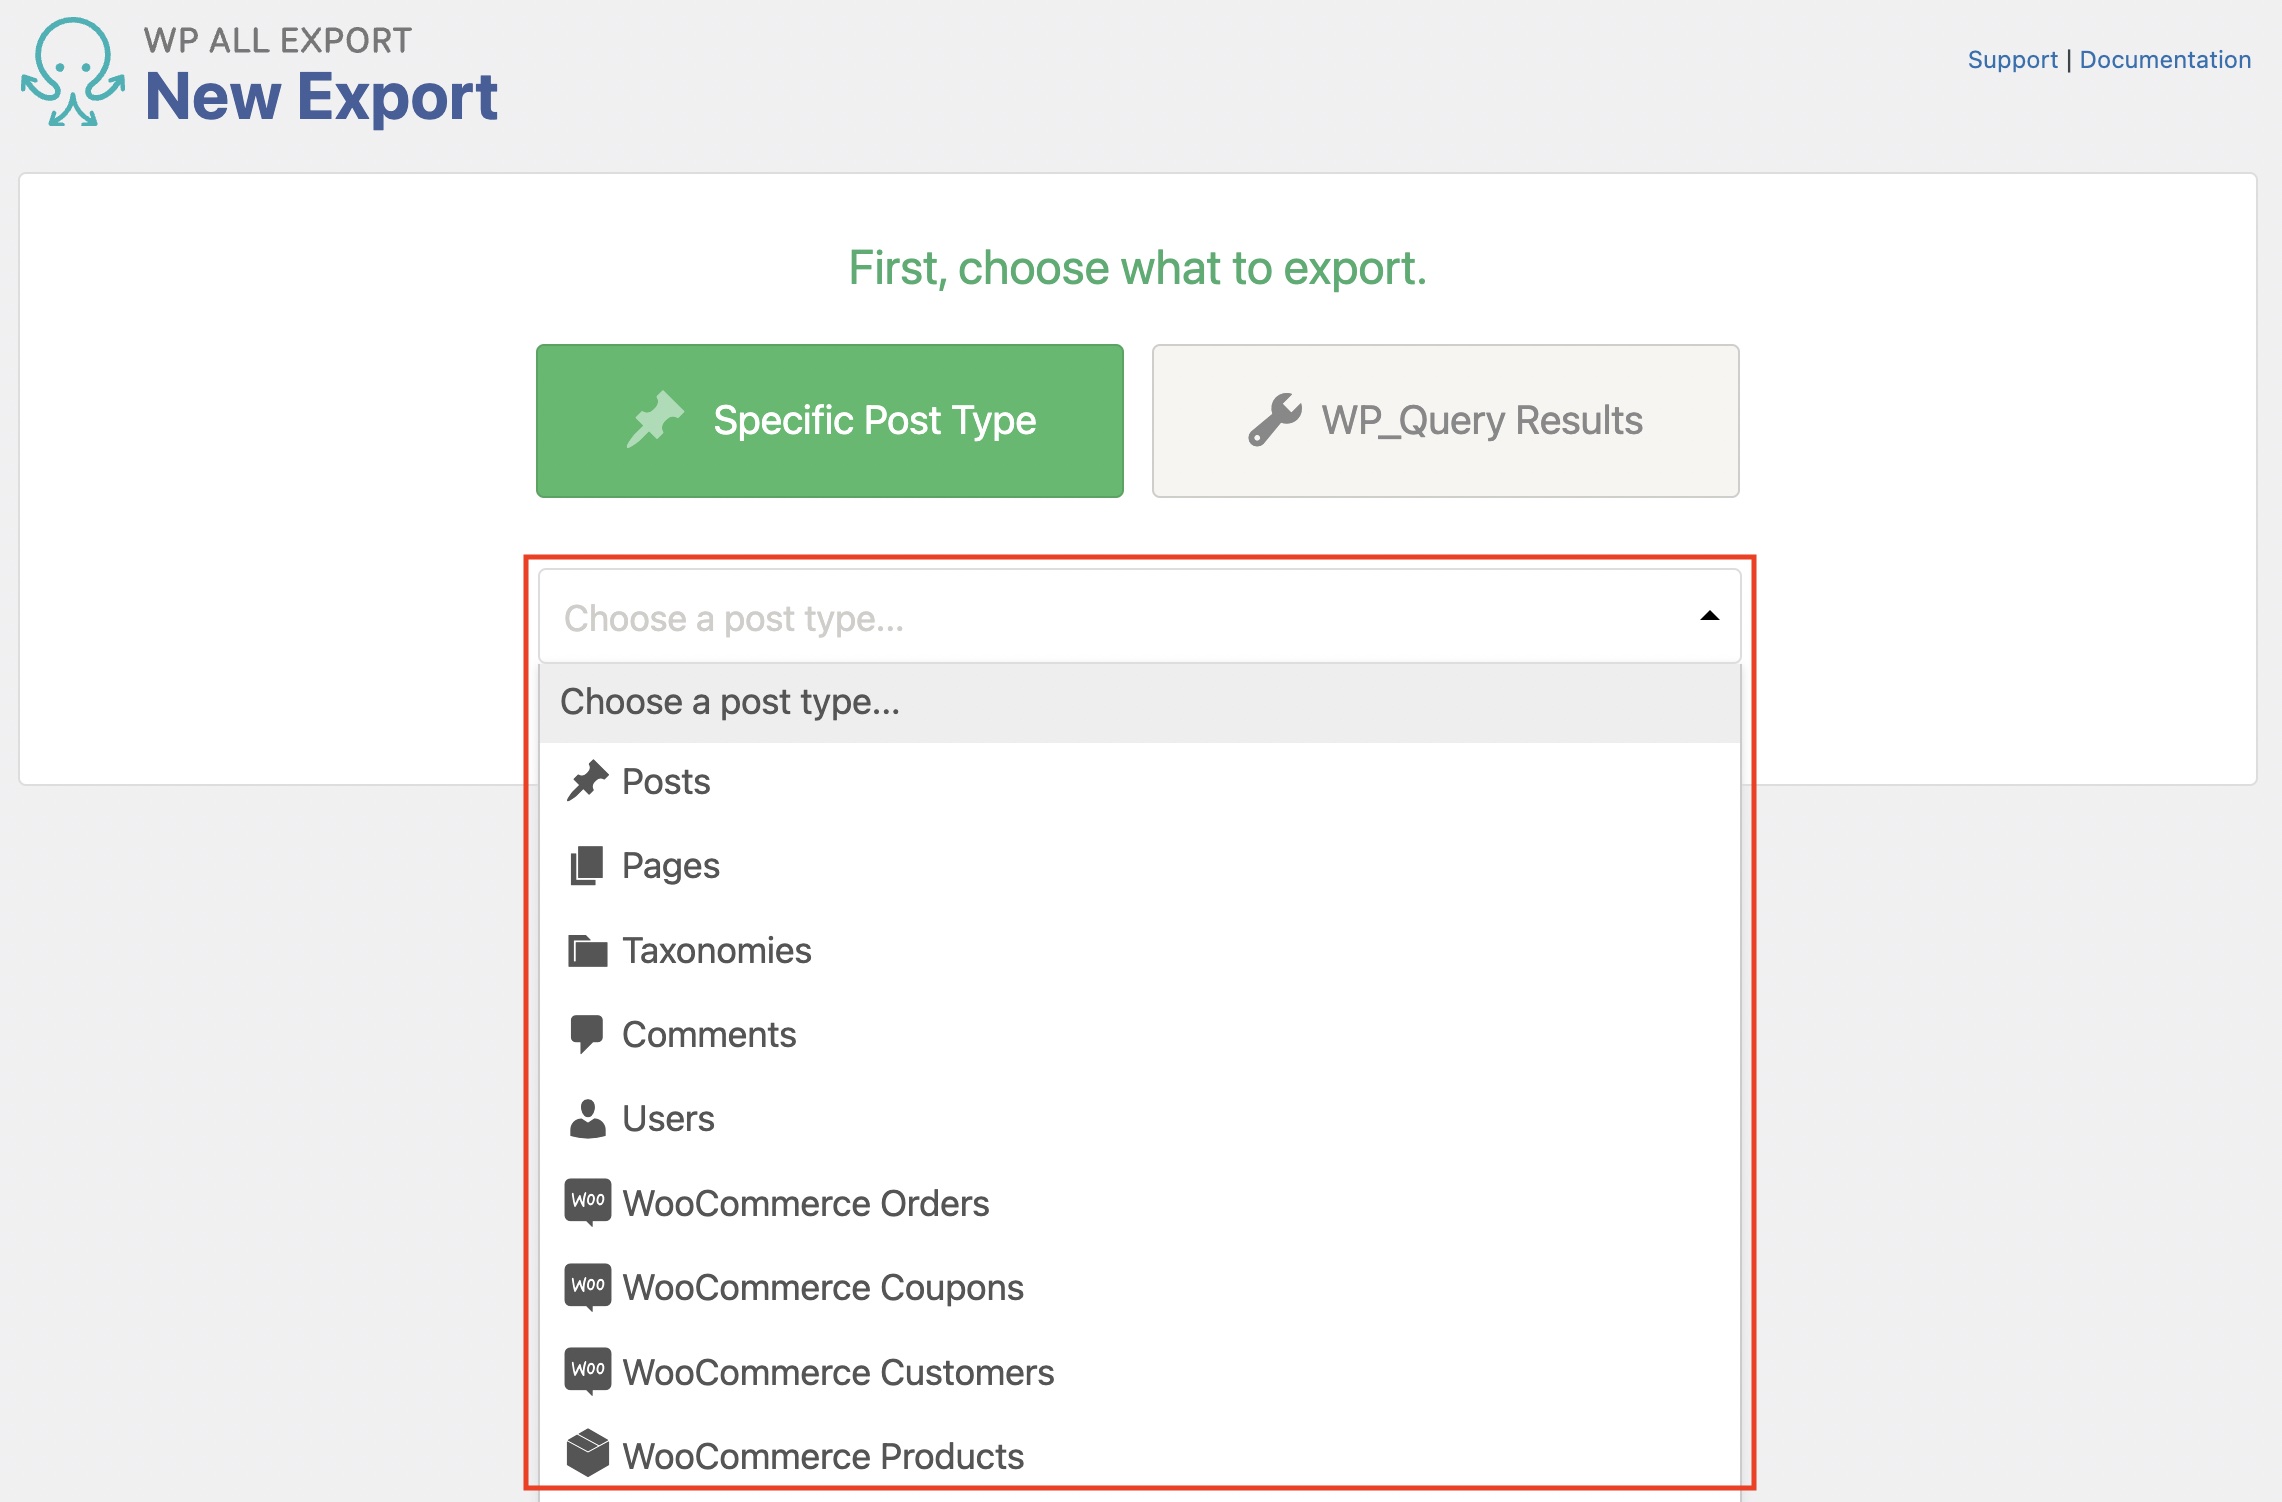
Once you've chosen a post type, click Customize Export File at the end to continue (not shown).
Step 2: Choose Your Export Columns
The fields available to export are listed on the right. Drag and drop individual fields from there to the column selection area, or click Add All to export everything.
All data is available for export, including media, images, categories and tags, custom fields, etc. Add-ons like WooCommerce, real estate plugins, Yoast, and ACF have custom data that can be exported, too.
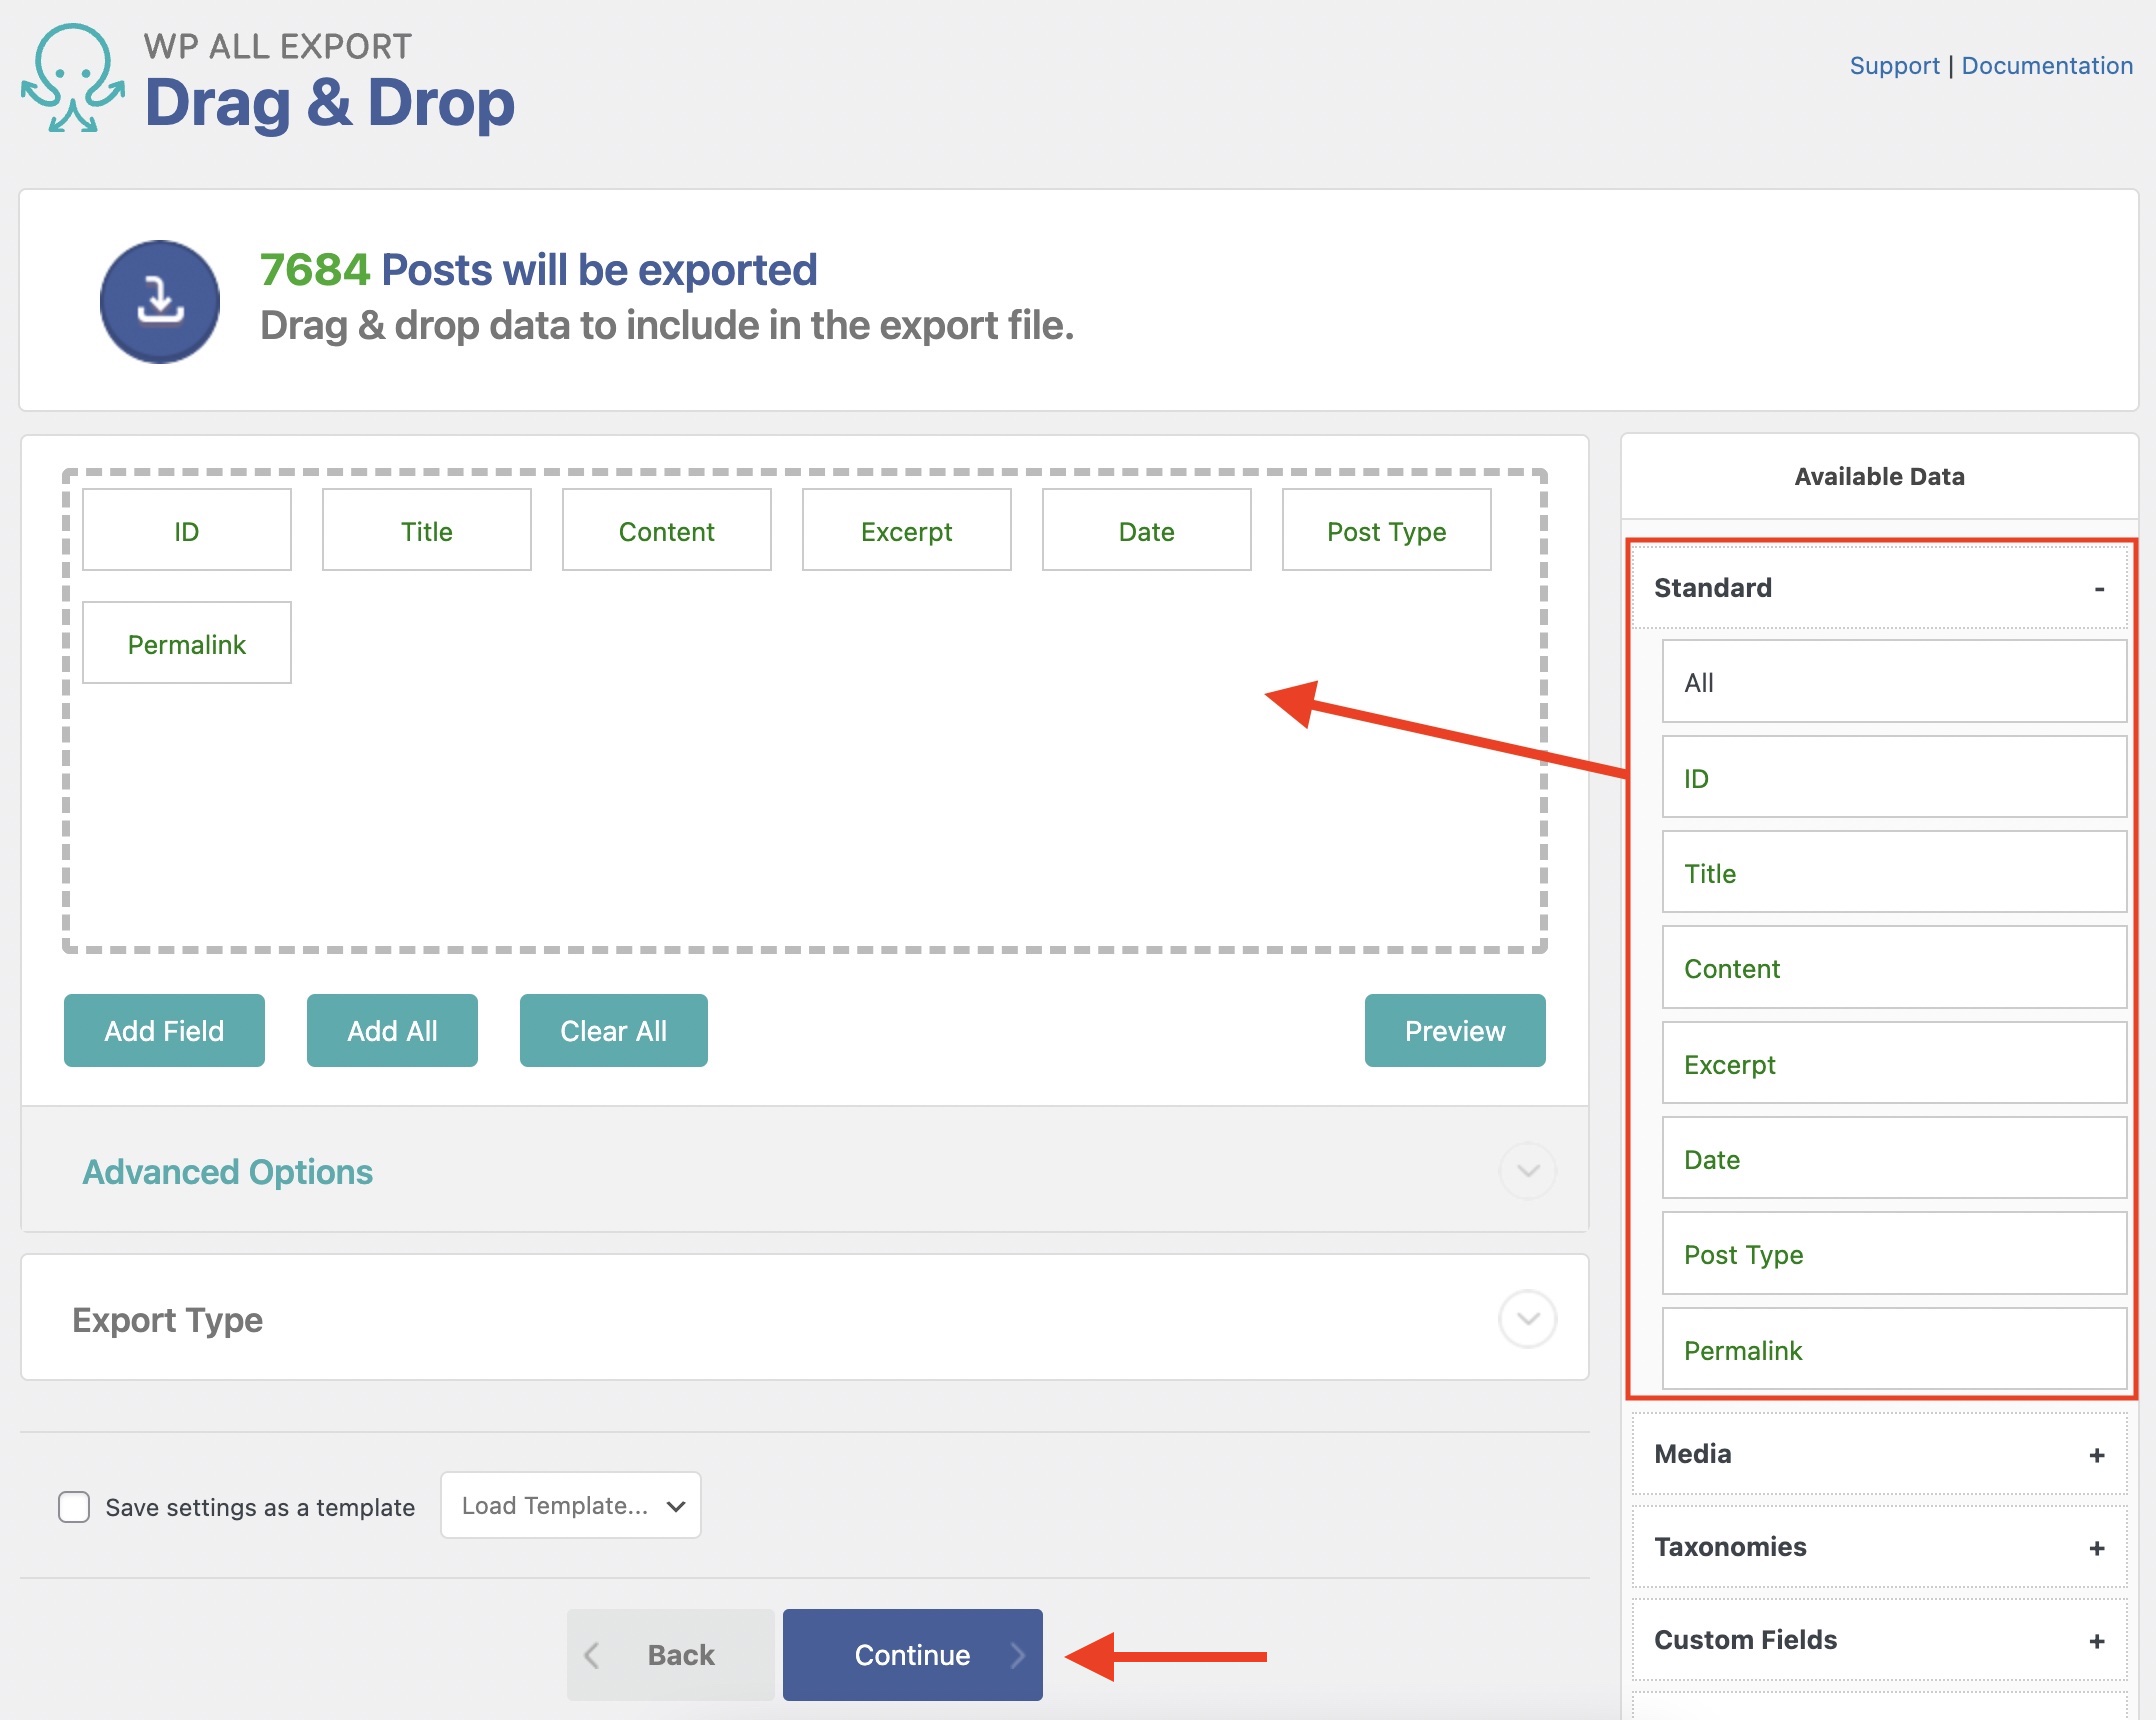
Once you've selected your export fields, you can move them around to reorder them. Click to rename individual elements, combine multiple fields, and more.
When your export columns are the way you want them, click Continue.
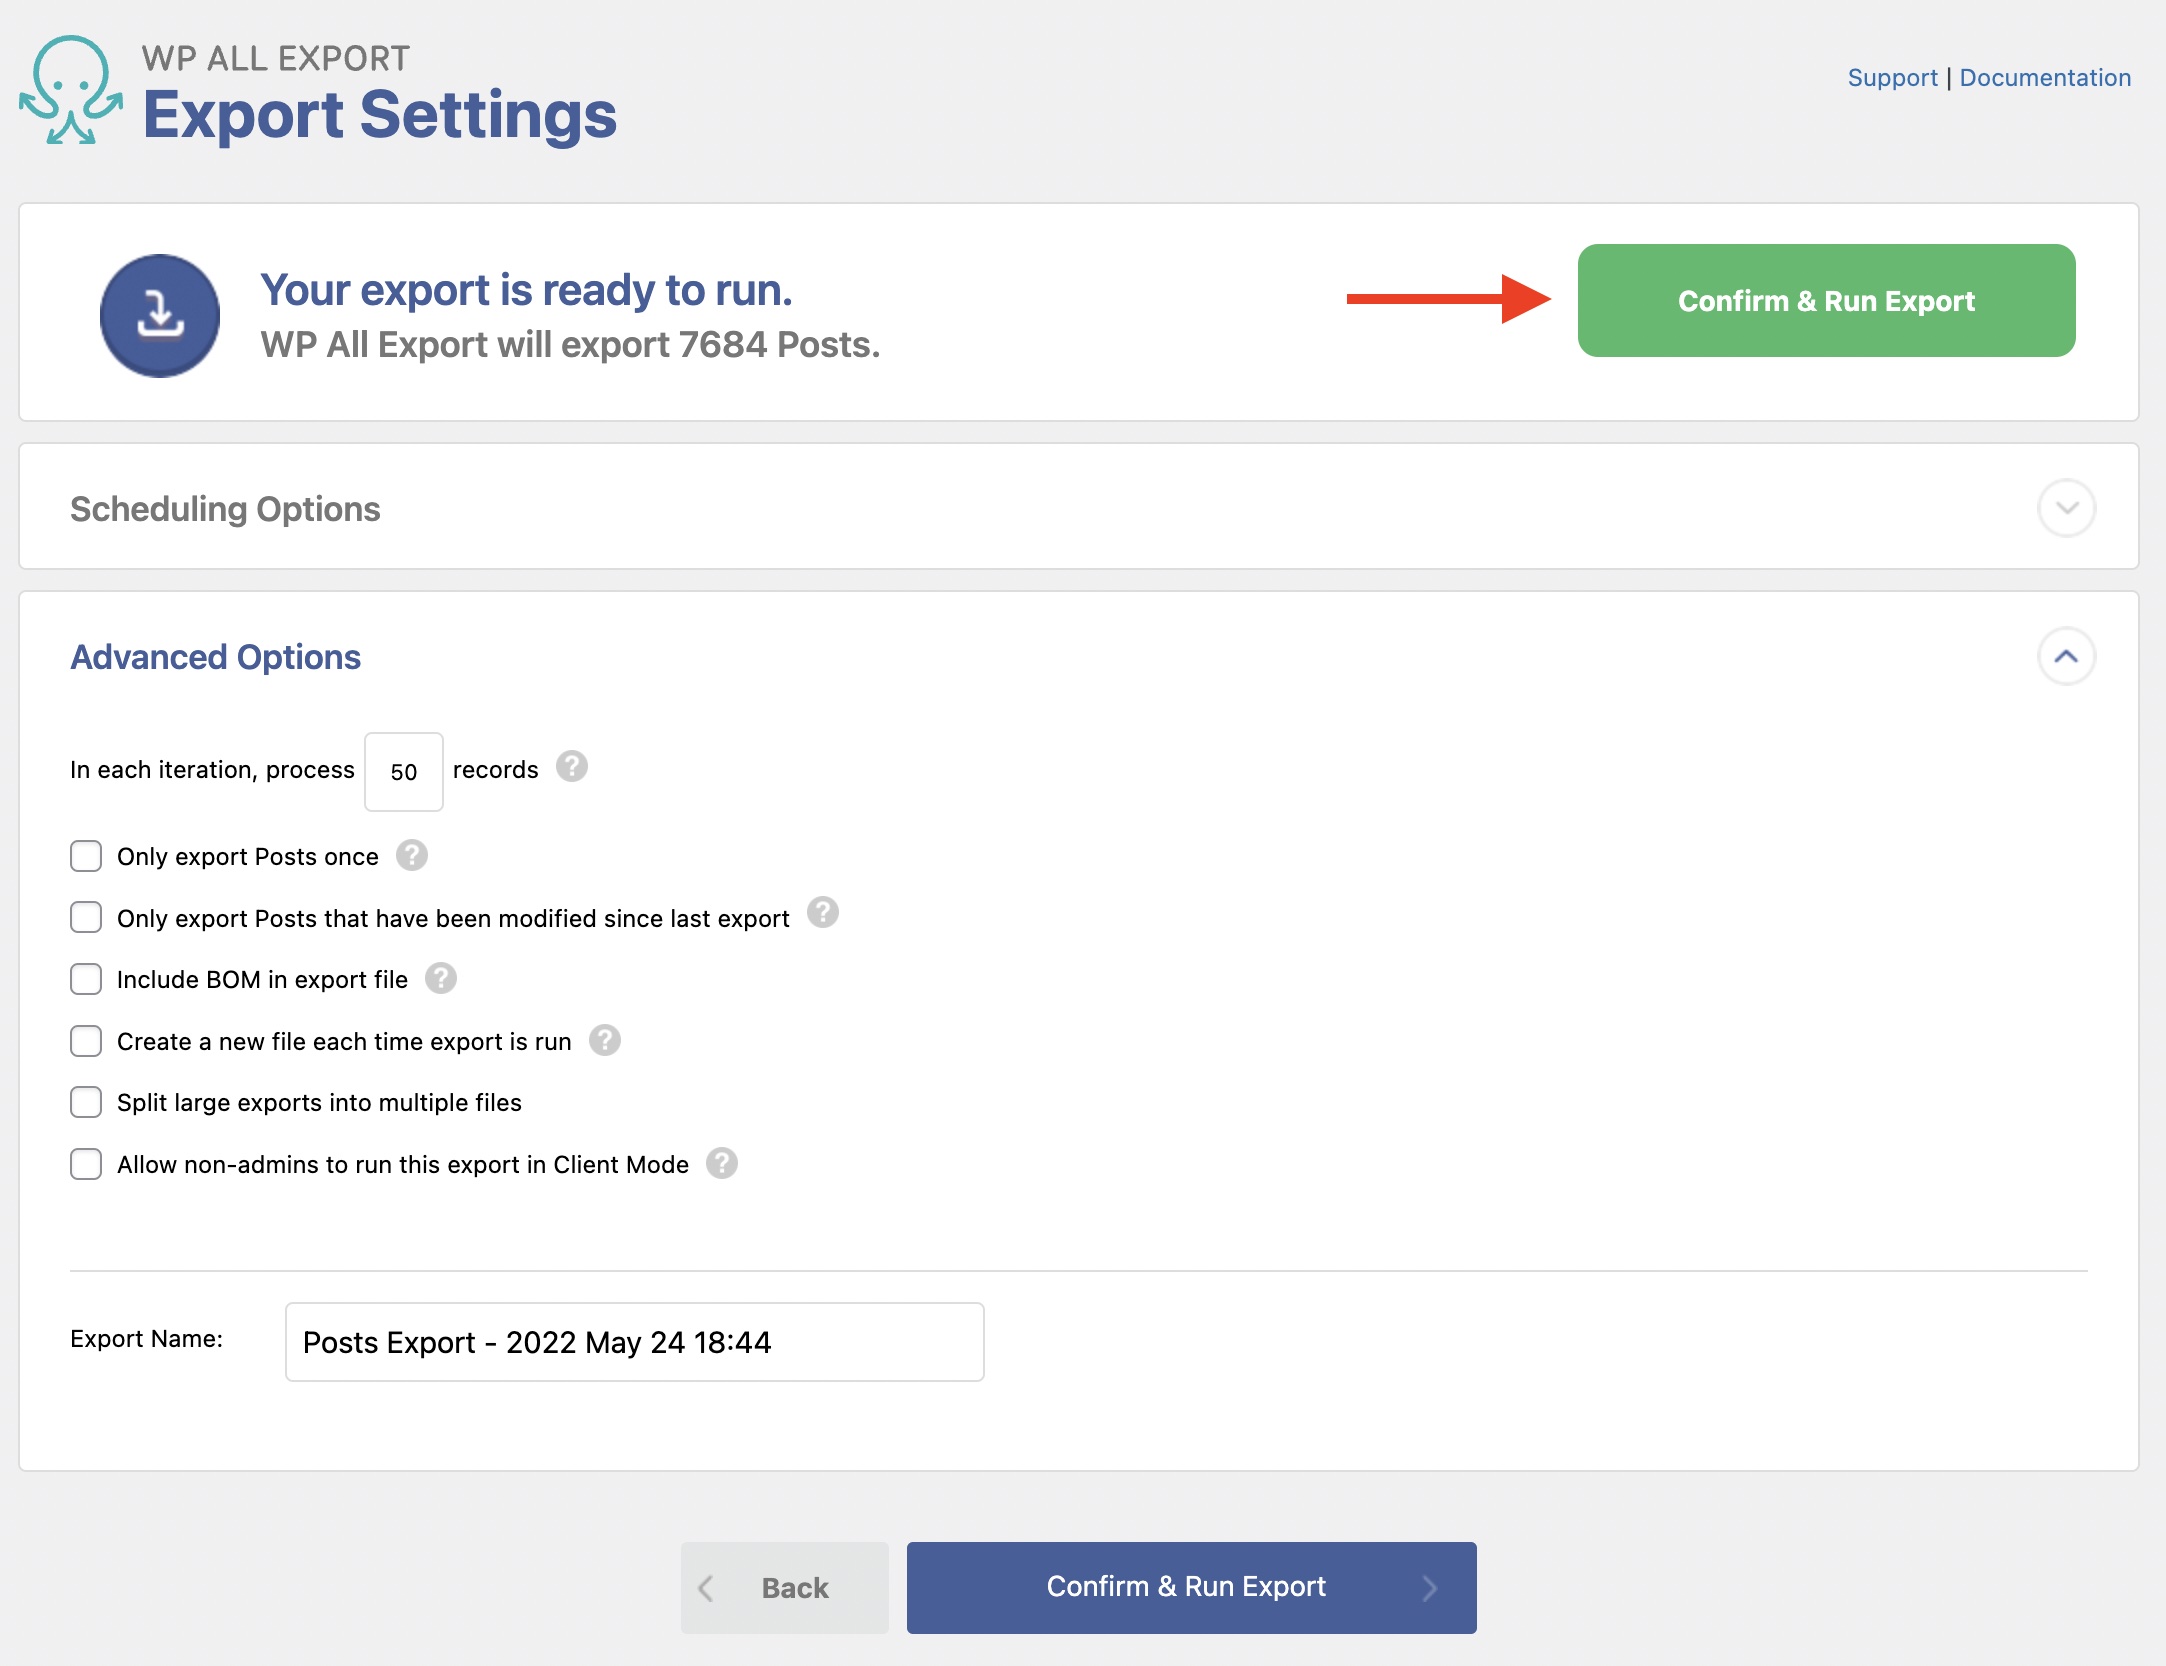
Step 3: Confirm and Run Your Export
You can now configure your WordPress export settings. This includes the ability to schedule your export and set advanced options. We'll leave these settings alone for now. Instead, click Confirm & Run Export to run your export.
Step 4: Download Your Exported WordPress Data
After the export finishes, download the generated export file. At this point, you can choose to migrate this data to another WordPress website, edit it in Excel and import it back into WordPress, or send it to Dropbox, Google Drive, email, and over 1000+ other external apps via Zapier.
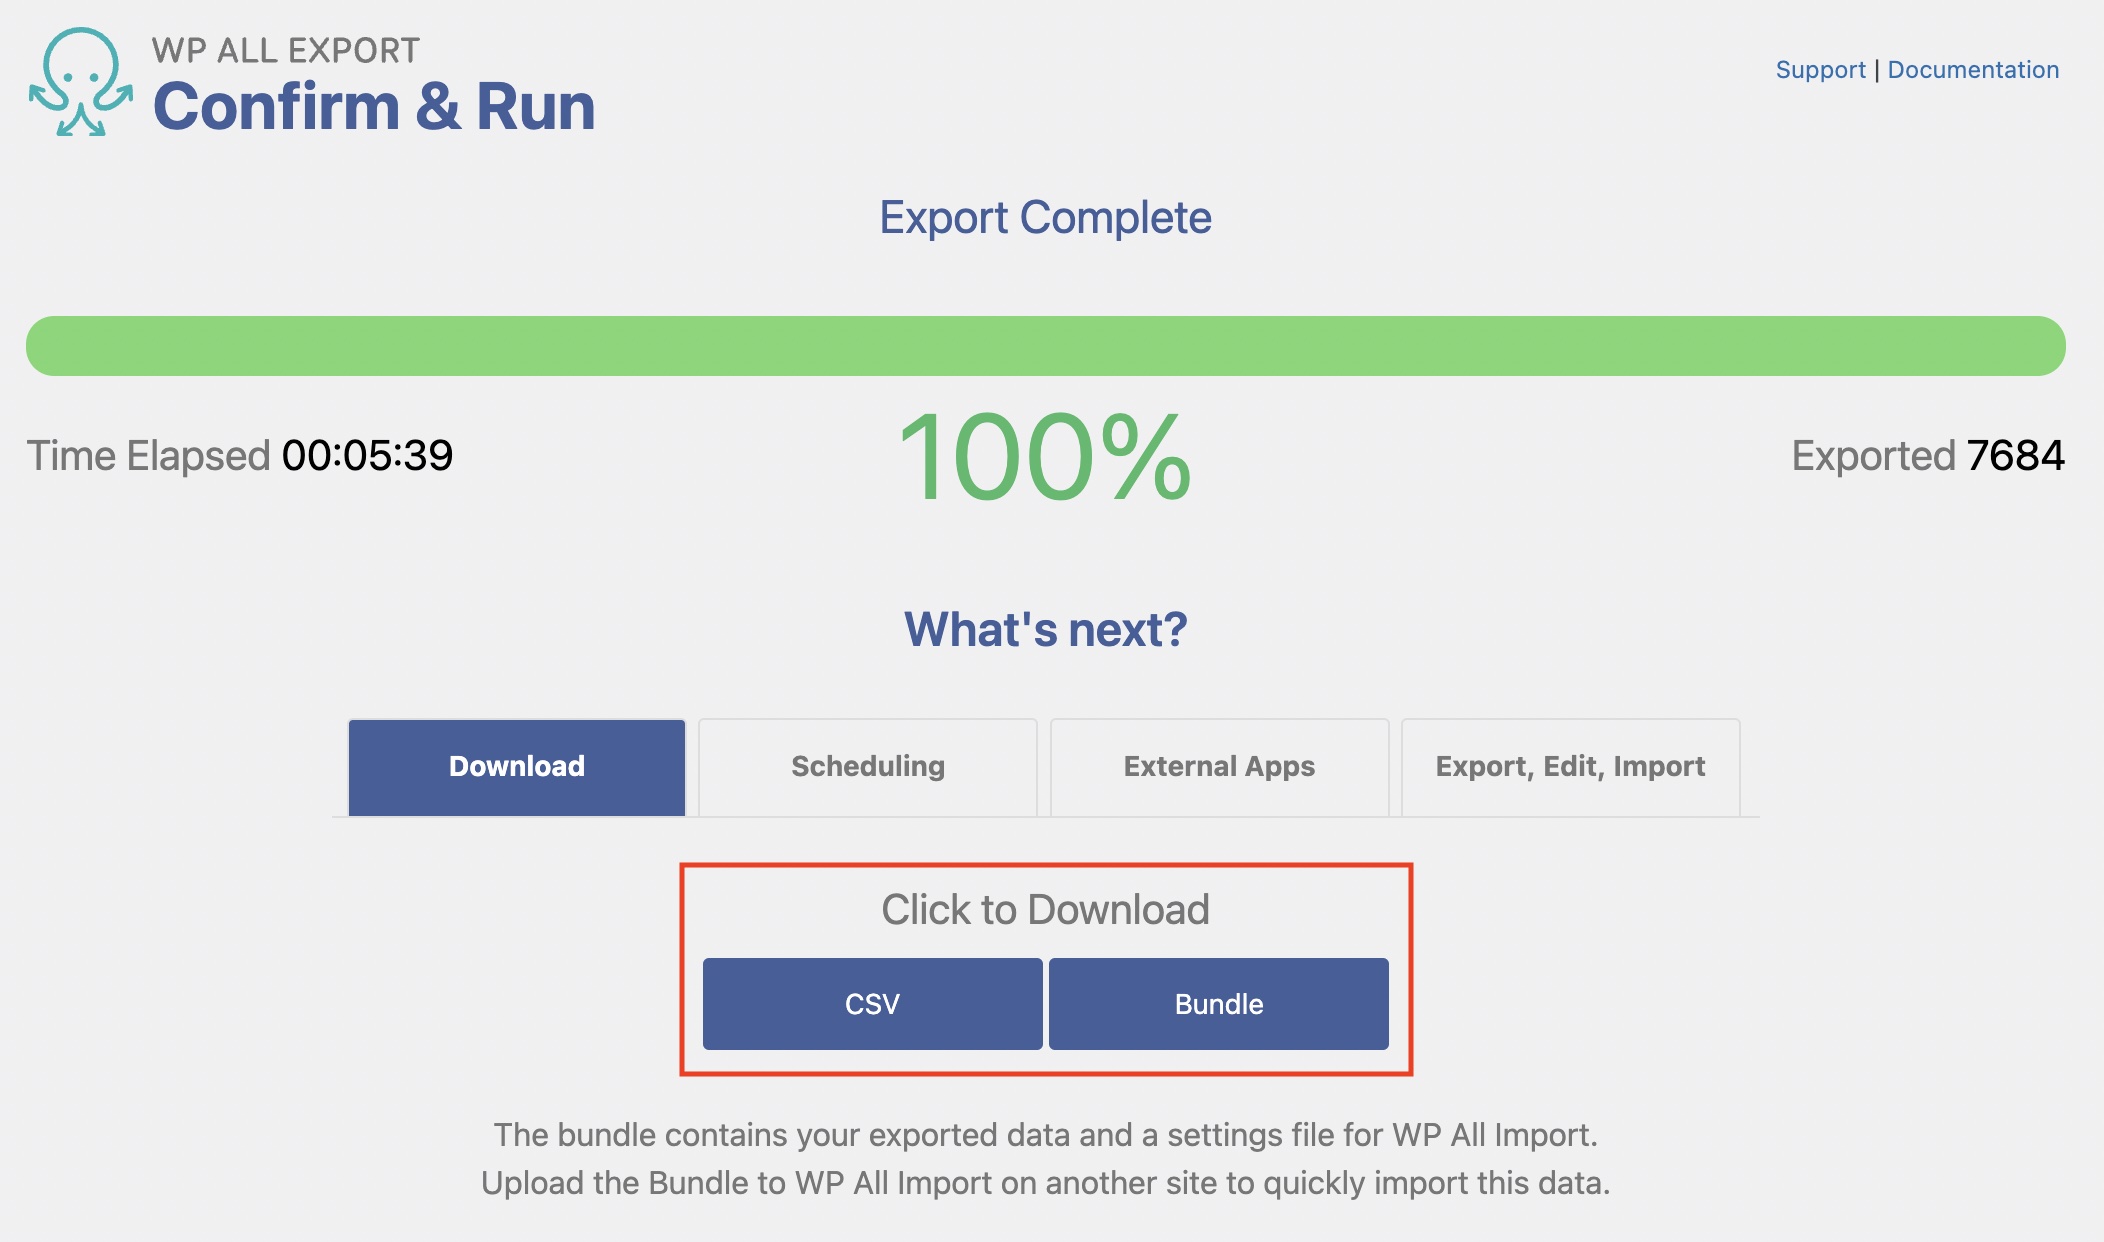
You can review previous exports via All Export › Manage Exports.
Export WordPress Data to any CSV, XML, or Excel
- Any theme or plugin
- Images & galleries
- Custom fields
- Zapier integration
- Woo, ACF, Meta Box, JetEngine
Export WordPress – Advanced Topics
Select a Different WordPress Export Type
To export WordPress data in a different format, expand the Export Type section in the Drag & Drop interface. Here are the available options:
- Spreadsheet
- CSV File: creates a .CSV file.
- Excel File (XLS): creates a .XLS file.
- Excel File (XLSX): creates a .XLSX file.
- Feed
- Simple XML Feed: creates a .XML file.
- Custom XML Feed creates a .XML file.

When you export WooCommerce products, there will be another Feed option: Google Merchant Center Product Feed. That export type is specific to products and generates a .TXT file.
Export WordPress Automatically with Scheduling
You can schedule your WordPress export using the following options:
- Cron jobs: this allows you to manually create cron jobs in your server (via cPanel, Plesk, or similar) and then run the export on a schedule. To learn more, see Manual Scheduling.
- Our Automatic Scheduling Service: this is an optional and monthly paid service that allows you to schedule exports directly from within our plugin's interface. See Automatic Scheduling Service.
The scheduling options can be defined by expanding the Scheduling Options section of the Export Settings screen (Step 3 above), or after the export has been created in All Export › Manage Exports › Scheduling Options.
Use PHP Code or Custom PHP Code when Exporting WordPress Data
In addition to exporting WordPress data easily, our software allows you to use PHP code or custom PHP code on the exported data.
This is useful for modifying your WordPress data on-the-fly while exporting. You can learn more about this in our documentation, How to Pass Exported WordPress Data Through PHP Functions. This technique allows you to apply a function to a single export element.
If you need to pass more than one export element through a function, you can use custom export fields instead. See Combine and Process Multiple Data Elements into a Custom Export Field for more information.
Saving or Using a Saved Export Template
WP All Export provides full control over how you export your data. This means that there's also a way to save the existing export template and settings to apply to a different/new/future export process. To save an export template, do this:
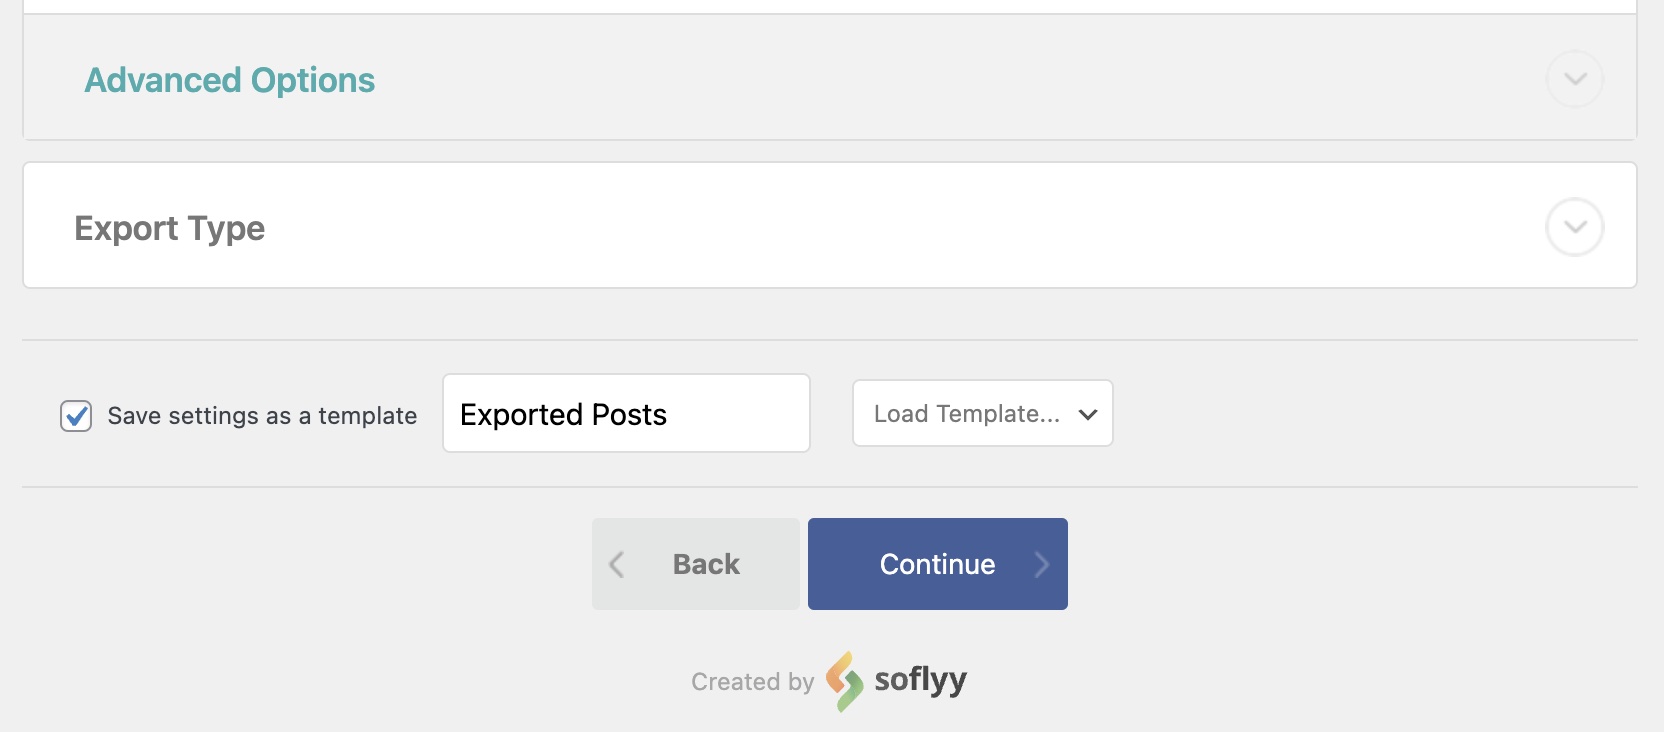
- While in Step 2 (as shown in this guide above), scroll all the way down and click to enable the Save settings as a template option.
- Input a name as the Template name.
That's it! The template will be saved once you continue to the next step or save/update the template.
To load a saved template, do the following:
- When in Step 2, scroll all the way down and locate the template section.
- Select the desired export template from the Load Template drop-down list.
- Once selected, the page will reload and apply all import mappings and settings.
Keep in mind that templates only work for the same post type in which they were originally created. You can manage saved export templates via All Export › Settings › Import/Export Templates.
Export WordPress – Frequently Asked Questions
What is a CSV File in WordPress?
"CSV" means "comma-separated value." A CSV file is a text file that contains multiple rows of data, with each row consisting of one or more columns. The columns are typically separated by a comma or some other character, while the rows are separated by one or more special characters.
How Do I Export WordPress Data to a CSV File?
Just follow the steps in this guide, as CSV is the default file format. If you want to change the file format, this is done in the Export Type section of the Drag & Drop screen. Other options include XML and Excel.
How Do I Export a Post From WordPress?
- Navigate to All Import > New Export.
- Select Posts as the export type.
- Filter the posts in the Add Filtering Options section.
- Choose your export columns.
- Run the export and download the exported data.
For more information, see How to Export WordPress Posts.
How Do I Export a Page From WordPress?
- Go to All Import > New Export.
- Choose Pages as the export type.
- Filter the pages in the Add Filtering Options section.
- Select your export columns.
- Complete the export and download the export file.
To learn more, see How to Export WordPress Pages.
Can I Export WordPress Users?
Yes. All you have to do in our plugin is change the export type to Users. Otherwise, the basic export process is the same. The only unusual factor with exporting WordPress users is that user password values are hashed, so they're not readable by humans.
See How to Export WordPress Users to CSV, Excel, or XML for additional details.
How Do I Export All Content From WordPress?
WordPress has a built-in export tool that lets you export all your posts, pages, comments, custom fields, terms, navigation menus, and custom posts. The problem with this tool is that it uses a brute-force method with no control over any aspect of the process.
WP All Export takes the opposite approach, allowing you to control every aspect of your WordPress records, including the use of advanced filters, column selection, and even programmatic manipulation of export data on the fly.
How Do I Export WordPress Media?
You cannot export the media library out of the box. To export media from your WordPress site, you need to export the post type or custom post type associated with the media that you wish to export.
For example, if you have multiple images attached to posts, you need to export the WordPress posts to obtain those images.
However, there's a workaround that allows using a WP_Query export (see documentation) to generate an export file with all of the media that exists on your site. Here's the query that you can use:
'post_type' => 'attachment',
'post_status' => 'inherit'
How Do I Import Data into WordPress?
- Go to All Import > New Import.
- Choose how you want to load your data (i.e., upload a file, use a URL, etc.).
- Select your import file and your import target (i.e., Posts, Pages, etc.).
- Map incoming data elements to your WordPress fields.
- Run the import.
For more information, see Importing CSV, XML, and Excel Files into WordPress.
How Do I Export and Import a WordPress Site?
- Export all of your desired data.
- Download the generated bundle files for each post type that you exported.
- Import each bundle file on the destination site.
- Verify that your data was successfully migrated.
This process is explained in more detail in our Migration overview.
Export WordPress – Related Docs
Learn how to import any CSV or XML file to WordPress.
Describes how to migrate data between sites.
Shows you how to bulk edit your WordPress data.
