The best import export plugin for WordPress & WooCommerce.

How to Migrate WooCommerce Orders
To migrate WooCommerce orders, go to All Export › New Export on the source site, select WooCommerce Orders, and export the bundle file. Next, go to All Import › New Import on the destination site and upload the bundle file.
Table of Contents
- Step 1: Create an Order Export
- Step 2: Configure the Export File
- Step 3: Import the Bundle File
- Step 4: Verify the Migrated Orders
Advanced Topics
Step 1: Create an Order Export
Navigate to All Export › New Export on the export site, then select WooCommerce Orders from the dropdown list. WP All Export will show the number of orders available to export.
To define which export columns to include in the export, click on Customize Export File. Otherwise, to migrate everything, click Migrate Orders.
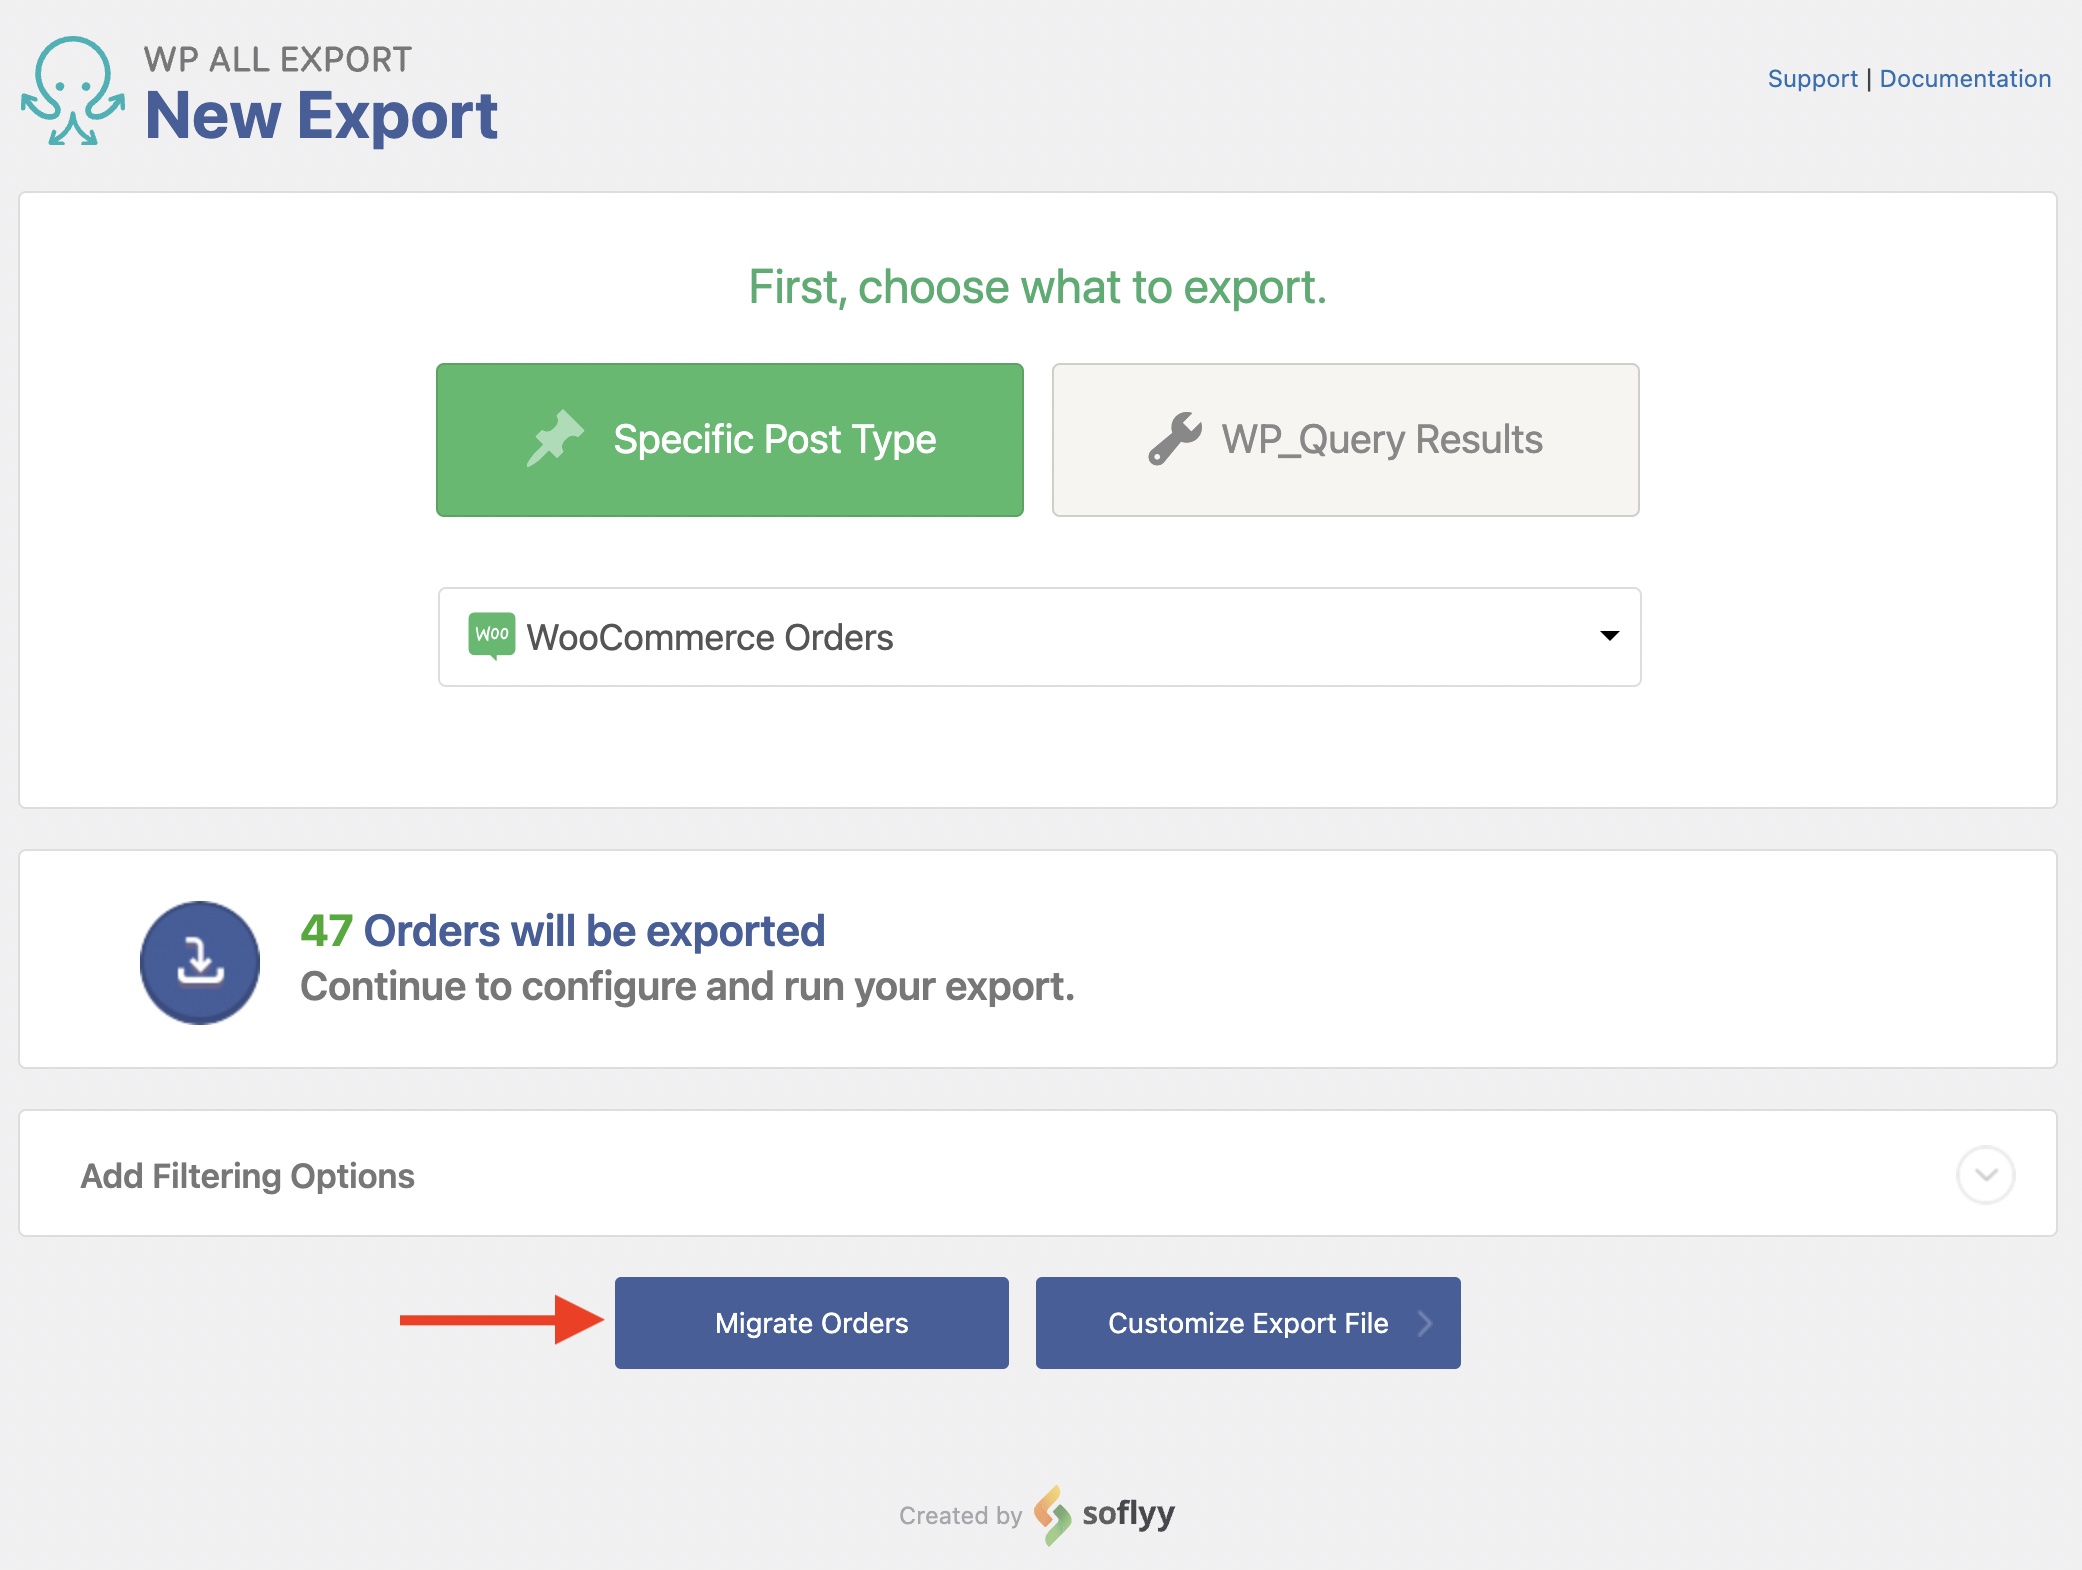
If you only want to migrate certain orders, you can add filtering rules using Add Filtering Options.
Step 2: Configure the Export File (Optional)
If you clicked Customize Export File, you can use our Drag & Drop interface to select your export columns. To migrate orders, you must at least select the columns needed to support a successful import on the destination site.

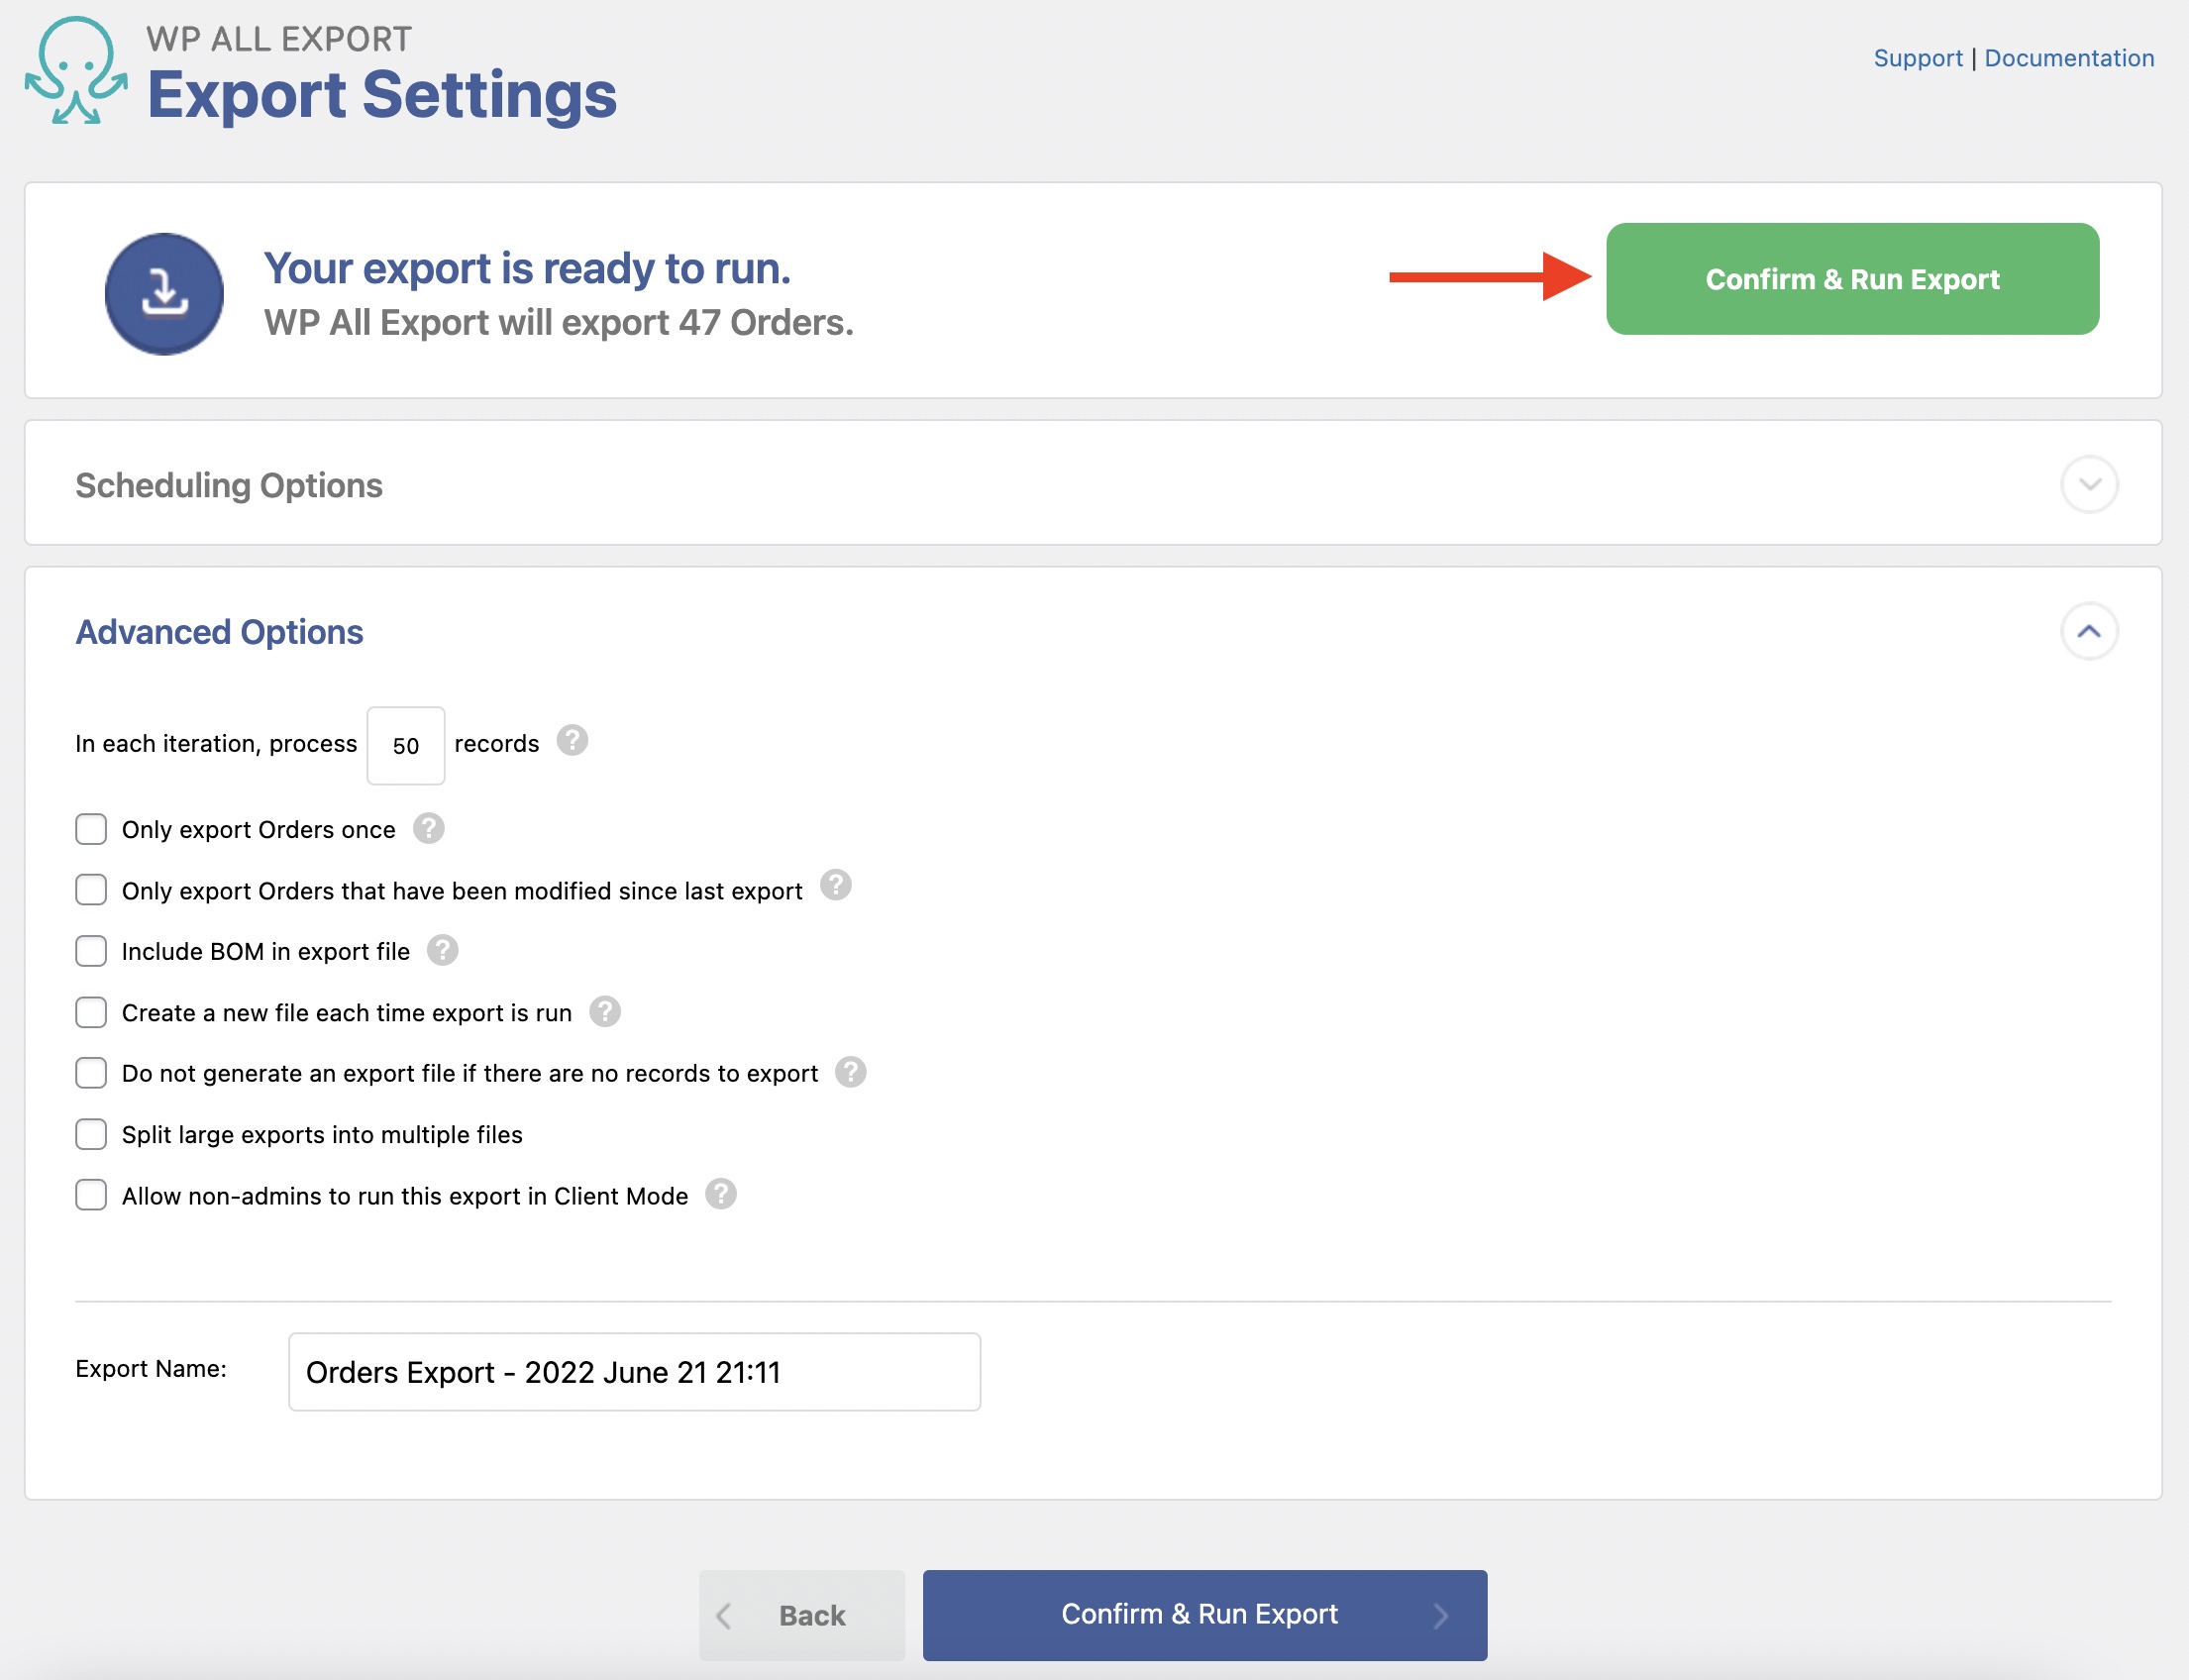
Once done, or if you clicked Migrate Orders, you will see the Export Settings screen, where you can define Scheduling Options or change the available Advanced Options.
For most WooCommerce order migrations, you can leave these export settings alone and use their default selections. Click on Confirm & Run Export to continue and run the export.
Once the order export is complete, download the Bundle file under Click to Download.
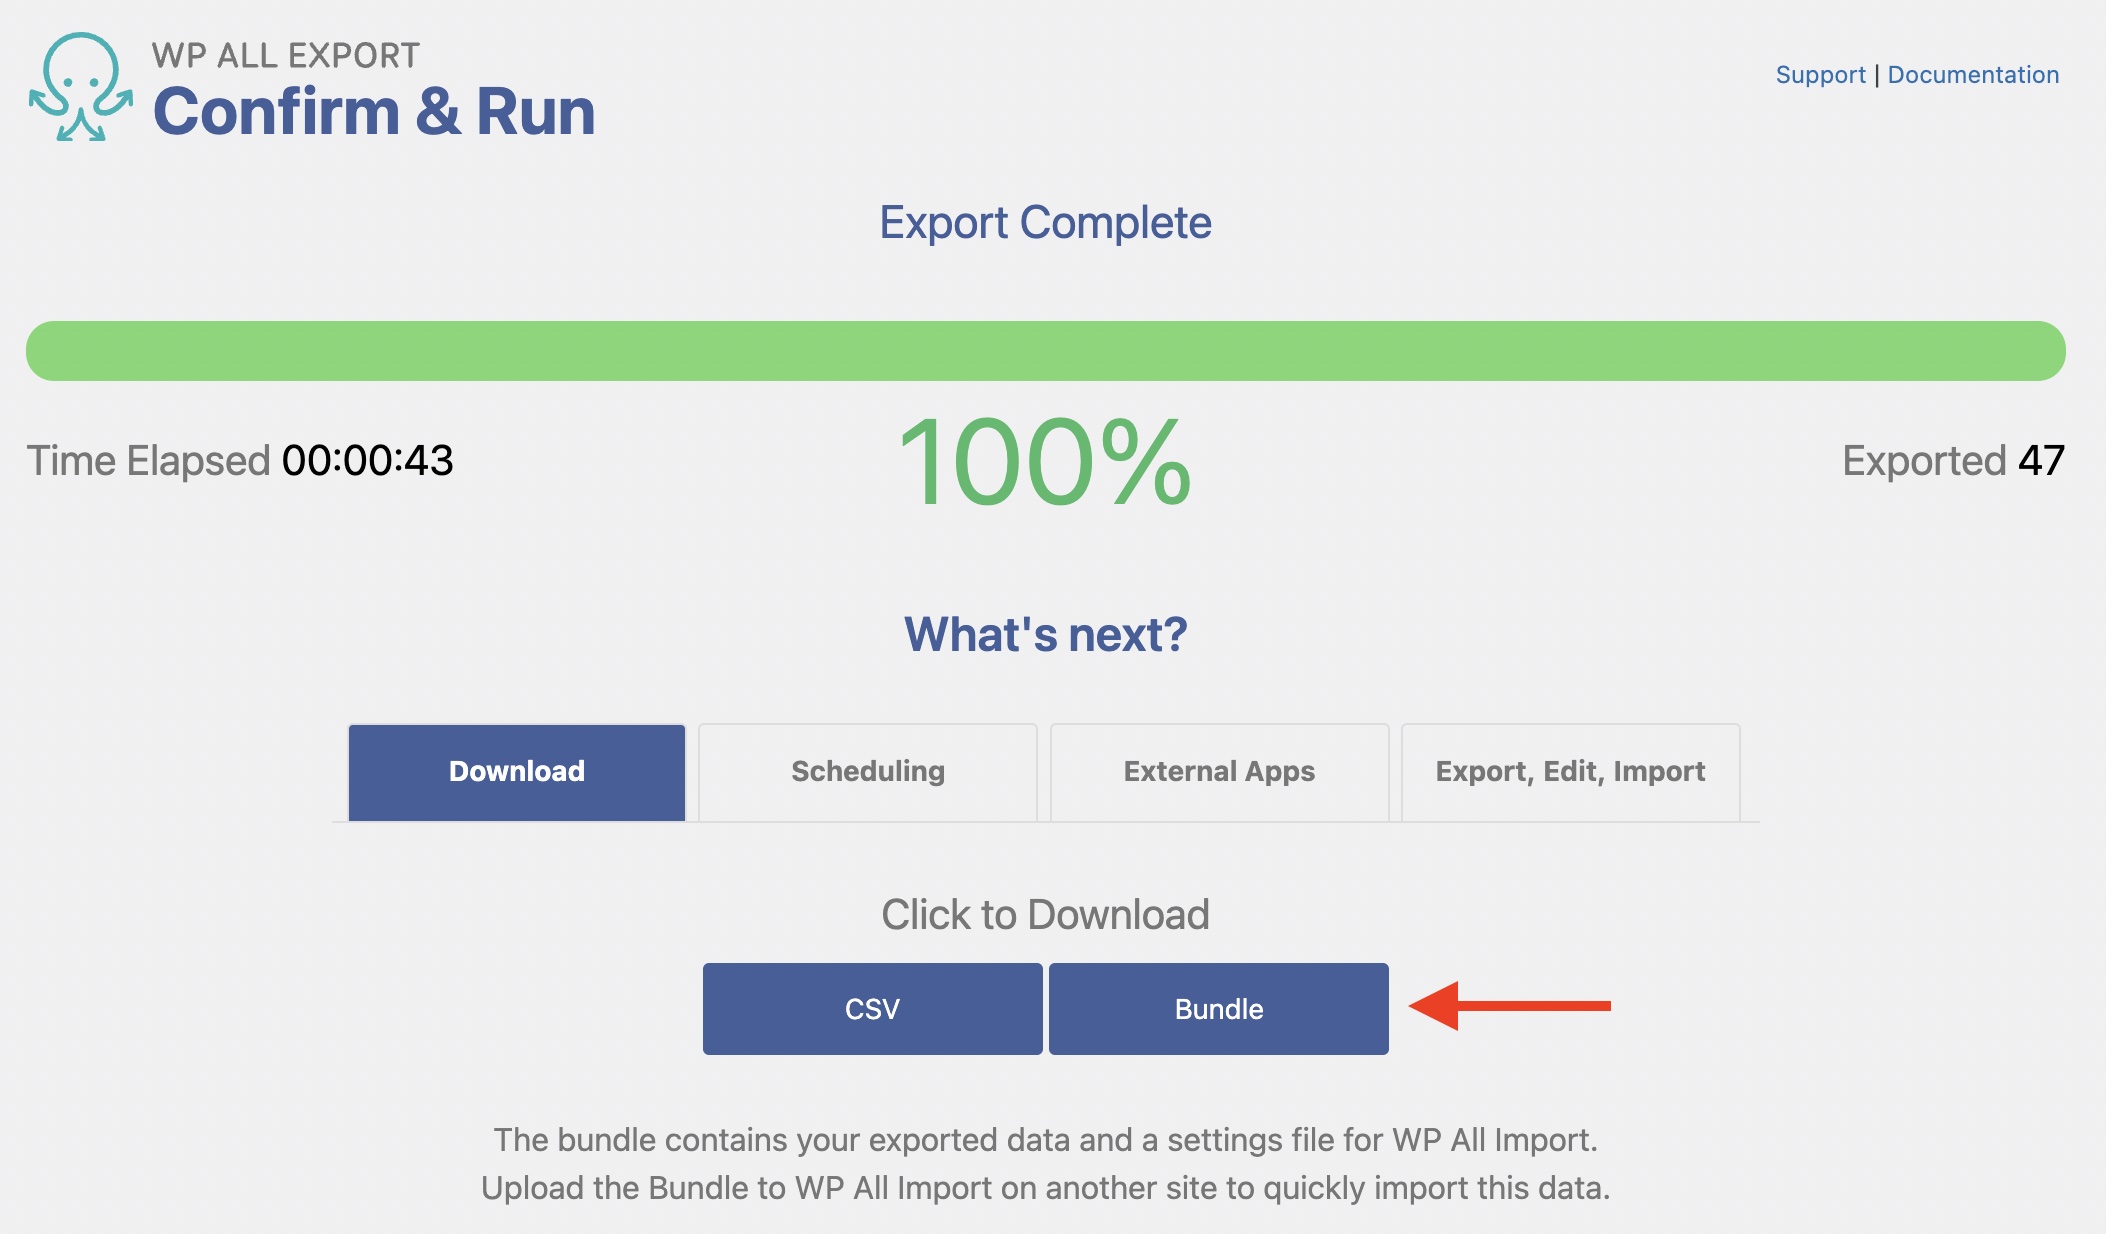
This bundle file helps make your order migration quick and simple, as it contains all exported WooCommerce orders along with a settings file to configure WP All Import automatically.
Step 3: Import the Export Bundle File
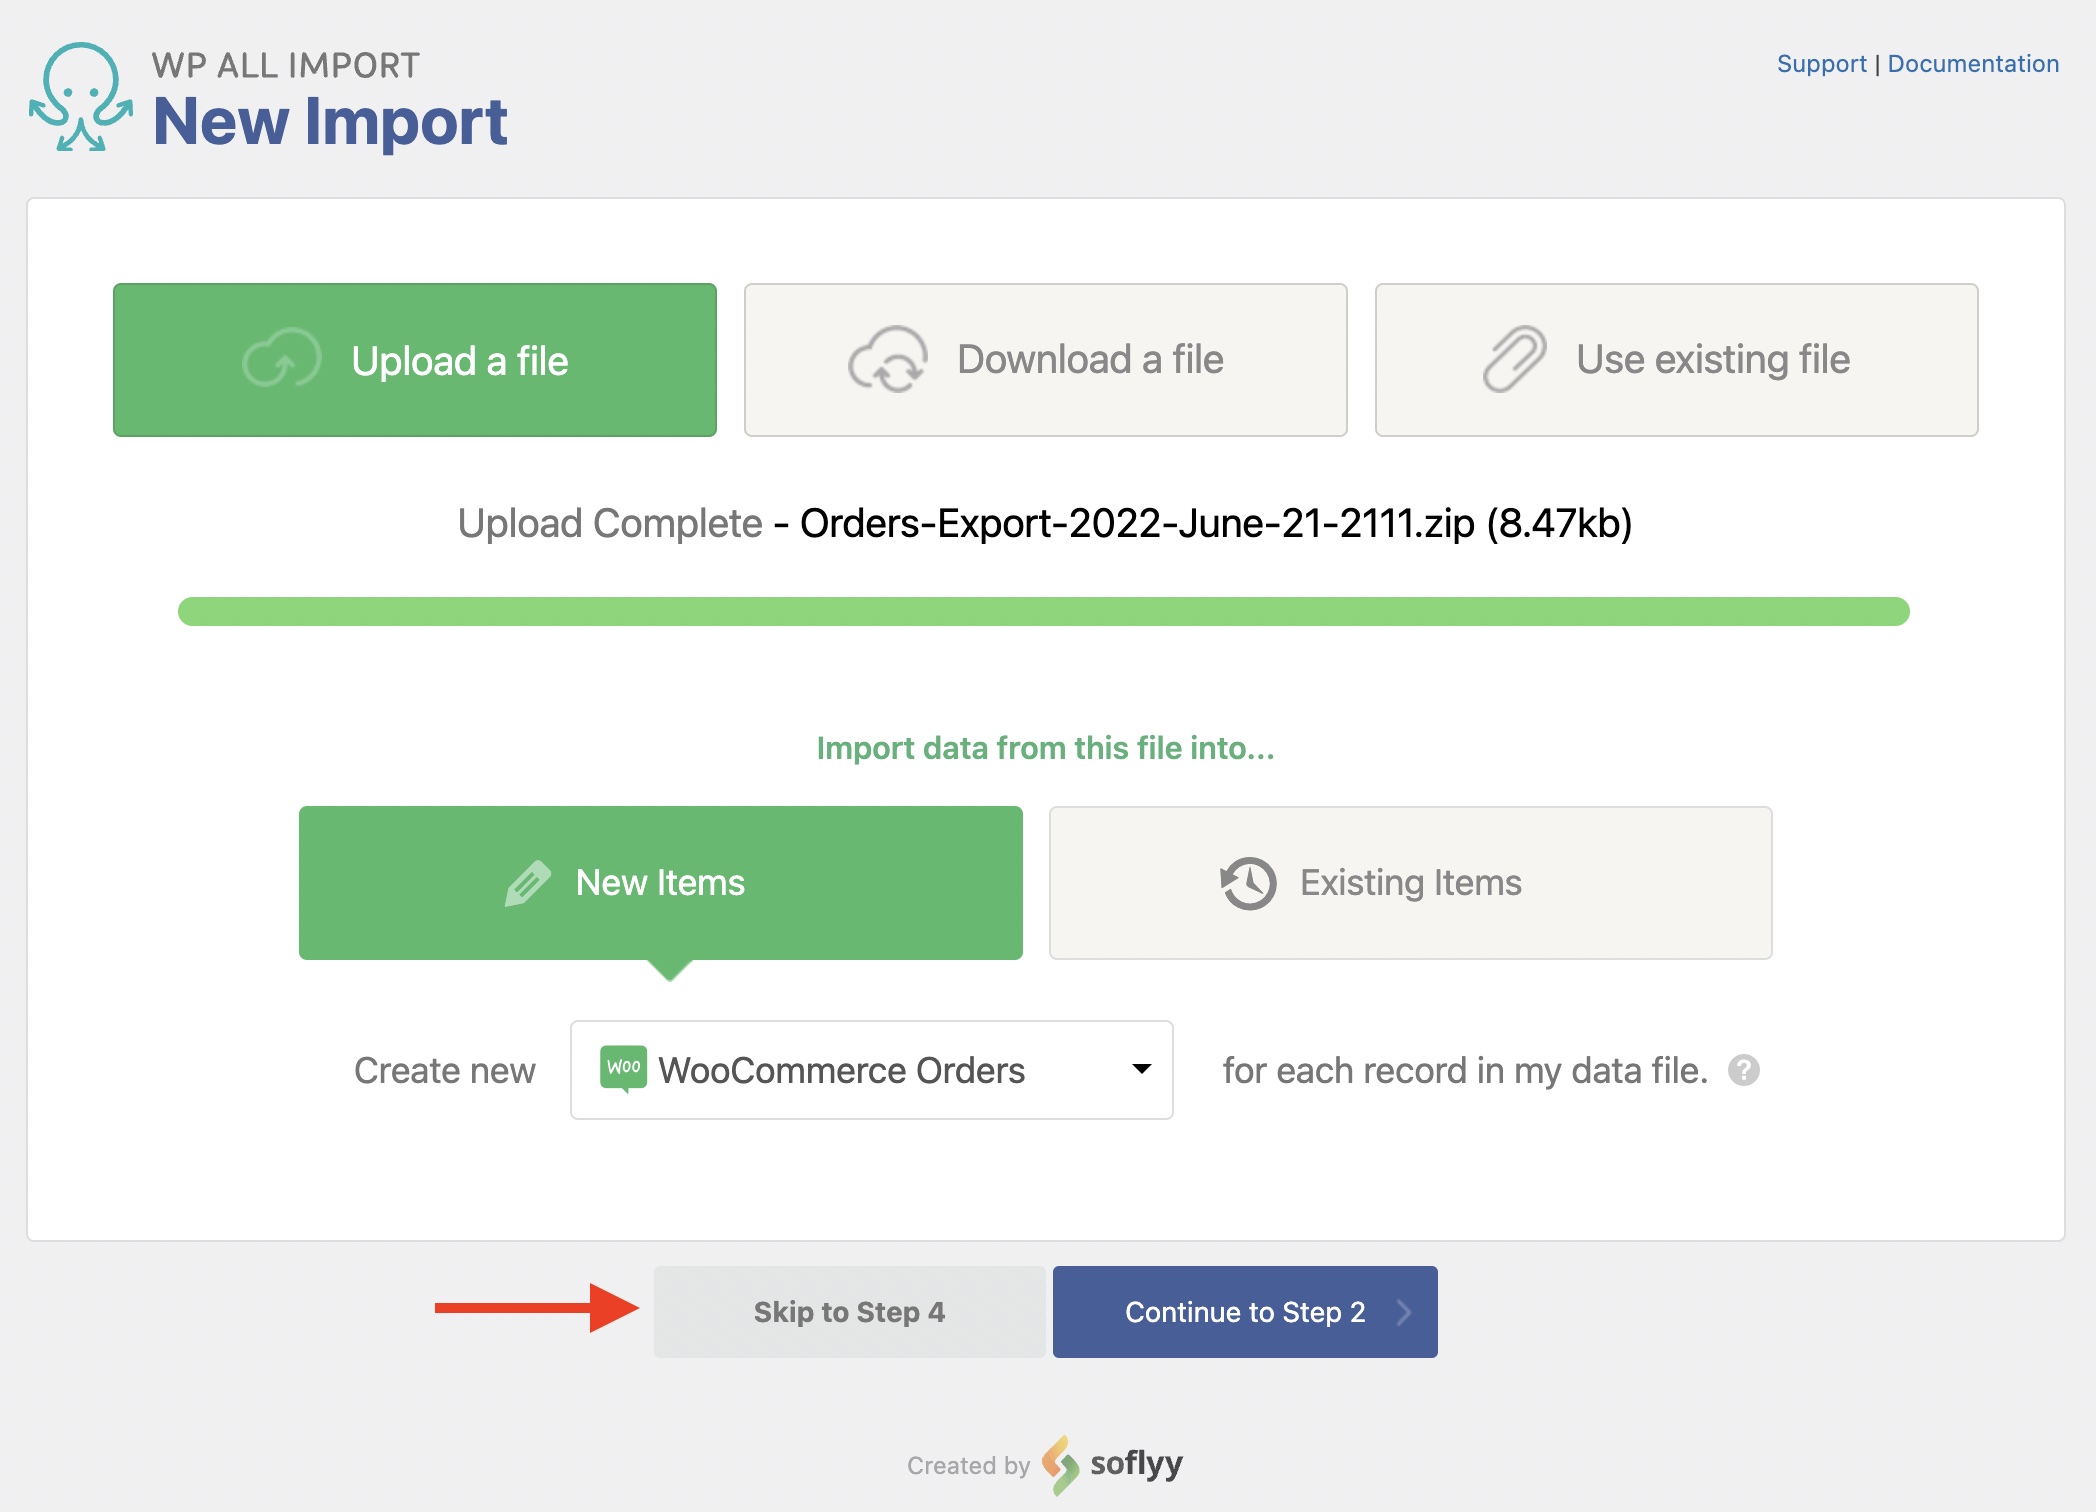
On the import site, navigate to All Import › New Import and upload the previously obtained bundle file.
Click on Skip to Step 4 so that the bundle file maps everything automatically. However, if you want to change the mappings, click on Continue to Step 2 and then click Continue after modifying the import mapping (not shown).
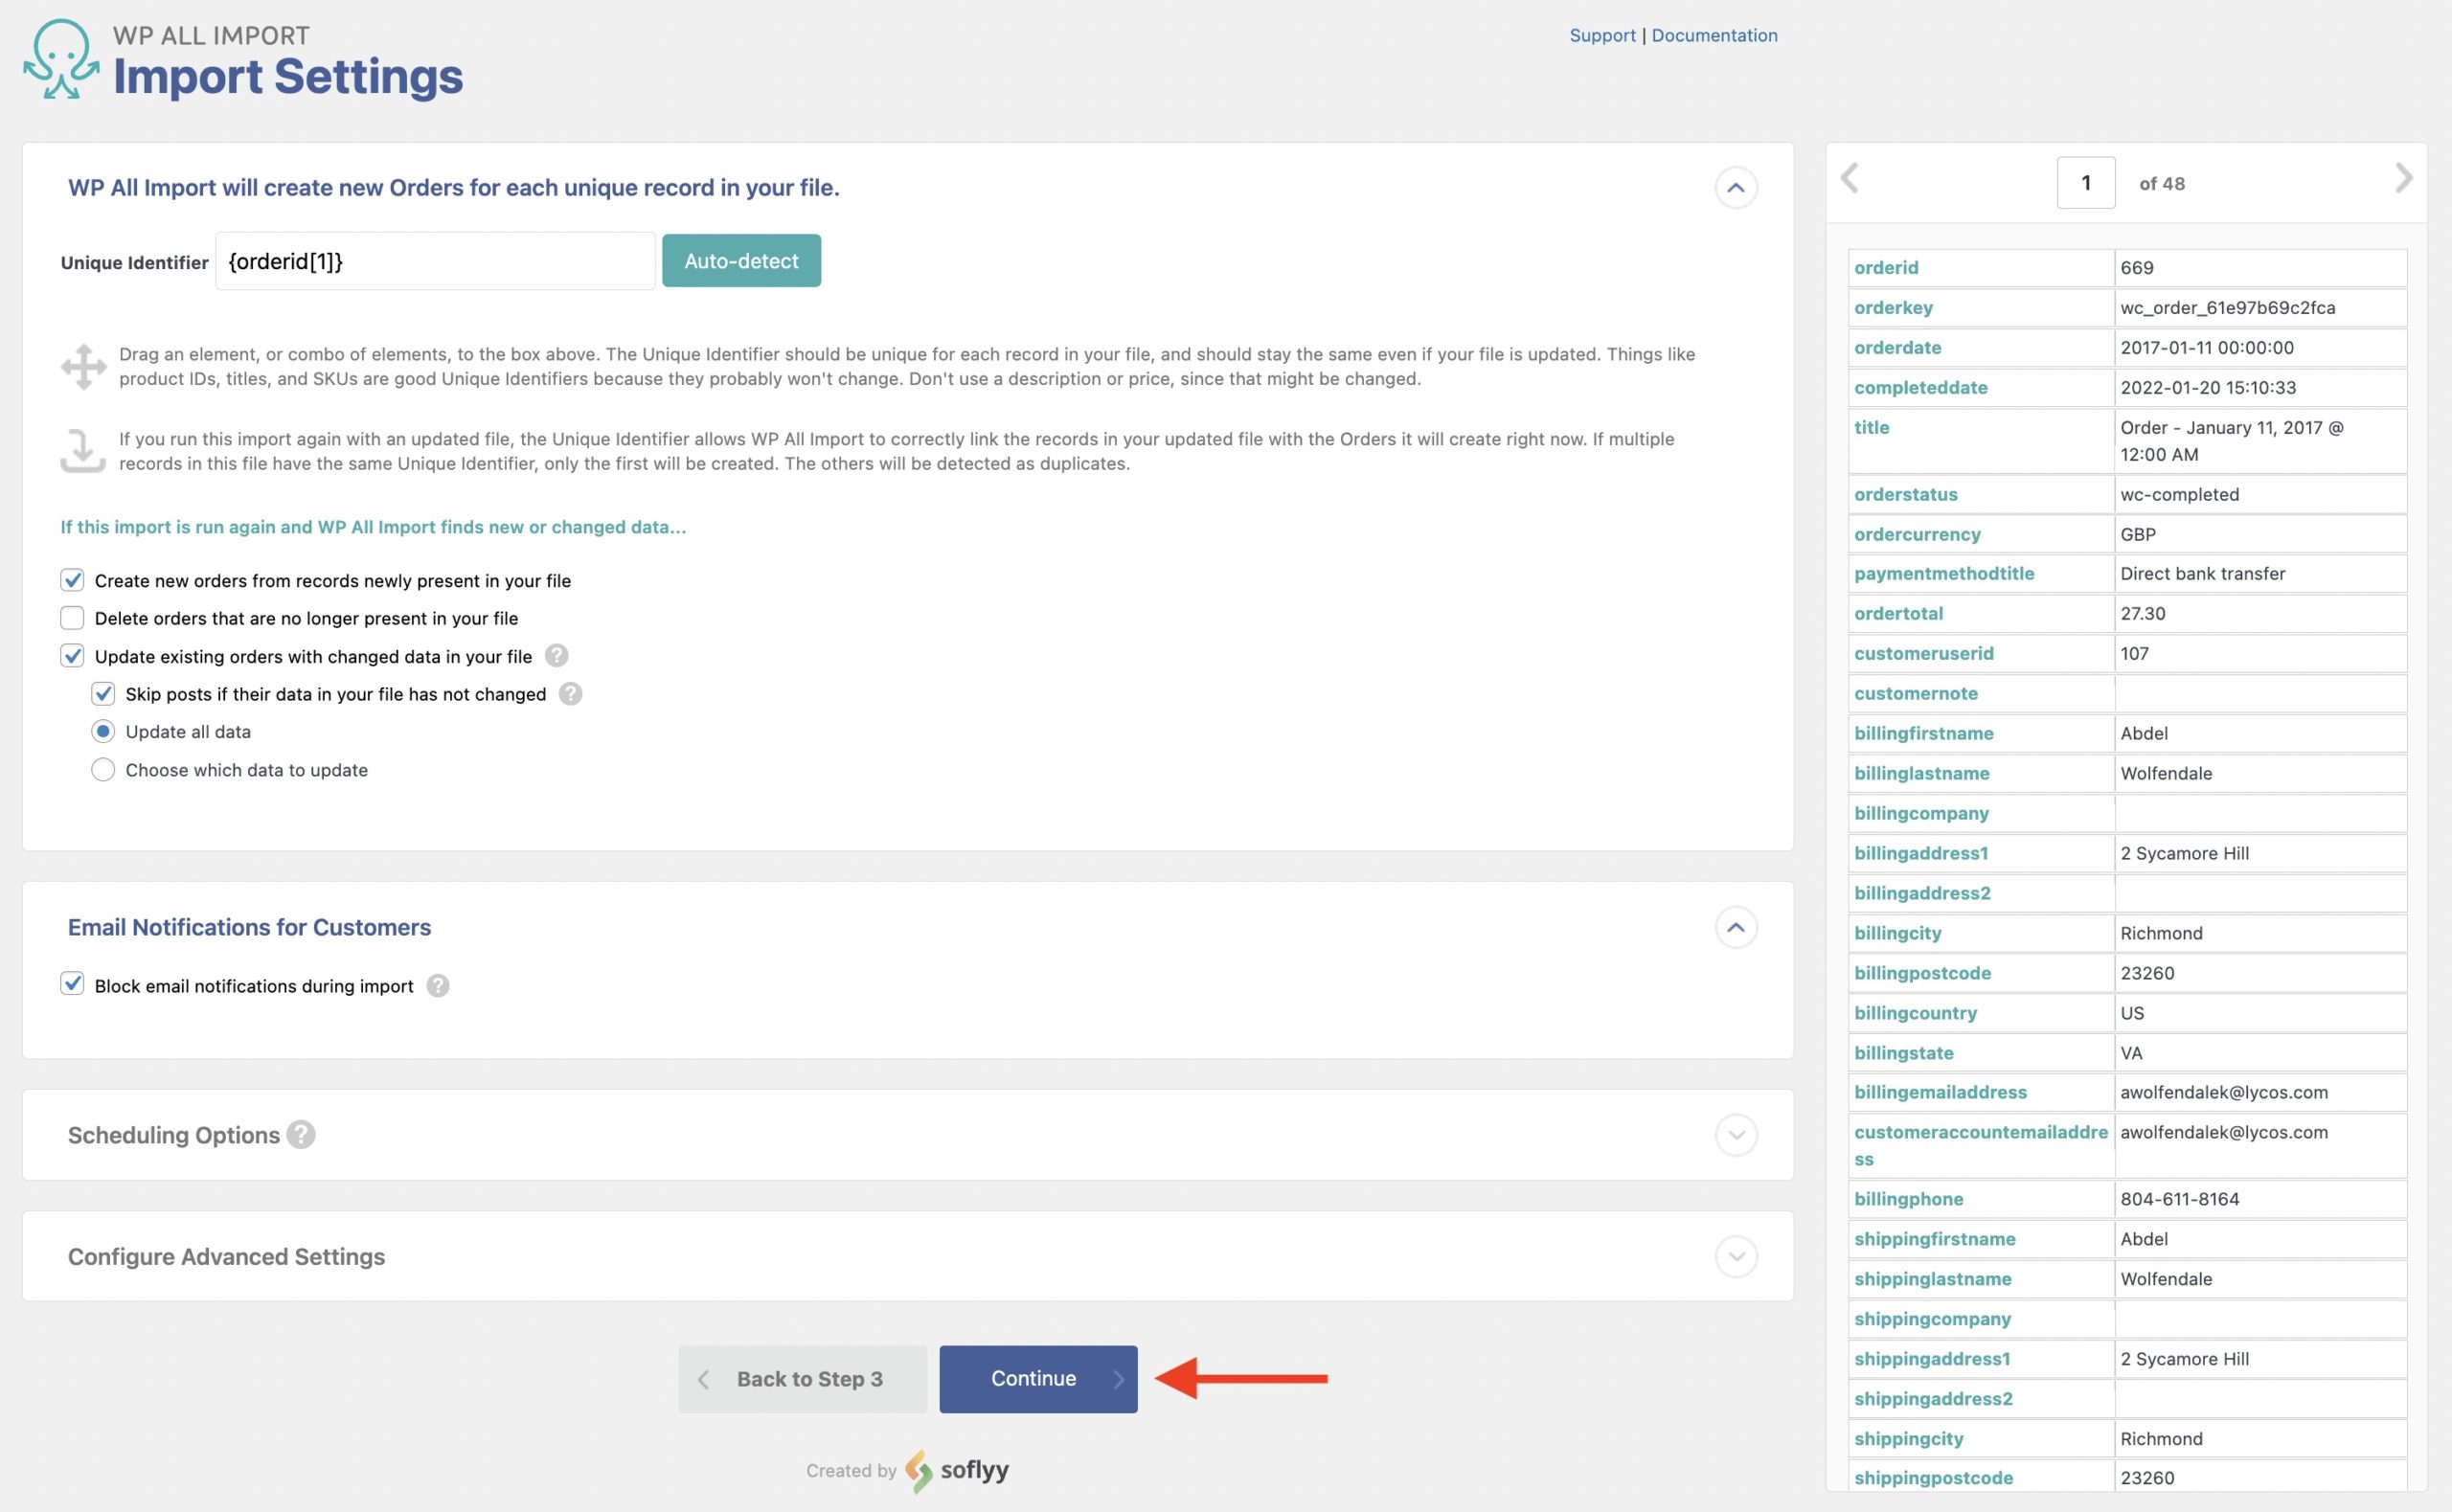
Next, you see the Import Settings screen. Here, you can unblock email notifications for customers (which are blocked by default), define Scheduling Options, and Configure Advanced Settings.
With most order migrations, you don't need to modify these settings, so you can leave everything as is.
To carry on, click Continue at the bottom.
Click Confirm & Run Import on the following screen (not shown).
Once the import completes, you will see an Import Complete! message:
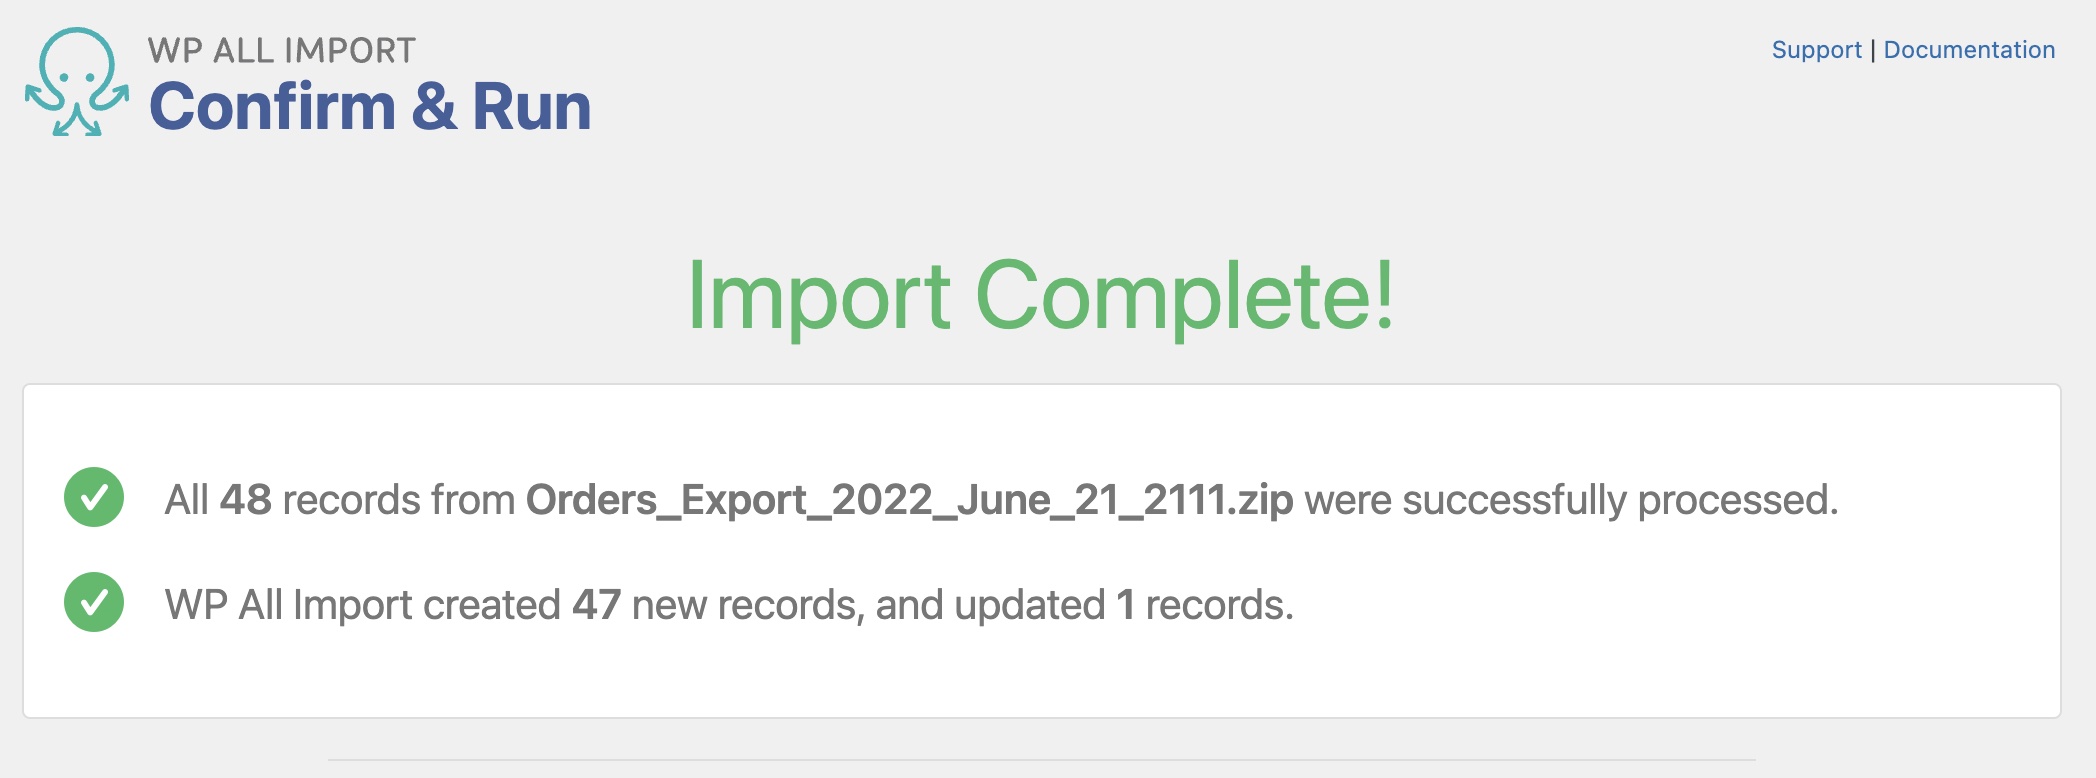
The order migration is now complete!
Step 4: Confirm That the Orders Have Been Migrated
Once the migration has finished, you should check that all the WooCommerce orders are present on the destination site. To do so, navigate to WooCommerce › Orders:
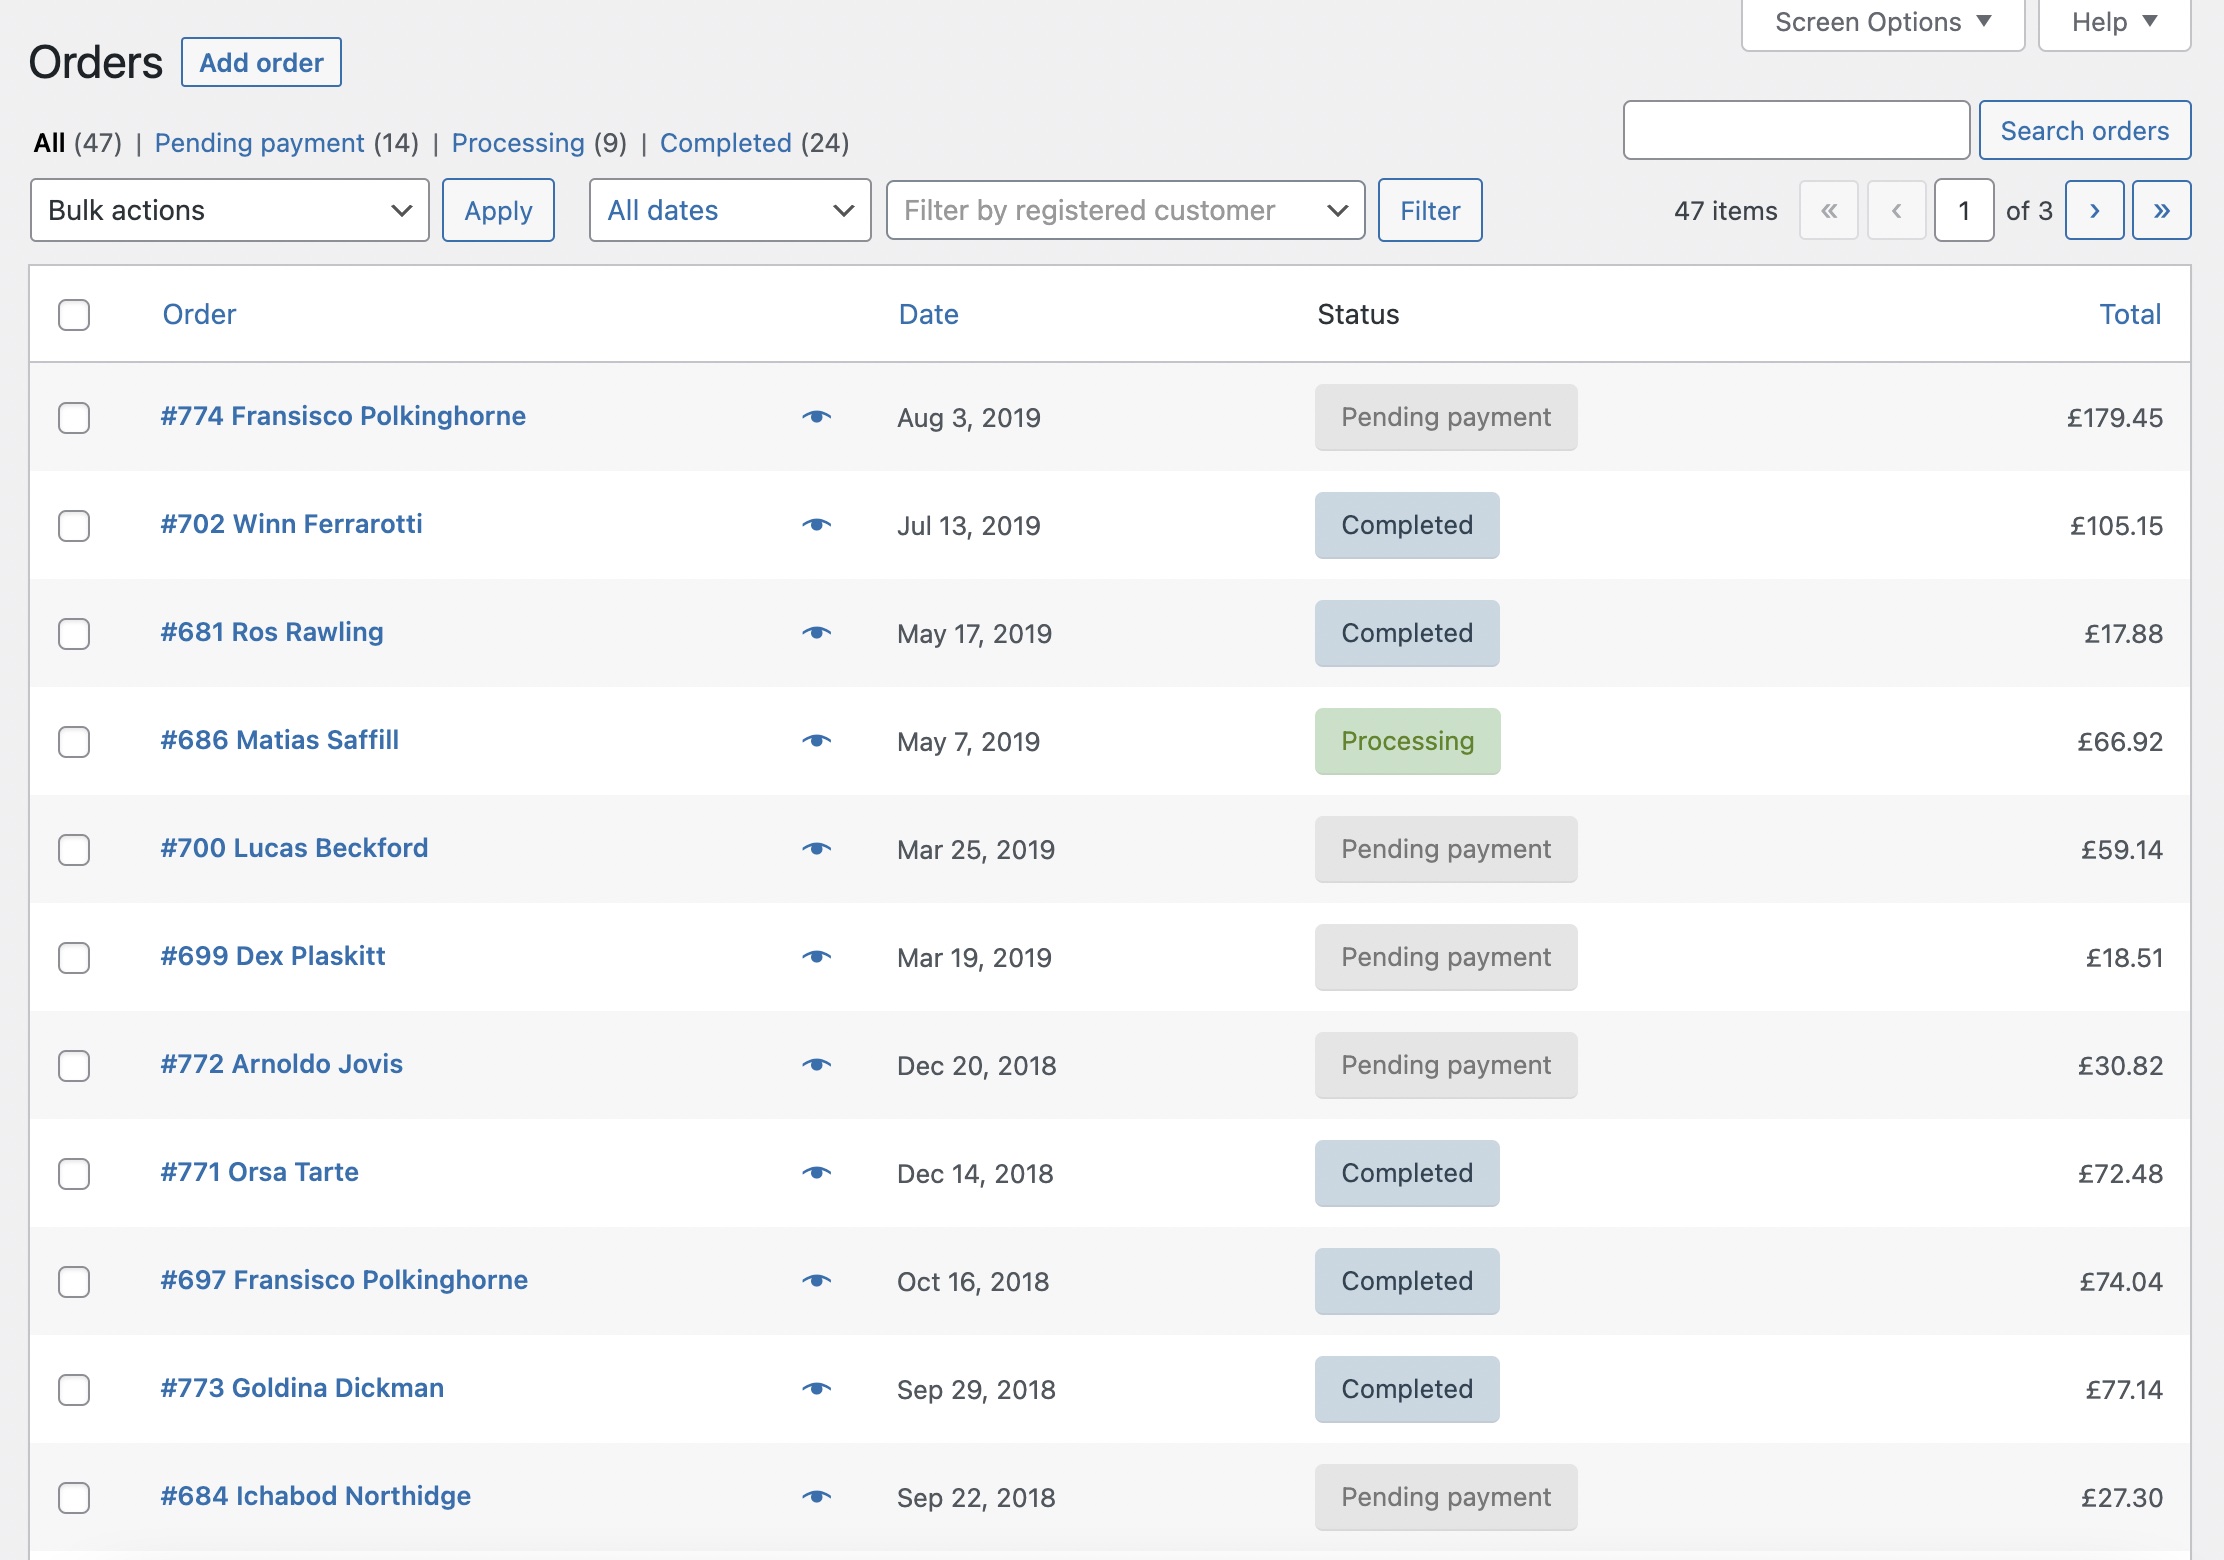
If you don't see all of the orders in that list, you should review the migration steps explained above and make sure that all instructions were followed correctly.
If some orders were migrated and some were skipped, you can review the advanced topics below to understand why some orders get skipped.
As a last resort, you can remove everything that was migrated and restart the order migration process from scratch.
Easily Migrate WooCommerce Orders
- One-click setup
- No configuration necessary
- Order items
- Taxes
- Link orders
- Complete control
Migrate WooCommerce Orders – Advanced Topics
Migrated Order Skipped Due to Customer Match Not Found
Out of the box, this shouldn't happen because the bundle migration file is configured to import as a guest customer if there's no match found:
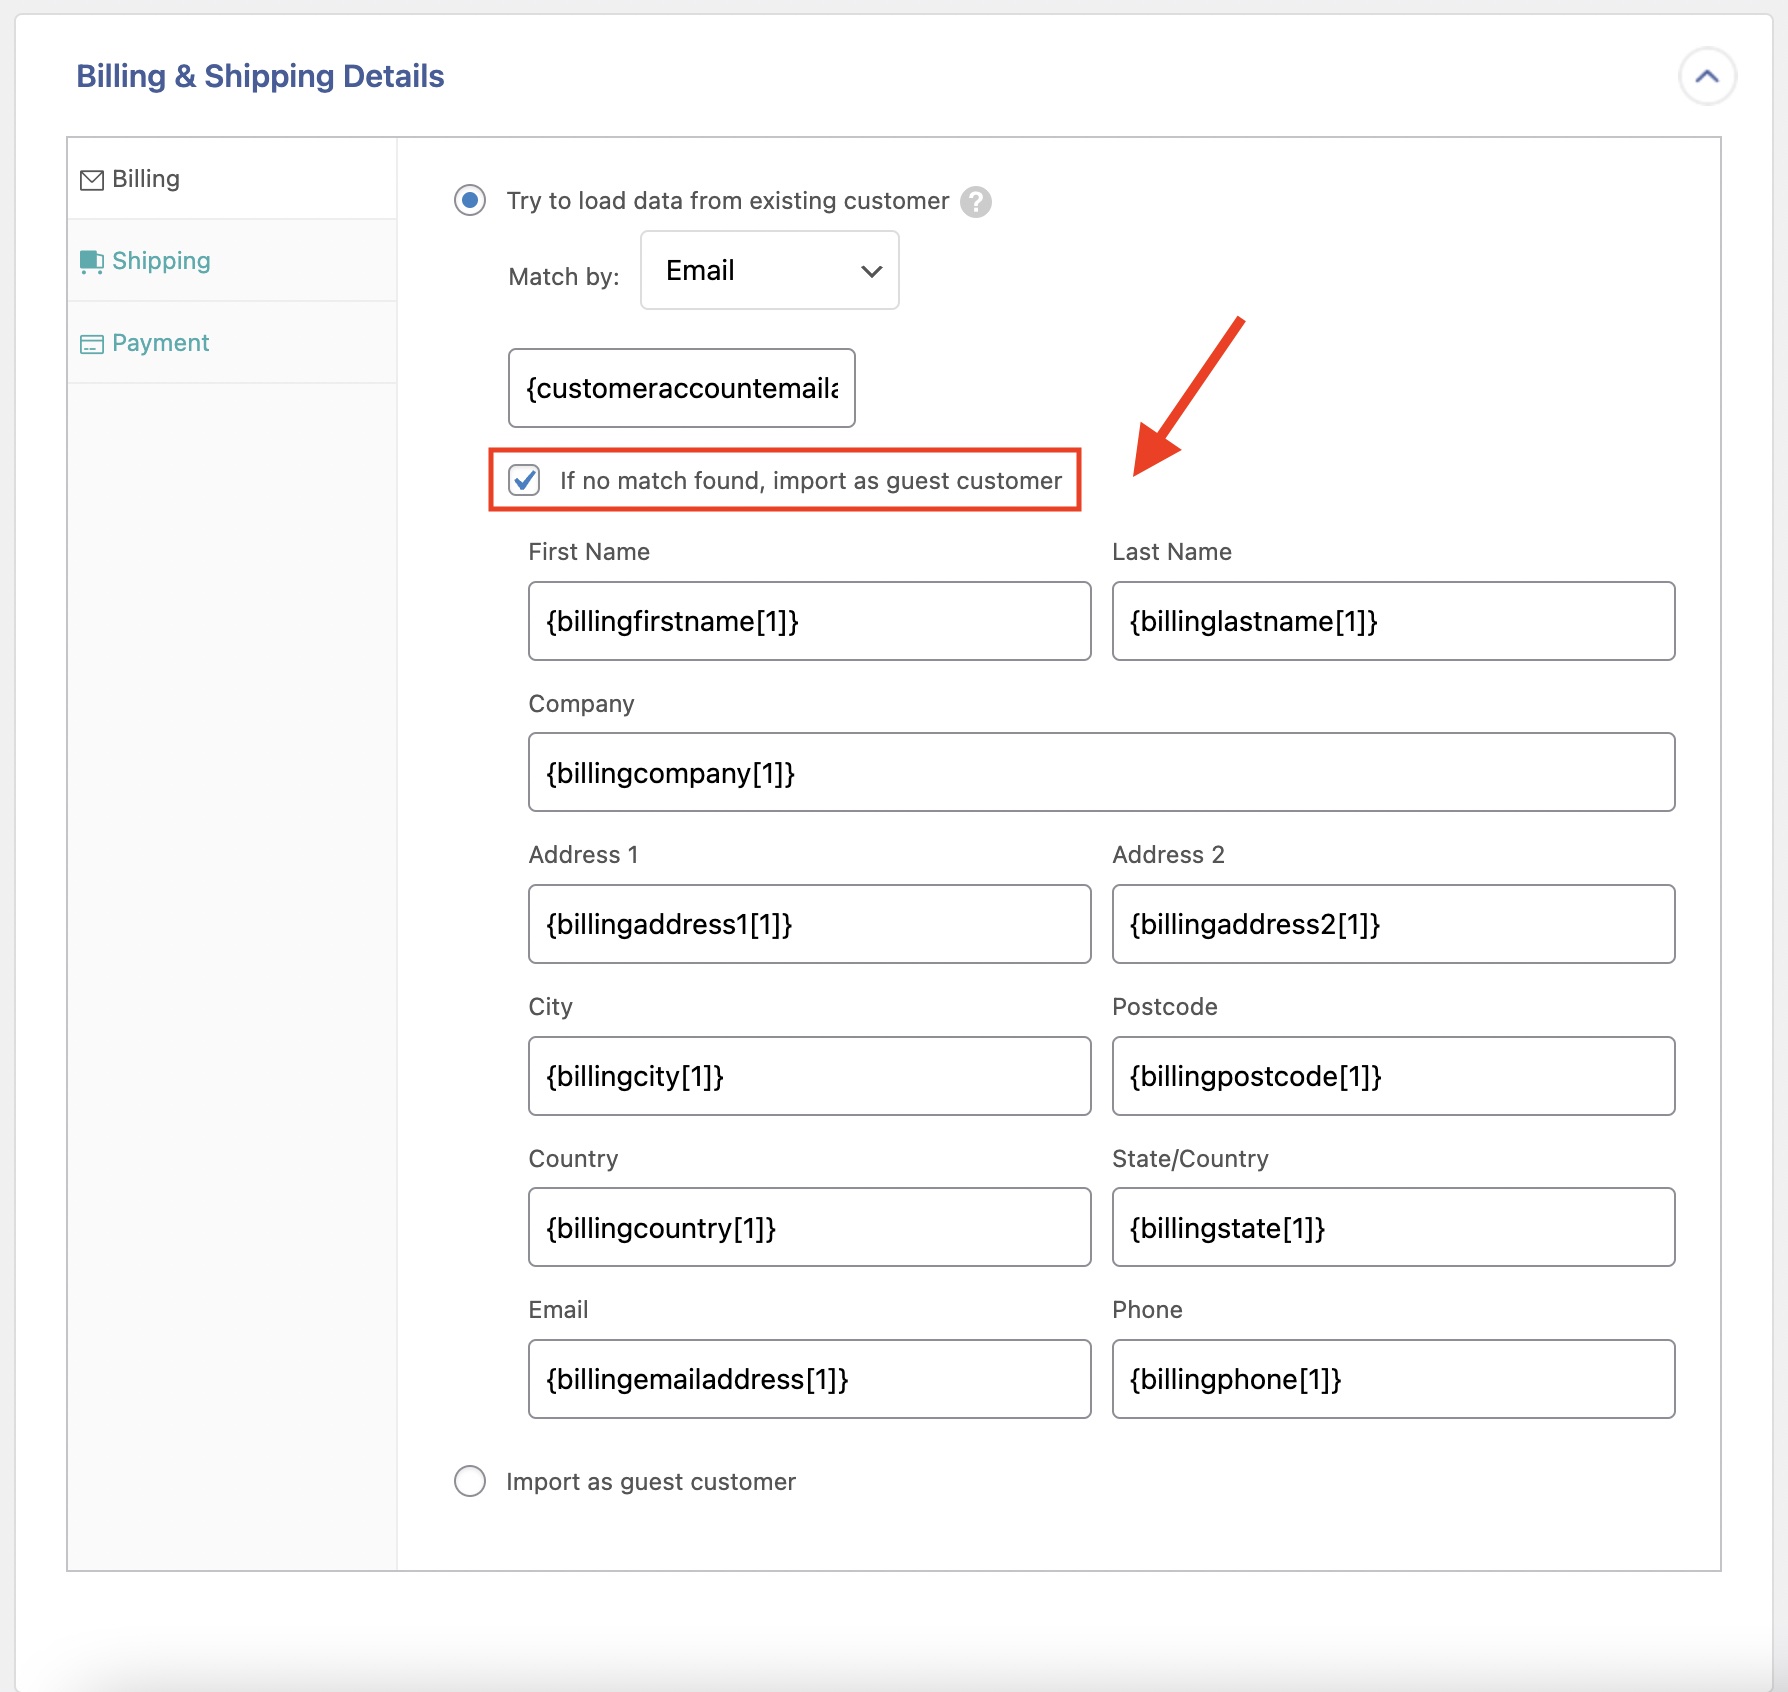
However, you'll find the following message in the History Logs if that setting is disabled and there's no match with an existing customer:
[22:31:02] SKIPPED: Search customer by email `[email protected]`. Existing customer not found for Order `Order – June 18, 2022 @ 02:43 AM`.In that case, you can solve the problem by making sure that there's a correct match with the order customer, or that the If no match found, import as guest customer option is enabled and all fields are filled in.
Migrated Order Skipped Due to Product Match Not Found
To ensure that the order migration is successful, the WooCommerce products should also exist on the import site and have a valid SKU. This is because orders are matched with existing products using the SKU.

If not all products exist, you can also migrate them. To learn how, see: How Do I Migrate WooCommerce Products?
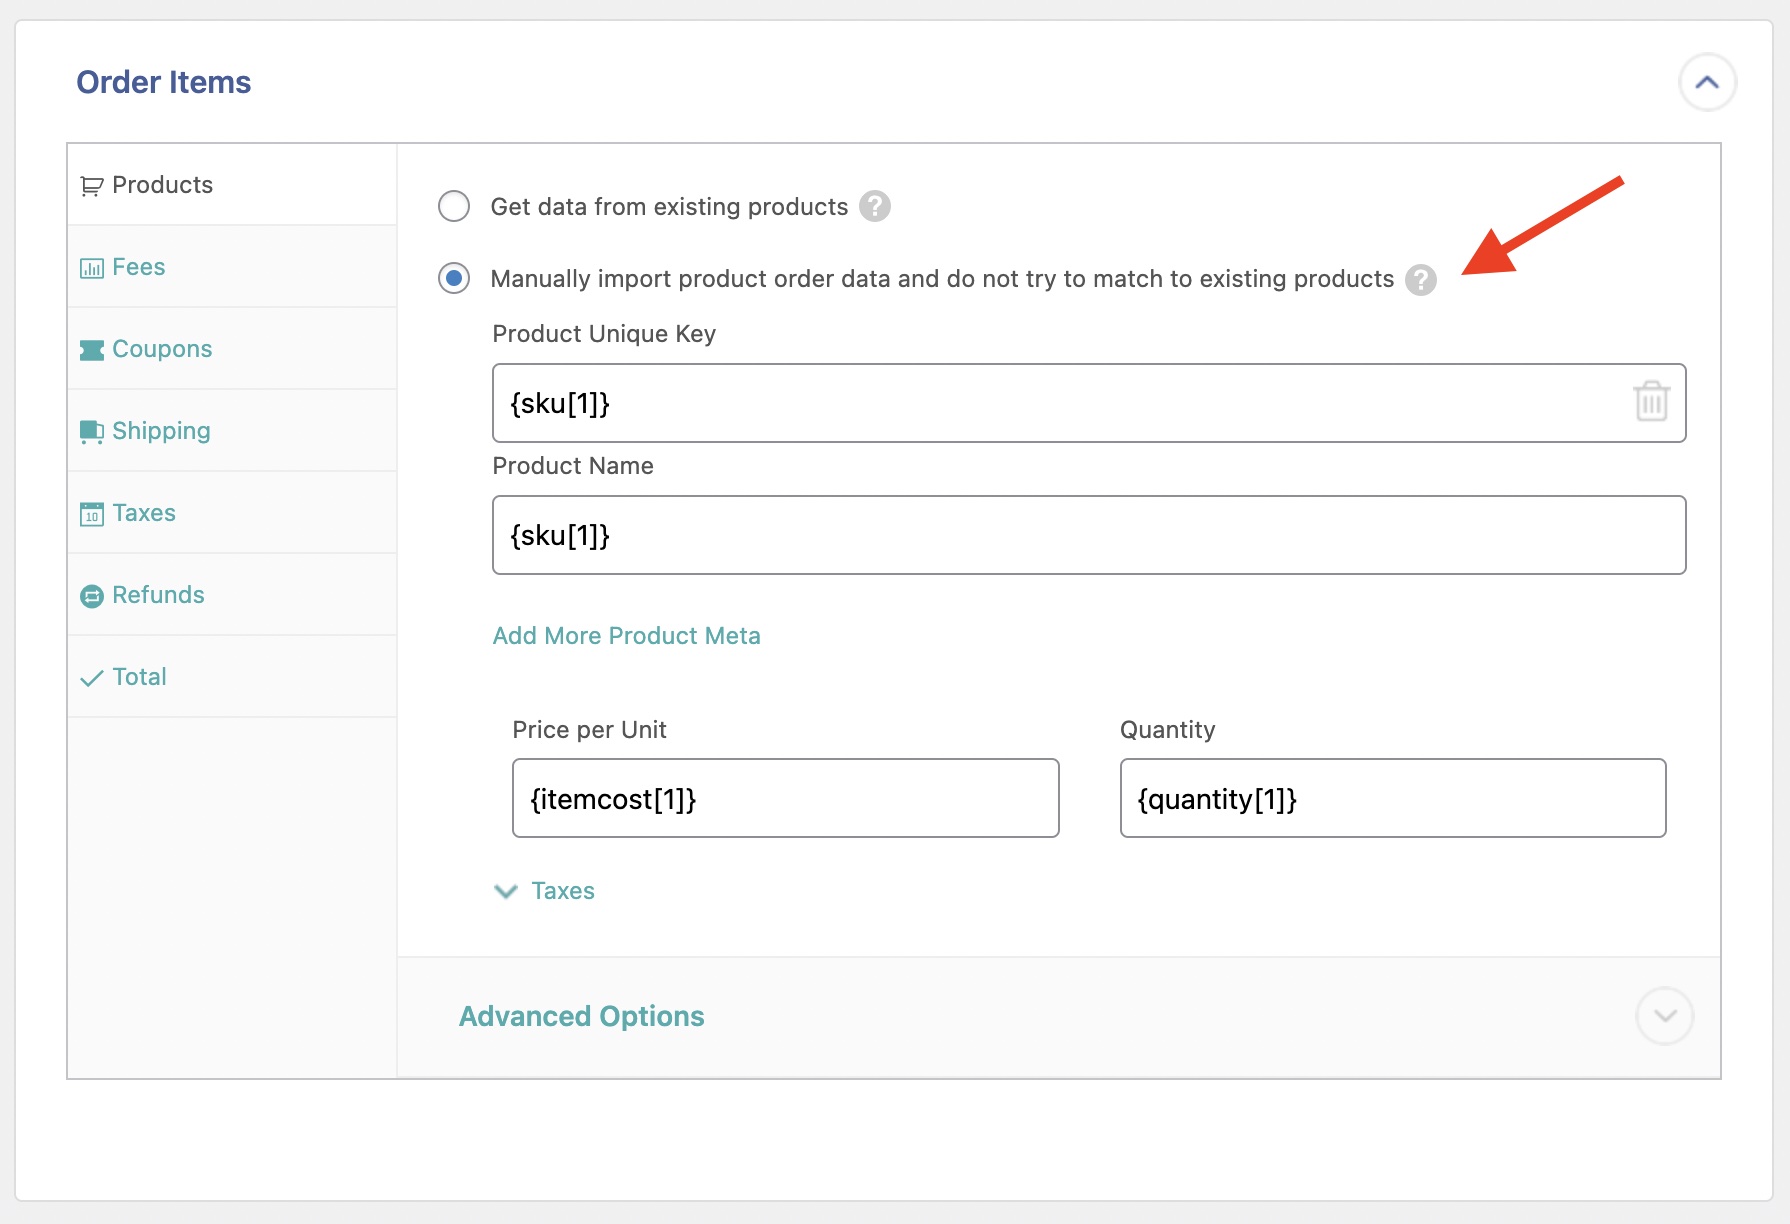
If you don't want to migrate the WooCommerce products, you can also manually import the product data to the imported order. Just enable Manually import product order data and do not try to match to existing products option and fill in the fields:
Link WooCommerce Products without SKU to WooCommerce Orders
If you want to migrate your products, but they don't have an SKU, you can temporarily generate one using a workaround:
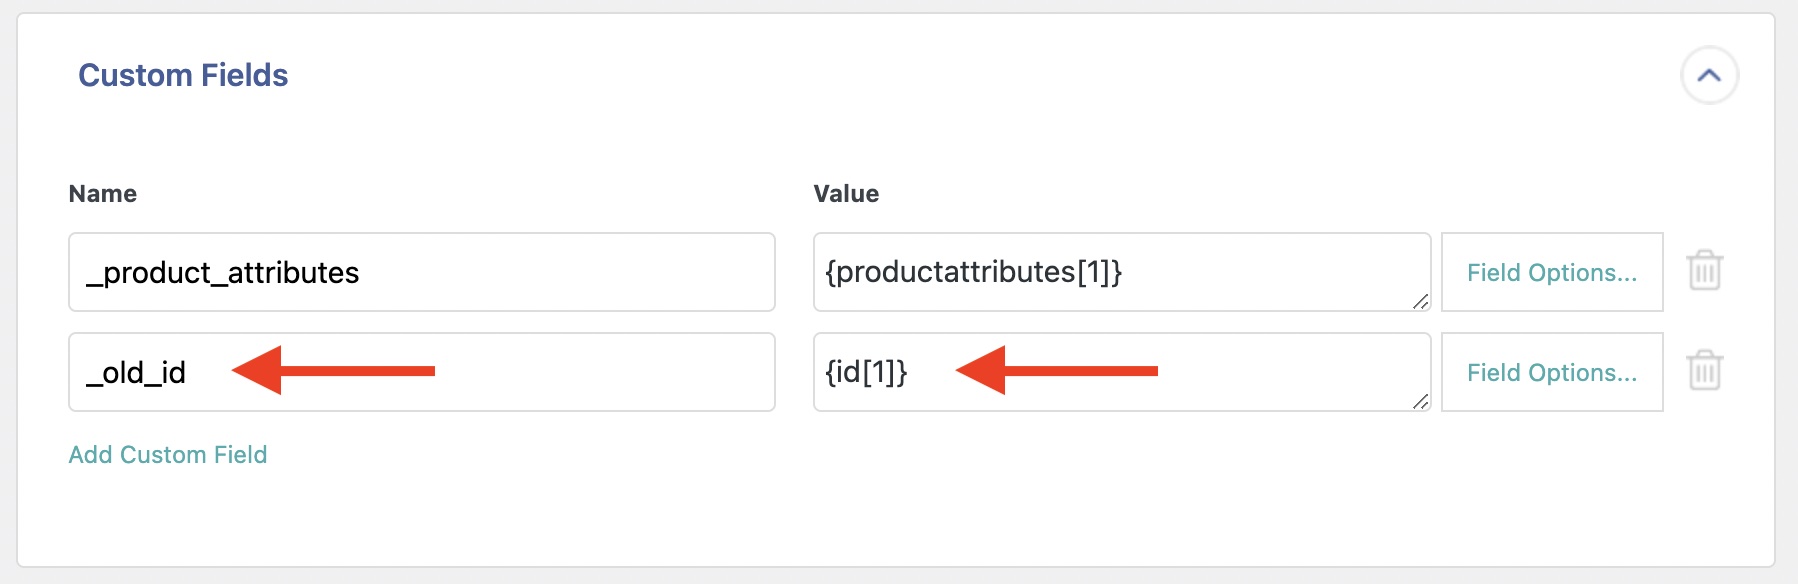
- First, while importing your products, add a custom field "_old_id" containing the product's ID. We use the product ID to generate a random SKU.
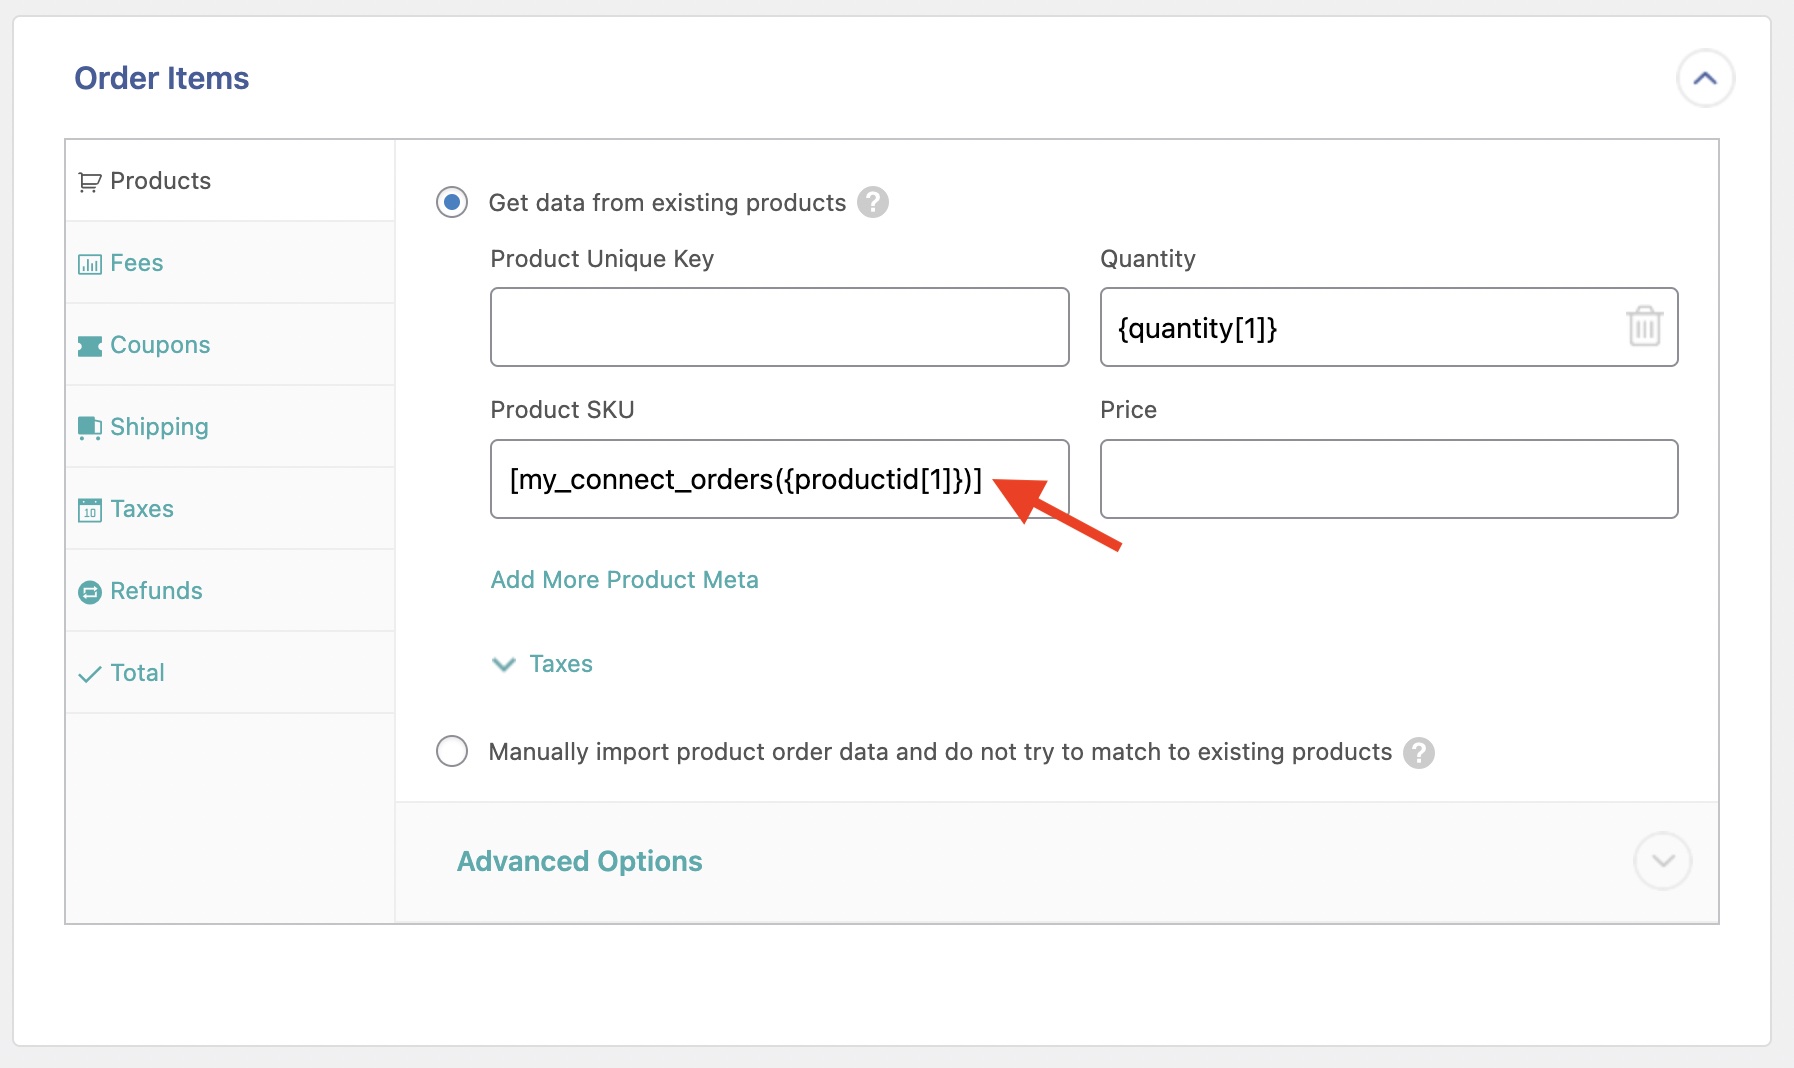
- Second, import your orders and use the following custom PHP function in the Product SKU field. Here's the code:
 //Usage example: [my_connect_orders({productid[1]})]

function my_connect_orders( $product_id ) {
    global $wpdb;
    $query = 'SELECT `post_id` FROM `' . $wpdb->prefix . 'postmeta` WHERE `meta_key` = "_old_id" AND `meta_value` = "' . $product_id . '"';

				if ( $product = $wpdb->get_row( $query ) ) {
					$random_sku = md5( $product->post_id );
					if ( $wc_product = wc_get_product( $product->post_id ) ) {
						$wc_product->set_sku( $random_sku );
						$wc_product->save();
						return $random_sku;
					}
				}
}- Here's how it looks:
- Third, add the following code in order to clean the temporary SKUs:
function remove_auto_generated_sku($post_id, $xml_node, $is_update)
{
global $wpdb;
$query = 'SELECT `post_id` FROM `' . $wpdb->prefix . 'postmeta` WHERE `meta_key` = "_old_id" AND `meta_value` = "' . $xml_node->productid . '"';
if ( $product = $wpdb->get_row( $query ) ) {
$random_sku = md5( $product->post_id );
if ( $wc_product = wc_get_product( $product->post_id ) ) {
$current_sku = $wc_product->get_sku();
if ($current_sku == $random_sku) {
$wc_product->set_sku( '' );
$wc_product->save();
}
}
}
}
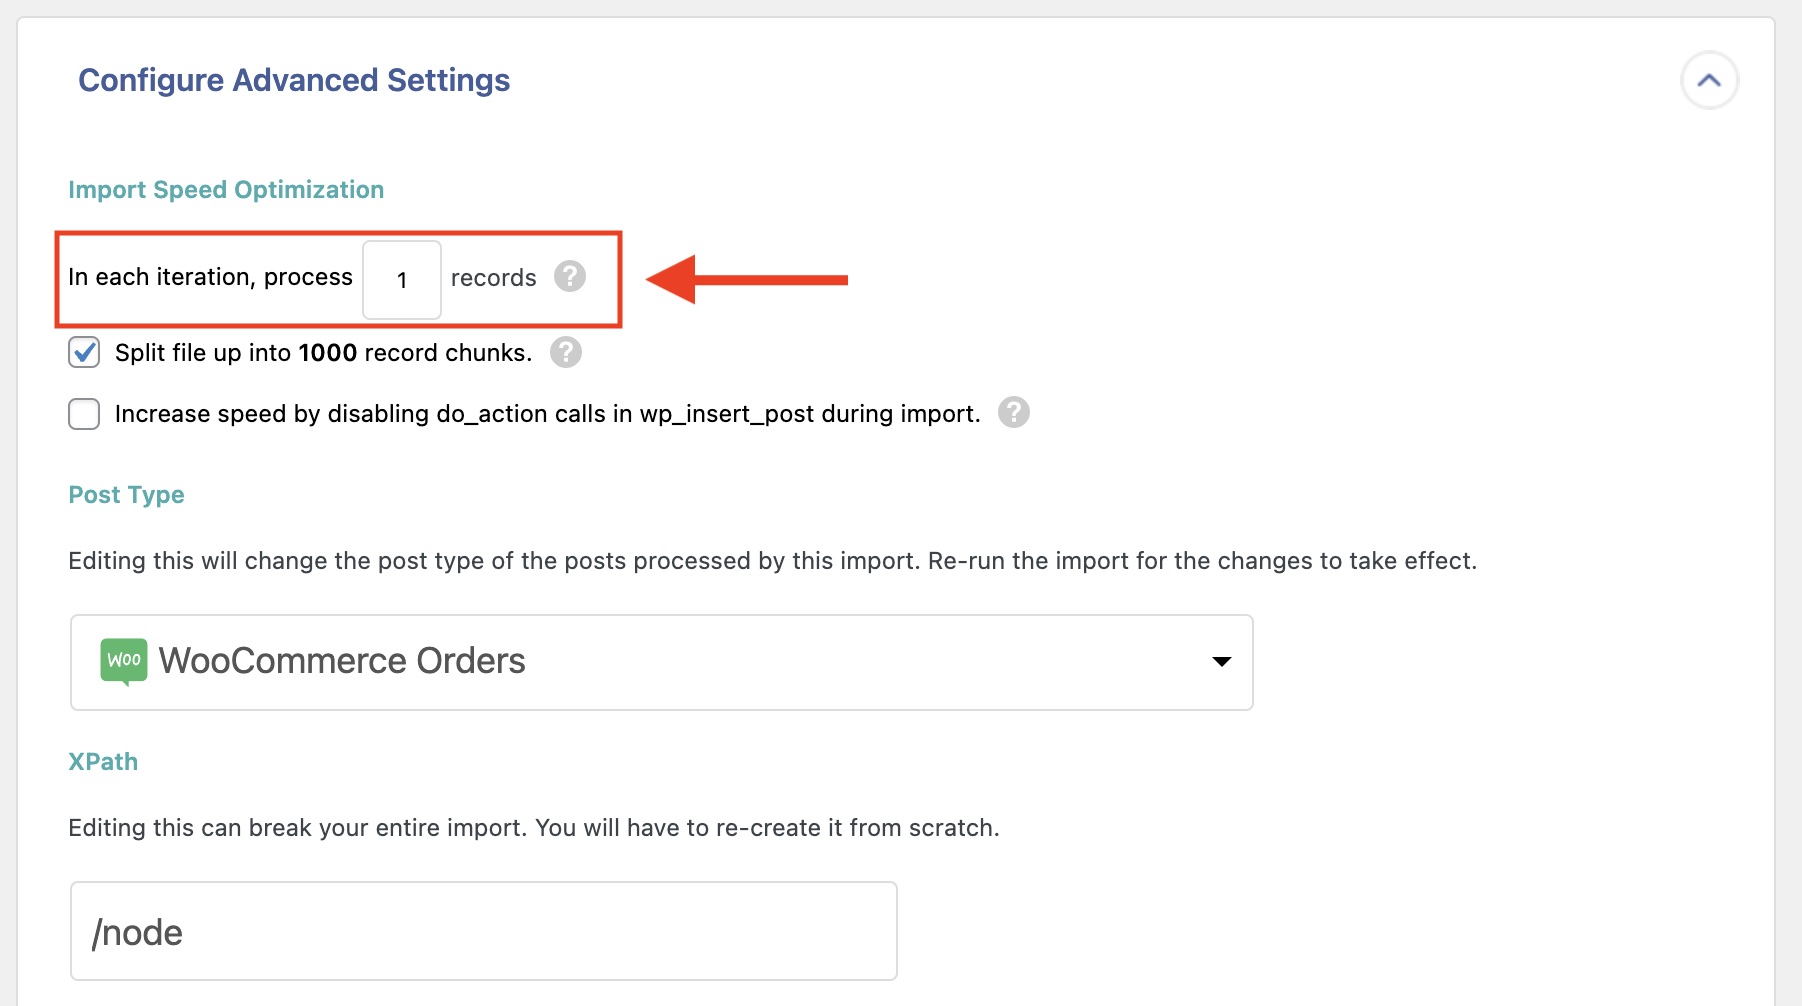
add_action('pmxi_saved_post', 'remove_auto_generated_sku', 10, 3);To make sure that this import works, set the records per iteration to 1 in your WooCommerce order import settings:
Add both code snippets to the Function Editor (All Import › Settings › Function Editor) or in a plugin like Code Snippets.
Migrate WooCommerce Orders – Frequently Asked Questions
Can I Migrate All WooCommerce Order Data, Even Custom Fields Added by Other Plugins?
Yes. Our plugins automatically recognize the custom data fields created by most WordPress or WooCommerce plugins and extensions. The only exception is if a plugin stores its data in a nonstandard way. In this case, just contact our support staff for further guidance.
How Do I Migrate Customers and Orders in WooCommerce?
To migrate customers and orders in WooCommerce, migrate your customers first, then your orders. When you migrate your orders, our plugin will help you link your orders to your customers. You can also add products to the mix, in which case the sequence is customers, products, and then orders.
How Do I Synchronize WooCommerce Order Data Between Sites?
- Generate an export bundle file with your desired WooCommerce orders.
- On the destination site, import the bundle file from Step 1.
- Set up both the export and import to run automatically using our scheduling tool.
- Make sure to test this process before putting it into production.
Note, if you also need to synchronize customers and products, you will need to repeat the above process for them, as well. You will also need to follow the recommended sequence of synchronizing customers and products before orders.
How Does Your Plugin Differ From Other Plugins That Migrate WooCommerce Orders?
Other plugins migrate your database and overwrite the data on your import site. Our plugin gives you far more control. If you wish, you can configure it to overwrite only the data that you want to overwrite. It even allows you to modify that data while importing or exporting it.
How Do I Export Orders from WooCommerce?
- Navigate to All Export › New Export.
- Choose WooCommerce Orders as the export post type.
- Use our Drag & Drop interface to configure your export columns.
- Run the export.
- Download your export file.
To learn more, see How to Export WooCommerce Orders to CSV, Excel, or XML.
How Do I Import Orders Into WooCommerce?
- Navigate to All Import › New Import.
- Select the method for importing your orders (i.e., upload a file, use a URL, etc.).
- Choose an import file and your import target (i.e., WooCommmerce Orders).
- Map the incoming data elements to the WooCommerce order fields using our Drag & Drop interface.
- Run the import.
See How to Import WooCommerce Orders for more information.
What Add-Ons Do I Need to Migrate WooCommerce Orders?
To migrate WooCommerce orders, you need to have both the WooCommerce Import Add-On and WooCommerce Export Add-On active on your site, along with WP All Import and WP All Export.
Migrate WooCommerce Orders – Related Docs
Describes the plugin features for migrating WooCommerce orders.
Export WooCommerce orders to CSV, Excel, or XML.
Learn how to import WooCommerce orders.
Migrate WooCommerce customers from one website to another.
Move WooCommerce products from one website to another.
