Remove or Modify Data Missing From the Import File
WP All Import features several ways to sync your WordPress site with your import file. You can run an import and remove all posts not found in your import file, regardless of how those posts were added. Or, you can run an import on a recurring basis, adding posts newly added to the import file/feed and removing posts no longer in the file/feed without touching the other posts on your site.
Remove or Modify Posts That Are Not Present in This Import File
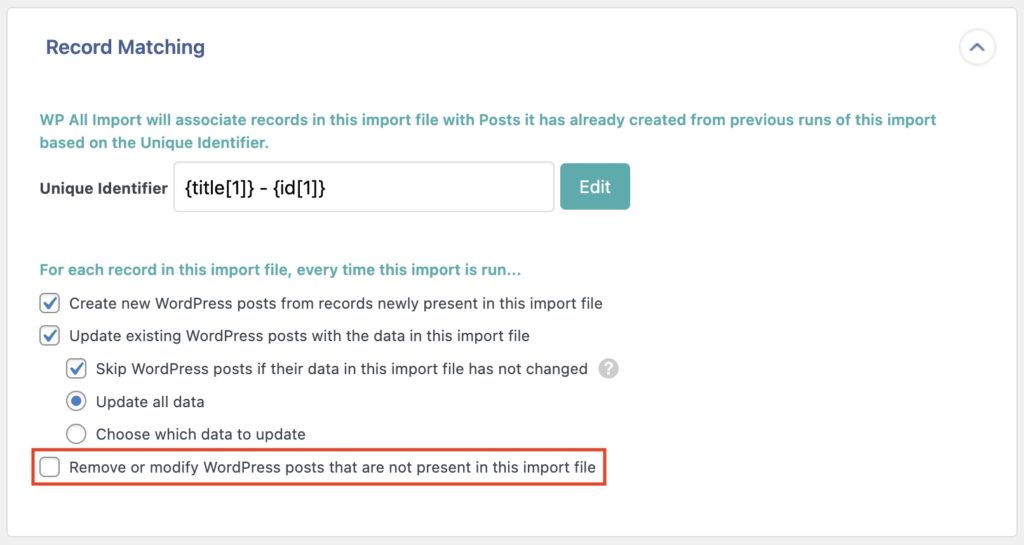
This setting is found on the import settings page when creating the import template. For existing imports, simply navigate to All Import › Manage Imports, locate the import where you want to enable it, and click on Settings.
Once there, enable the Remove or modify WordPress posts that are not present in this import file checkbox.

This setting is available to both New Items and Existing Items imports.
If you don't need this behavior anymore or want to disable it, you can do so at any time, simply uncheck this setting and save the import settings.
There will be notices shown for your import after this is enabled. Even though we only explain how to use this setting for WordPress posts, it's used in the same way for other post types.
Which Posts Do You Want to Remove or Modify?
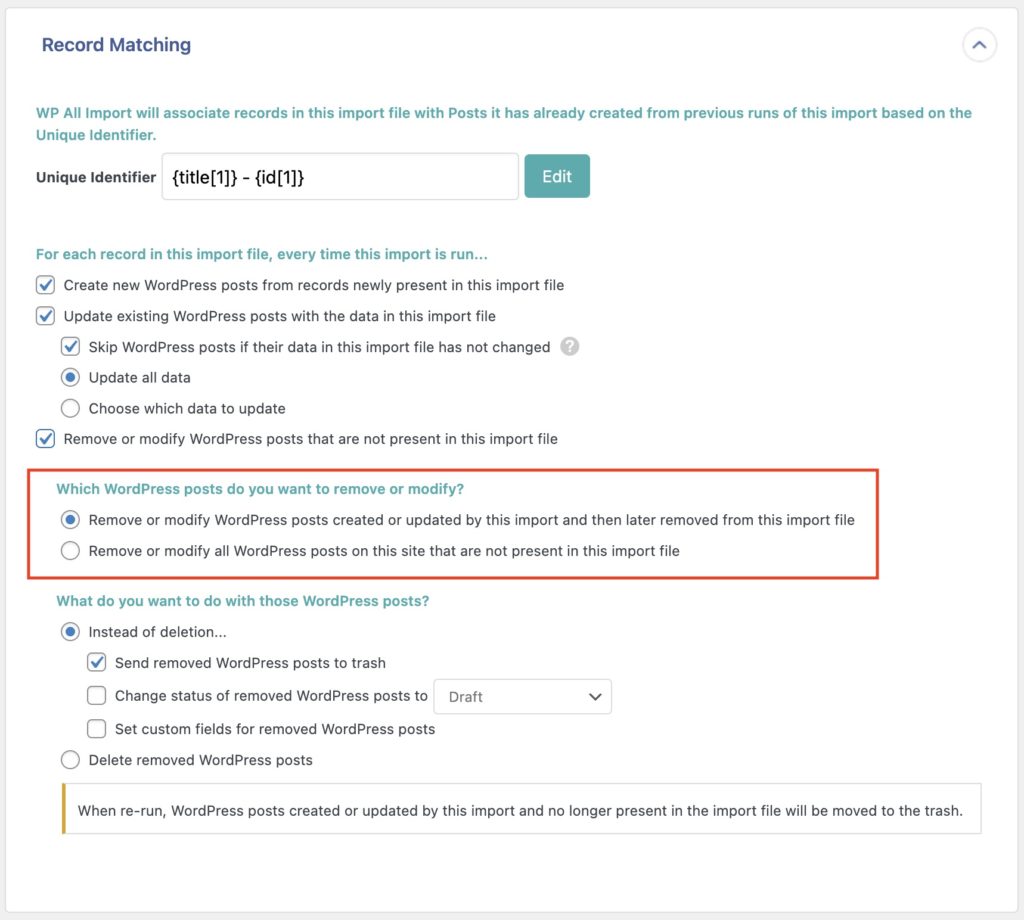
After enabling this setting, you'll be shown its available options. First, you decide which posts to target.
The first option targets posts created or updated by this import and later removed from the import file. This is selected by default.
The second option targets all posts from the site which aren't present in this import file. It would even target manually created posts.

Real World Examples for Each Option (using WooCommerce Products)
Below you'll see two different real-world examples that apply to each option:
a) Remove or modify WooCommerce products created or updated by this import and then later removed from this import file

Let's say that you have a product feed provided by your supplier. You can use that product feed to manage the products from that specific supplier: import new products, update existing ones, and delete missing ones.
To delete missing products and only target the products from this feed, you would choose this option. It targets products created or updated by this import and later removed from the import file.
b) Remove or modify all WooCommerce products on this site that are not present in this import file

On a different example, let's say that you have some existing products, but you want to replace all products from your site with the products from your XML feed.
You want the import process to kill/delete all existing products and keep only the newly imported ones. You can do so with this option.
The import process runs daily, with new products being added and old ones being removed. After running the import and removing everything, you can go back and change from this option to only target products from this file (option a from above). That way, you can later add new products manually, and they won't be deleted.
This option targets all WooCommerce products that exist on your site but aren't present in your import file, even if those products weren't created or updated by this import before.
What Do You Want To Do With Those Posts?
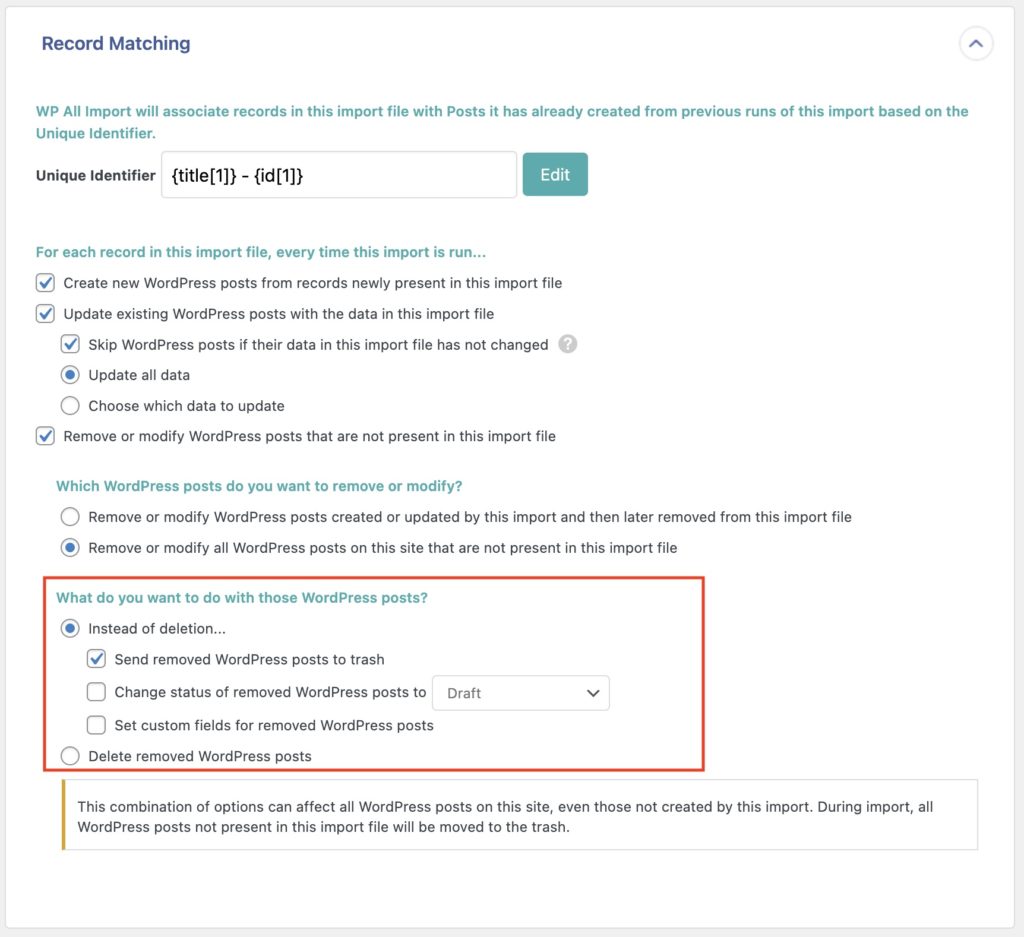
Once you choose which posts to target, you'll be asked a second question, where you decide what happens to those removed posts.
Below that, you will see a notification message telling you what to expect whenever the import is re-run. That notice will update and reflect any changes made to this setting.

Instead of deletion...
Instead of deleting the targeted post, take a different action. You can select multiple options:
Send removed WordPress posts to trash
This is enabled by default and will simply send to the trash any post that's found missing from the import file.
Change status of removed WordPress posts to {Draft}
This allows changing the post status of the removed posts to a different one. Available options: draft, pending review, private, and published.
Set custom fields for removed WordPress posts
Once enabled, you can input a name and a value to set a custom field for the removed post. You can add multiple custom fields.
Delete removed WordPress posts
By enabling this, you would completely remove any missing records from the site, skipping the trash altogether. This cannot be undone, so ensure you've done a site backup before enabling this.
If chosen, you will also have the option to delete files and images attached to the removed WordPress posts.
Example of How To Set Missing Products as Out of Stock
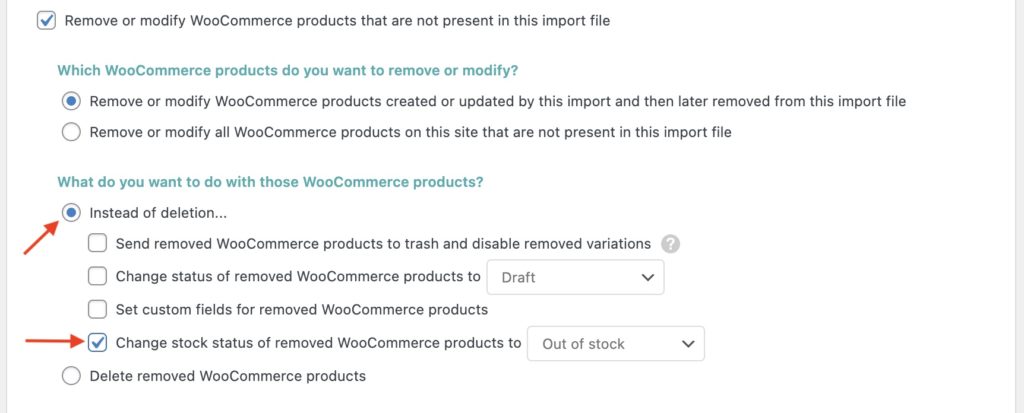
For example, let's say that you have a feed to handle WooCommerce products. You've previously imported this feed, and now it has some removed products. But, you don't want to trash or delete those products removed from your feed. Instead, you want to change their stock status to out of stock. You would simply choose:
Instead of deletion › Change stock status of removed WooCommerce products to Out of stock.

That's it!

Import Any CSV, XML, or Excel to WordPress
- Any theme or plugin
- Images & galleries
- Custom fields
- Categories & tags
- Woo, ACF, Meta Box, JetEngine
Backups and Potential Problems
Be Cautious Targeting All Posts
Exercise caution whenever you choose the option Remove or modify all WordPress posts on this site that are not present in this import file, as it will include all records existing on your site, even manually created posts.
You should also exercise caution when skipping the trash and choosing to delete removed posts, as this action cannot be undone, and you wouldn't be able to recover the removed records unless you have a site backup.
Try in Sandbox
As a rule of thumb, you should be trying this option along with its possibilities on a staging copy of your site, or in a risk-free environment like our sandbox.
That way, you can validate that everything works as expected and that you get your desired results without damaging your site.
You should also always test this option by sending removed records to the trash, instead of deleting them immediately.
You Say That I Should Have Backups. Why?
You should have site backups because it's the only way to ensure that you can roll back to a previous version in case something goes wrong. For example, if you encounter issues after running the import, or if you suffer unwanted data loss.
There will be a modal popup before saving the settings explaining this and confirming that you have such backups. It will also explain what the import will do once it's re-run.
Please ensure that you have valid and correct site backups when using this setting, as fully deleted records cannot be recovered. Do not proceed with the import until you have backups.
Related Docs
Learn how to use cron jobs to automate your imports.
Learn more about how to set up and use recurring import processes.
Step-by-step instructions on how to manually target and update WordPress data.