How to Import WordPress Posts with Images
To import WordPress posts along with their images, go to All Import › New Import and upload your import file. Choose Posts from the dropdown list, then set up your import process, including the images you want to import.
Execute the import and then review the imported posts and their images.
The following video shows how to do this. Although it focuses on importing images for WooCommerce products, the same information applies to WordPress posts.
Table of Contents
- Step 1: Create a New Posts Import
- Step 2: Review the Import File
- Step 3: Map the Incoming Data
- Step 4: Configure the Import Settings
- Step 5: Run the Import
Advanced Topics
- Import Images From an FTP Source
- Import Images From an External Source
- Import Variable Number of Images Per Post
Step 1: Create a New Import for WordPress Posts
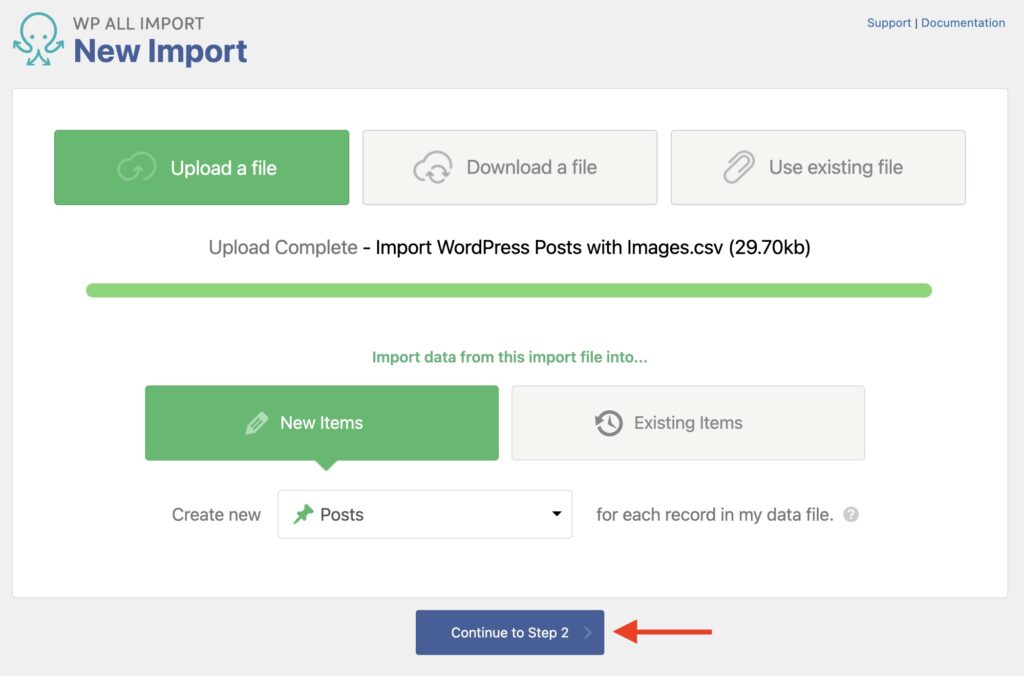
Go to All Import › New Import and upload your import file. Select Posts from the dropdown list of available post types to import, then click Continue to Step 2.
Step 2: Review the Import File
In the Review Import File screen, you can review the posts and images to import. If you see any problem with the import data, edit your import file and repeat this process.
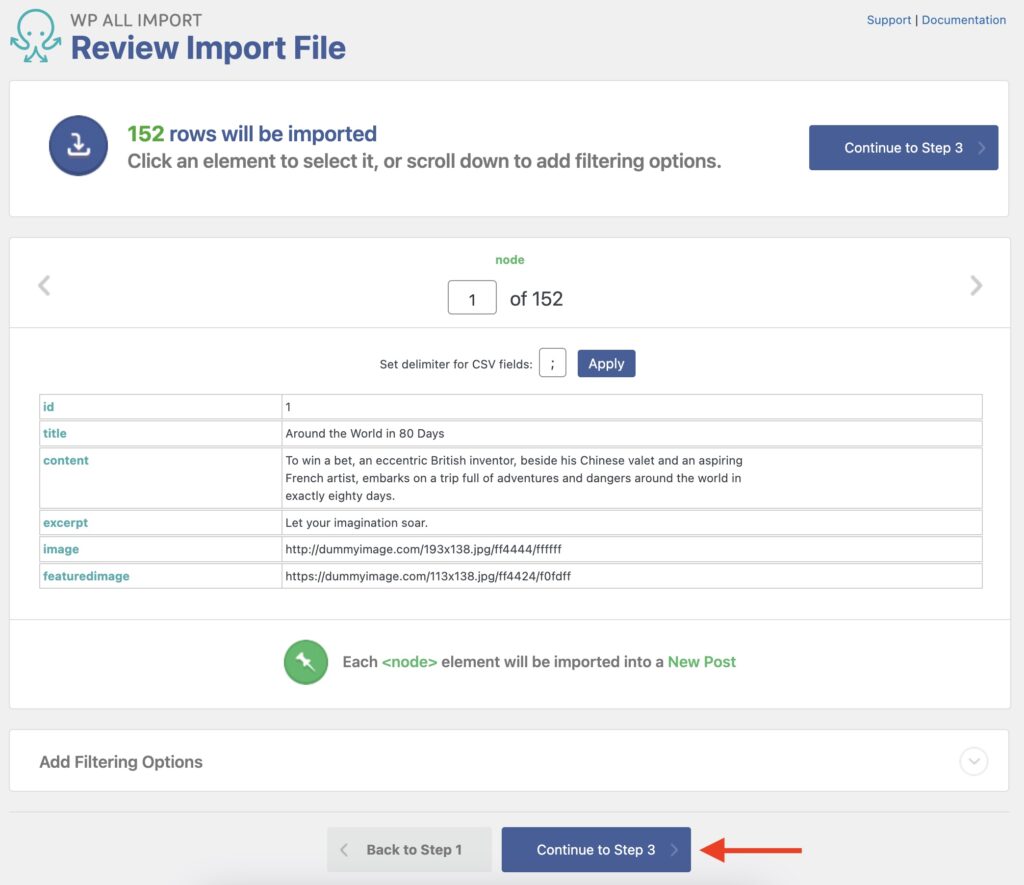
In this screen, you can add filters using the Manage Filtering Options section, which lets you decide which records should be imported instead of importing everything contained in your import file.
Once done, click Continue to Step 3.
Step 3: Map the Incoming Data Elements to the Correct Post Fields
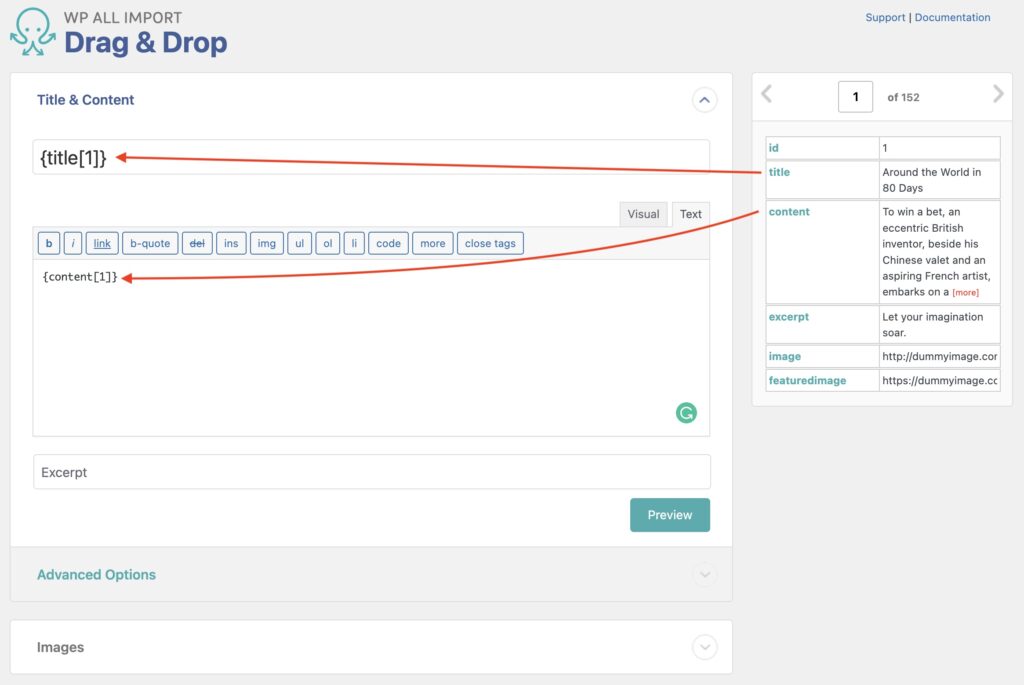
Now you see the Drag & Drop screen, where you build the template that's used for the import. To add fields, drag them from the right panel to the appropriate target field on the left.
Title & Content
Map the title, content, and short description first:
Below this section, you will find the Images section.
Post Images
Here, you define which images should be imported into each post. This includes the featured image.
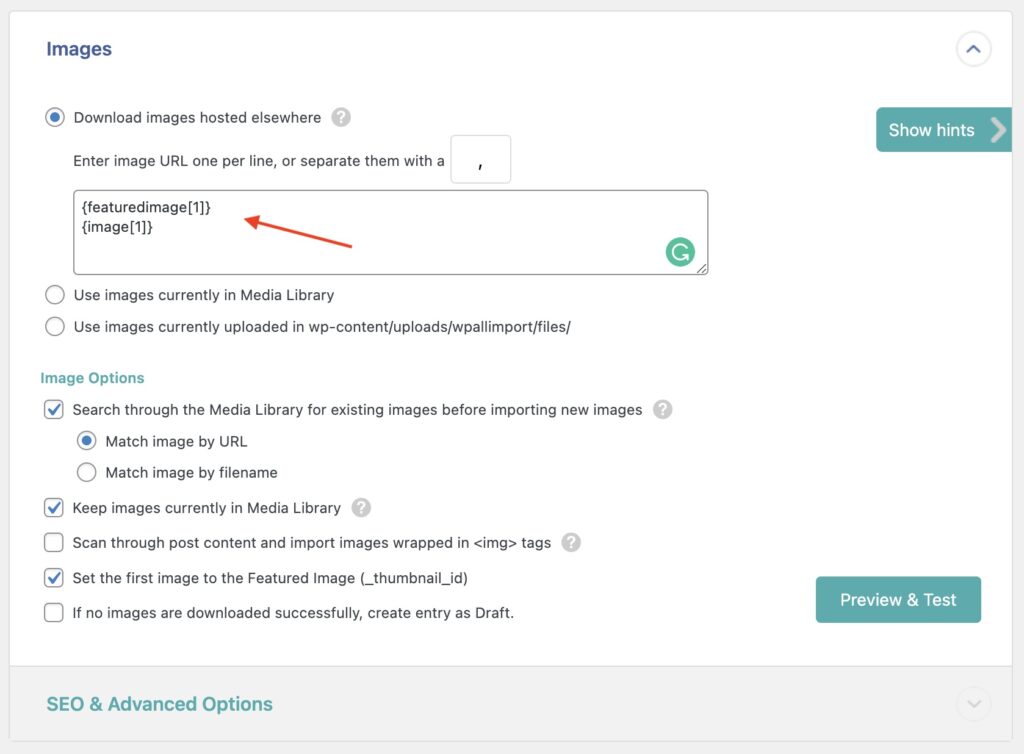
The options here provide different methods to import your images:
Download images hosted elsewhere
This is the default option, which uses direct URLs to download the images. The images will be added to the Media Library once they're imported.
Use images currently in the Media Library
If the images for the import already exist in the Media Library, you can use this option instead of downloading new images. In this case, you just need to import the image filenames.
Use images currently uploaded in wp-content/uploads/wpallimport/files/
If you have the images on your computer, you can upload them to this folder and use this option. The images will be added to the Media Library upon import. Again, all you need to provide here are the image filenames.
Images Options
These options are self-explanatory and also contain a "help" tip when necessary. That said, here is a brief explanation for each:
– Search through the Media Library for existing images before importing new images
Enabled by default. If an image with the same file name or remote URL is found in the Media Library, then that image will be attached to the imported record instead of downloading a new image. Disable this setting to always download a new image.
– Keep images currently in Media Library
Enabled by default. When disabled, all images attached to the imported post are deleted from the Media Library, forcing the images to be imported again.
– Scan through post content and import images wrapped in <img> tags
This option will search through your post content for <img> tags. If found, those images will be downloaded and added to your Media Library, and the old image URL in the content will be updated to the newly imported image. This ensures that you are hosting the content images.
– Set the first image to the Featured Image (_thumbnail_id)
Enabled by default. This assigns the very first imported image as the Featured Image or _thumbnail_id for this record.
– If no images are downloaded successfully, create entry as Draft.
When enabled, even if you define that all posts should be imported with a Published post status, any post that doesn't contain a valid image will be created as a Draft.
SEO & Advanced Options
Under this panel, you can add metadata to the images (such as title, caption, alt text, and descriptions) and change the image file names and extensions.
There are other sections below, but we won't go over these now. Once everything is mapped, click Continue to Step 4 at the bottom of the page (not shown).
Step 4: Configure the Import Settings
Next, you see the Import Settings screen, where you define the remaining import settings and configurations.
Click on Auto-detect to create a unique identifier, which allows WP All Import to distinguish between posts.
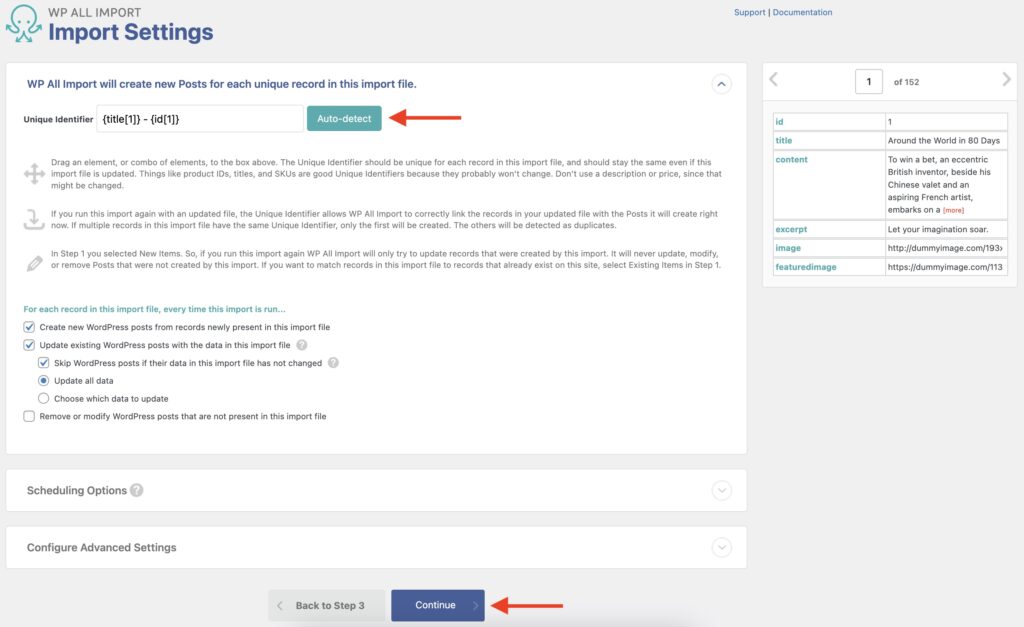
In this same panel, you define how the import behaves whenever it's run again. For example, you can tell the import to update specific pieces of data for previously imported posts, or to delete posts missing from the import file.
You also have two other panels: Scheduling Options and Configure Advanced Settings. We'll leave these untouched for this example.
Click Continue at the bottom to go to the next step.
Step 5: Run the Import and Review the Imported Posts with Images
You now see the Confirm & Run screen with an import summary:
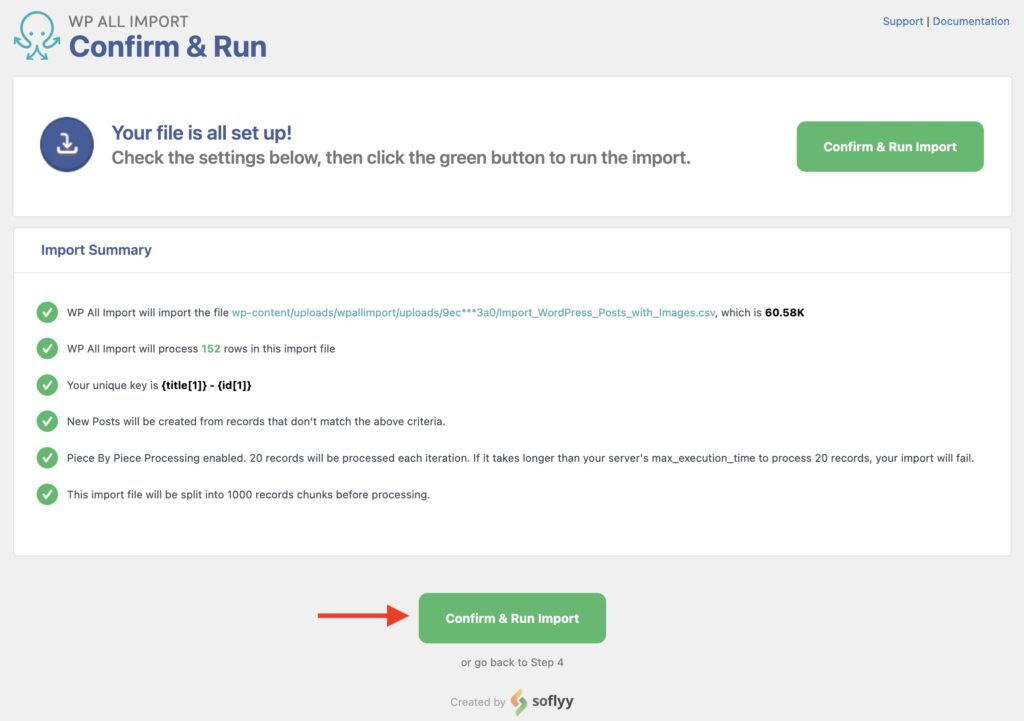
After you verify that everything is correct, click Confirm & Run Import to execute the import. Once it completes, you'll see this screen:
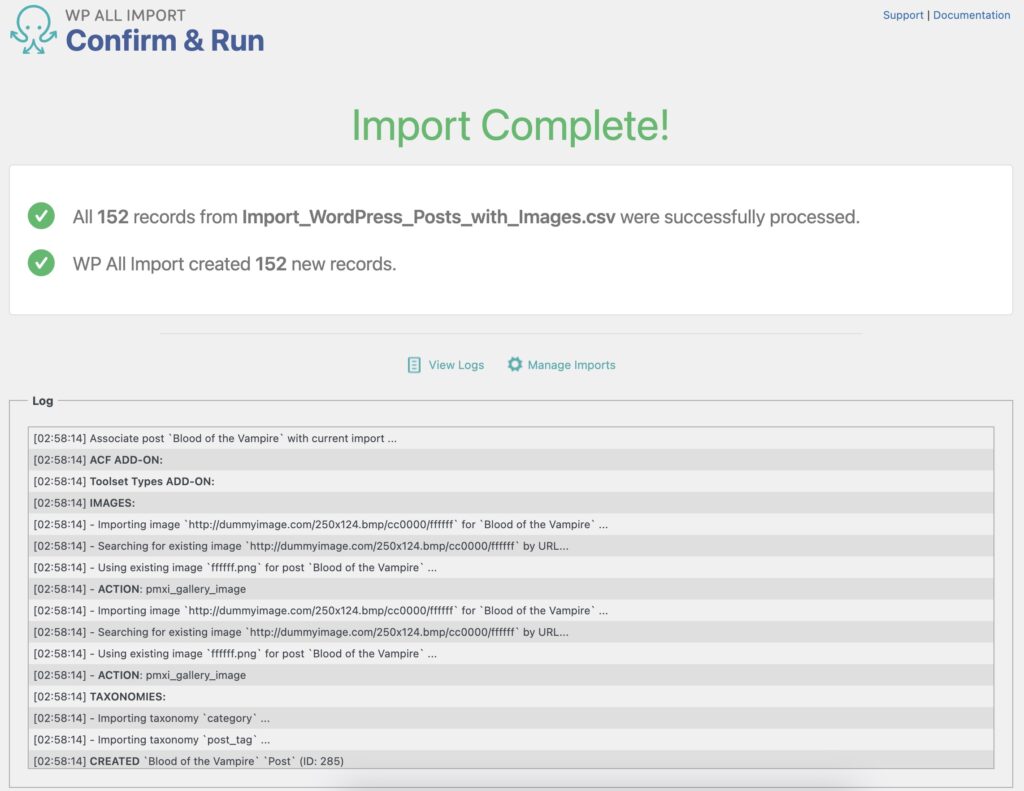
You can then navigate to Posts › All Posts and check that the posts and their images were correctly imported.

Import Any CSV, XML, or Excel to WordPress
- Any theme or plugin
- Galleries & images
- Images from any source
- Woo, ACF, Meta Box, etc
Import WordPress Posts with Images — Advanced Topics
Import Images From an FTP Source
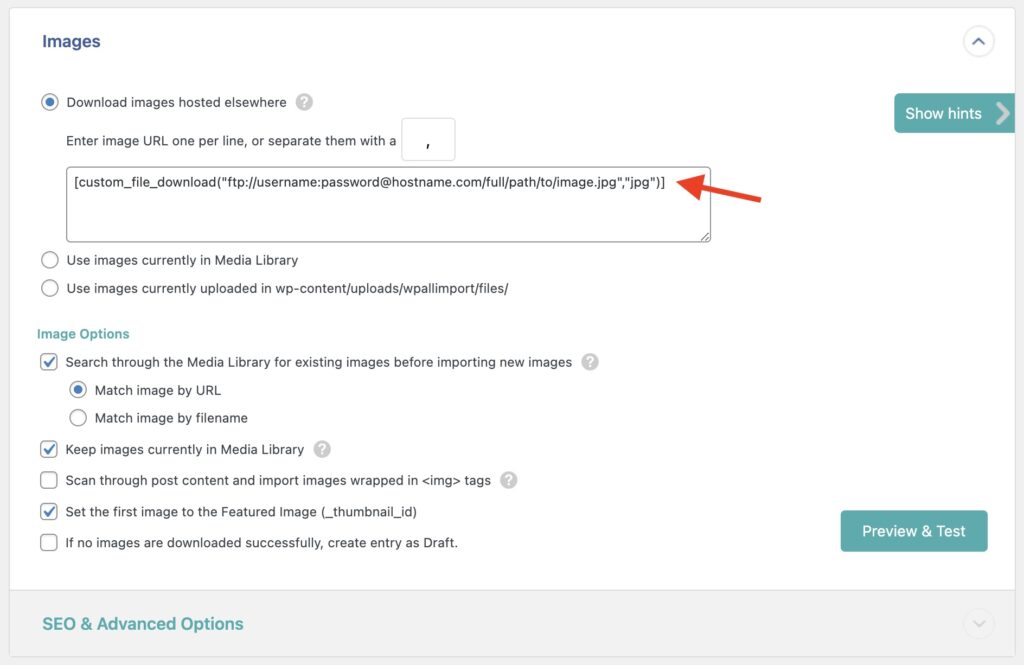
To import images from an FTP source, you need to use the Download images hosted elsewhere option along with a custom PHP script that downloads your image from the FTP source and returns it.
You can use the code from the Workaround for Importing from FTP to achieve this:
Import Images From an External Source
You can import images from most external sources. Most of the time, you simply use the default option Download images hosted elsewhere, and input the URLs to the images.
If you don't have a direct link to the image, for example, when images are stored on Google Drive, you need to generate and provide direct URLs.
If the images are protected by HTTP auth, you can use the same instructions as explained in Password Protected Files.
Import Variable Number of Images Per Post
In some cases, your import file may contain multiple images per post, which is especially typical with blog posts. Here are the most common scenarios:
Option A: Image URLs Stored In A Single Column Or Element, And Separated By A Character
You can input multiple values and separate them by a comma (selected by default), though the separator can be updated when required. You can type in this data manually to apply it to all records or use import elements to apply it dynamically based on your import file.

Option B: Image URLs Stored In Different CSV Columns or XML Elements
To include all possible import elements with image URLs, just enter one per line. If there are empty elements, they will be ignored, so you can safely add all possible XPaths:

Option C: Use an XPath Query or a FOREACH Loop
With XML files, there may be multiple child elements with the exact same name. Example XML:

You can use an XPath query to output a comma-delimited list with the image names from that example XML:
{images/image/@src}
Or, you can use a FOREACH loop to traverse through each child element, allowing you to add extra data that's also returned:
[FOREACH({images/image})]
http://www.example.com/my-folder/{@src},
[ENDFOREACH]
Import WordPress Posts with Images — Frequently Asked Questions
How Do I Import a Featured Image in WordPress?
- Create your import via WP All Import.
- In Step 3, in the Images section, add your images import element.
- Enable the option Set the first image to the Featured Image (_thumbnail_id).
- Run the import.
- Verify that the imported image(s) are correct.
Learn more about the import process in the Import Quickstart guide.
How Do I Export a WordPress Post with Pictures?
- Go to All Export › New Export.
- Choose Posts from the dropdown list.
- Add the image columns and everything else you need to export.
- Run the export and download the export file.
- Verify that the exported data is correct.
Learn more in Exporting WordPress Posts with Images.
How Do I Migrate WordPress Posts and Their Images?
- On the export site, go to All Export › New Export.
- Choose Posts and then Migrate Posts.
- Download the exported bundle file.
- On the destination site, upload the bundle file.
- WP All Import will automatically configure itself based on the bundle file's contents.
- Finish the import to complete the migration.
Learn more about this process in the Migrate Quickstart guide.
Import WordPress Posts with Images — Related Docs
Learn about the differences between a "New Items" and "Existing Items" import.
Learn how to import WordPress posts using WP All Import.
Learn more about how to set up and use recurring import processes.