Send Exported WordPress Data via Email using Zapier
Zapier can be used to send an export file via email. Connect Zapier to WP All Export and create the required trigger and action. The trigger executes whenever a new export is found. The action then sends the export file via email using Gmail.
Watch the video tutorial below to see how easy it is:
For text instructions, please continue reading below:
Trigger: New Export File in WP All Export Pro
Learn more about connecting to Zapier and setting up the trigger here: How to Send Exported WordPress Data to Zapier.
Action: Send Email in Gmail
Choose app & event
Once the trigger is configured and tested, Zapier will prompt you to select an action.
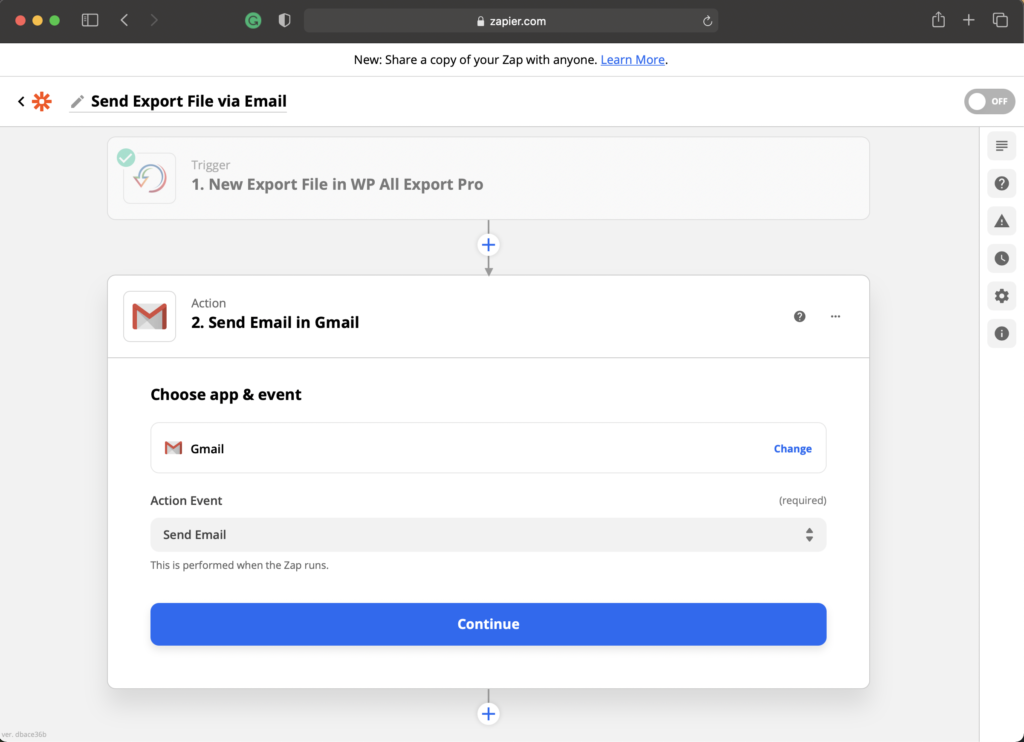
Choose Gmail as the app and Send Email as the event, then click Continue.
Choose Account
Zapier will ask for the Gmail account to use. If there's no account connected, select + Connect a new account from the dropdown list and follow the steps.
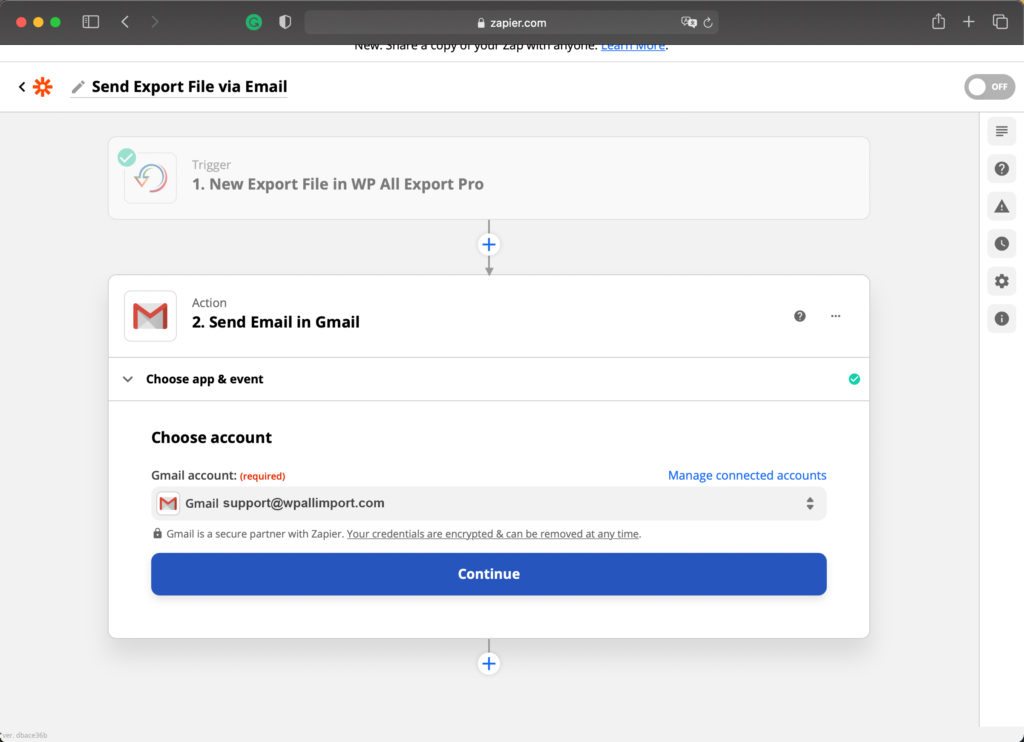
Once the account is selected, click Continue.
Set up action
This section allows you to set up the email that will be sent.
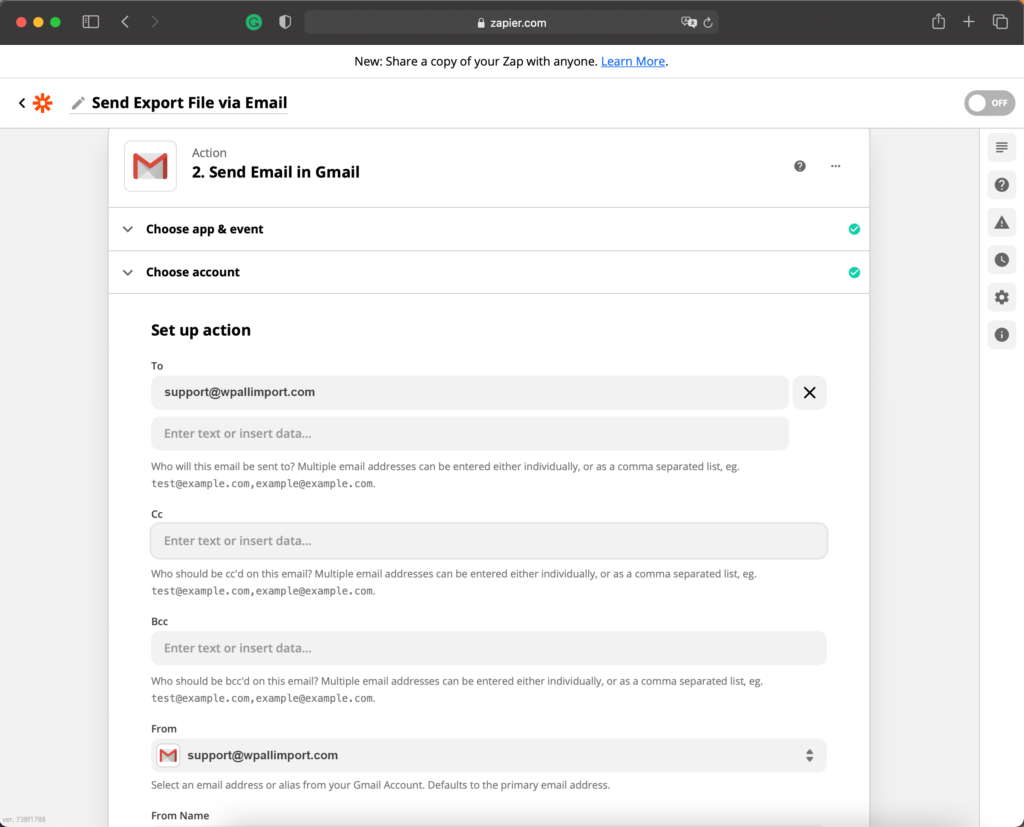
The following can be configured:
- To: Who will this email be sent to? Multiple email addresses can be entered as a comma separated list.
- Cc: Who should be cc'd on this email? Multiple email addresses can be entered as a comma separated list.
- Bcc: Who should be bcc'd on this email? Multiple email addresses can be entered as a comma separated list.
- From: Select an email address or alias from your Gmail Account. Defaults to the primary email address.
- From Name: Used to define a different "From" name for the email.
- Reply To: Specify a single reply address other than your own.
- Subject: Email's subject or title.
- Body Type: Type of content found in the body, plain or HTML.
- Body: Body or content of the email.
- Signature: Include a default signature with the email? Will be placed at end of the message after a line break and another "--" line.
- Label/Mailbox: Used to define a label to sort the email.
- Attachments: The file to be attached. Select Export File from the dropdown list to attach the actual export file.
Click Continue to move on to the following step.
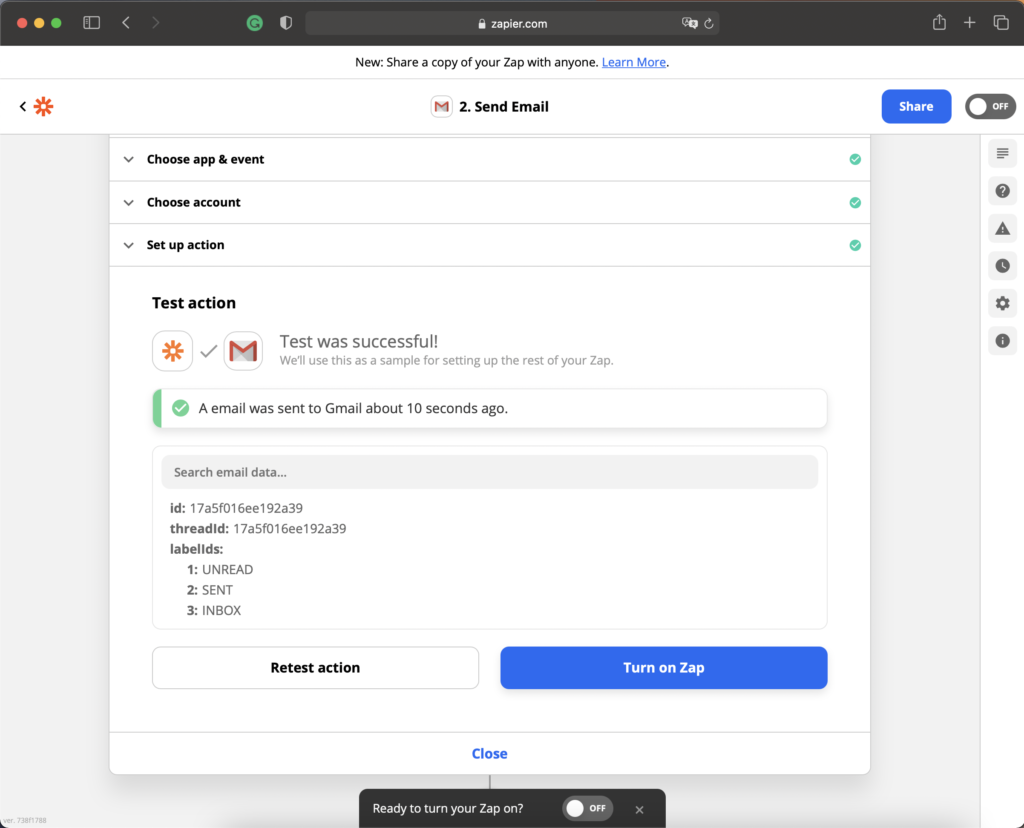
Test action
Once the email has been configured, Zapier will attempt to test the action. Select Skip Test to avoid this step.
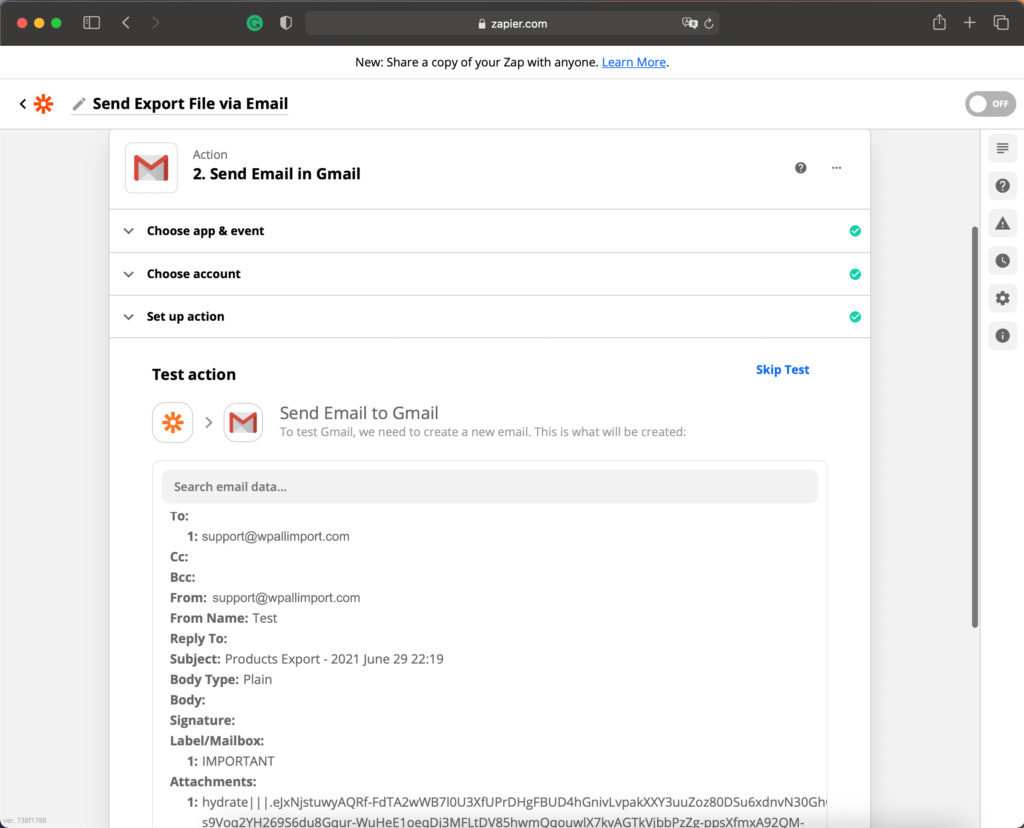
Review all information about the email and click Test & Continue.
Once the test has been completed, click on Turn on Zap to enable the newly created zap.

Export WordPress Data to any CSV, XML, or Excel
- Any theme or plugin
- Images & galleries
- Custom fields
- Real-time exports
- Woo, ACF, Meta Box, JetEngine
Related Docs
Learn how to connect WP All Export with Zapier to send the exported data.
Shows you how to send the exported file to a Dropbox using Zapier.
Quickstart guide that shows you how to export data from WordPress using WP All Export.