The best import export plugin for WordPress & WooCommerce.

How to Import WordPress Categories and Tags
To import WordPress categories and tags, navigate to All Import › New Import. Specify your import source, select Taxonomies for the import type, then choose the specific category or tag as your import target.
Use the Drag & Drop interface to map the incoming data elements to their target fields, then run the import. WP All Import automatically detects all available taxonomies, including custom categories and tags.
Table of Contents
- Understanding WordPress Taxonomies
- Types of Imports
- Step 1: Create a New Import
- Step 2: Review the Import File
- Step 3: Map the Incoming Data
- Step 4: Configure the Import Settings
- Step 5: Confirm and Run the Import
Understanding WordPress Categories and Tags
WordPress uses taxonomies to group posts, products, and other post types together based on relationships. Two taxonomy types are available by default: Categories and Tags. Categories are used to group post topics, while tags are used to describe posts in more detail.
Categories can also contain hierarchies. For example, an e-commerce store may have a Women's Clothing category with subcategories like Winter Wear, Everyday Wear, and Beach Wear. Winter Wear itself may have other subcategories like Jackets, Snow Pants, and Underlayers.
In this model, the Jackets subcategory is considered to be the child of Winter Wear, while Winter Wear is the child of Women's Clothing.
When WooCommerce is installed on a WordPress site, it adds custom taxonomies such as Product categories, Product tags, and Product type, among others. Attributes are also added as a taxonomy.
Plugins and themes are free to add their own custom categories and tags. For example, a fitness company may create categories for Fitness Level and Experience Level so that they can group their members accordingly. They may also add descriptive tags like Shy, Outgoing, Competitive, etc., to help members more accurately describe themselves.
You can read more about WordPress taxonomies here: https://wordpress.org/support/article/taxonomies/.
Importing Taxonomies With Posts vs Importing Taxonomies on Their Own
Taxonomies are usually created when importing posts. However, there may be cases where you want to import categories and tags separately from posts. That is the subject of this tutorial.
We will be using an e-commerce clothing store for this example. Thus, we import Product categories.
Step 1: Create a New Import for WordPress Taxonomies
Navigate to All Import › New Import:

Upload your file, select Taxonomies as the import type, choose the desired taxonomy (such as category or tags), and click Continue to Step 2.
Step 2: Review the Import File
The Review Import File interface allows you to check whether WP All Import has correctly parsed the incoming data:
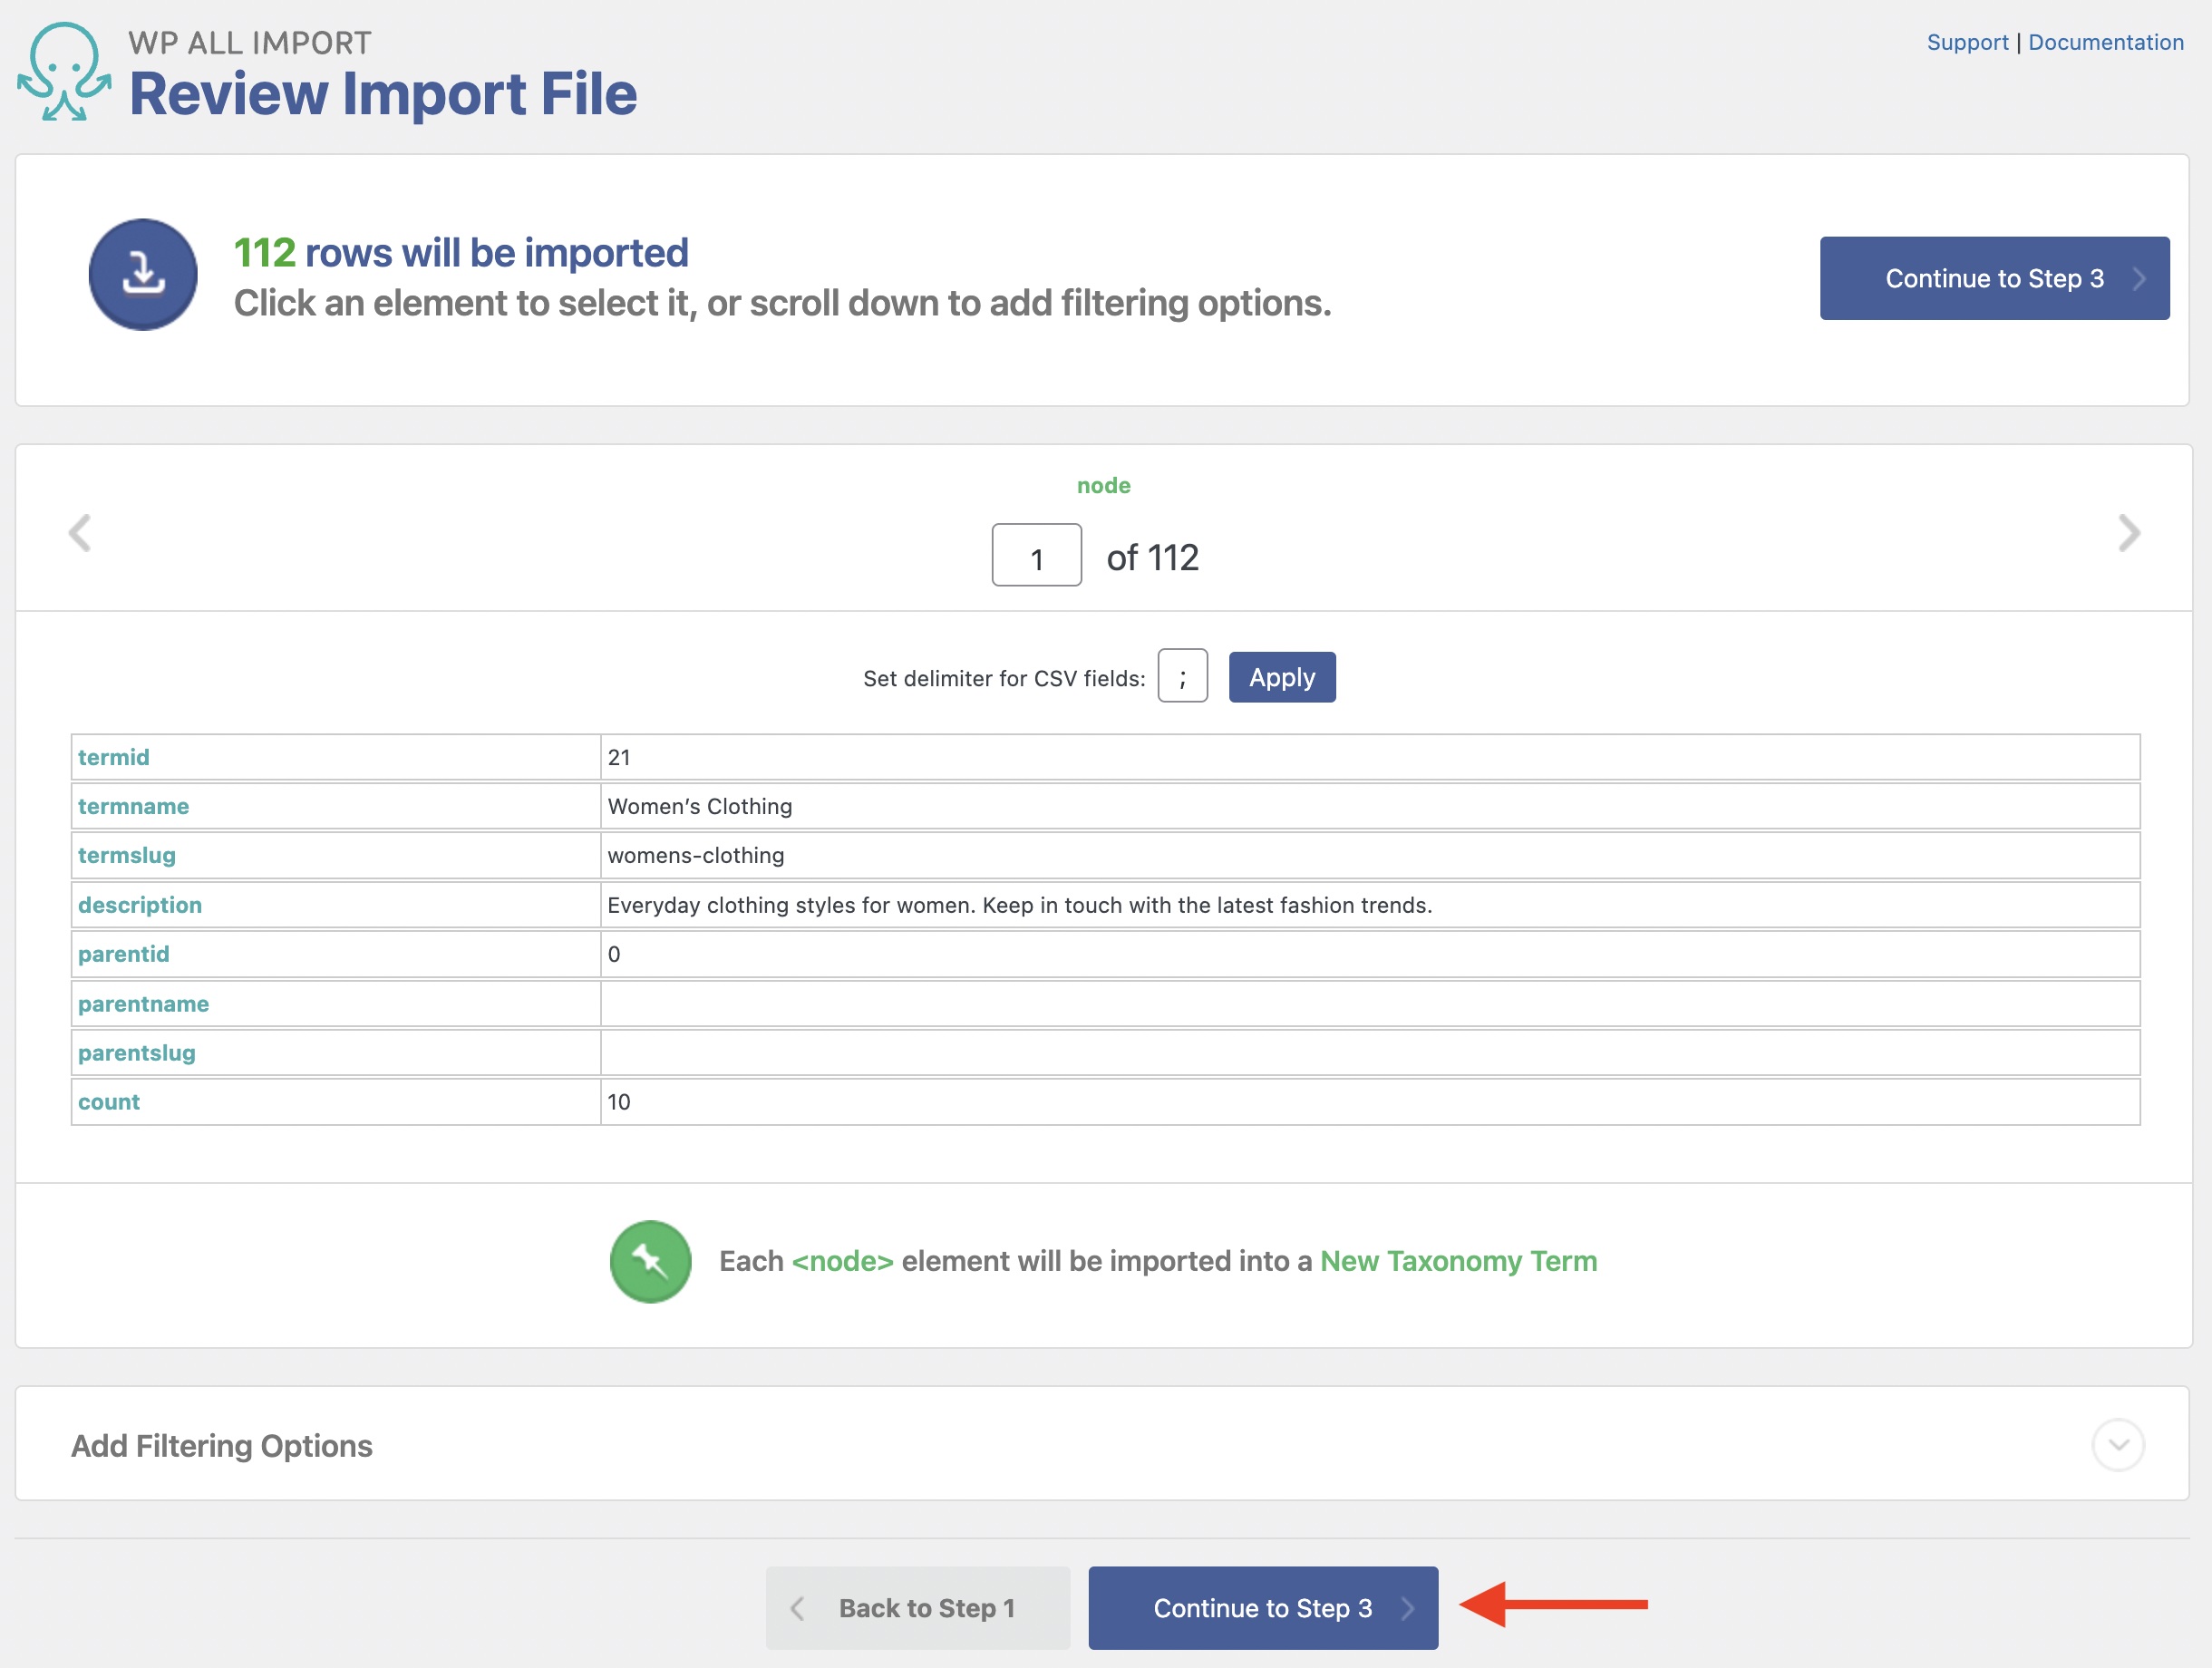
As you can see, WP All Import has detected 112 incoming records. You can use the gray arrows in the top corners of the middle panel to iterate through the individual records.
The data looks good, so click Continue to Step 3.
Step 3: Map the Incoming Data Elements to the Target Fields
The Drag & Drop interface lets you map the incoming data elements to the target fields. To do this, simply drag data elements from the Available Data section on the right to the appropriate fields on the left. In this case, we are dragging the incoming termname and description data elements to the corresponding fields in the Name & Description panel.
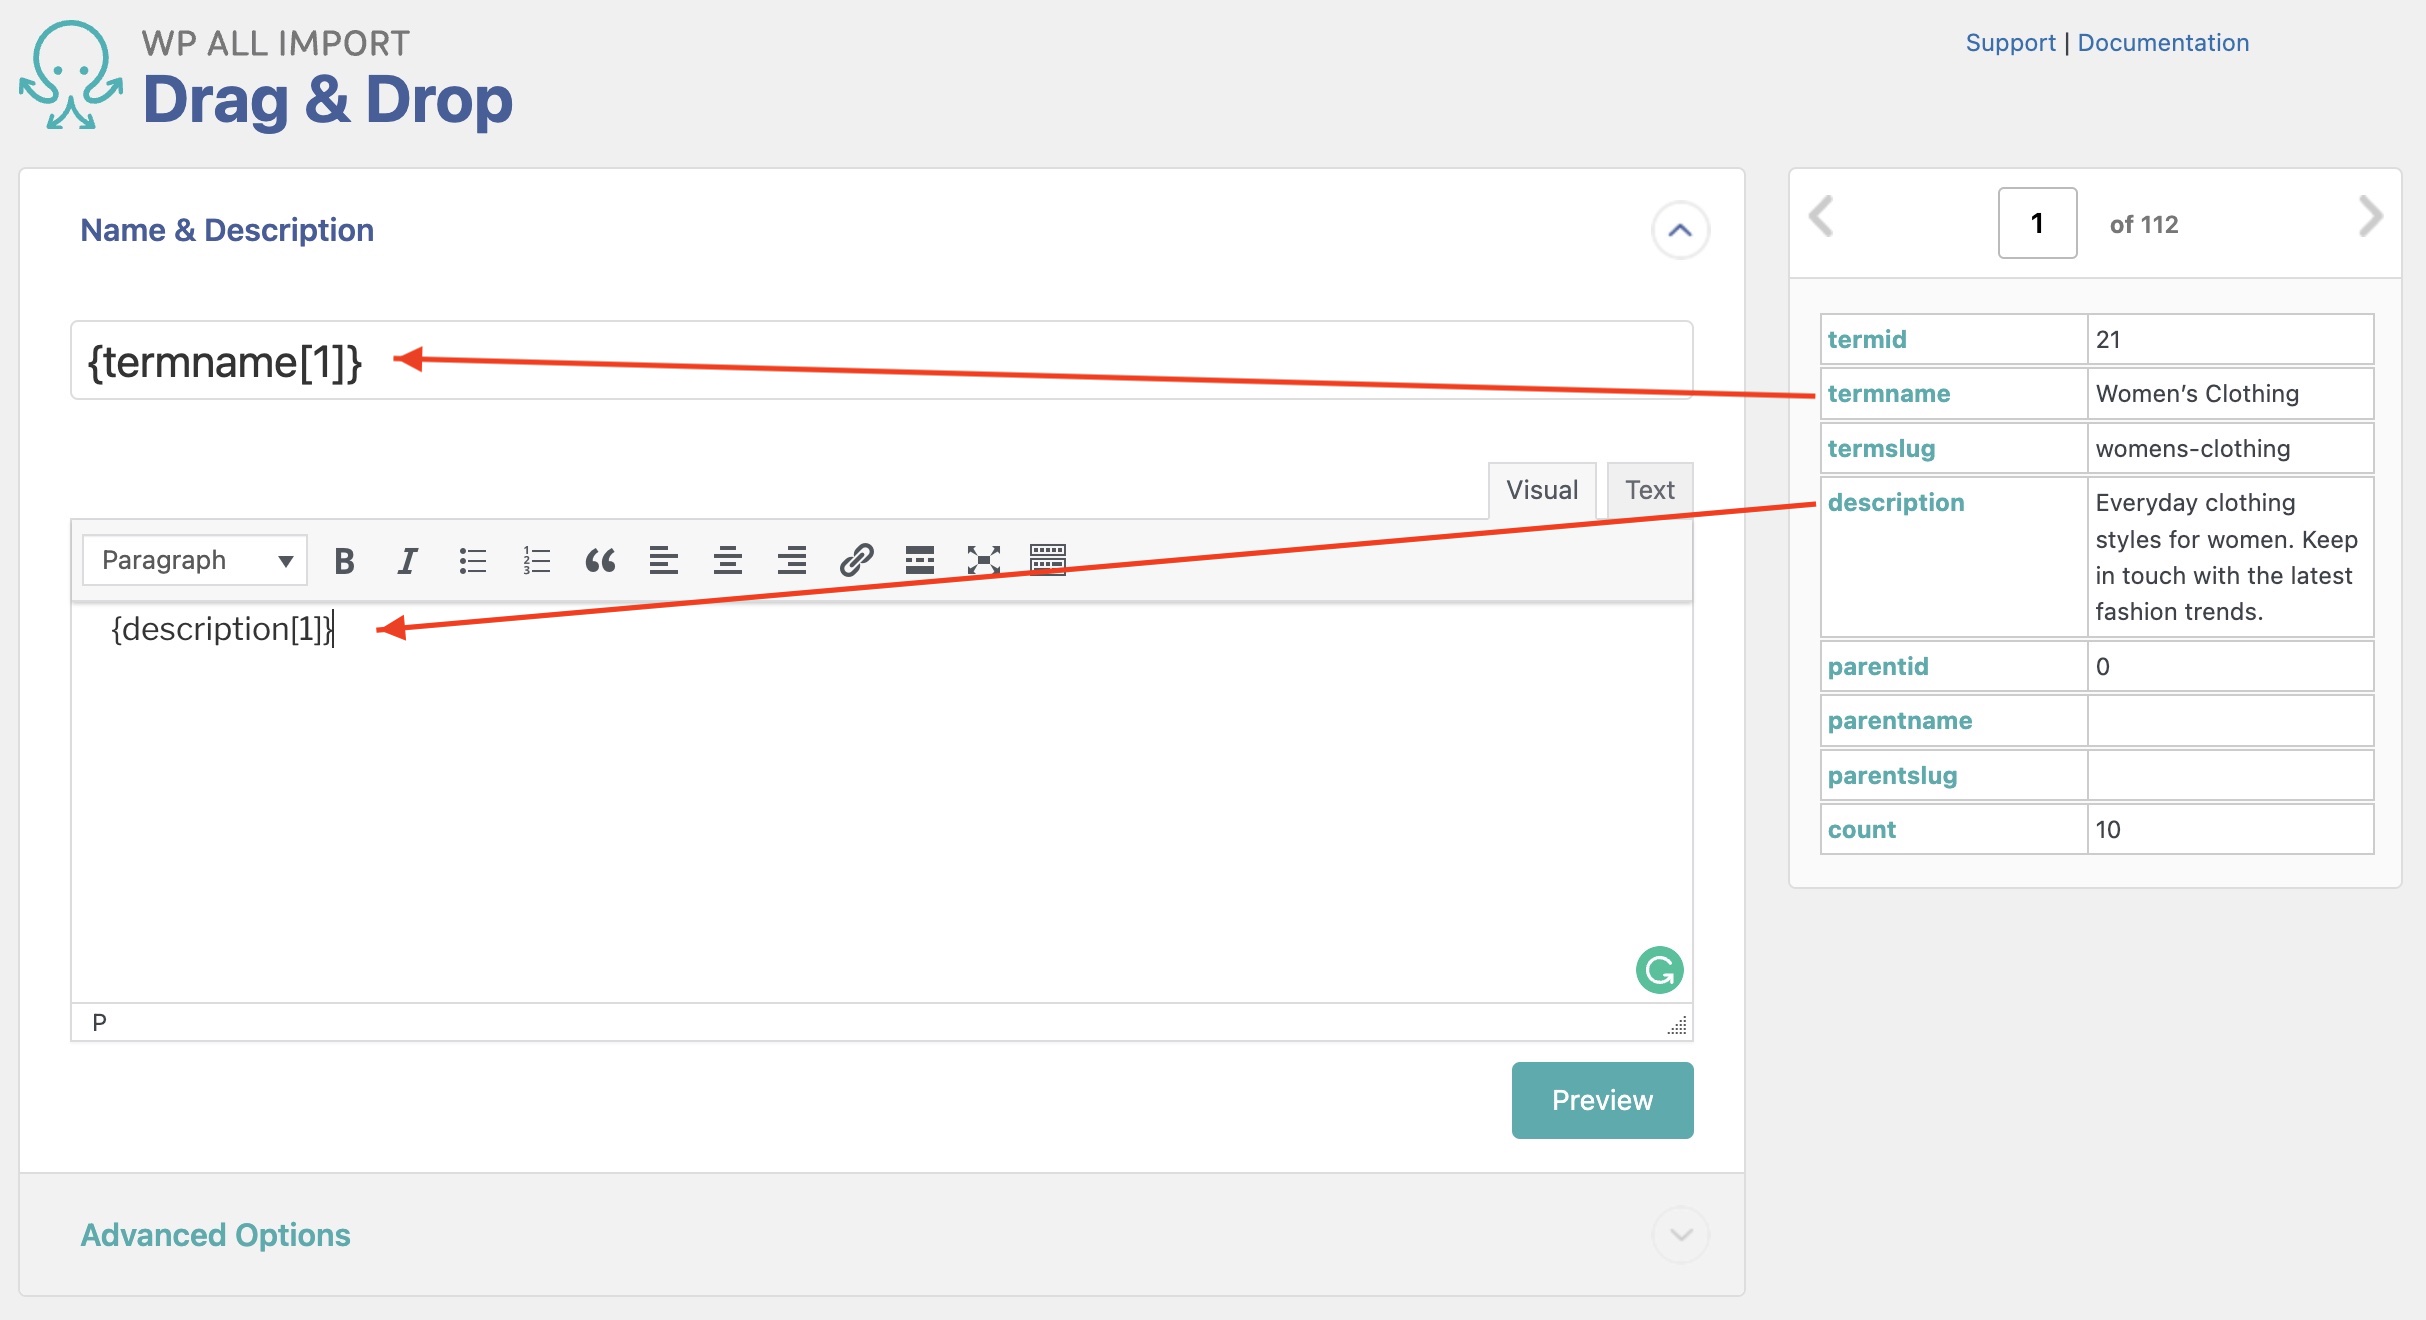
You would take this same action for a tag import and also for most custom taxonomies, provided they adhere to convention.
If you were importing tags, this is the only mapping that is required.
For categories, close the Name & Description panel and expand the Other Category Options panel. Here, drag the incoming parentname data element to the Parent Term field.
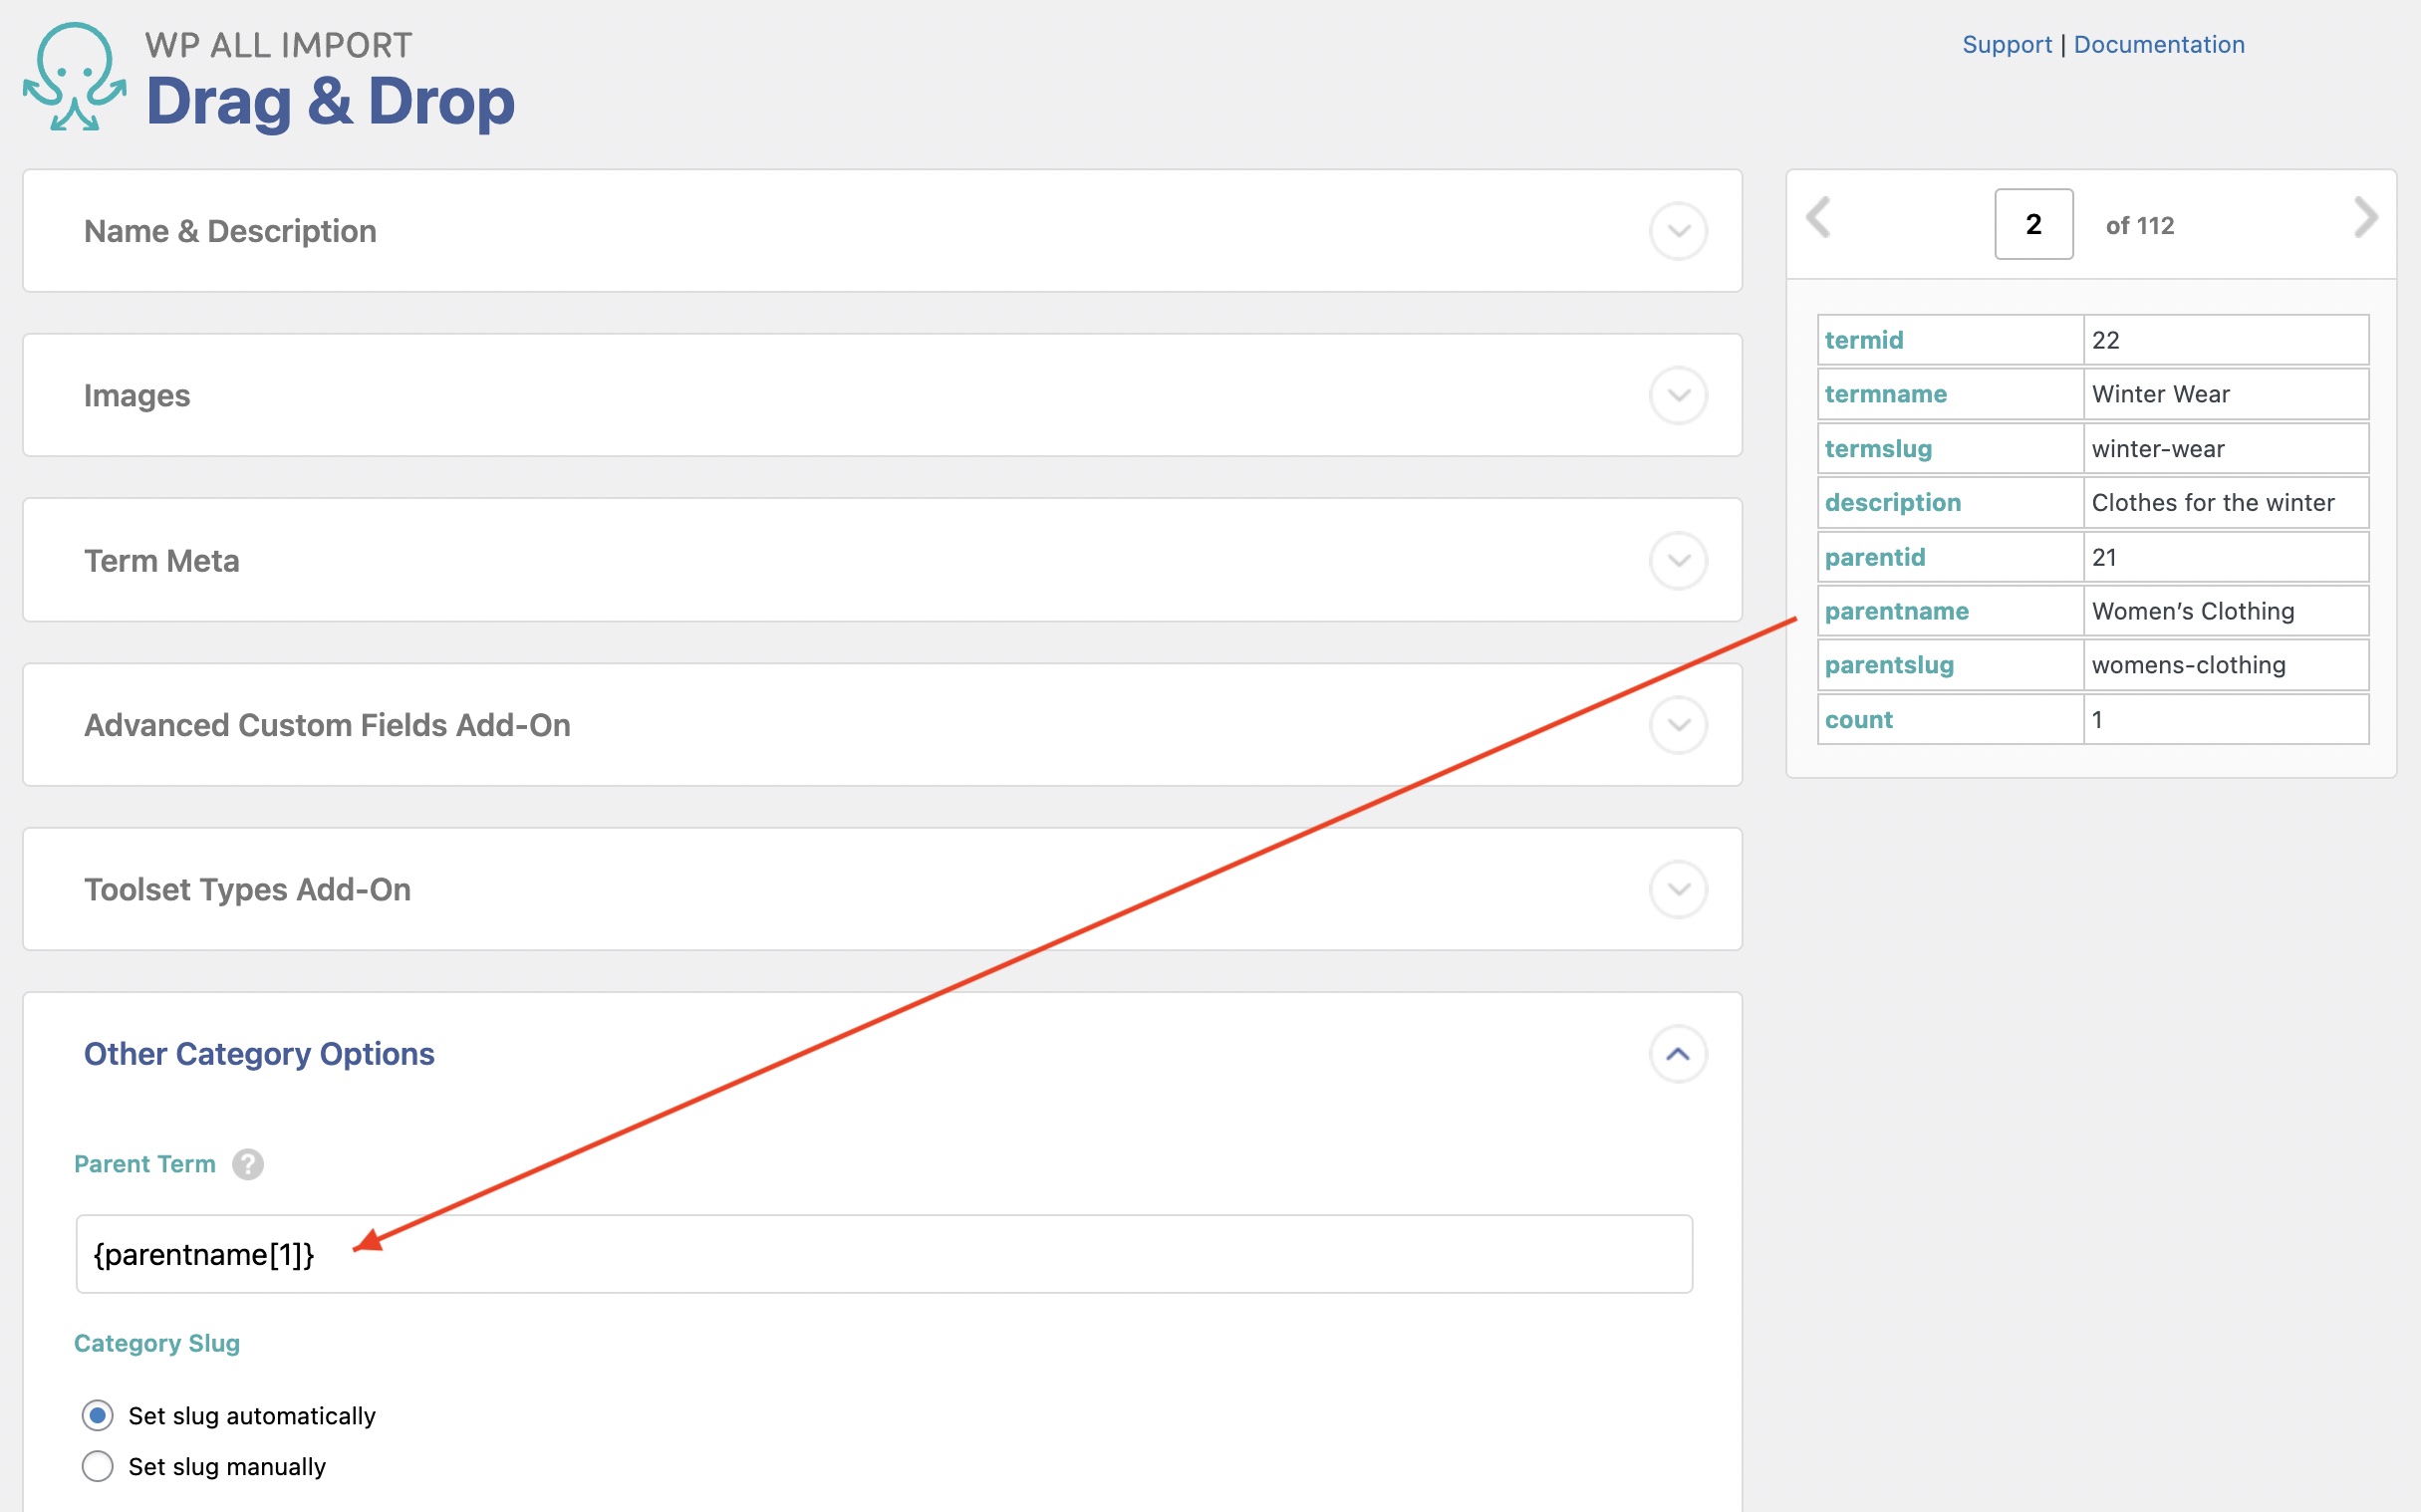
This mapping is used to import the hierarchal relationships between categories. Note that we used parentname here, but we could have also used parentid or parentslug. WP All Import will handle any of the three.
Note, also, that these instructions apply to built-in categories/tags as well as custom taxonomies. However, in some cases, full data mapping may involve custom code.
Click the blue Continue to Step 4 button at the bottom.
Step 4: Configure the Import Settings
The Import Settings screen allows you to configure some important options for your import:

- Click the Auto-detect button. This will automatically identify a unique identifier for the taxonomies in your import file.
- You do not have to worry about this set of options for an import of new categories or tags. But if you re-run this import, this set of options lets you instruct WP All Import on how to handle issues, such as whether the import should delete or update existing categories/tags.
- Click Continue.
Step 5: Confirm and Run the Import
The Confirm and Run screen allows you to confirm some final settings before running the import:

Here you can review the settings in the Import Summary section. Click on Confirm & Run Import to continue.
The import will then run. When it completes, WP All Import will bring up this screen:
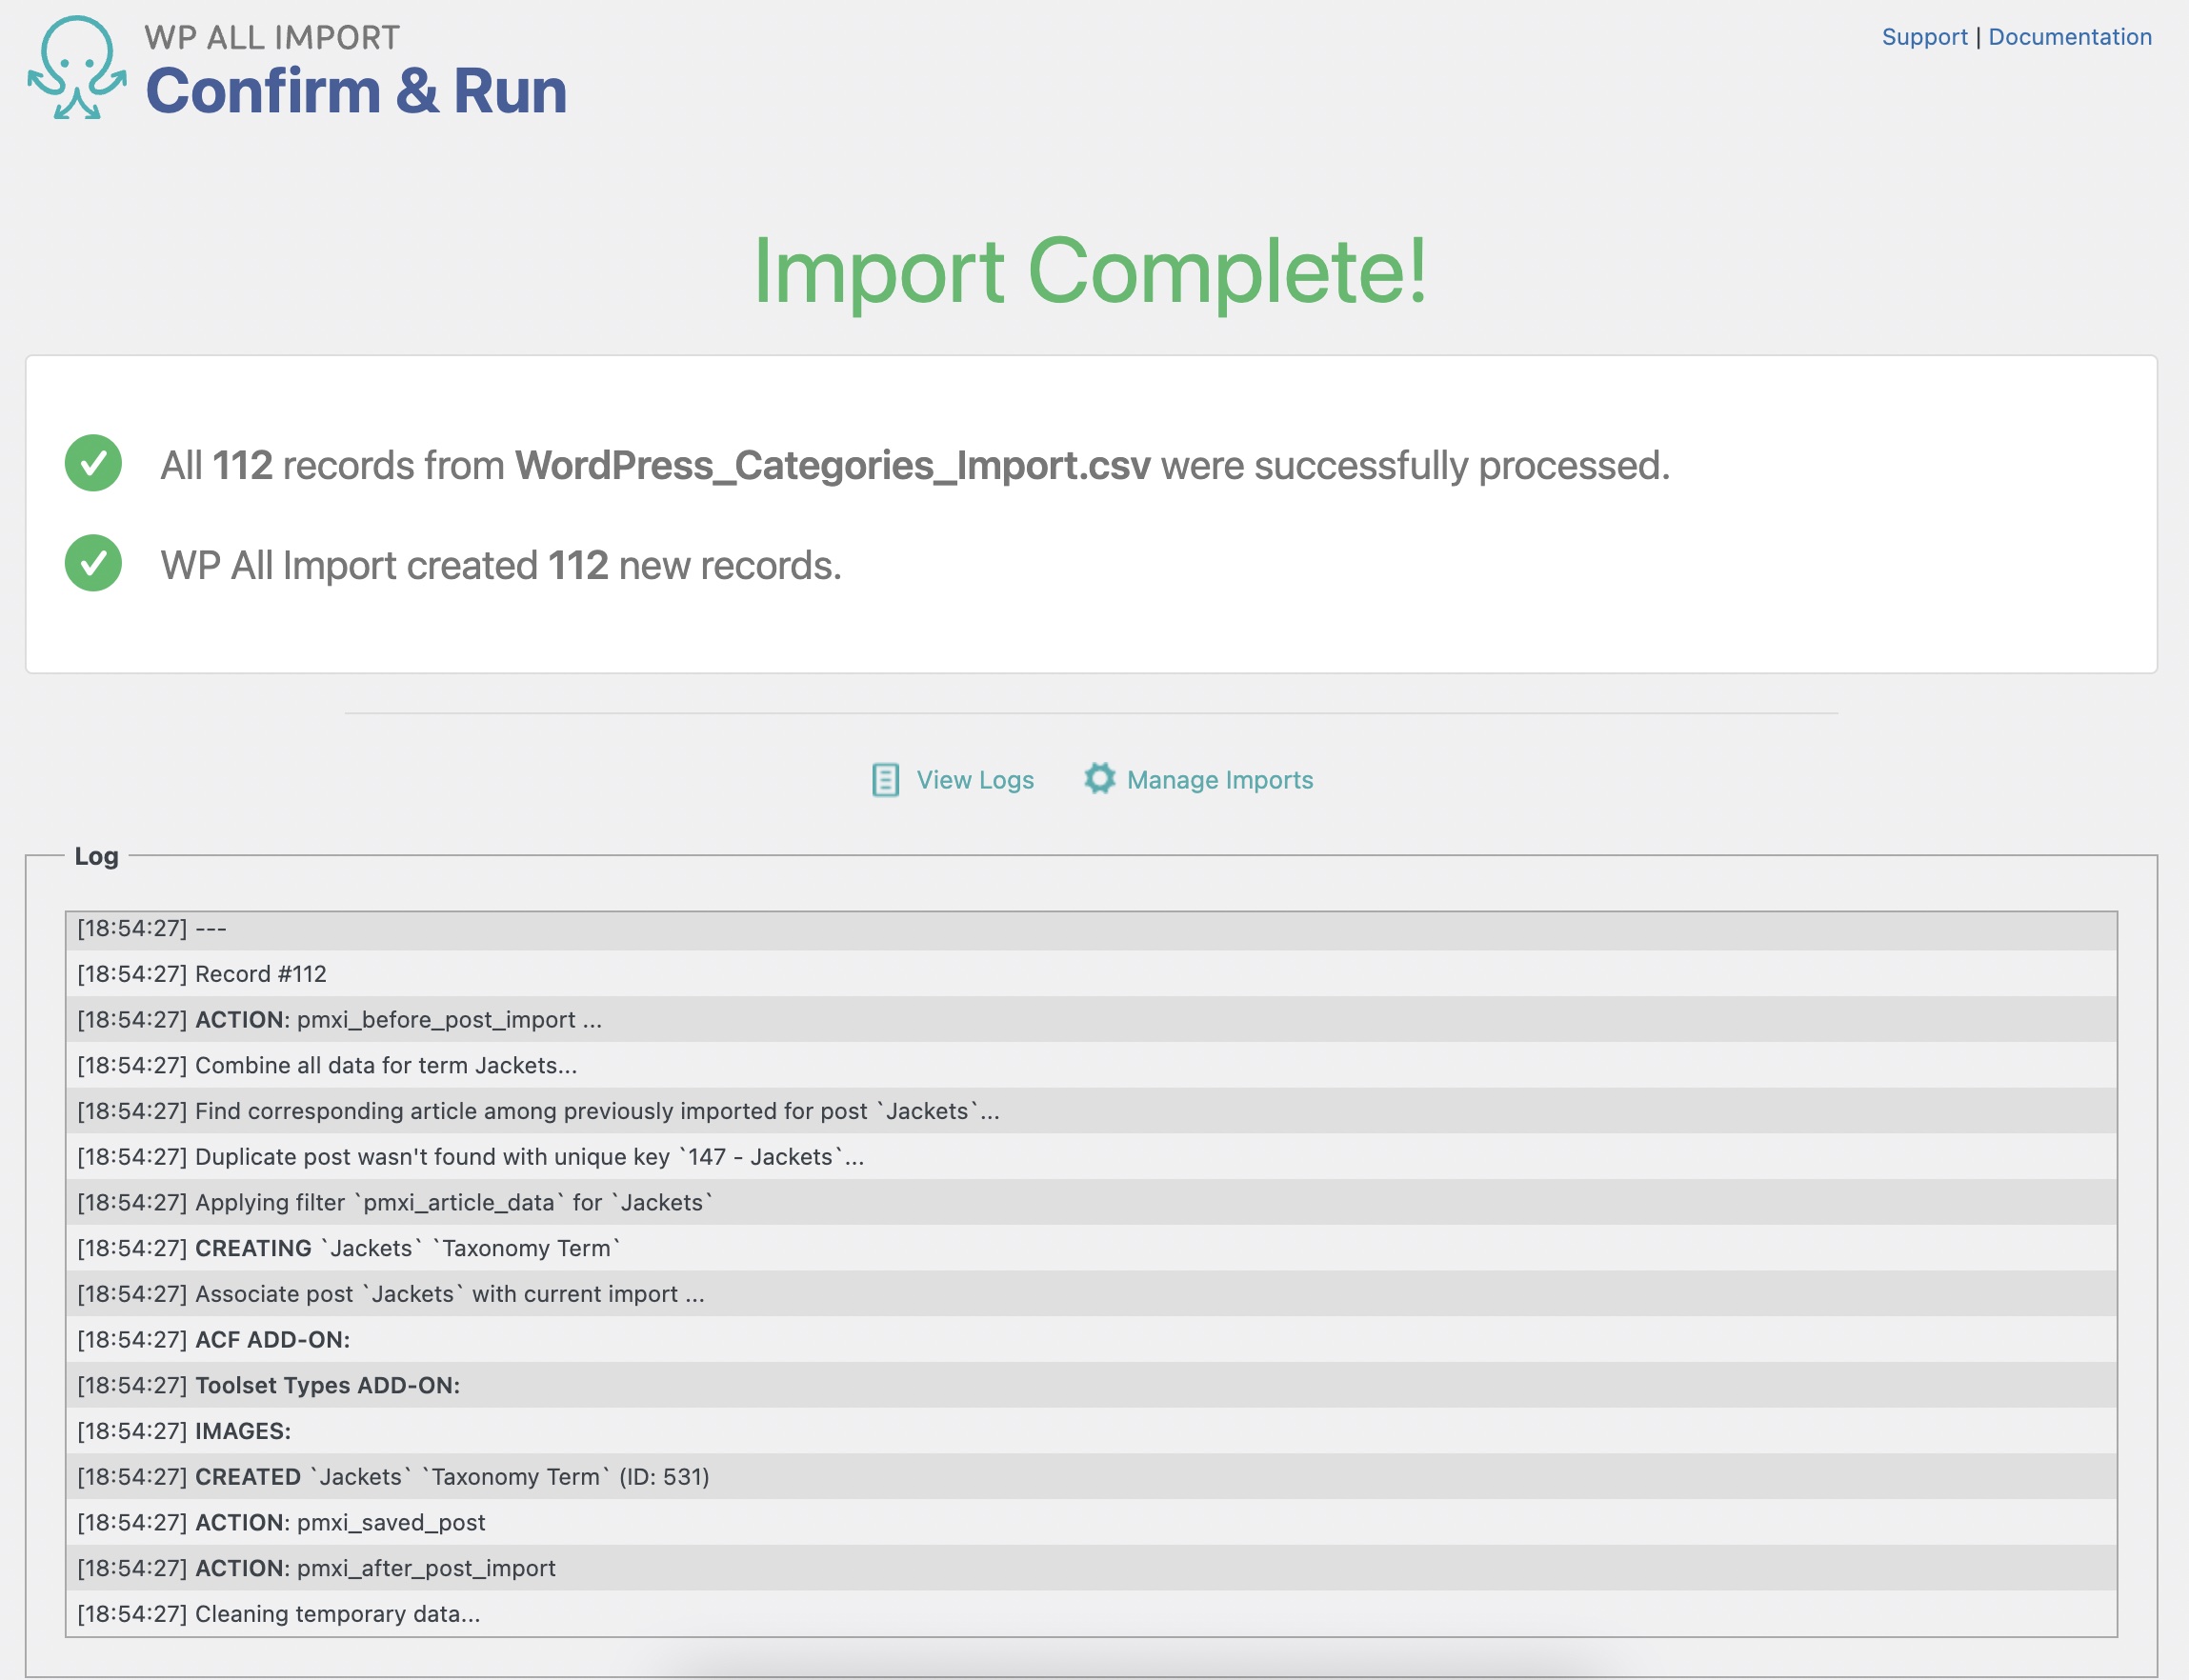
To confirm that everything worked as expected, navigate to Products › Categories in the WordPress main menu. There, you should see all of your imported product categories correctly.
Easiest Way to Import WordPress Categories and Tags
- Custom taxonomies by any plugin/theme
- Intelligent matching
- Hierarchical parent/child
- Custom term meta and images
Import WordPress Categories and Tags — Frequently Asked Questions
What is the Difference Between Categories and Tags Again?
Categories and tags are both used to classify posts, which is why they are collectively referred to as "taxonomies." Categories are broader and are used to group posts, while tags are more specific and are better for describing posts.
How Do I Import Posts with Categories in WordPress?
- Configure your WordPress posts import as usual.
- In the Drag & Drop interface, there is a Taxonomies, Categories, Tags section that allows you to specify how to handle incoming categories and tags.
- Complete the import.
- Review the imported categories and/or tags.
For more information, see Import WordPress Taxonomies.
How Do I Import Categories with a Hierarchy in WordPress?
Follow the steps described in this guide. To define the hierarchy, just drag and drop the incoming parent category id, name, or slug into the Parent Term field of the Other Category Options section of the Drag & Drop screen.
How Do I Import Categories from CSV to WordPress or WooCommerce?
Just upload your CSV file at the start of the import process. WP All Import will automatically recognize the file type and adjust its interface accordingly. The rest of the process remains the same regardless of the import file type.
How Do I Bulk Upload Categories?
Just follow the steps in this guide and import more than one category. Any time you upload more than one category, you are bulk-loading categories. Unlike the bulk edit process, there is nothing special about bulk loading.
How Do I Import Tags into WordPress?
- Navigate to All Import > New Import and upload an import file.
- Choose Taxonomies as the import post type.
- Select Tags as the subtype.
- Map the incoming data elements to their taxonomy fields.
- Run the import and check the imported data.
How Do I Export WordPress Categories or Tags?
- Go to All Export › New Export.
- Choose Taxonomies as the export post type, and then select the specific taxonomy that you want to export.
- Configure your export columns using the Drag & Drop interface.
- Run the export.
- Download your export file.
For more information, see How to Export WordPress Categories and Tags.
How Do I Migrate WordPress Categories or Tags to Another Website?
- Export the categories or tags for migration but instead download the bundle file.
- The bundle file includes import instructions as well as the export data.
- Import the bundle file on the target site.
- Run the import.
- Verify that the imported categories and/or tags are correct.
For more information, see Migration Overview.
Import WordPress Categories and Tags — Related Docs
Import metadata into your categories or tags.
Export WordPress posts along with their assigned taxonomies (such as categories or tags).
Export WordPress categories or tags directly without exporting the associated posts.
