The best import export plugin for WordPress & WooCommerce.

Filtering Import Data with XPath
You can configure filters in the Manage Filtering Options section, available in Step 2 when creating an import, or in the Edit Template page when editing an existing import. Filters allow you to define which records to import.
WP All Import filters data using XPath. The visual filter designer lets you visually construct an XPath expression. In this article, we'll describe how to use this designer.
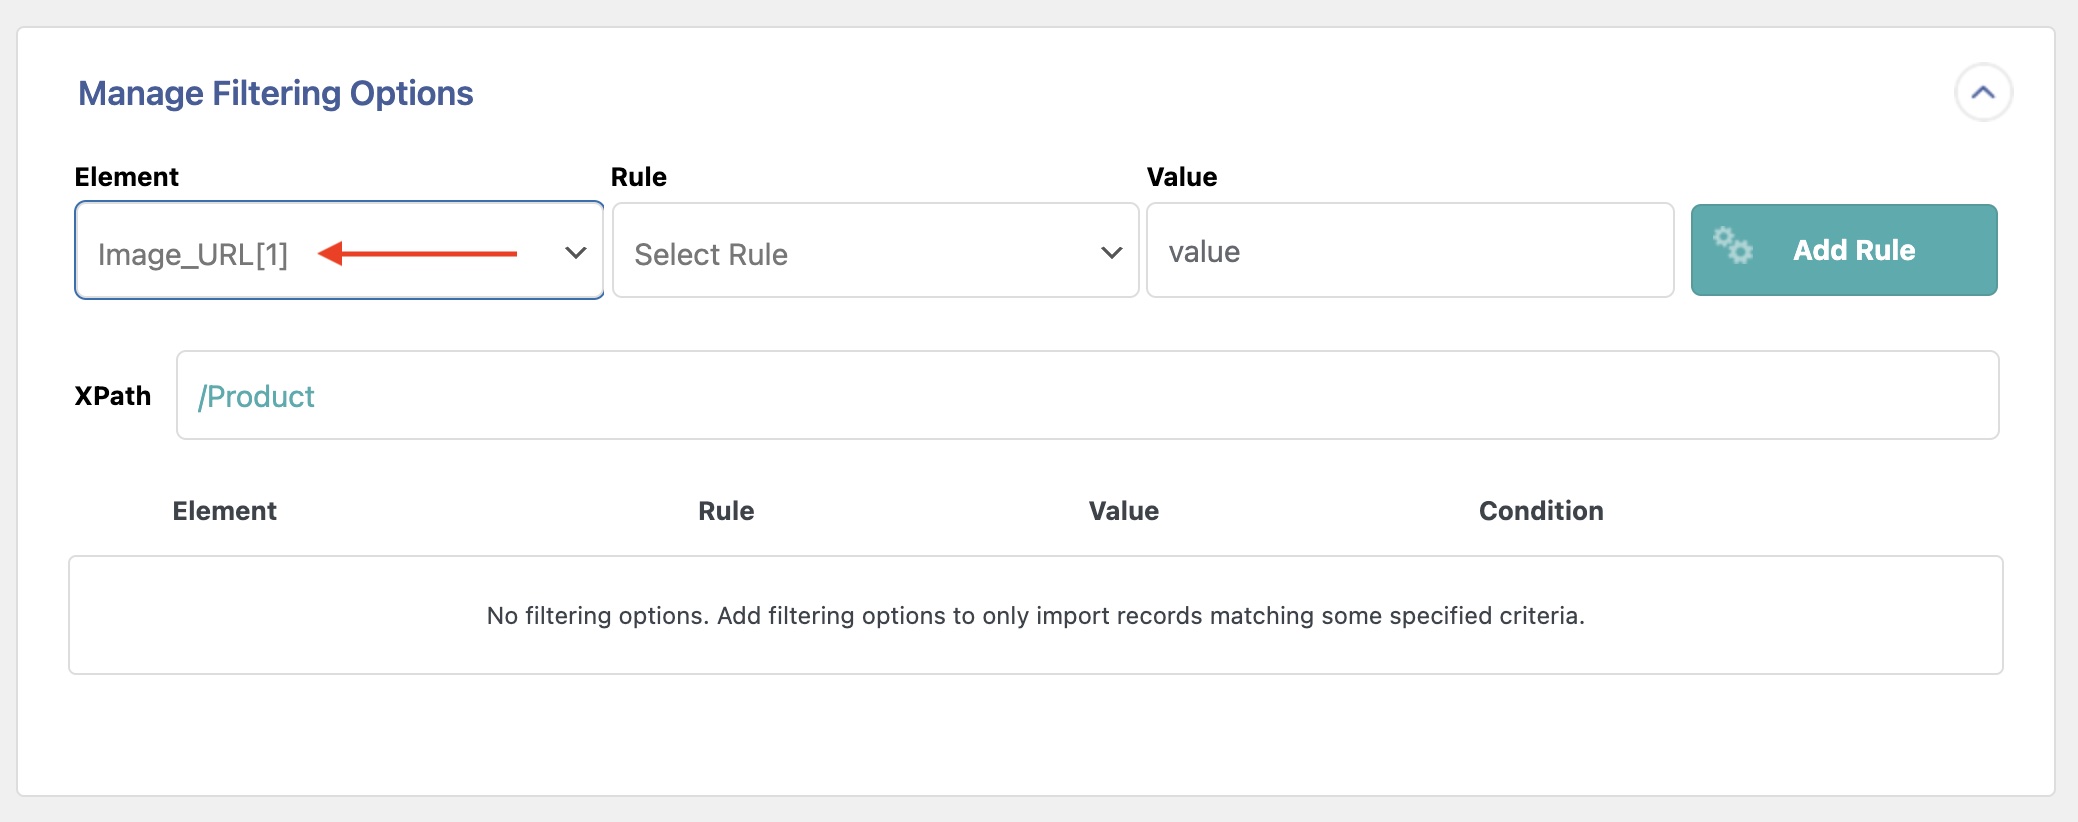
Step 1: Select an Import Element to Filter Import Data
You can choose any of the import file elements in this step. For example, if you only want to import products with valid images, choose Image_URL as the Element.
Step 2: Add a Filter Rule
The Rule selection box lets you choose which rule to use for the filter. In this example, we have selected is not empty, meaning we want to import only products where the Image_URL element has data.
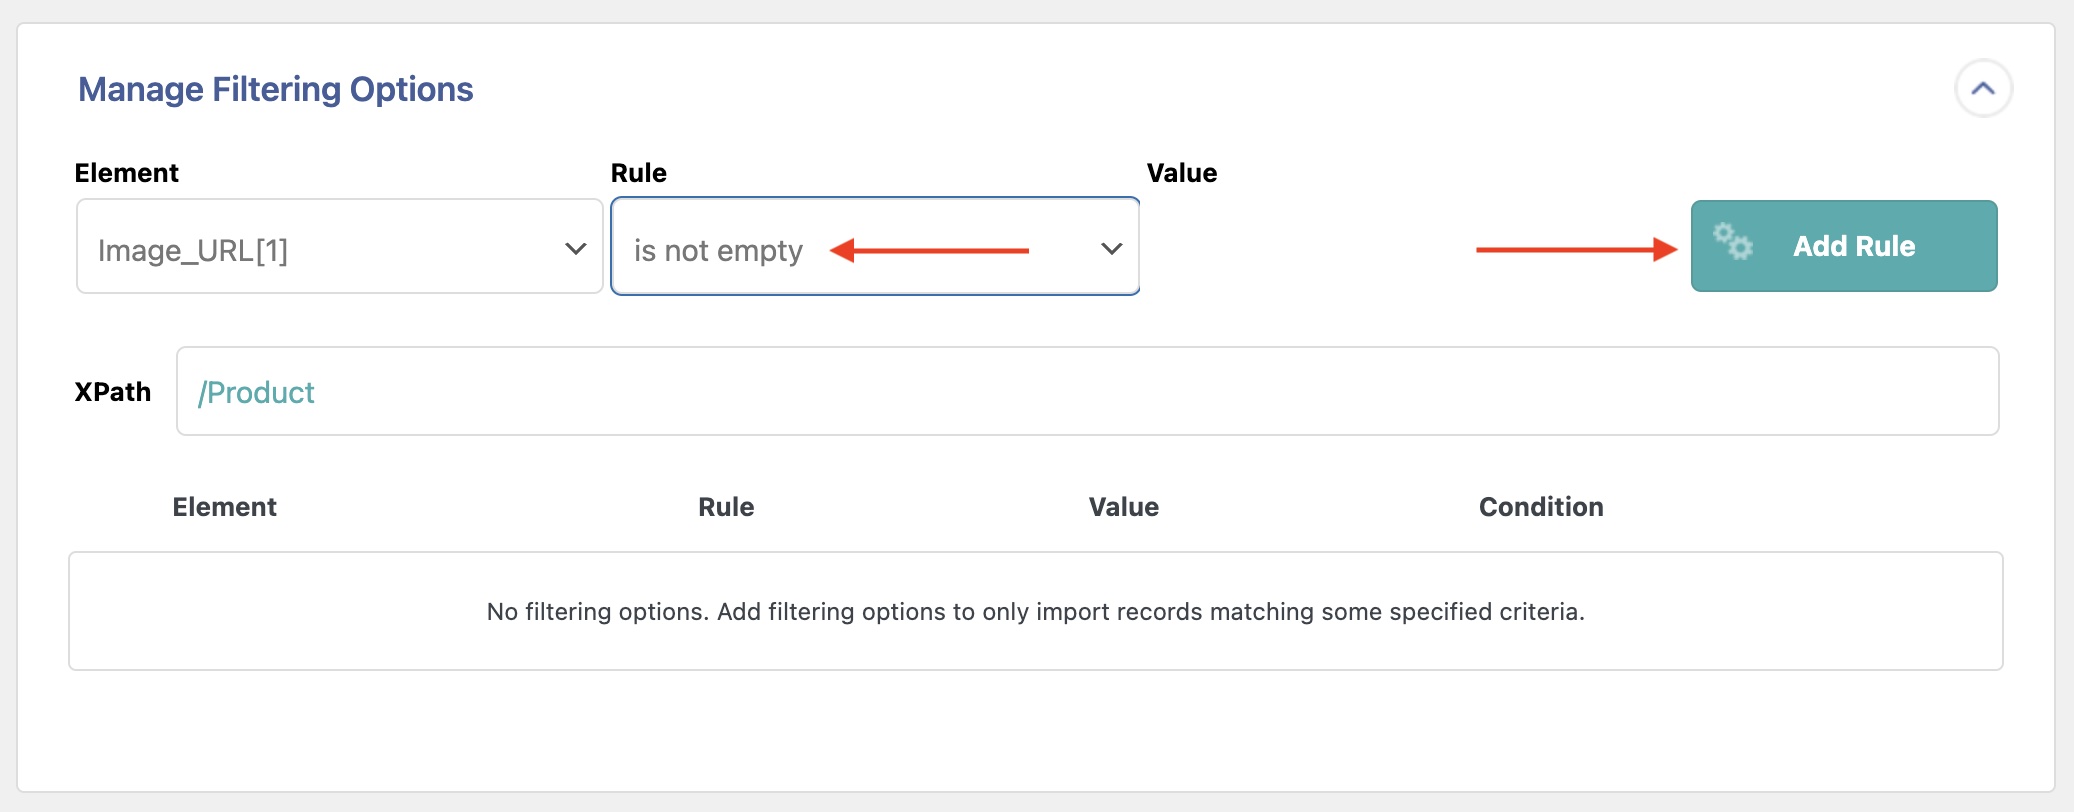
For most filters, you must also specify a Value. However, when using either the is empty or is not empty, a Value is not required.
Click the Add Rule button to continue.
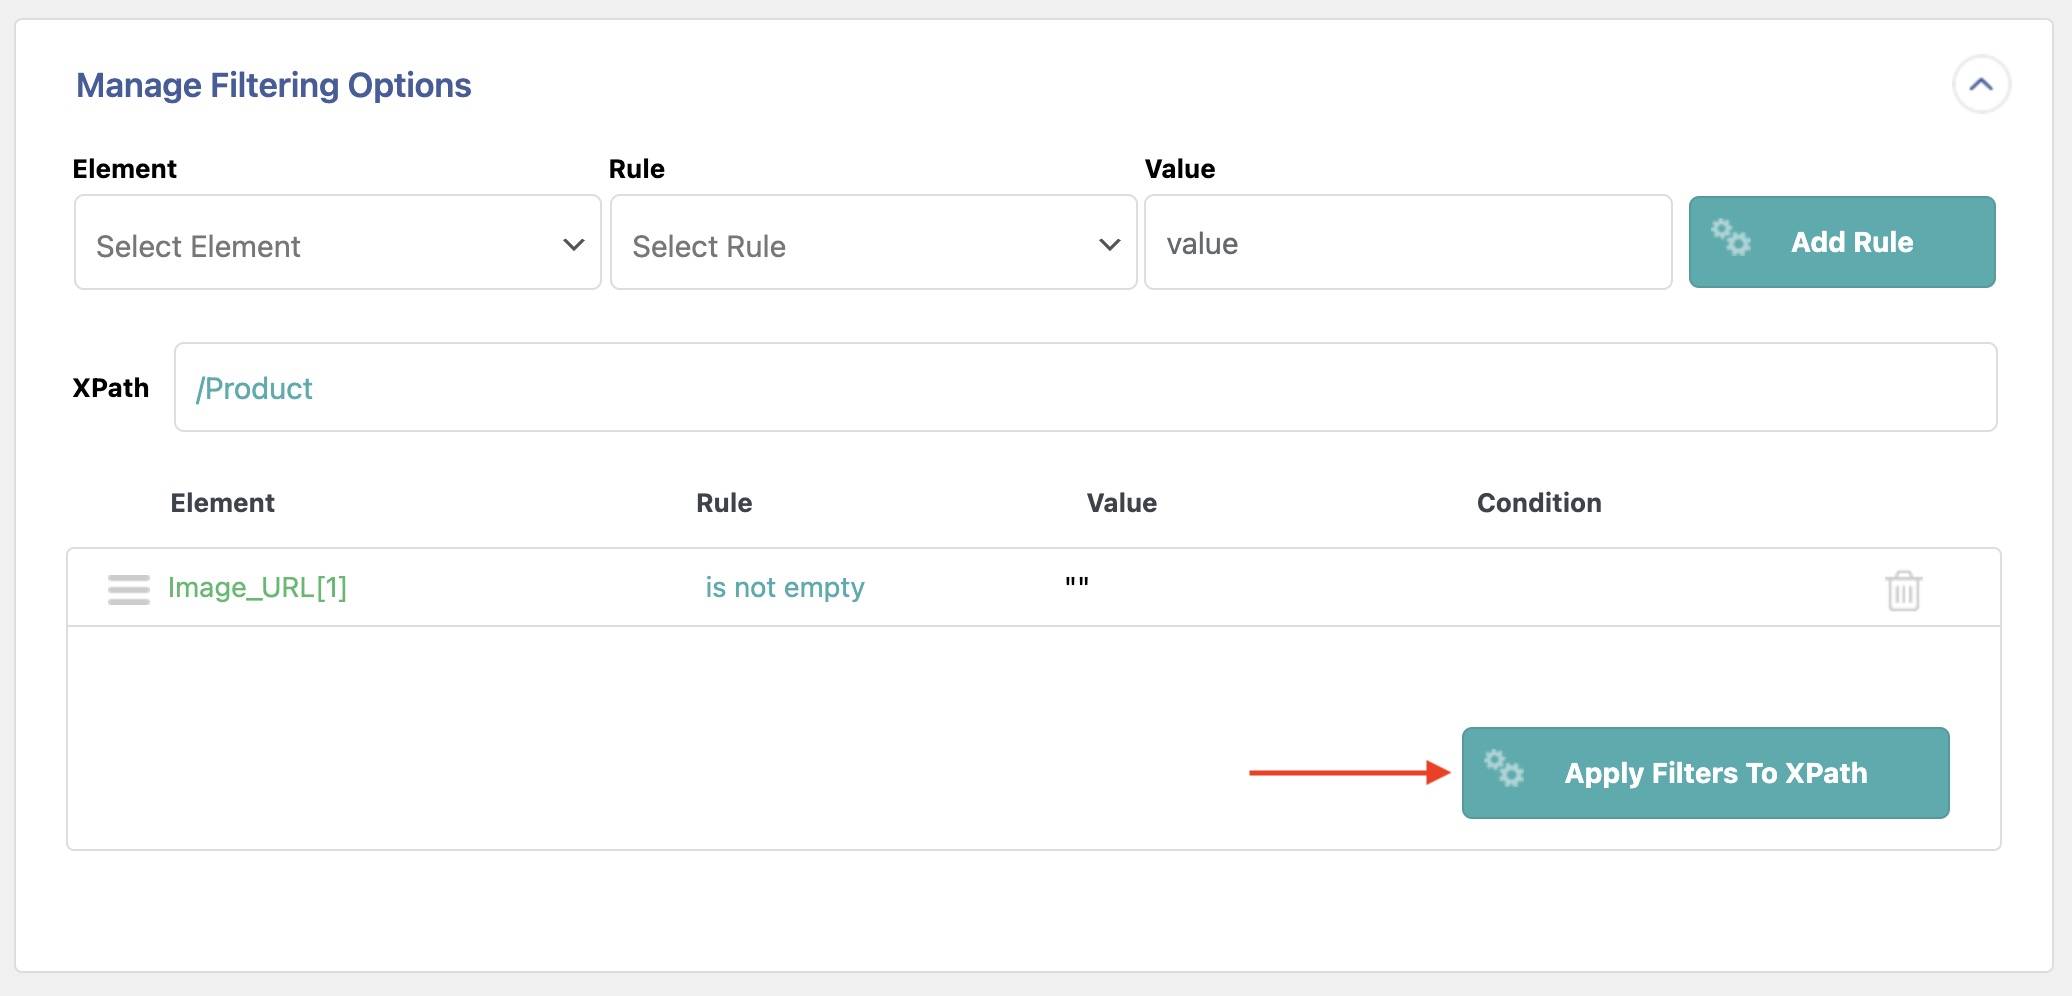
The new filter will appear in the lower section and can be reviewed. If all looks well, click Apply Filters to XPath to apply the new filter. The XPath field will then be updated.
Step 3: Enter a Filter Value
When required, input the Value that you want to filter by. For example, you can filter out any images with names that include the ".jpg" extension:
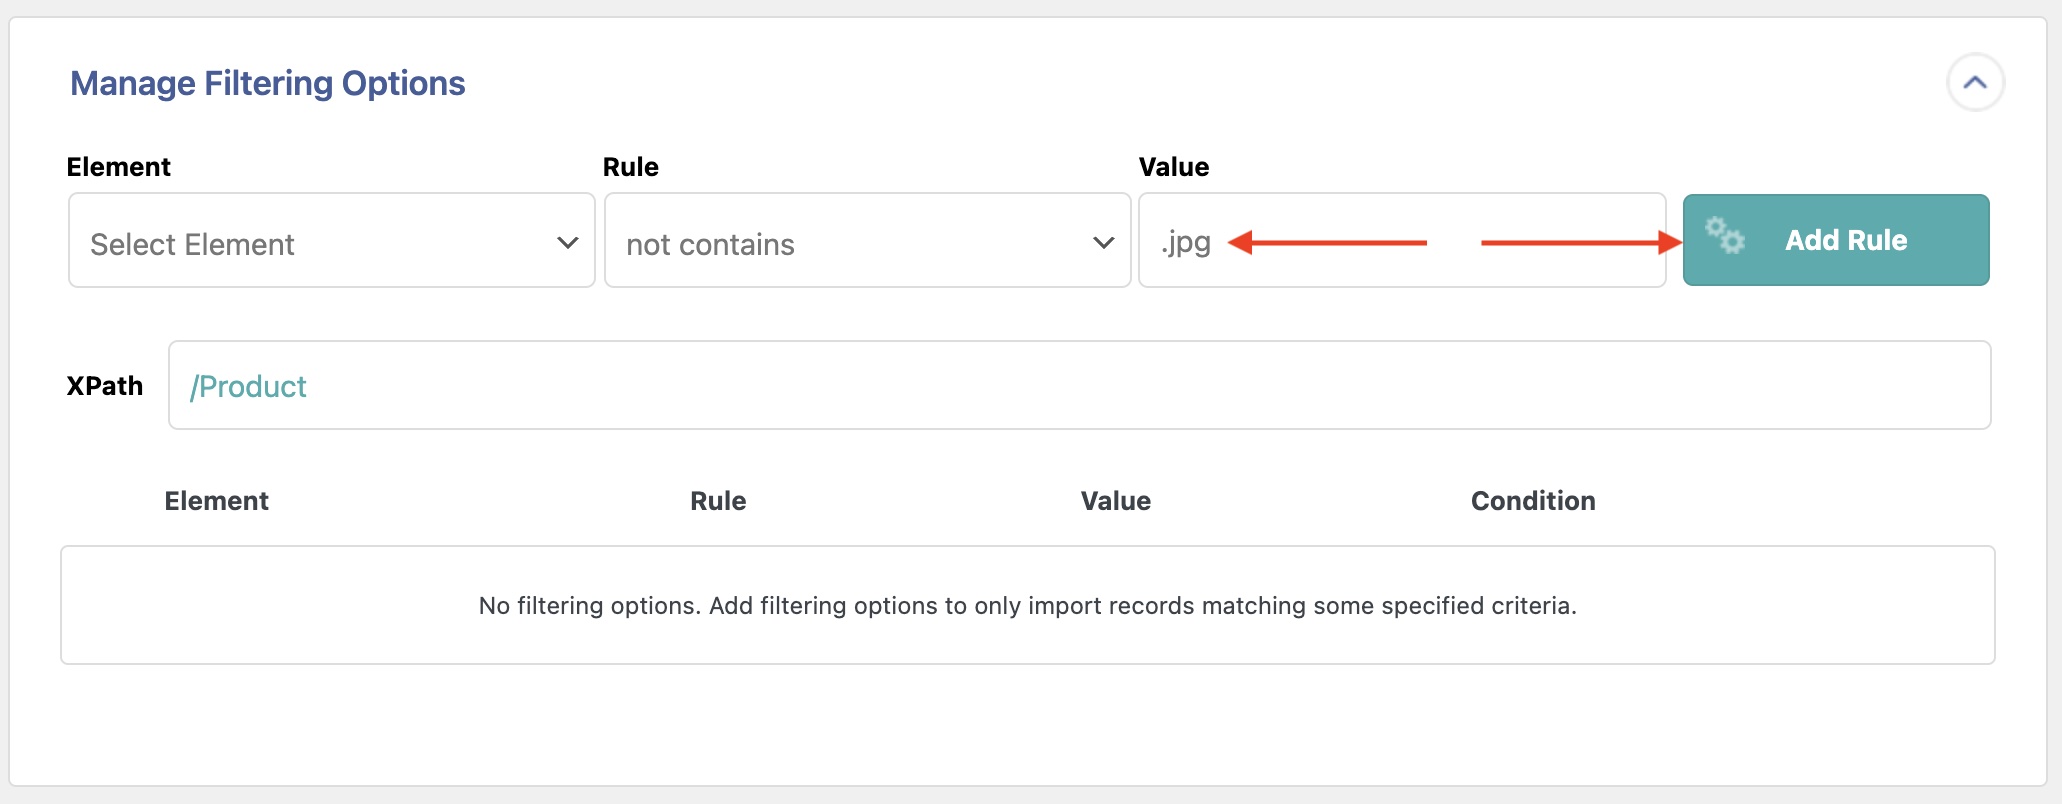
Otherwise, the Add Rule process is the same.
You can also manually write an XPath expression to filter your file. Learn more at https://www.w3schools.com/xml/xpath_syntax.asp.
Adding Multiple Filter Rules
You can add multiple filter rules and connect them using the logical operators AND (&&) and OR (||). The AND (&&) operator matches records that satisfy both conditions, while the OR (||) operator is used to match records that satisfy either condition.
Here's an example showing how to filter products when image URLs are not empty and the sale price is higher than 50:
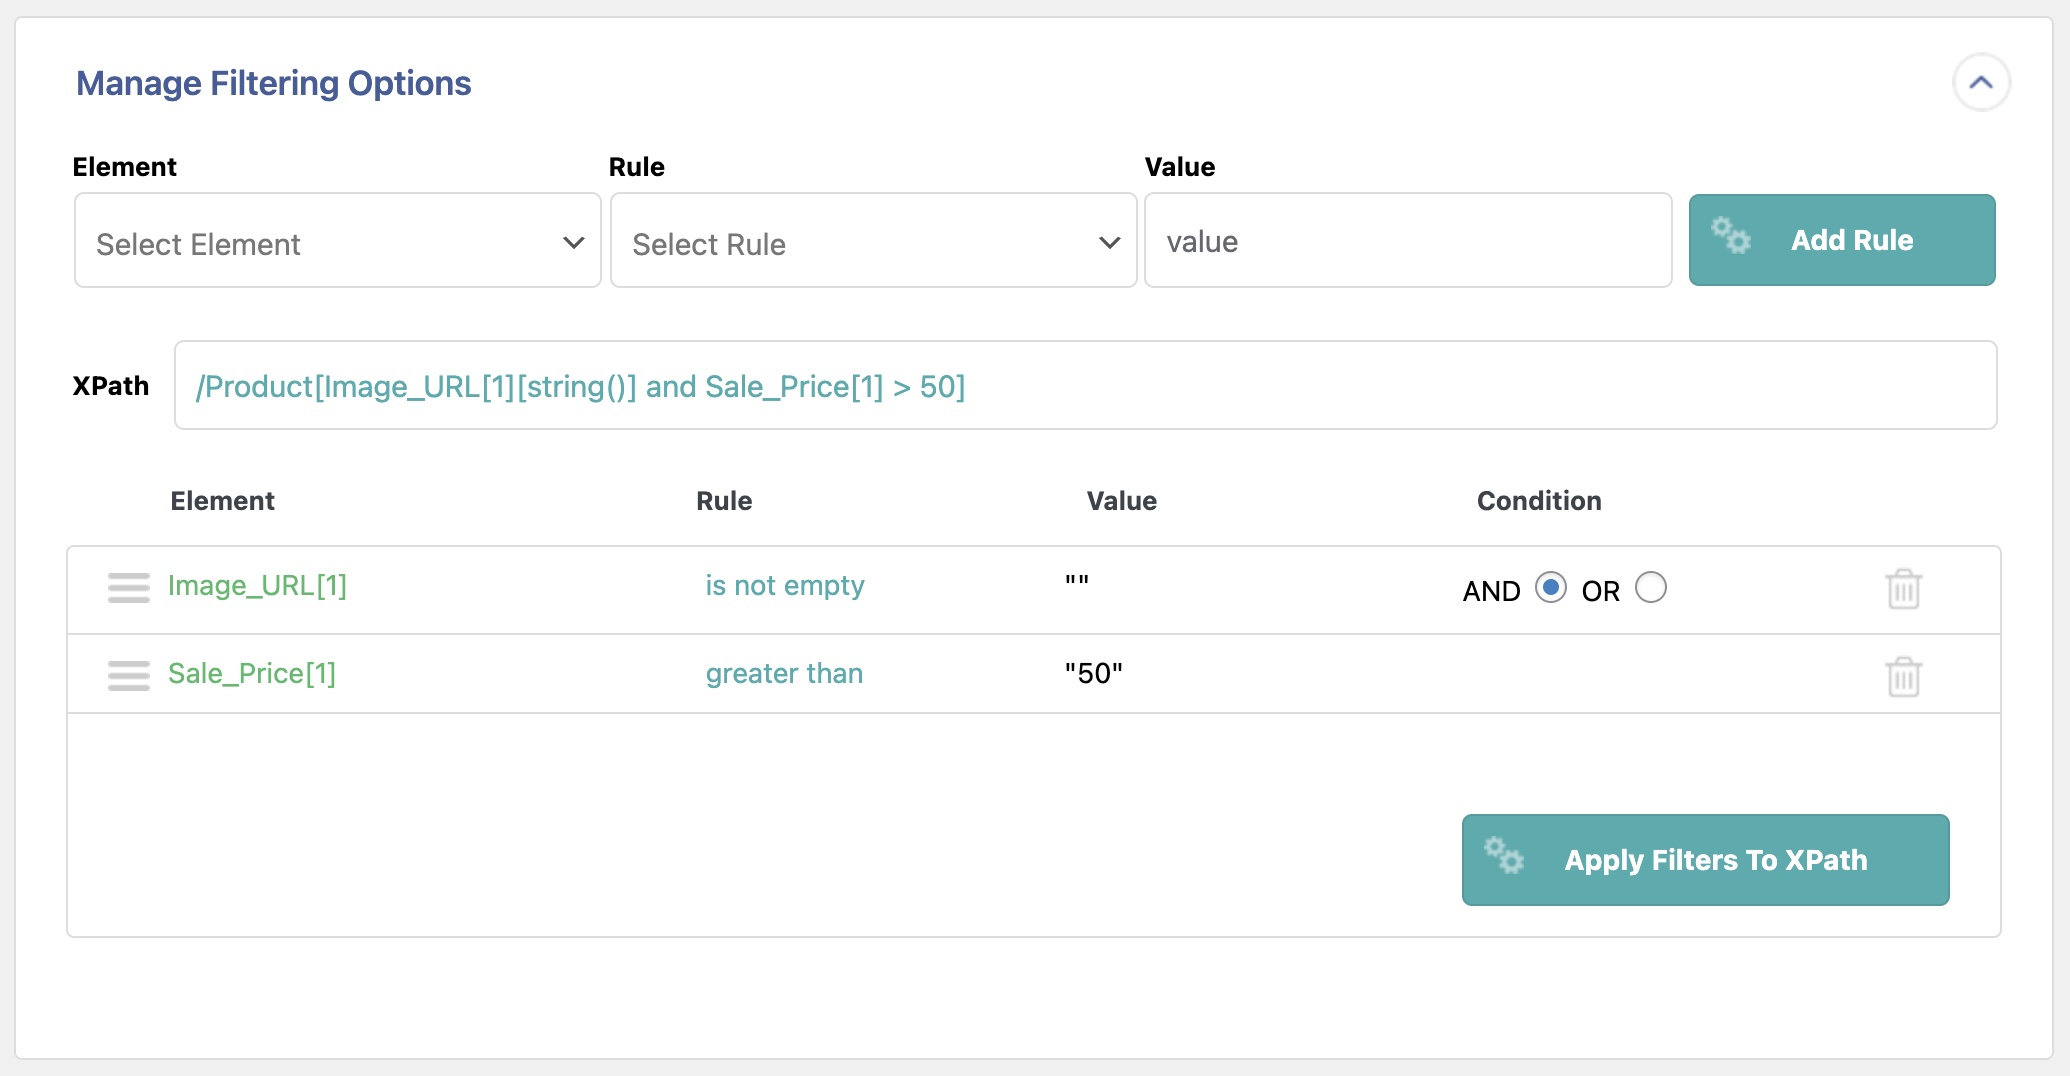
You can add as many filter rules as you need, giving you full control over your import data.
Import Any CSV, XML, or Excel to WordPress
- Advanced filtering
- Images & galleries
- Custom fields
- Categories & tags
- Woo, ACF, Meta Box, JetEngine
Filter Import Data — Advanced Topics
Add Indentation to Create Nested Filters
When working with multiple filter rules, you can nest or group rules simply by indenting them:
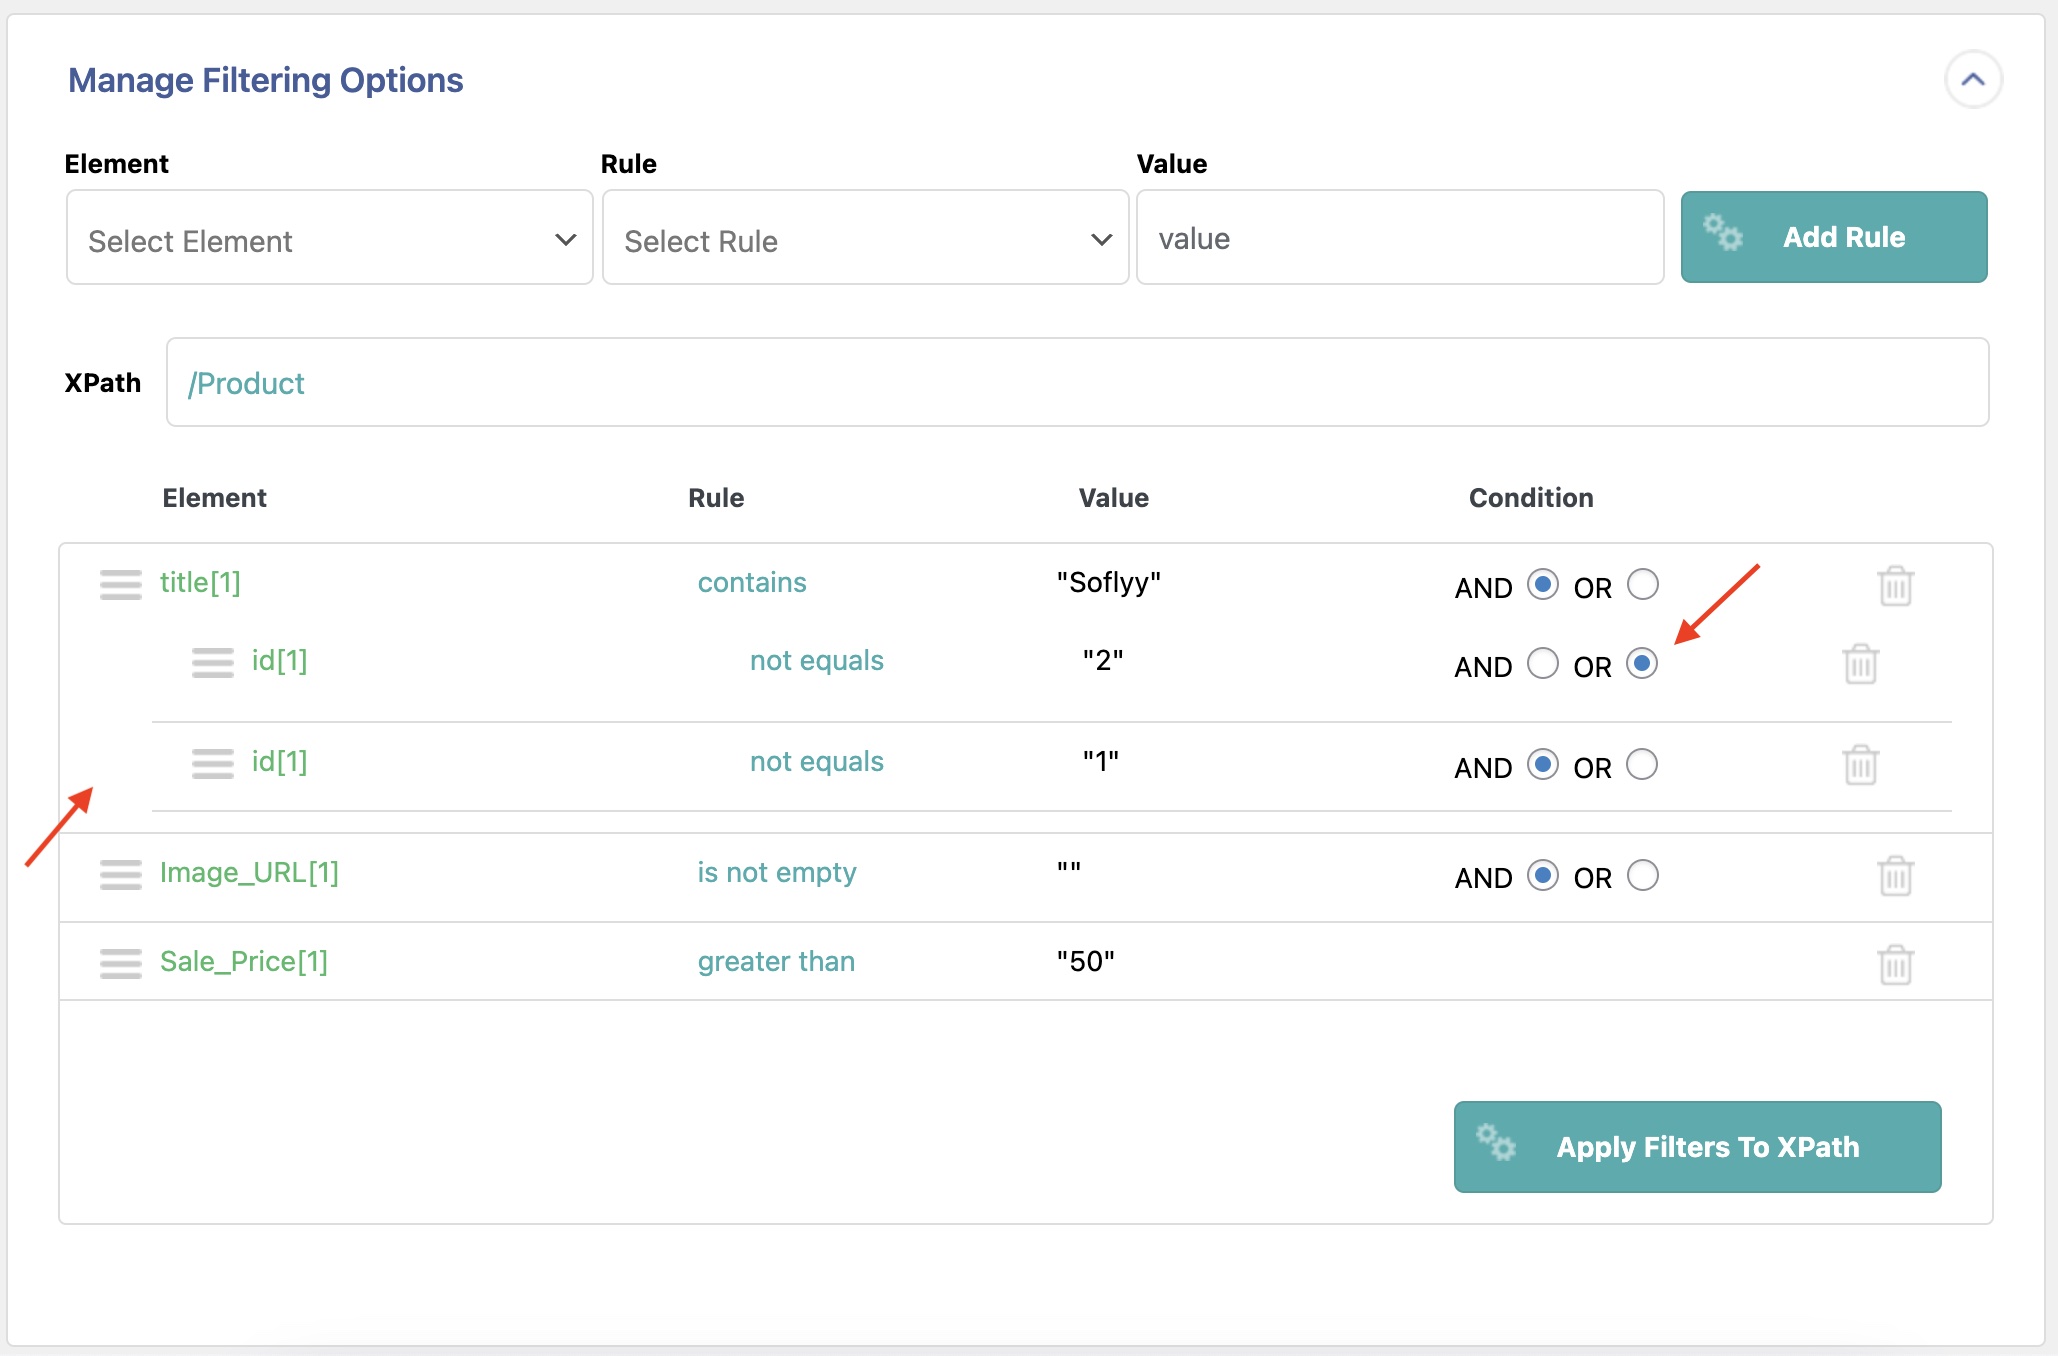
This is equivalent to using parentheses and allows you to create logic such as (A AND B) OR (C AND D). In fact, by combining AND, OR, and nesting, you can create any filter logic you desire.
Modify Existing Import Filters
You can modify filters for an existing import by using this procedure:
- Navigate to All Import › Manage Imports.
- Locate the import in question.
- Click Edit Template.
- Modify your filter in the Manage Filtering Options section.
- Save the import template.
Filter Import Data — Related Docs
Quickstart guide that explains how to use WP All Import.
Execute custom code to modify the import data on the fly.
Learn about WP All Export's API and hooks.
