The best import export plugin for WordPress & WooCommerce.

How to Import Gravity Forms Entries
To import Gravity Forms entries, go to All Import › New Import, select your import file, then choose Gravity Forms Entries and the target form from the dropdown lists. Build your import with the Drag & Drop interface, then run it.
Table of Contents
- Step 1: Create a New Gravity Forms Import
- Step 2: Review the Import File
- Step 3: Map the Incoming Data
- Step 4: Confirm and Run the Import
Advanced Topics
Step 1: Create a New Import for Gravity Forms Entries
Navigate to All Import › New Import and upload your import file. In the dropdown list, choose Gravity Forms Entries and select the target form.
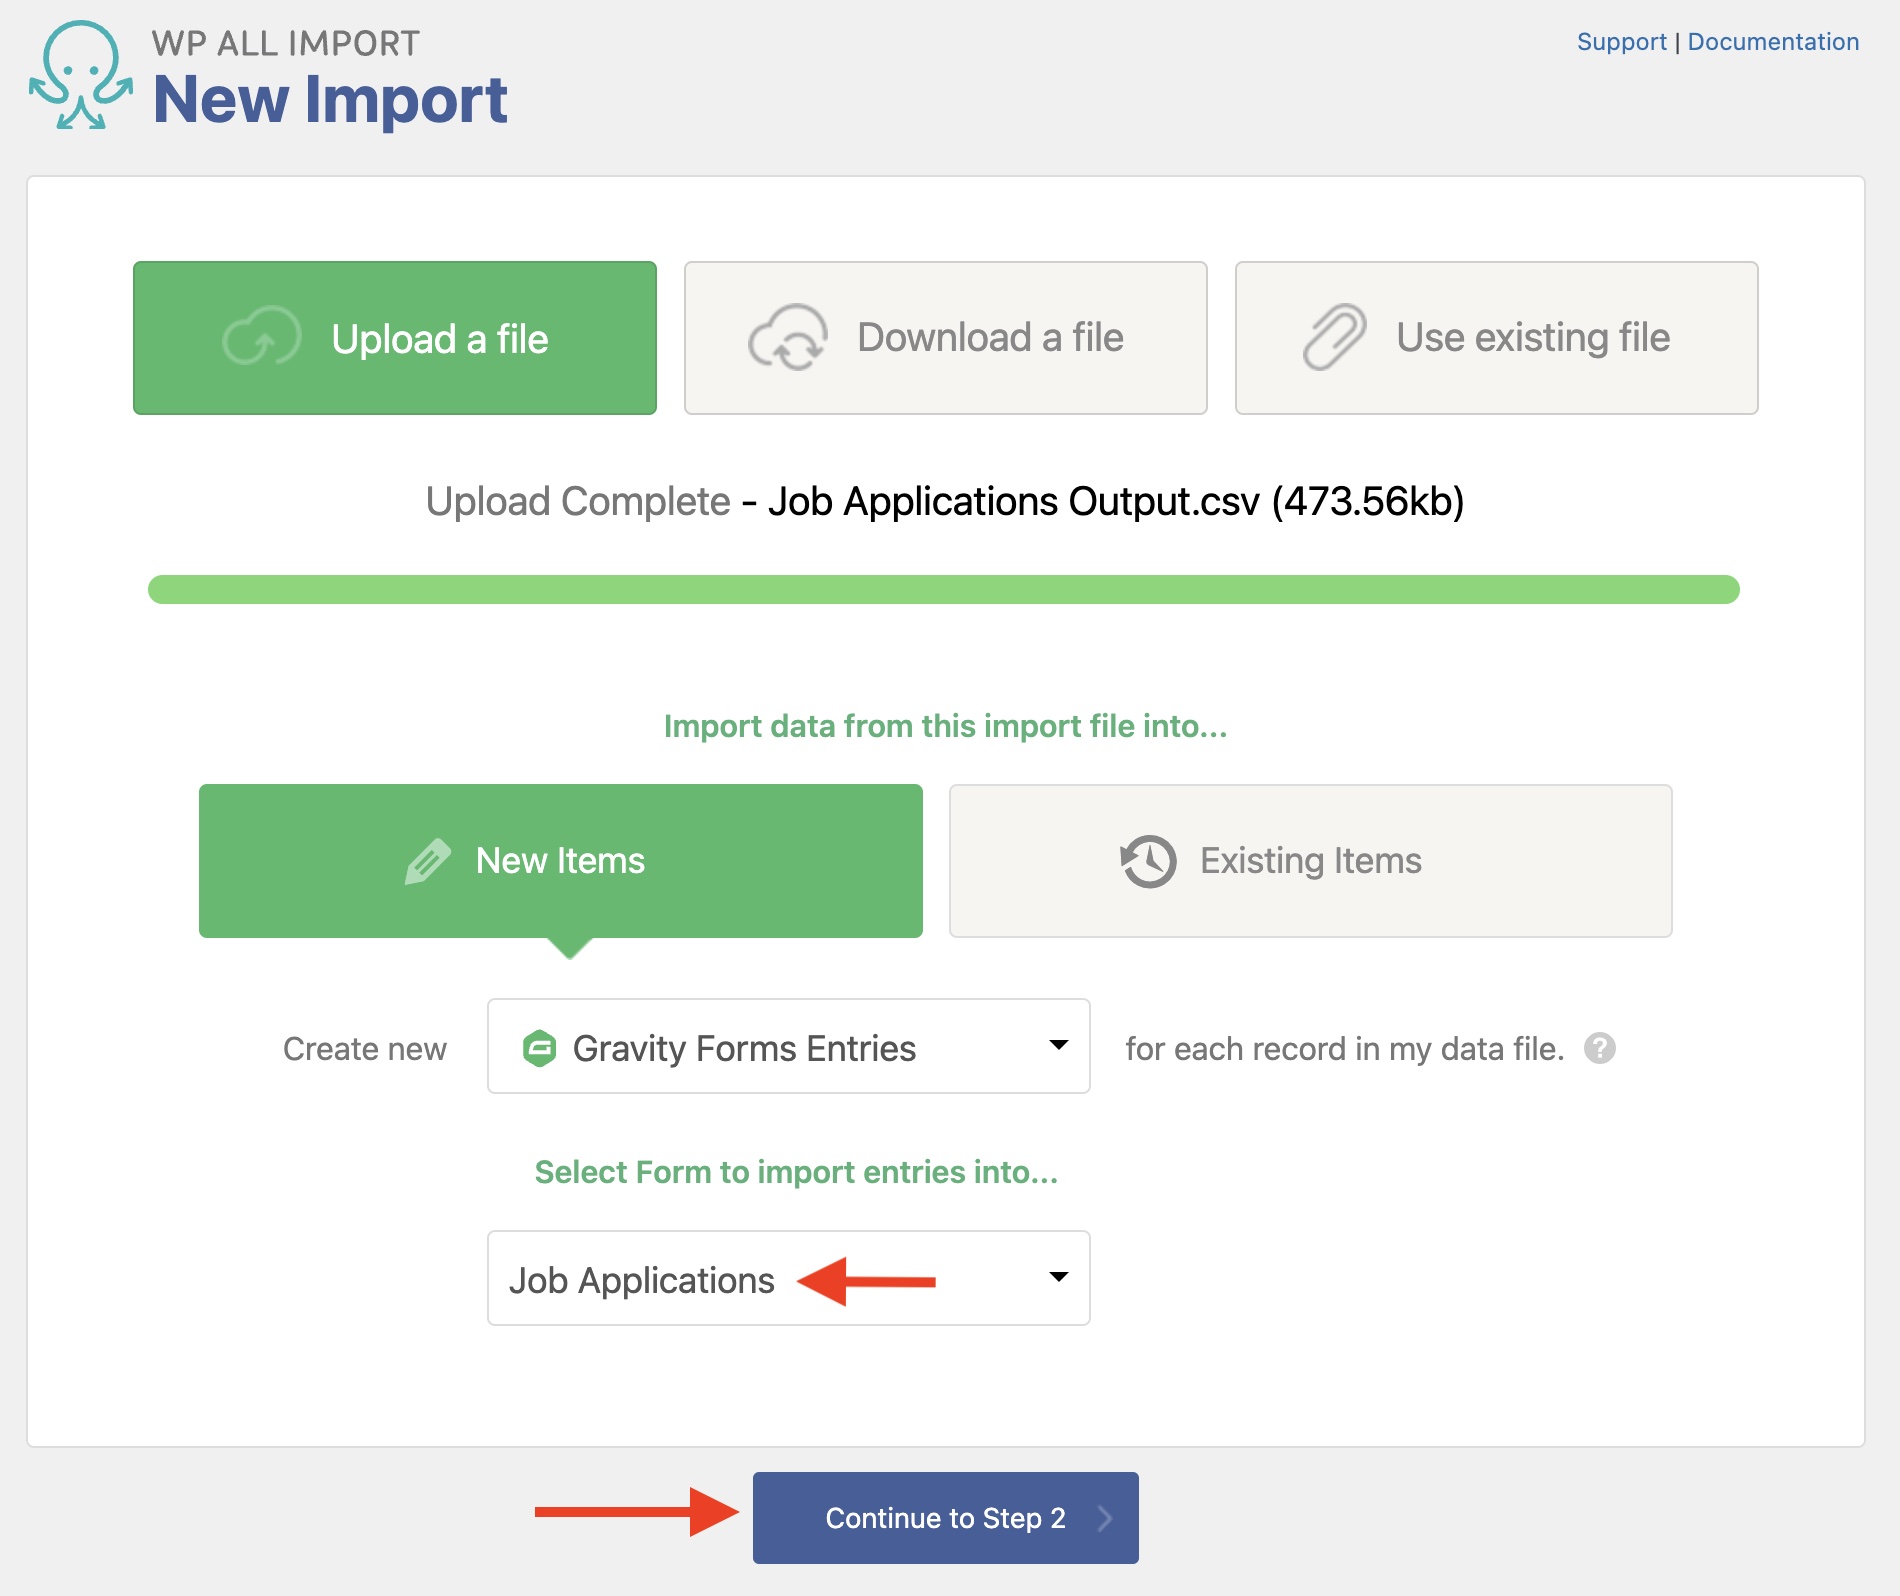
Click Continue to Step 2.
Step 2: Review the Import File
Now you see the Review Import File screen, where you can review the import data to make sure it's correct.
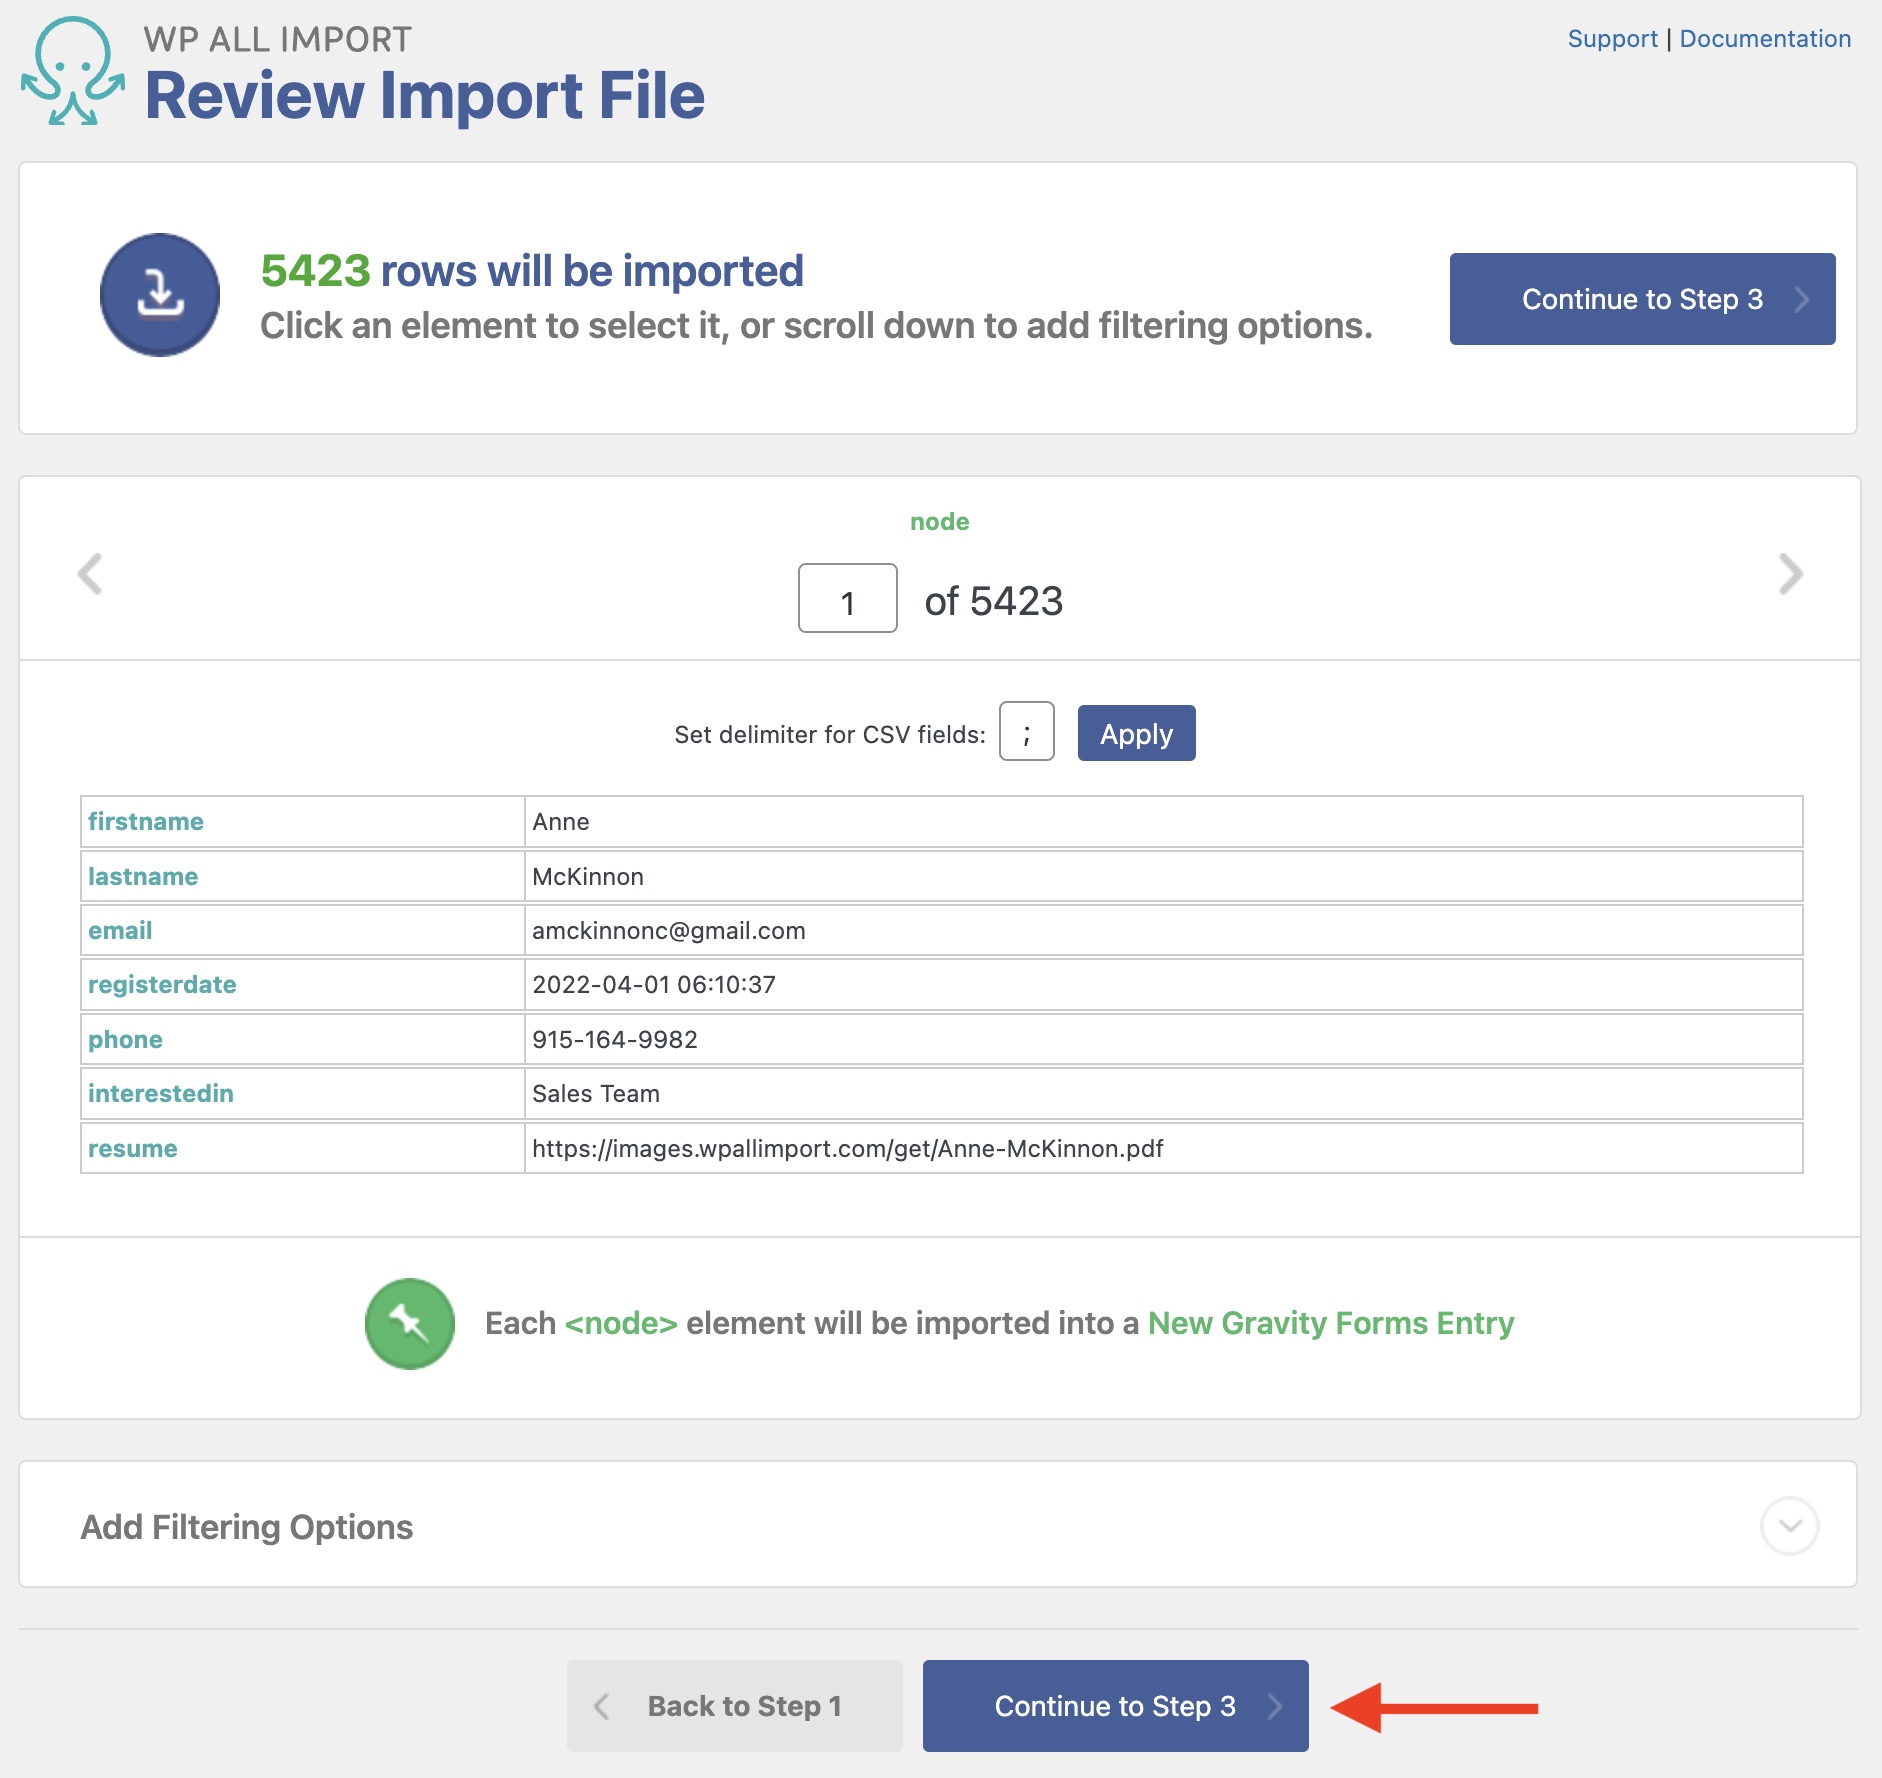
Depending on the import file that you use, you can set a different delimiter (CSV files) or choose a different XML node (XML files).
At the bottom of this screen, you can add filters to selectively import the entries, using the Manage Filtering Options section.
Click Continue to Step 3 to proceed to the next step.
Step 3: Map the Incoming Data Elements to the Correct Target Fields
The Drag & Drop interface will appear. You can map all of your entry data under the Gravity Forms Entries section. In this case, since we're importing Job Applications, you'll see the fields for that form:

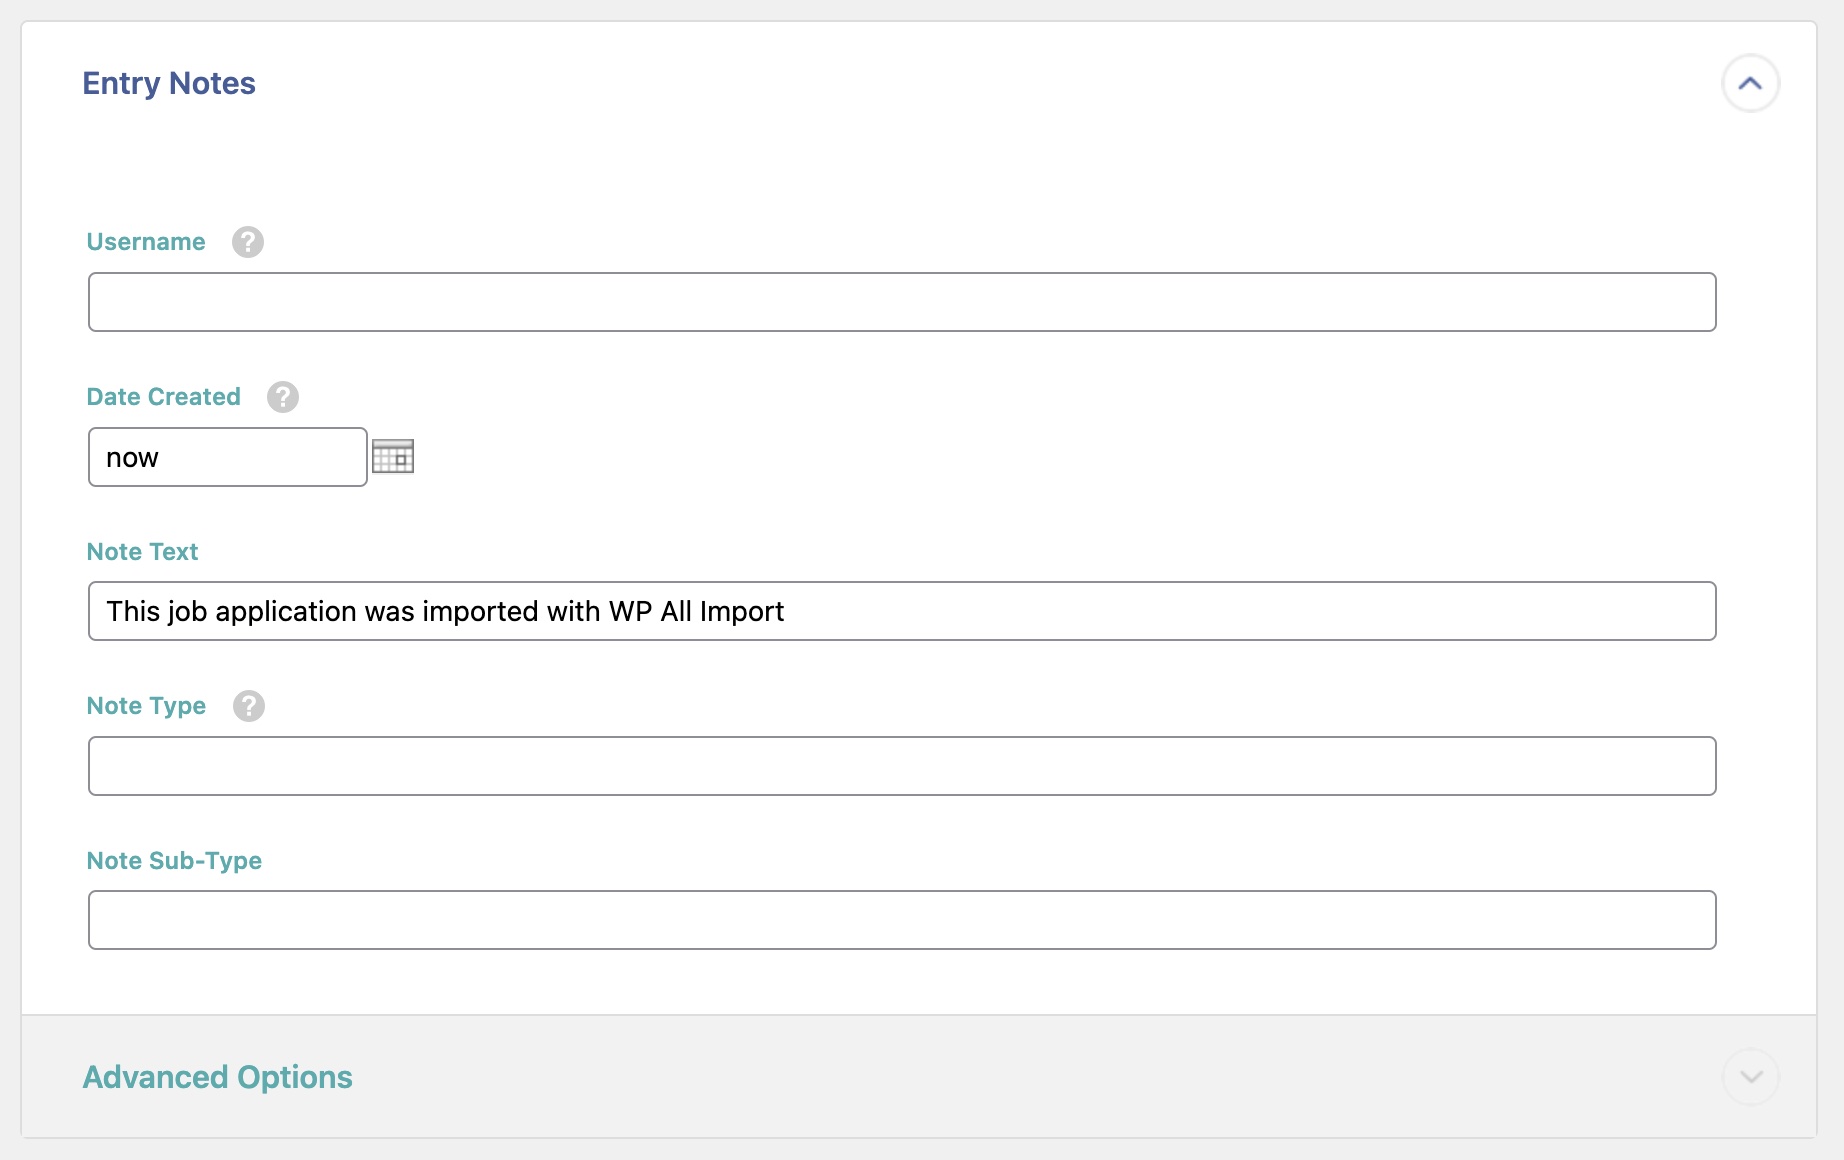
There's also an Entry Notes section that lets you add notes to the entries that are being imported, along with the note metadata (i.e., author, date, type). For example:
Finally, the Other Entry Options section lets you import the date when the entry was made, along with metadata about each imported entry (such as who created it, if it's been read, its status, etc.):
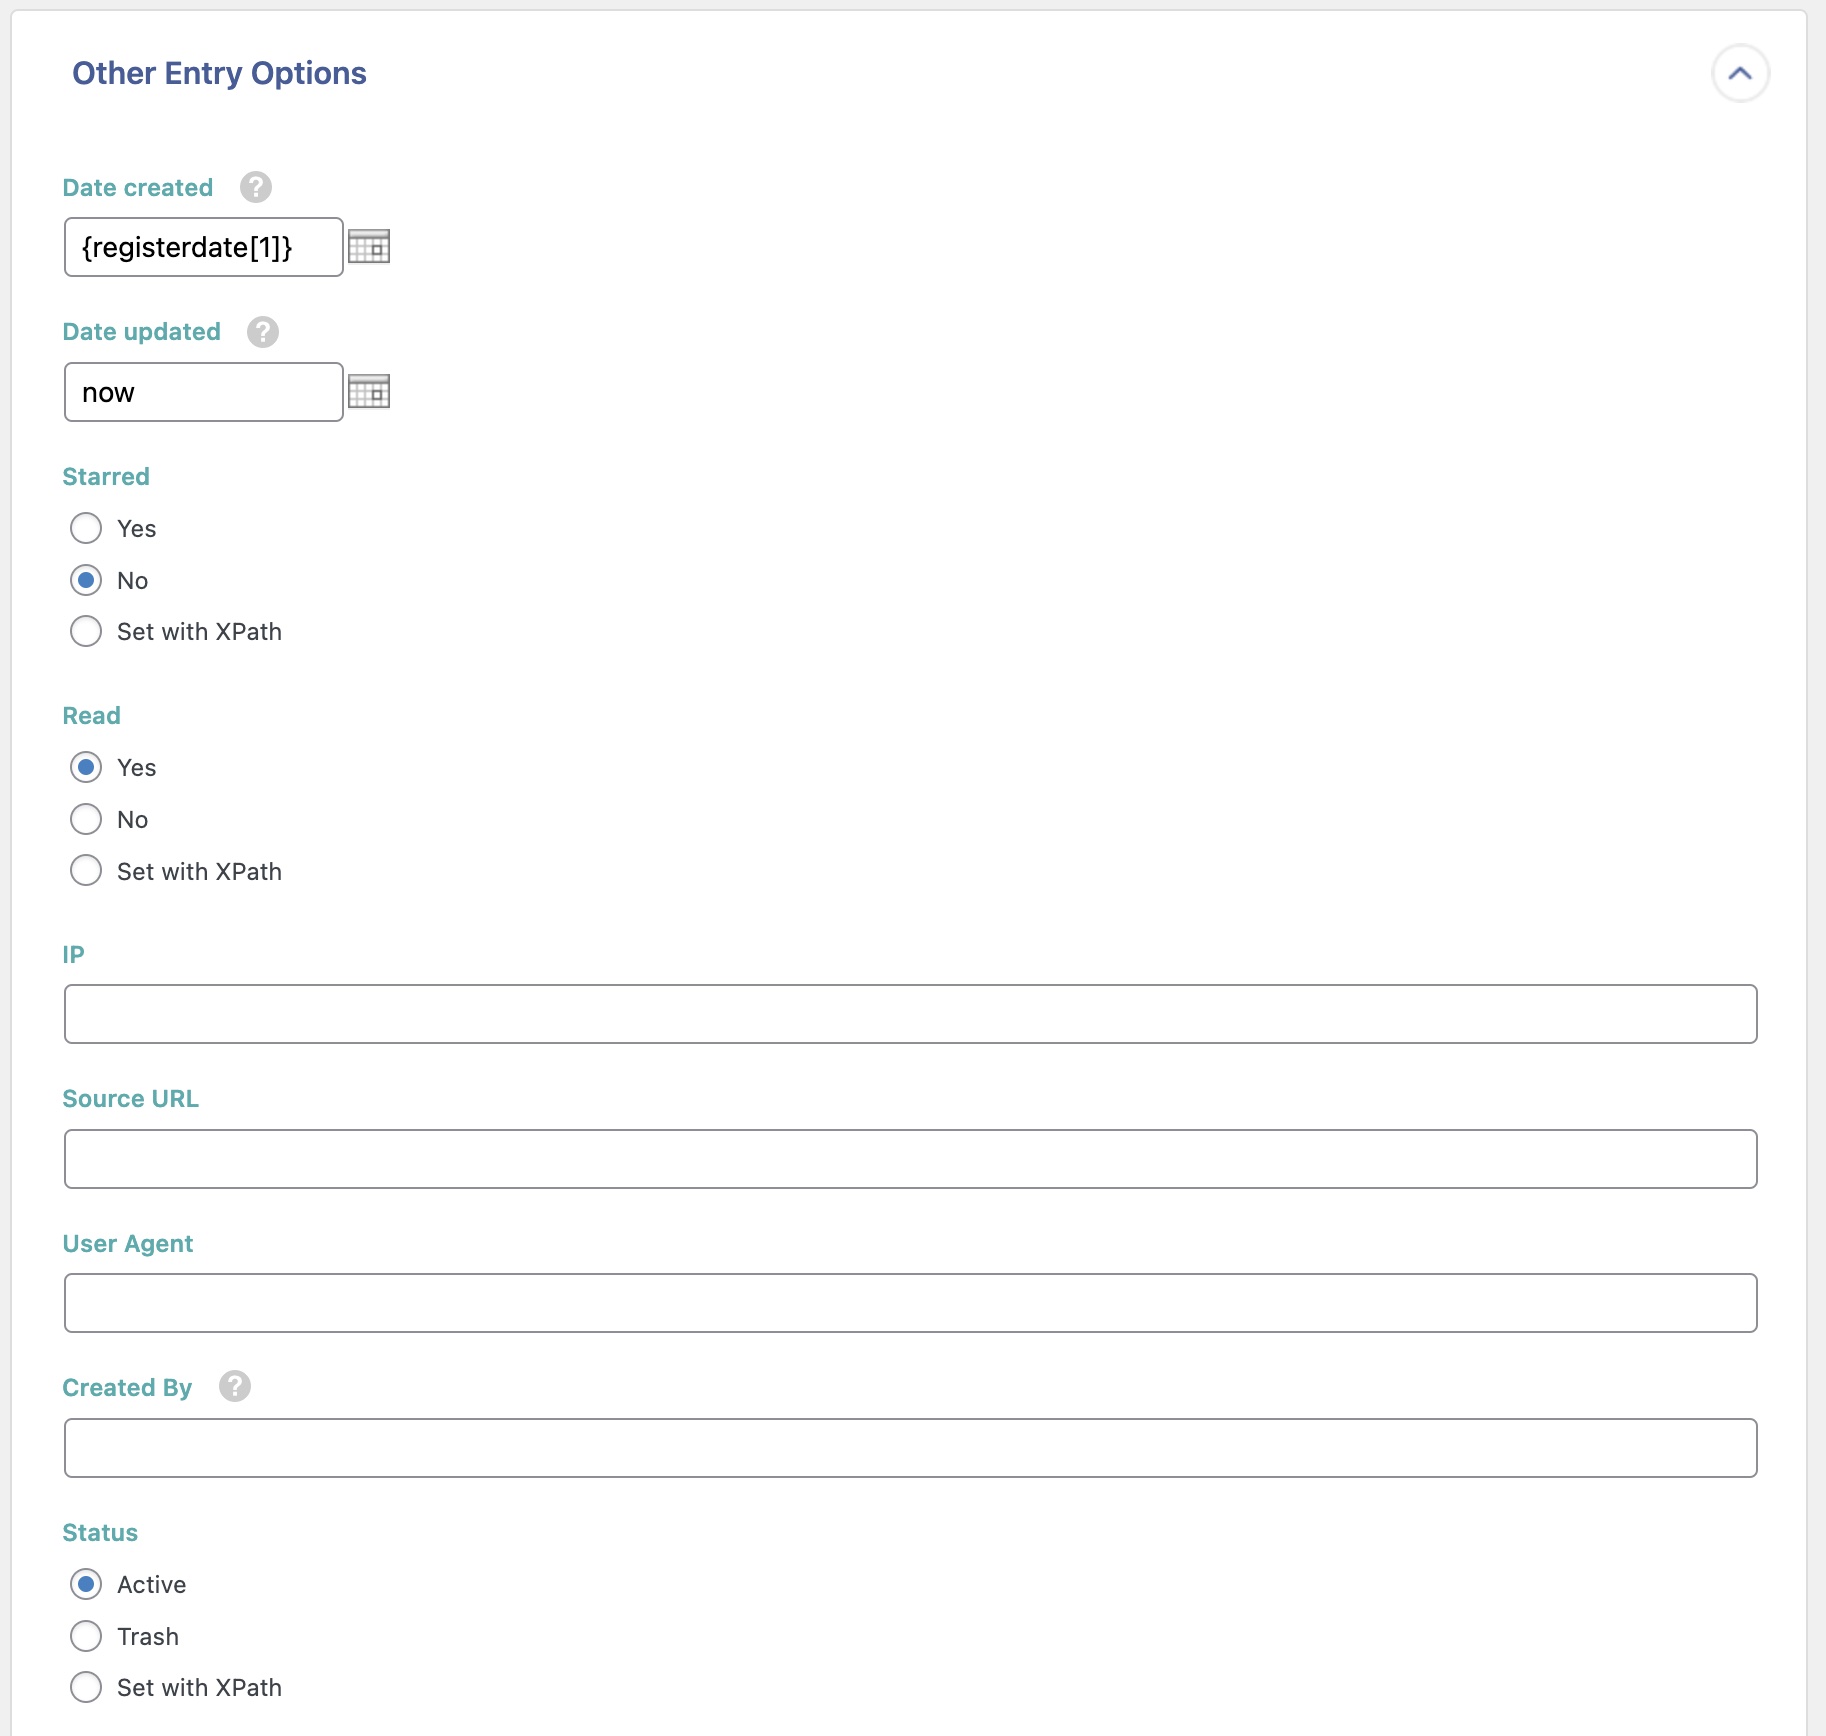
Once done, click Continue to Step 4 at the bottom (not shown).
Step 4: Confirm the Settings and Run the Import
The Import Settings screen appears next. Here, you can configure key import settings, though, for most cases, you can just use the default settings. Click on Auto-detect next to the Unique Identifier to let WP All Import generate this identifier for you.
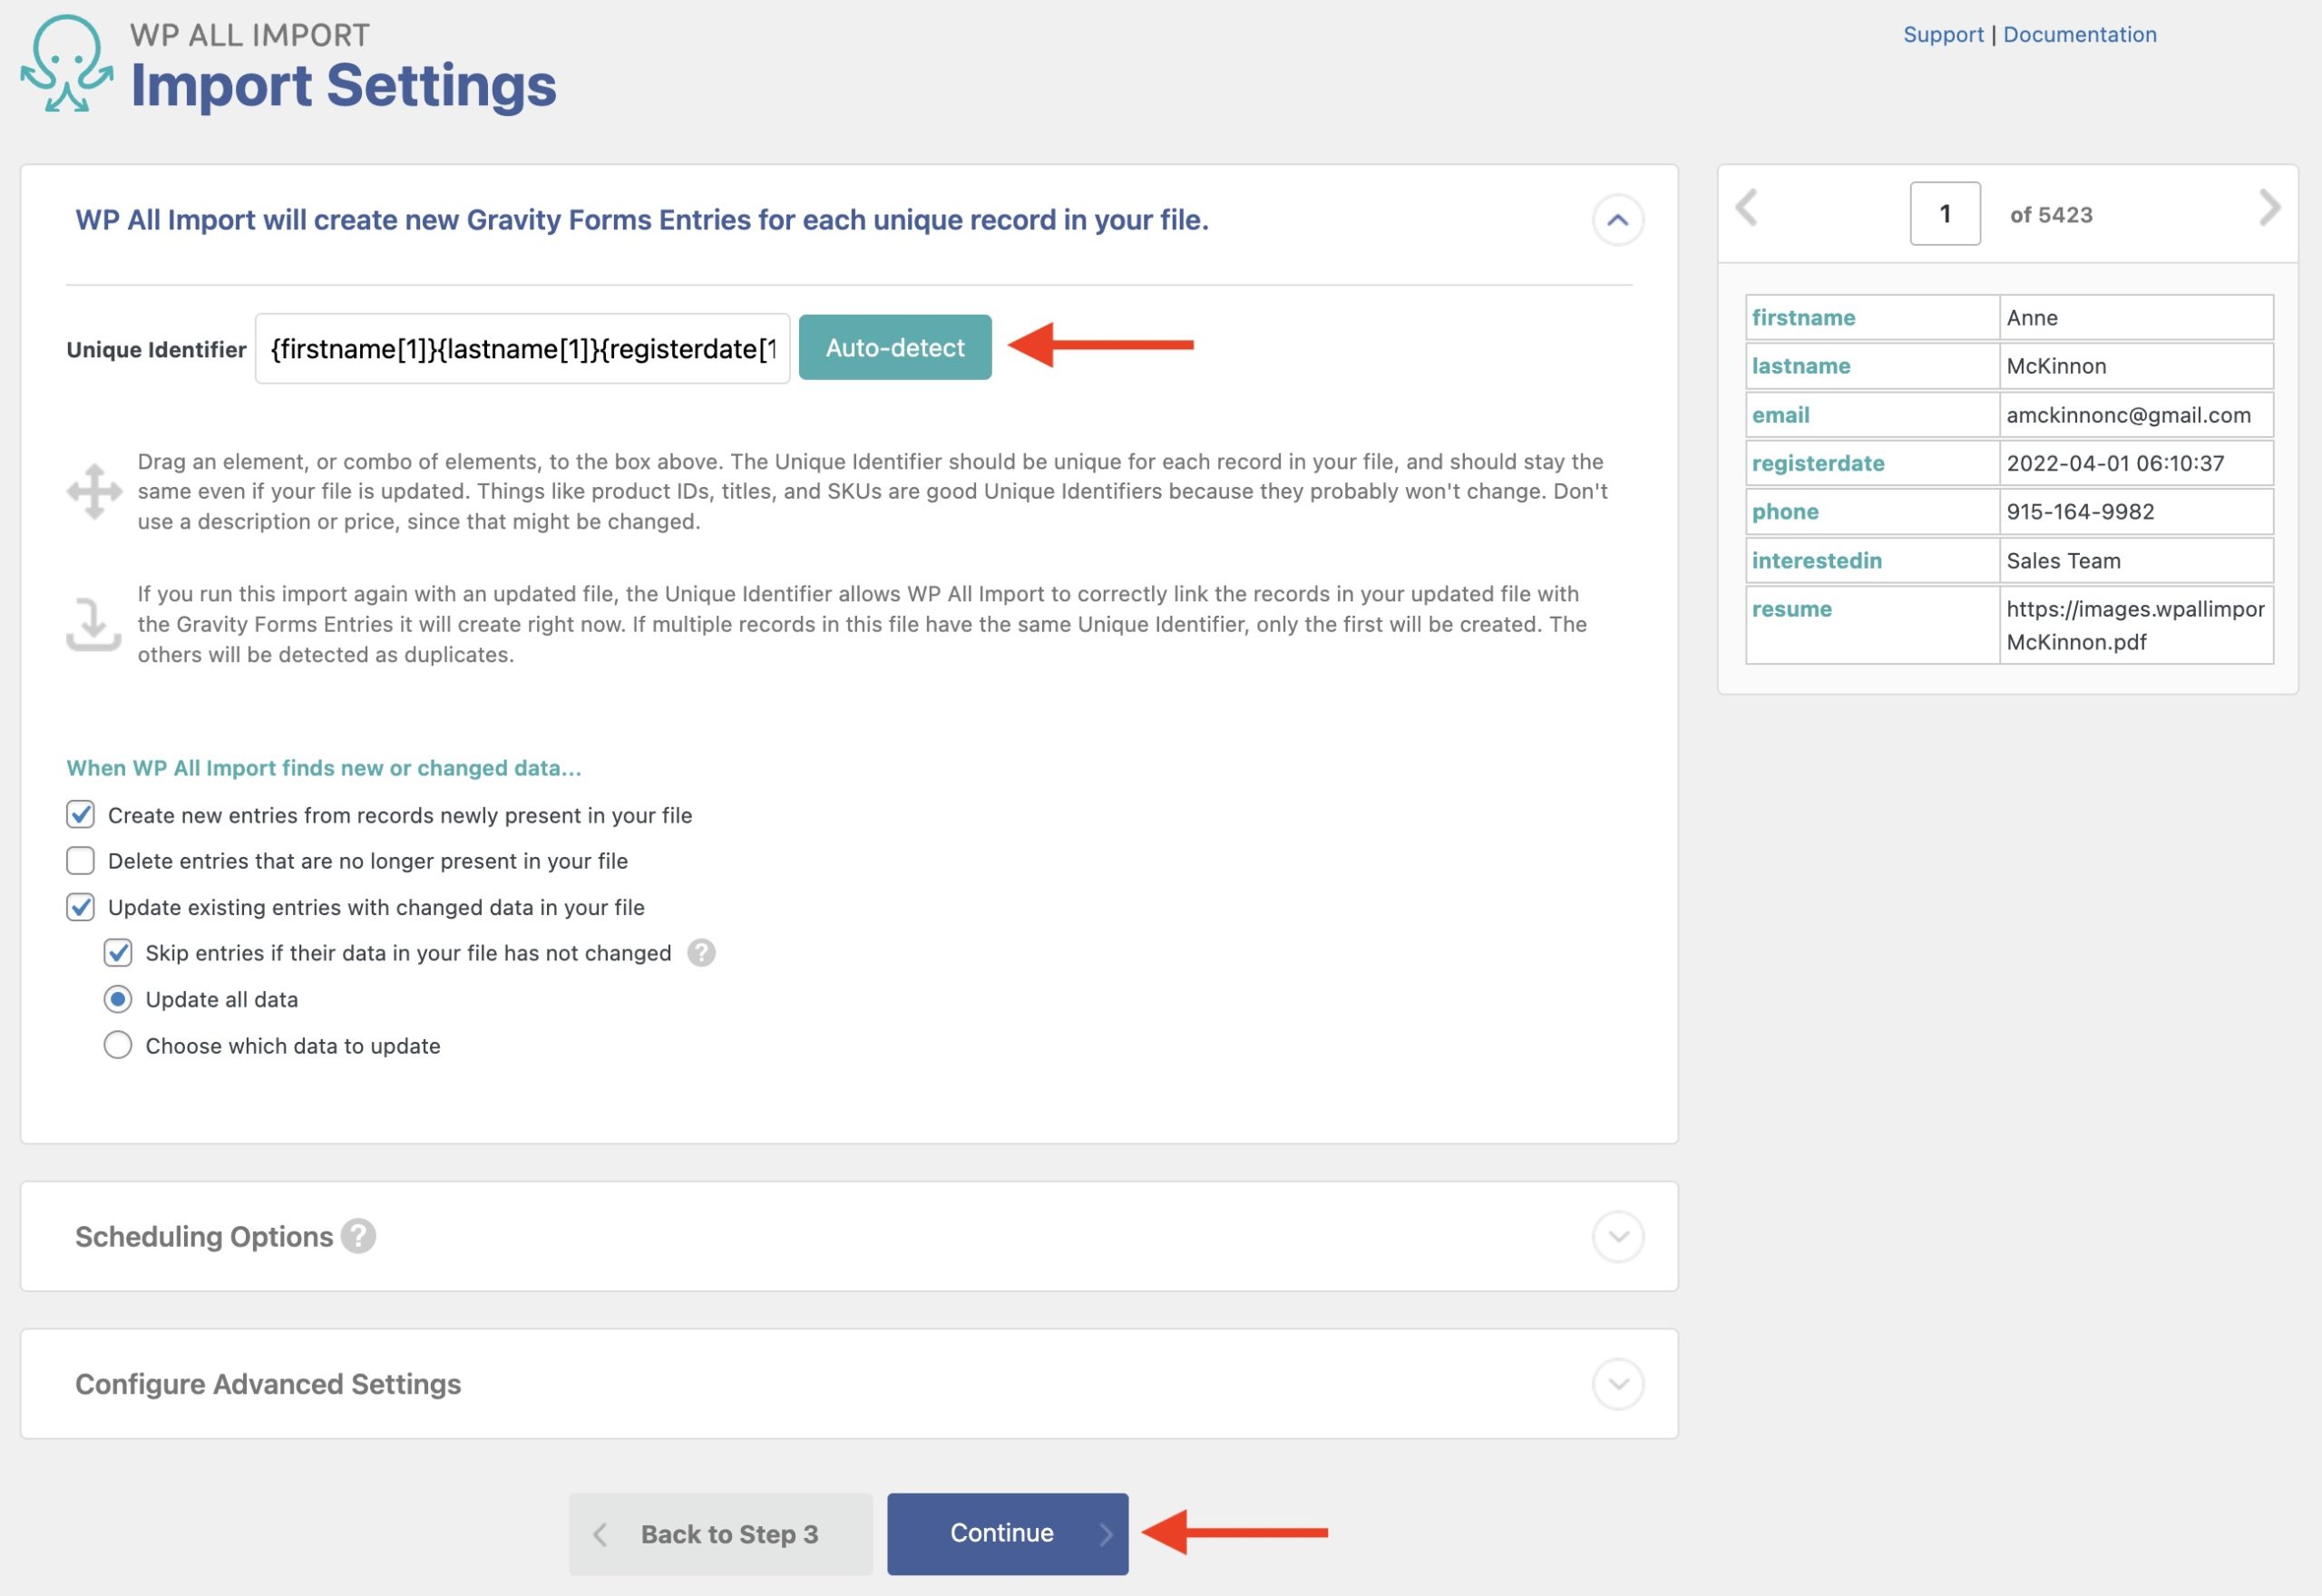
You can also change how the import should behave if it is run again.
There are two other panels near the bottom of the screen: Scheduling Options and Configure Advanced Settings. You can leave these alone for now. Click Continue to carry on.
Next, you see the Confirm & Run screen, where you can check an import summary (not shown) and finally run the import by clicking on Confirm & Run Import (not shown).
You'll see the following screen once the import is complete:

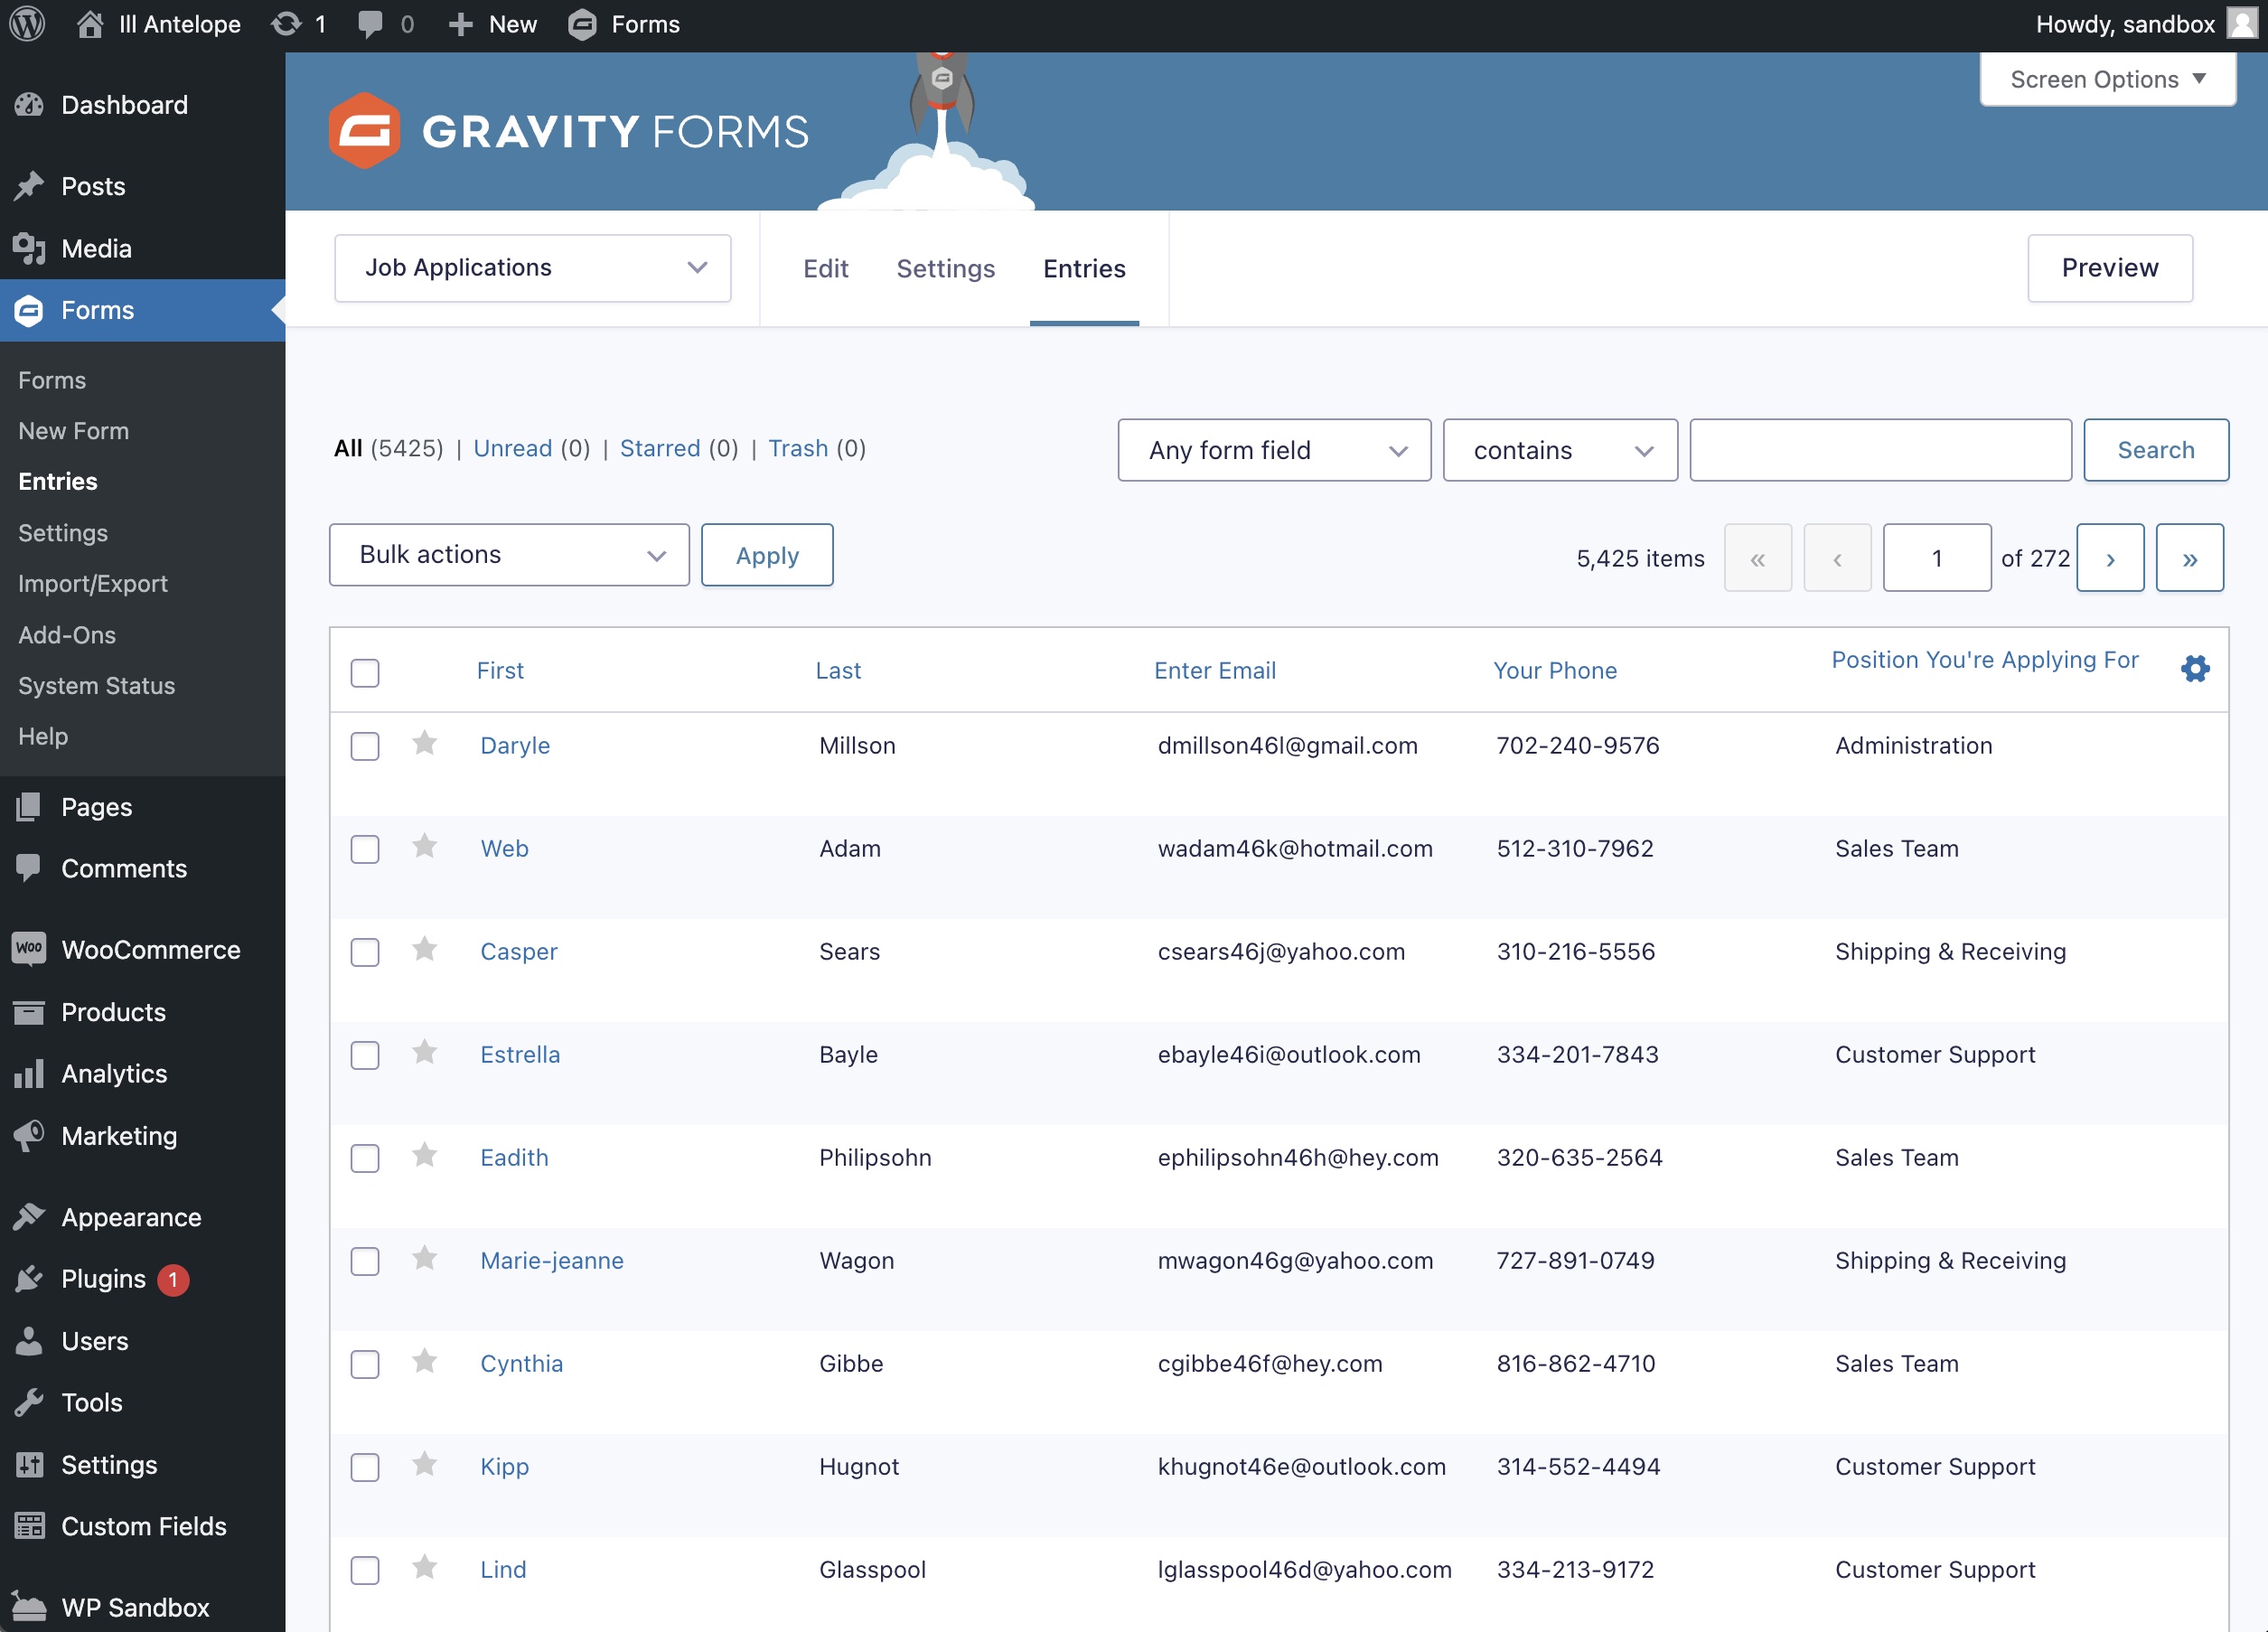
You can now review your imported Gravity Forms entries in Forms › Entries:
Import Gravity Forms Entries from CSV, Excel, or XML
- Any Gravity Forms field type
- Use PHP
- Documented API
- Any file format / type
Import Gravity Forms Entries — Advanced Topics
Use PHP Functions to Modify Gravity Forms Entries During Import
With PHP functions, you can modify the incoming Gravity Form entries in whatever way you need. For example, you can use the str_replace function to turn any value into another, such as turning a "1" into a "Yes" and a "0" into a "No":
[str_replace(array("1","0"),array("Yes","No"),{Consent_Given[1]})]
This is barely an example, but virtually any import field can be modified on the fly using PHP. Learn more about using custom PHP code during imports here: Inline PHP.
Filter the Import Records
Sometimes, you may need to import just a subset of your Gravity Forms entries. You can achieve this by using filters and selectively choosing which entries to import.
To select which entries are imported, expand the Manage Filtering Options panel at the bottom of the New Export screen. A filter needs a target Element, a Rule to apply, and a Value to filter by:
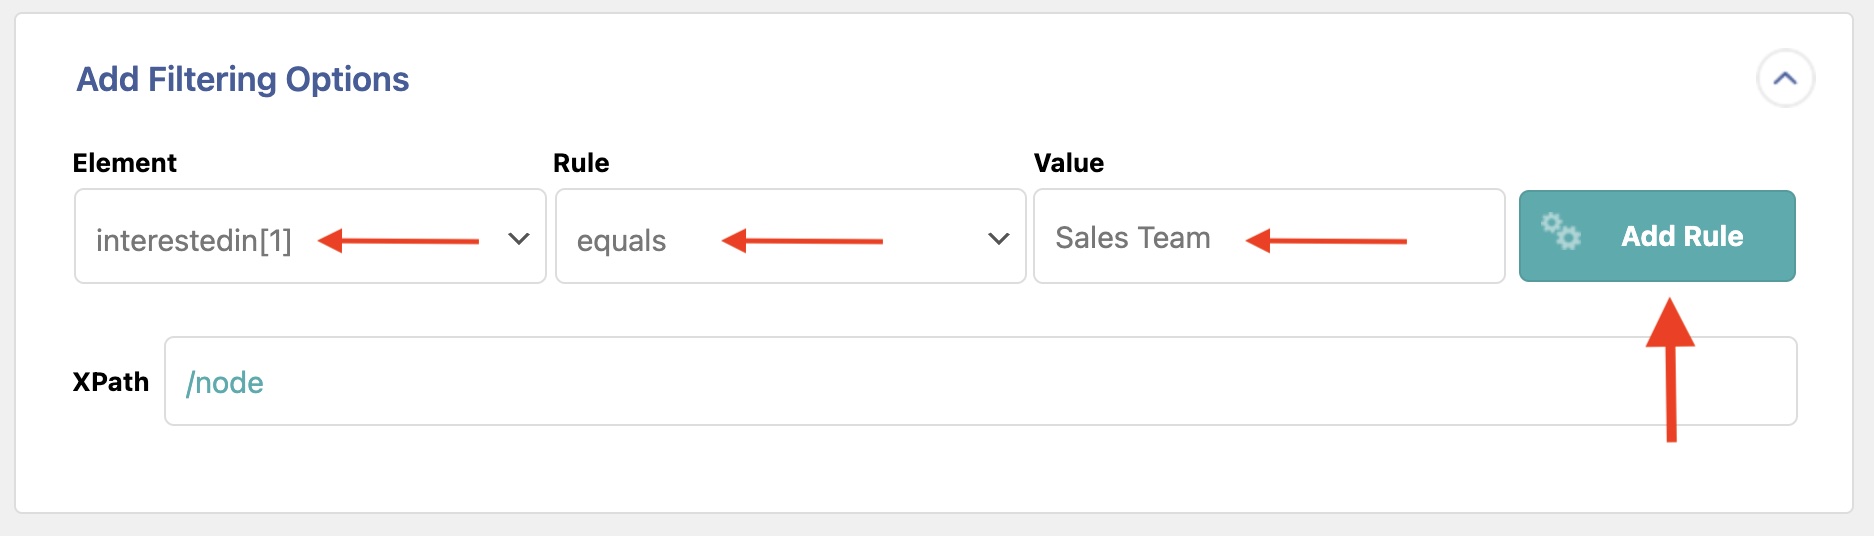
The example filter above has these values:
Element: Interested In
Rule: equals
Value: Sales Team
This means, “Import only Gravity Forms entries where the field 'Interested In' equals 'Sales Team'."
Once you've input the filter data, click Add Rule and follow along to apply it.
Schedule the Gravity Forms Entries Import
You can schedule your Gravity Forms entries import using either of the options provided by WP All Import:
- Manual Cron Jobs: defined manually on your server (i.e., via Plesk or cPanel) and included at no extra cost. Learn more here: Scheduling Imports Using Cron Jobs.
- Automatic Scheduling Service: paid monthly subscription that allows you to set up imports directly from within WP All Import. Learn more here: Automatic Scheduling.
Once the import is scheduled, it will run at your selected time and automatically import your Gravity Forms entries.
Import Gravity Forms Entries — Frequently Asked Questions
Can I Import Gravity Forms Entries From One Form Into Another?
Yes, but the data is unlikely to match field for field. If it does, why are you using two different forms? The most likely use case for this scenario is that you are transitioning from one form to another. In this case, you must be careful to map the correct source fields to the correct target fields.
Can I Modify The Gravity Forms Fields With an Import?
The Gravity Forms Import Add-On allows importing entry data into existing Gravity Forms. It doesn't allow modifying the form itself.
How Do I Export Gravity Forms Entries?
- Navigate to All Export › New Export.
- Select Gravity Forms Entries from the dropdown list.
- Select the form you want to export entries from.
- Customize your export columns.
- Run the export.
You can then download the bundle or the exported file with your Gravity Forms entries. Learn more in How To Export Gravity Forms Entries to CSV, Excel, or XML.
How Do I Migrate Gravity Forms Entries to a Different Site?
- Create an export of the Gravity Forms entries that you want to migrate.
- Run the export and download the bundle file, which contains instructions on how to import the data.
- On the destination site, create a new import using the bundle file.
- Run the import
- Verify that the entries were migrated as expected.
To learn more, see How to Migrate Gravity Forms Entries from One WordPress Site to Another.
How Do I Bulk Edit Gravity Forms Entries?
- Create an export with the desired Gravity Forms entries.
- Download the export file.
- Use your favorite spreadsheet to bulk edit the file.
- Re-import the modified data using the Import with WP All Import option.
- Verify your results.
Learn more about the bulk edit process here: Bulk Edit Quickstart.
How Do I Import a Gravity Form into WordPress?
To import a Gravity Form into WordPress (i.e., the form itself, not the entries), go to Forms > Import/Export and select the Import Forms tab. Choose the import file, then click the Import button. Of course, the file must be formatted correctly for the importer to work. The best way to ensure this is to use the Export Forms tab to create that file.
Where Does Gravity Forms Store Data?
Gravity Forms entries are stored in custom tables in your WordPress database, which is located on your hosting provider. This ensures that they are securely stored.
What Add-Ons Do I Need to Import Gravity Forms Entries?
To import Gravity Forms entries, you need to have the Gravity Forms Import Add-On active on your site, along with WP All Import.
Import Gravity Forms Entries — Related Docs
Automate your import to run on a specific schedule using manual cron jobs.
Use WP All Export to export your Gravity Forms entries easily.
Learn more about how to set up and use recurring import processes.
