How to Import JetEngine Choice Fields
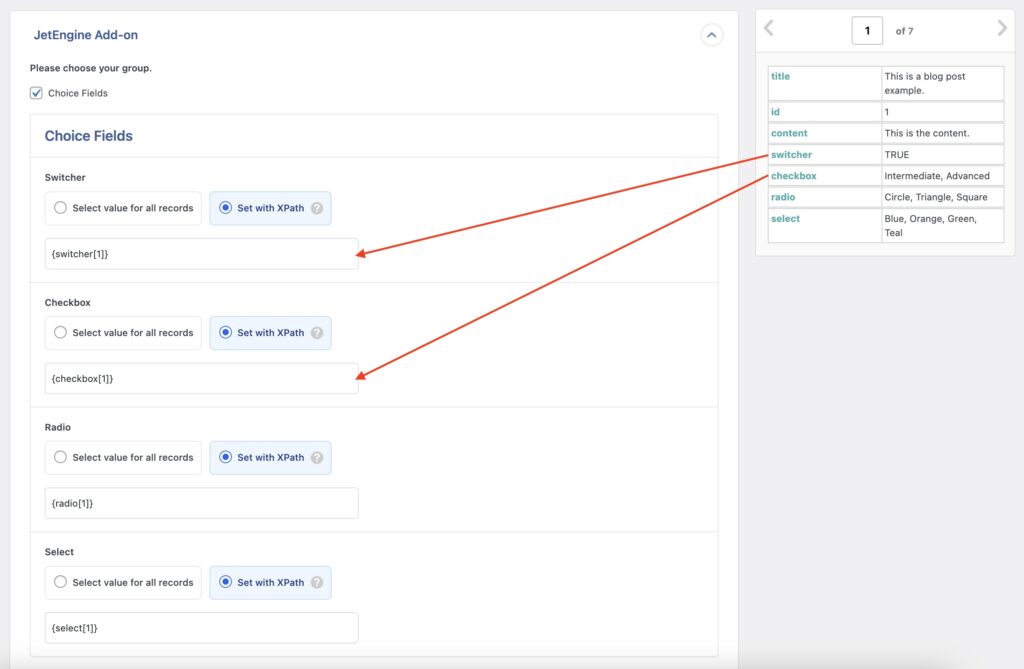
To import JetEngine choice fields, go to All Import › New Import and start a new import process for the post type that contains the JetEngine choice fields. Use the JetEngine Add-On section to map the incoming data elements to their corresponding fields.
The following JetEngine choice fields can be imported: Switcher, Checkbox, Radio, and Select. Here's more on each:
- Switcher: This field lets you select a boolean (valid or false) statement. Import either
trueorfalse. - Checkbox: This field lets you import a choice or multiple choices across different options. For multiple values, separate with commas. If you have both values and labels in your field definition, use the values.
- Radio: This field lets you import a radio value. For multiple values, separate with commas. If you have both values and labels in your field definition, use the values.
- Select: This field lets you select a choice from different values. For multiple values, separate with commas. If you have both values and labels in your field definition, use the values.

Import JetEngine Choice Fields — Frequently Asked Questions
Are All JetEngine Fields Supported?
Yes, the JetEngine Import Add-On supports all custom fields available in JetEngine except the maps fields (which are coming soon). To import your fields, you must have installed both WP All Import Pro and the JetEngine Import Add-On.

Import to JetEngine from any CSV, Excel, and XML
- Every JetEngine field
- Any file format / data structure
- Inline PHP
- Images, galleries, cloneables, etc
- Woo, ACF, Meta Box
- Any theme or plugin
Import JetEngine Choice Fields — Related Docs
Learn more about importing JetEngine fields into WordPress.
Quickstart guide showing you how to import any file into WordPress using WP All Import.
Execute PHP or custom code to modify ACF data during import.