The best import export plugin for WordPress & WooCommerce.

Scheduling Imports Using Cron Jobs
Cron jobs help automate tasks on a schedule. They are like alarms for your computer, running scripts or performing actions at specific times. They save time by automating repetitive tasks.
To run a WordPress import on a schedule, you can set up two cron jobs on your server. This feature is included in WP All Import out of the box and lets you run your import automatically.
Manual Scheduling vs Automatic Scheduling
WP All Import offers two different ways to automate imports. The first option is to manually create the cron jobs on your server. The second option is to use our paid Automatic Scheduling Service, where you can set your imports to run on a schedule from within WP All Import instead of setting up cron jobs.
This guide focuses on manually creating the cron jobs.
How Manual Cron Jobs Work
Each time an import cron job is run, WP All Import will download your XML or CSV file from the specified source and update, delete, and create posts on your site according to your settings.
To set up a recurring import using cron jobs, specify the URL to your XML or CSV file on the import Settings page. This can also be activated when using an FTP or SFTP file source, or when using the Use existing file option.
Next, visit the Scheduling Options link on the All Import › Manage Imports page to open the Scheduling Options screen.

You need to choose the Manual Scheduling option here:
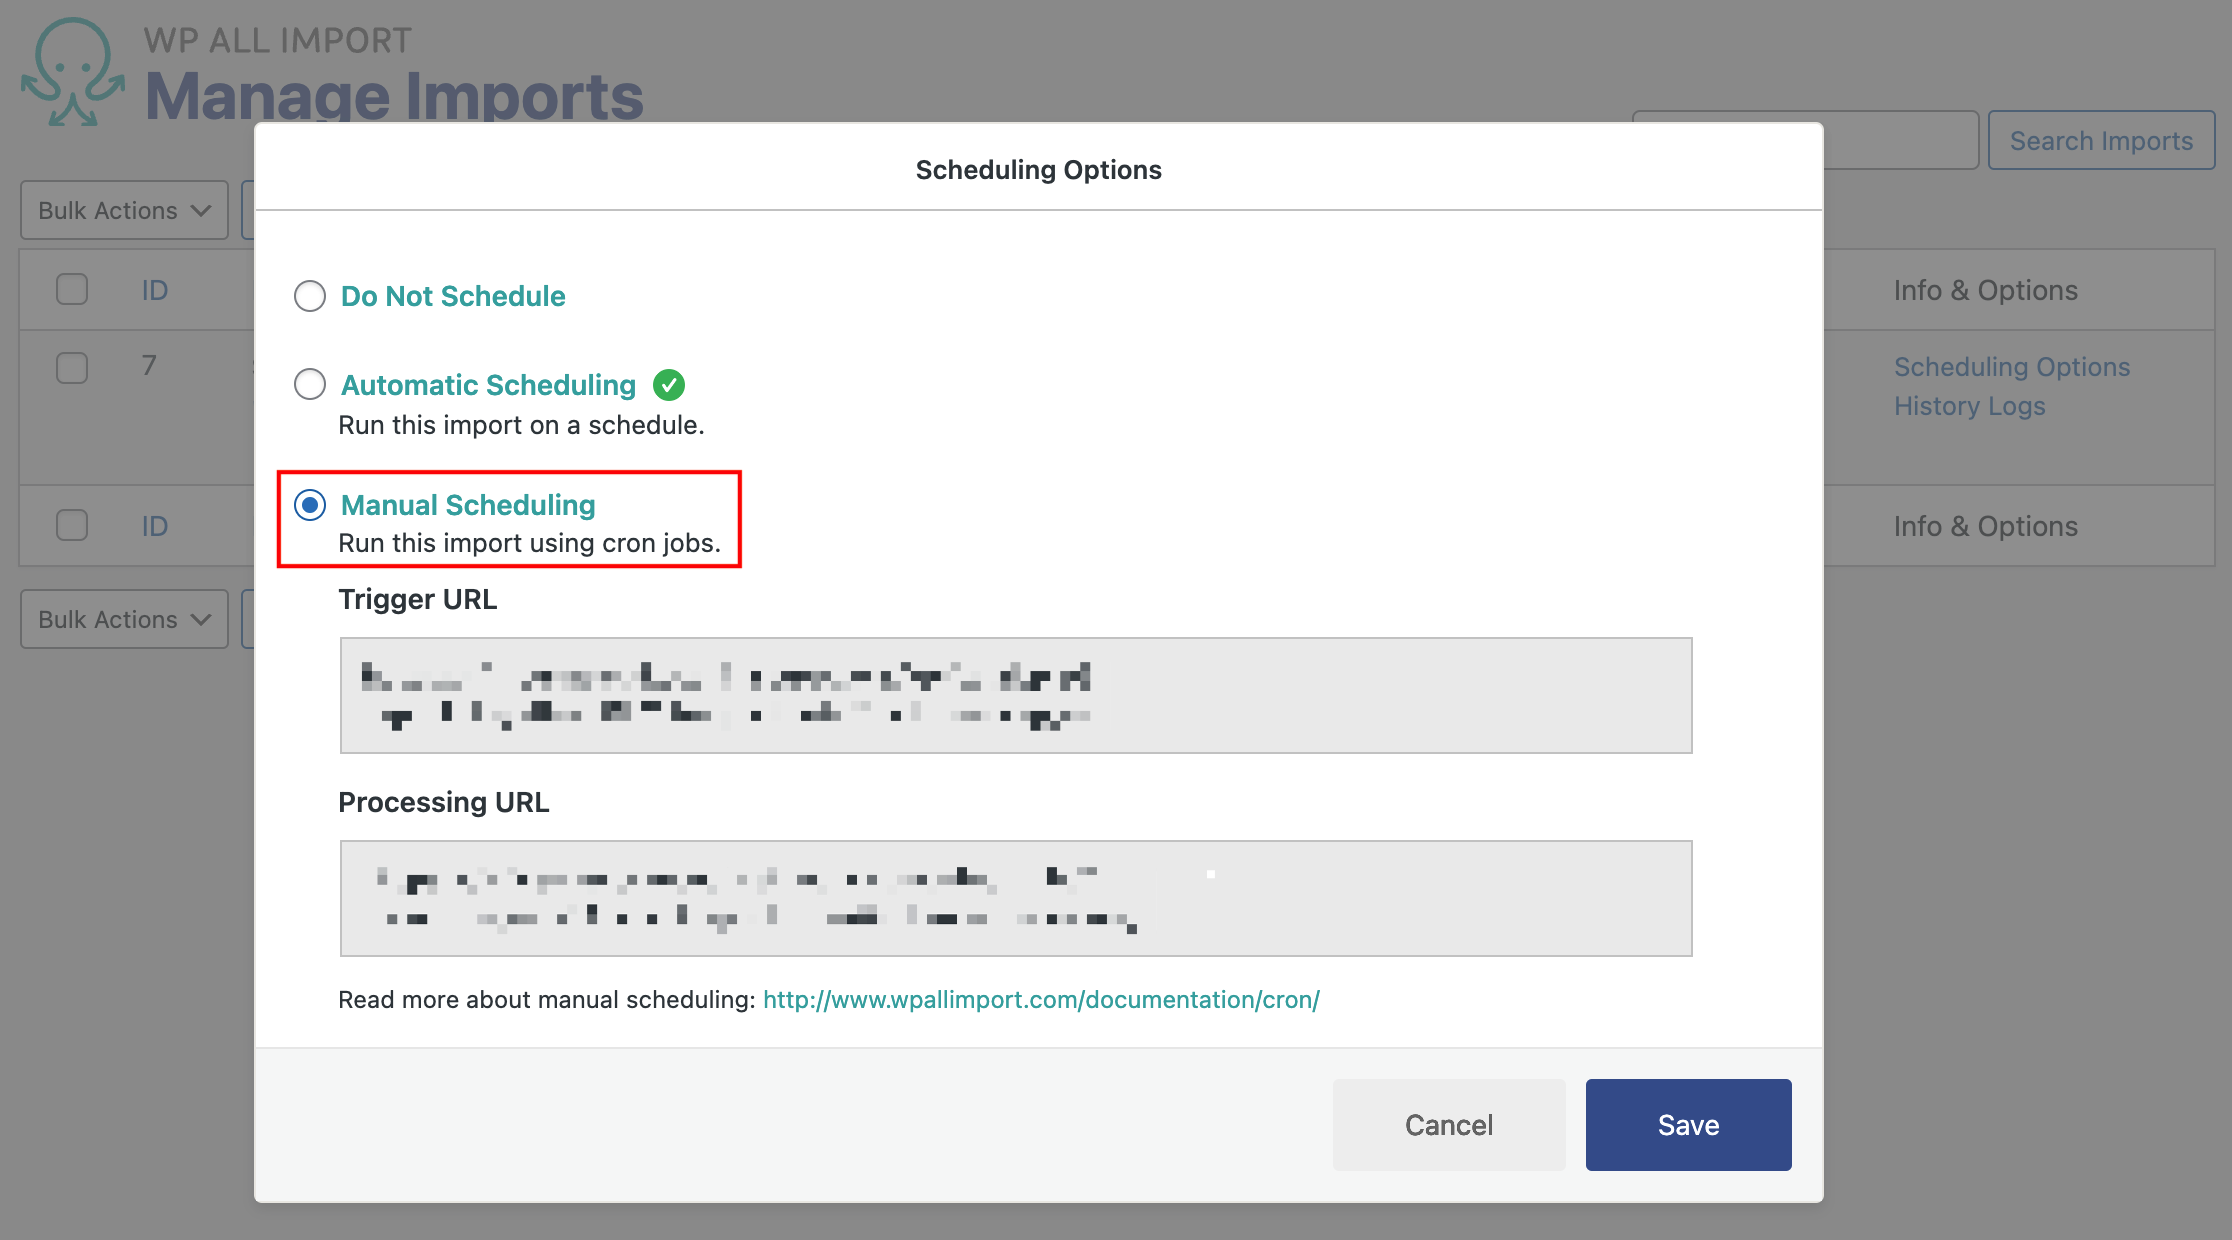
You can ignore the Save button, as nothing needs to be saved on this screen. The cron job URLs are always active.
Each import has two cron URLs – a trigger URL and a processing URL.
The trigger URL will look something like this:
http://YOUR-WEBSITE.com/wp-load.php?import_key=[YOUR_SECRET_KEY]&import_id=[YOUR_IMPORT_ID]&action=trigger
The processing URL will look something like this:
http://YOUR-WEBSITE.com/wp-load.php?import_key=[YOUR_SECRET_KEY]&import_id=[YOUR_IMPORT_ID]&action=processing
You can find your secret key on the All Import › Settings screen and the import ID on the All Import › Manage Imports screen.
If you want to run your import every 24 hours, you should run the trigger URL every 24 hours. If you want to run your import once per week, you should run the trigger URL every week.
The processing URL should be run every two minutes because it may not finish your import in one run. The reason is that many hosts have maximum script execution times in place, so your processing script may only finish a small percentage of your import before it times out.
If this is the case and the processing script is run again after two minutes, it checks to see if your import is finished or if there’s still work to be done. If there’s work to be done, it will import posts for as long as it can, or two minutes, whichever is longer.
On the next run of the processing script, it will see if more work needs to be done on the import. If so, it will do it. If not, it will “untrigger” the import, which means the processing script will have no effect until the import is triggered again by the next run of the trigger script.
Besides the trigger and processing URLs, there is a cancel URL available to cancel the cron job execution:
The cancel URL will look something like this:
http://YOUR-WEBSITE.com/wp-load.php?import_key=[YOUR_SECRET_KEY]&import_id=[YOUR_IMPORT_ID]&action=cancel
Setting Up Cron Jobs Correctly
The instructions for setting up cron jobs vary across hosts. You can often do it in your web hosting control panel.
To create a cron job that hits the cron URLs, the wget command is often used. Below are a few cron command examples (not all options work with all hosts, so you should ask your host for guidance):
wget --spider "http://YOUR-WEBSITE.com/wp-load.php?import_key=[YOUR_SECRET_KEY]&import_id=[YOUR_IMPORT_ID]&action=trigger&rand="$RANDOMwget -q -O - "http://YOUR-WEBSITE.com/wp-load.php?import_key=[YOUR_SECRET_KEY]&import_id=[YOUR_IMPORT_ID]&action=trigger&rand="$RANDOMcurl "http://YOUR-WEBSITE.com/wp-load.php?import_key=[YOUR_SECRET_KEY]&import_id=[YOUR_IMPORT_ID]&action=trigger&rand="$RANDOMlynx "http://YOUR-WEBSITE.com/wp-load.php?import_key=[YOUR_SECRET_KEY]&import_id=[YOUR_IMPORT_ID]&action=trigger&rand="$RANDOMAs seen in those examples, we use a $RANDOM parameter as a cache-busting technique. This is particularly handy in servers where heavy caching doesn't allow the cron jobs to function correctly.
Import Any CSV, XML, or Excel to WordPress
- Cron Scheduling
- Images & galleries
- Custom fields
- Categories & tags
- Woo, ACF, Meta Box, JetEngine
Email Template to Ask Host For Support
To ask your web hosting provider to set up the cron for you, use this email template:
Hi Support,
Please set up two cron jobs.
CRON JOB 1
Fetch this URL every 24 hours: http://YOUR-WEBSITE.com/wp-load.php?import_key=[YOUR_SECRET_KEY]&import_id=[YOUR_IMPORT_ID]&action=trigger
CRON JOB 2
Fetch this URL every 2 minutes: http://YOUR-WEBSITE.com/wp-load.php?import_key=[YOUR_SECRET_KEY]&import_id=[YOUR_IMPORT_ID]&action=processing
Thanks,
Your Name
If your web host doesn’t have a cron feature, you can use an external service like EasyCron.
Call Cron URLs from the Command Line
You can call the WP All Import and WP All Export cron URLs from the command line. This may be necessary if your site's configuration won't allow inbound calls to the regular cron URLs.
It should look something like this:
/path/to/your/php-cgi /path/to/yourwordpressinstall/wp-load.php import_key=ABC123 import_id=5 action=trigger/path/to/your/php-cgi /path/to/yourwordpressinstall/wp-load.php import_key=ABC123 import_id=5 action=processingNote: The php-cgi binary must be used, or the parameters won't be passed correctly.
Related Docs
Learn about our optional paid Automatic Scheduling Service.
Quickstart guide that explains how to use WP All Import to import data.
Use PHP functions in WP All Import to modify data on-the-fly.
