The best import export plugin for WordPress & WooCommerce.

How to Import Any CSV, XML, or Excel File into WordPress
To import any CSV, XML, or Excel file into WordPress, simply map the incoming data elements to their corresponding WordPress fields by using our convenient drag & drop tool. You can filter and even modify the incoming data during the import process.
Table of Contents
- Step 1: Create a New WordPress Import
- Step 2: Review the Import File
- Step 3: Map Data to WordPress Fields
- Step 4: Select Data to Update
- Step 5: Confirm & Run the Import
Advanced Topics
- Add Filters to new Imports
- Modify Filters for Existing Import
- Reuse Import Template on Multiple Imports
- Schedule an Import to Run Automatically
- Duplicate an Import Process
Step 1: Create a New WordPress Import
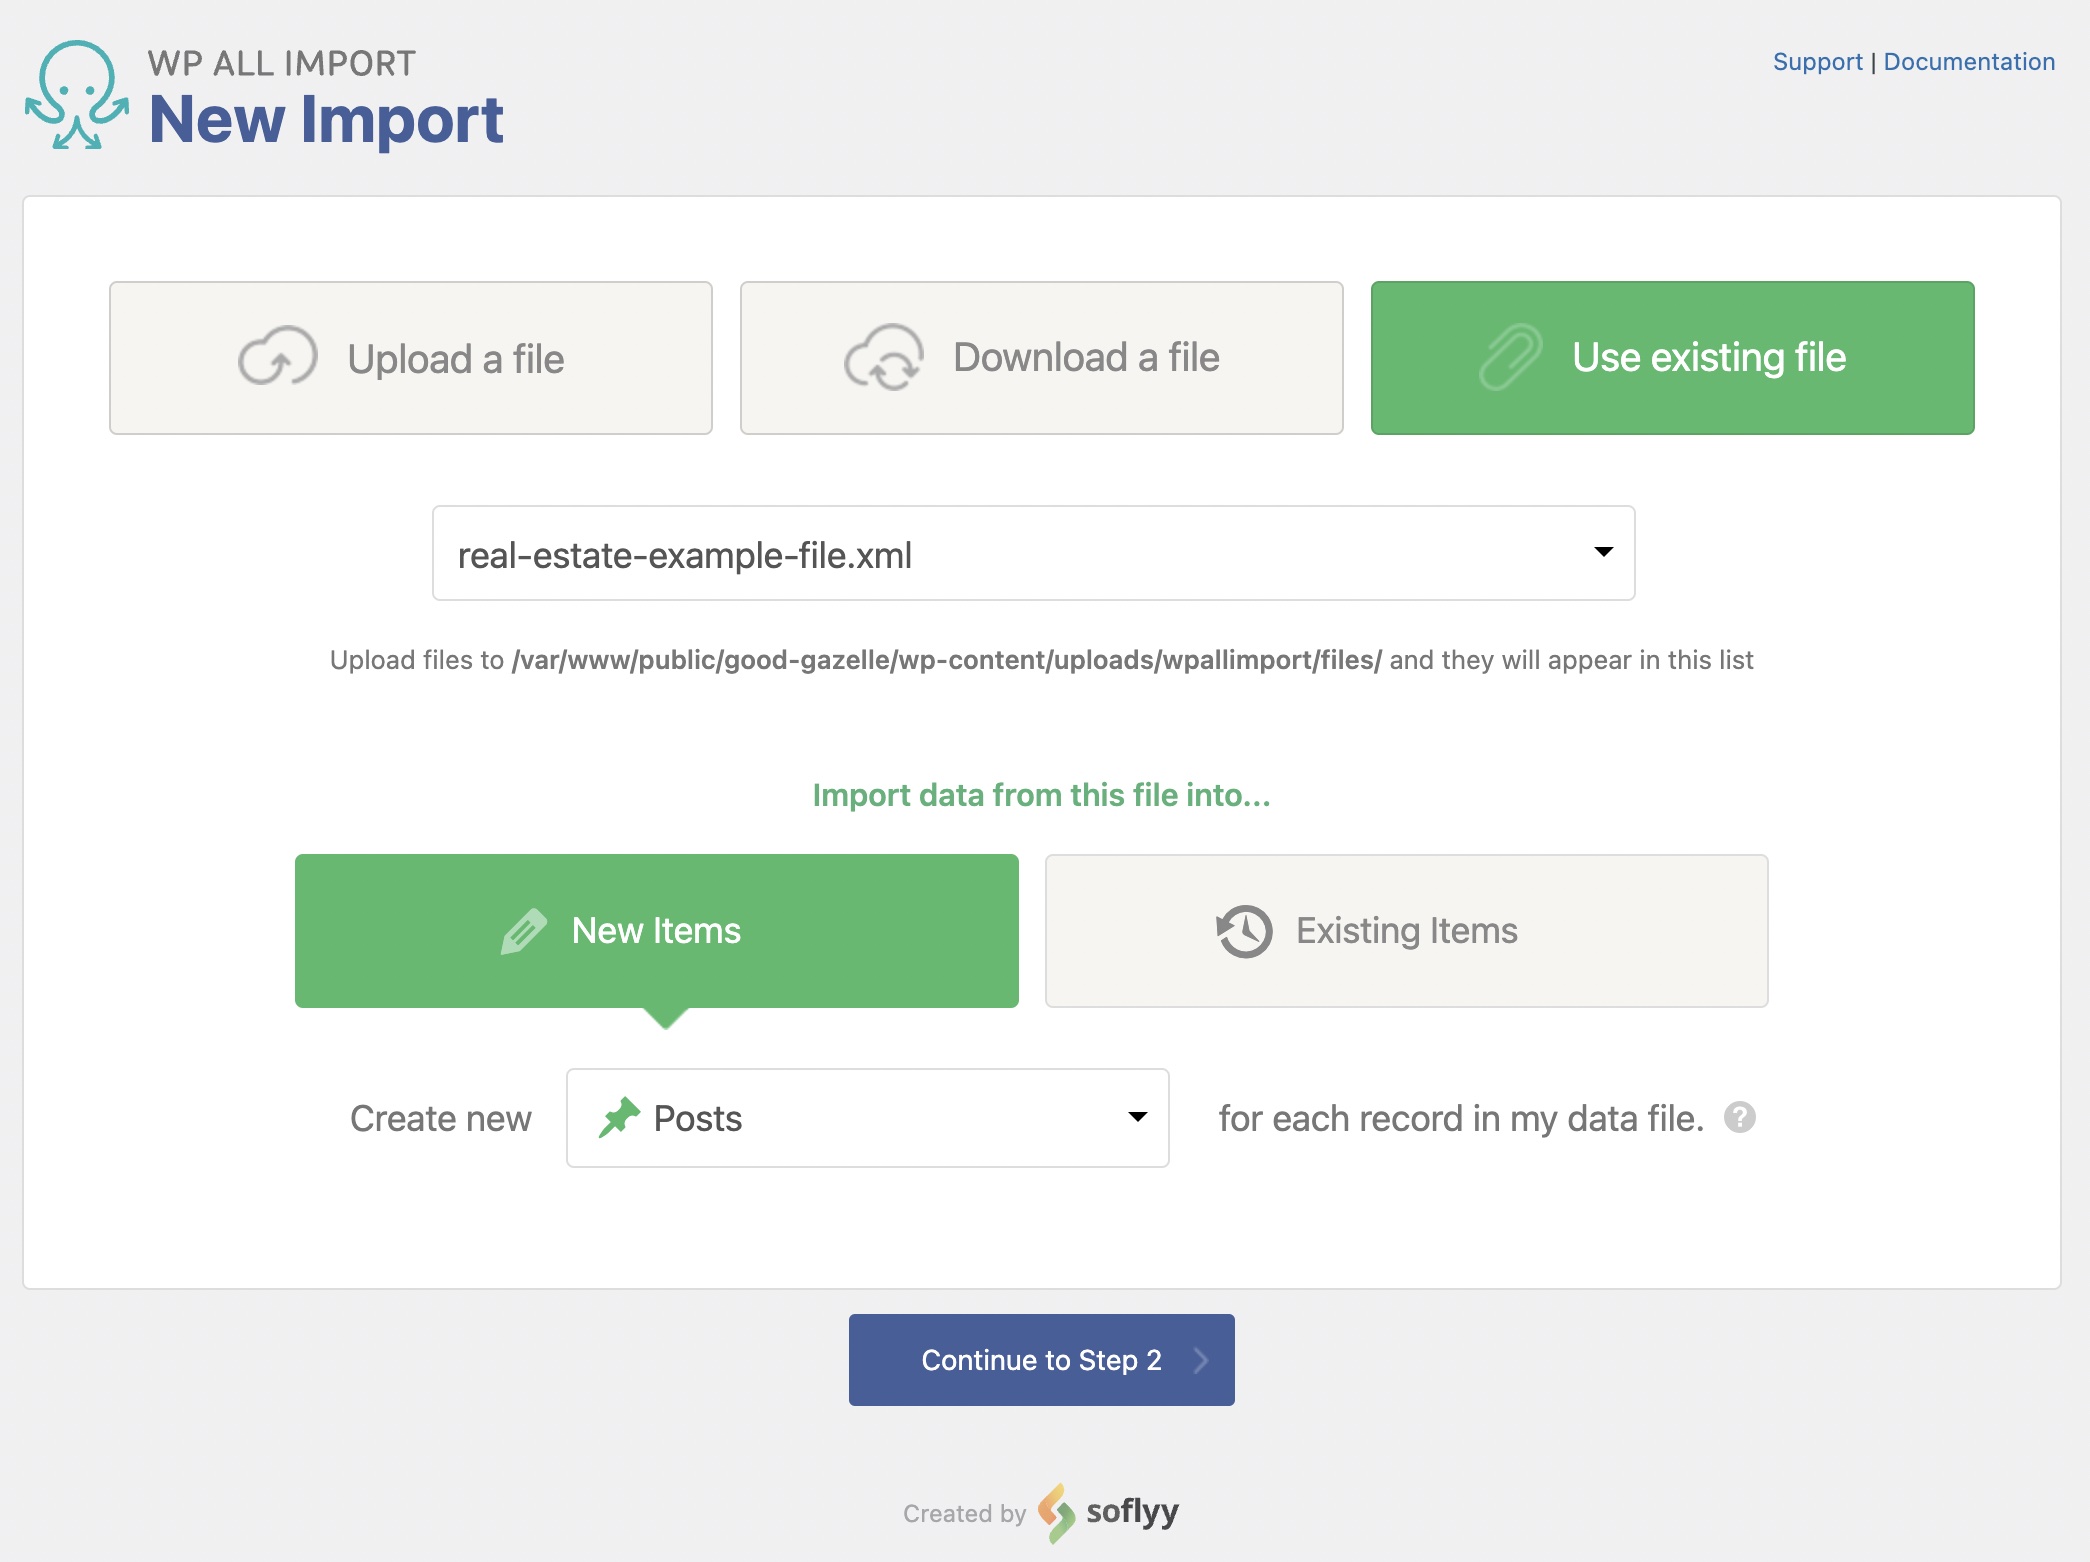
The first step to creating a WordPress import is to upload your import file via All Import › New Import. You can choose to upload the file from your computer, paste in a URL to the file, or choose an existing file that you've already used with WP All Import.
Next, choose either New Items or Existing Items. If you are importing data from your file into posts that are already on your site, select Existing Items. Otherwise, select New Items.
Finally, you need to decide what you want to import. You can import Posts, Pages, Taxonomies, Users, or custom post types added by other themes and plugins like WooCommerce Products.
Step 2: Review the Import File
WP All Import will process your file and prepare it for import. If you uploaded a CSV, check that the correct delimiter was used. When you upload an XML file, check that the correct node is selected.
If you only want to import some of the records in your import file, you can add filters under Manage Filtering Options.
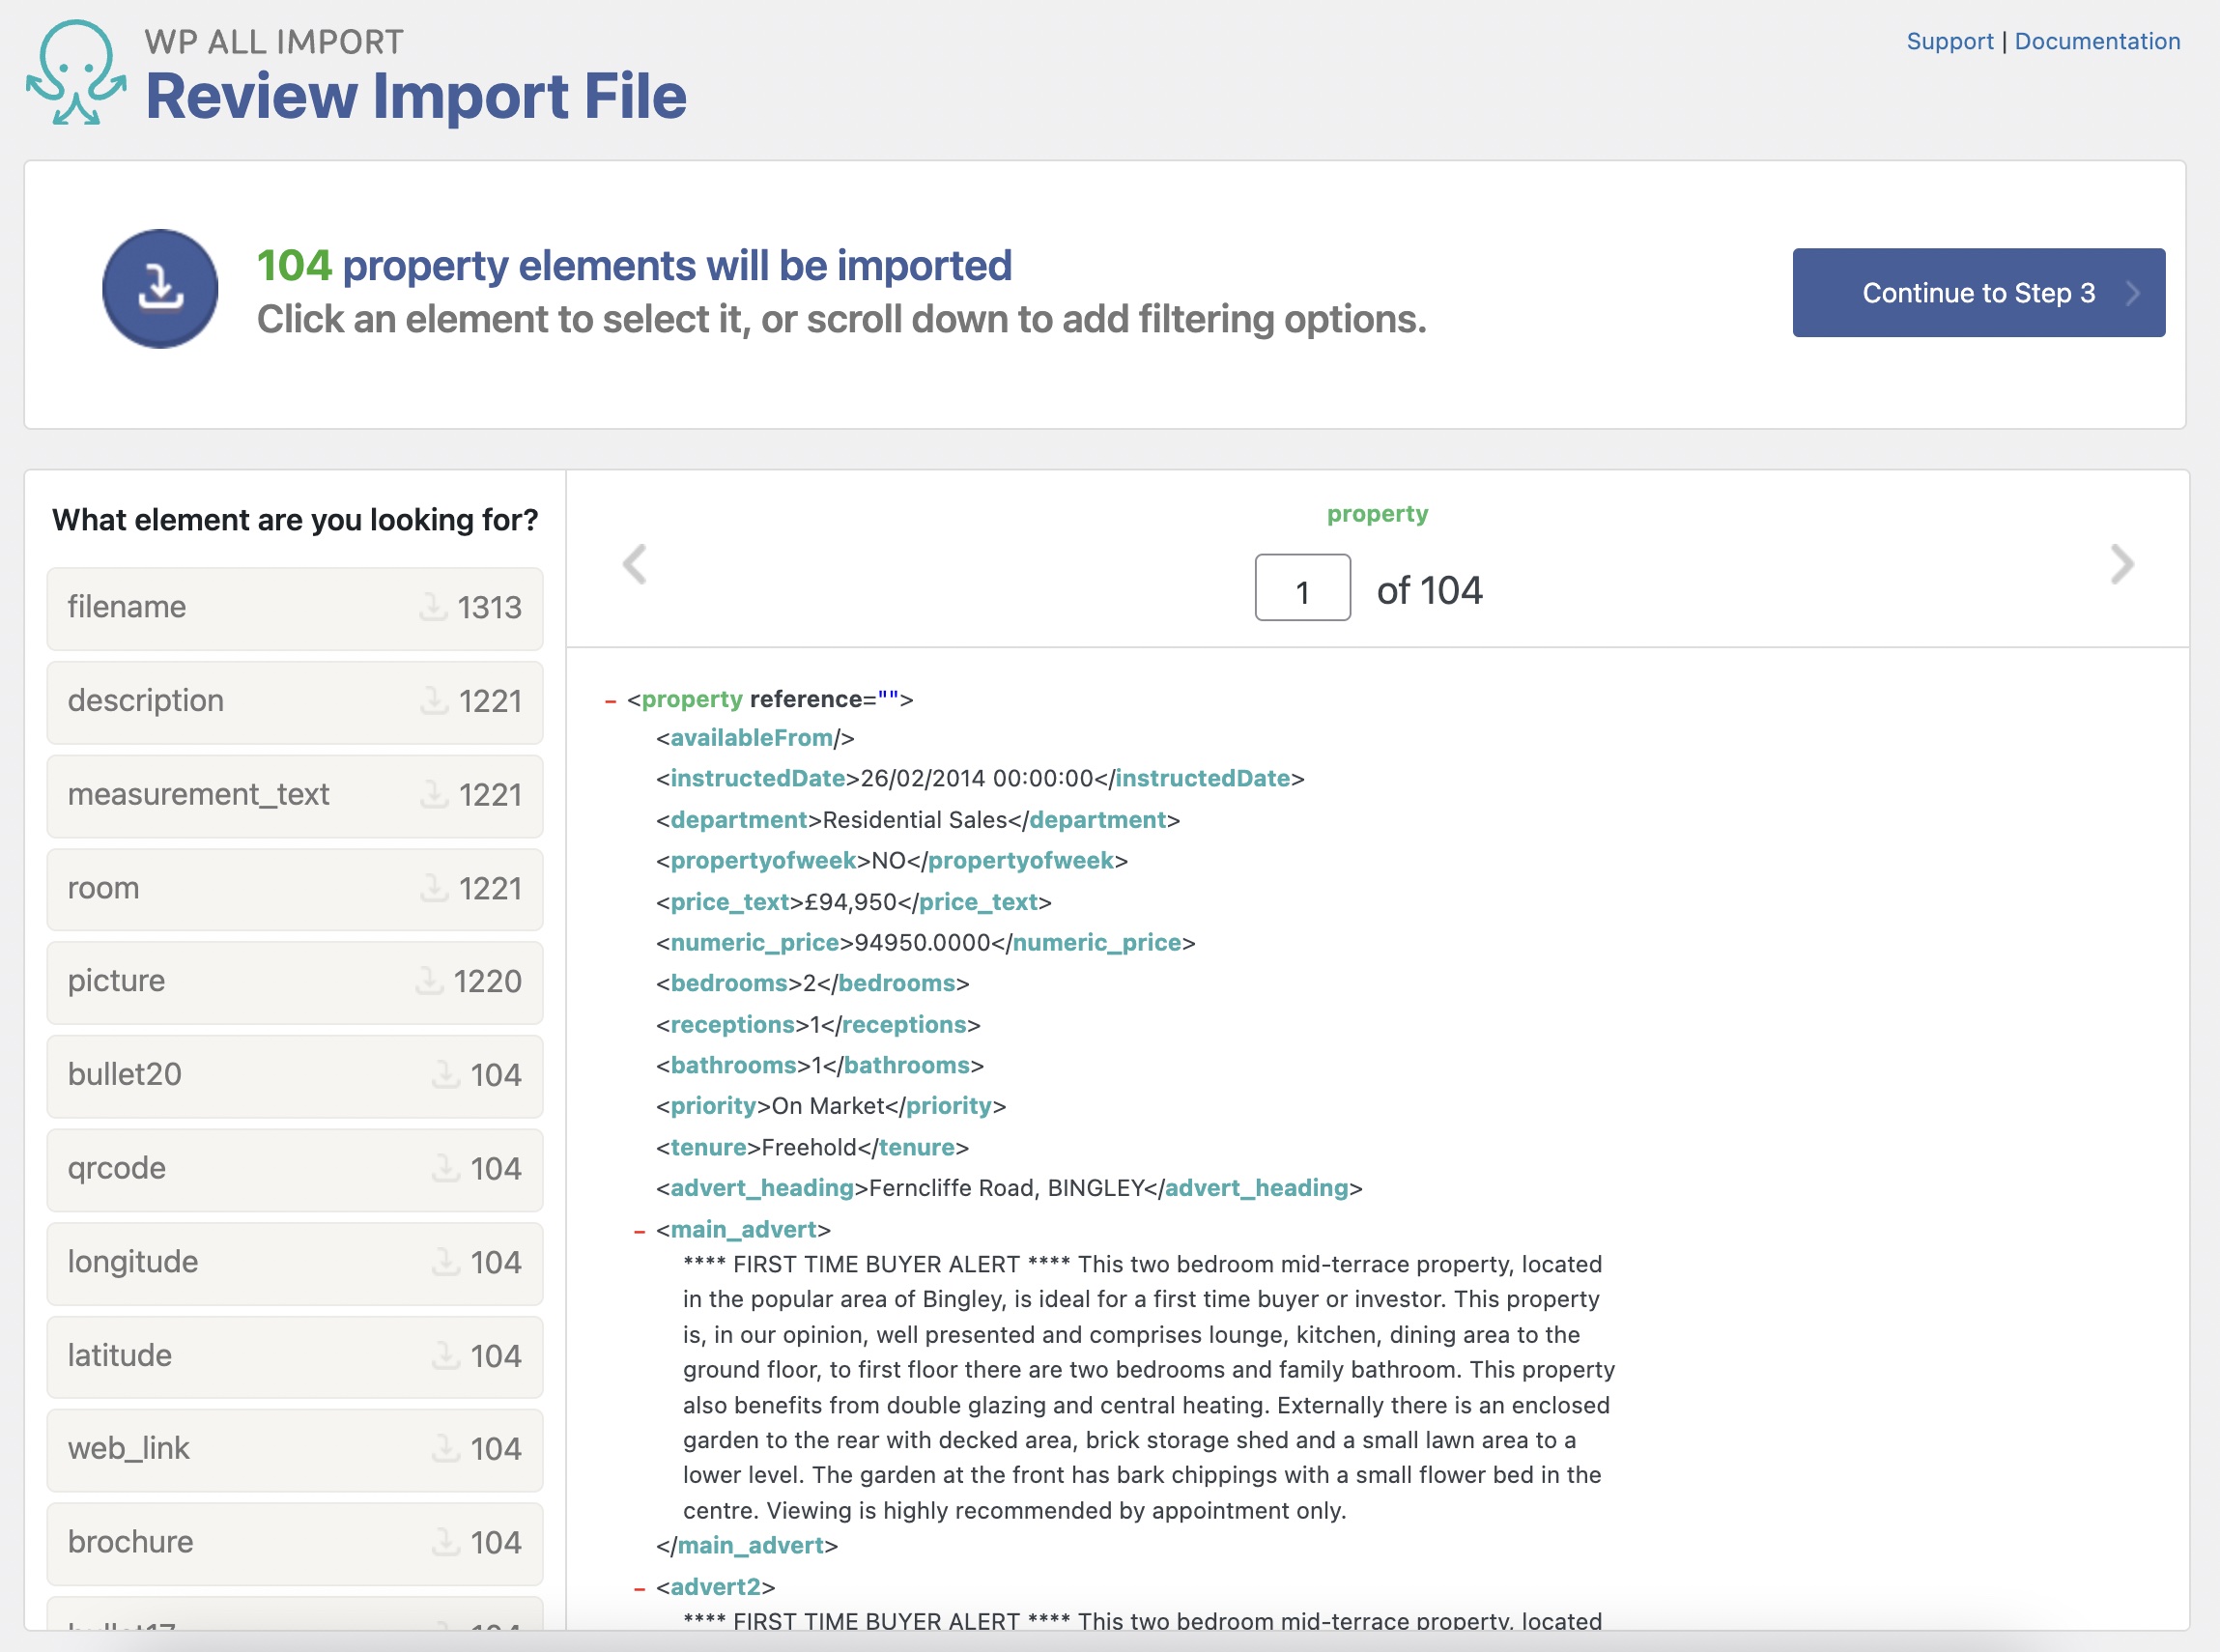
Click Continue to Step 3 to carry on with your WordPress import.
Step 3: Map the Incoming Data Elements to the Correct WordPress Fields
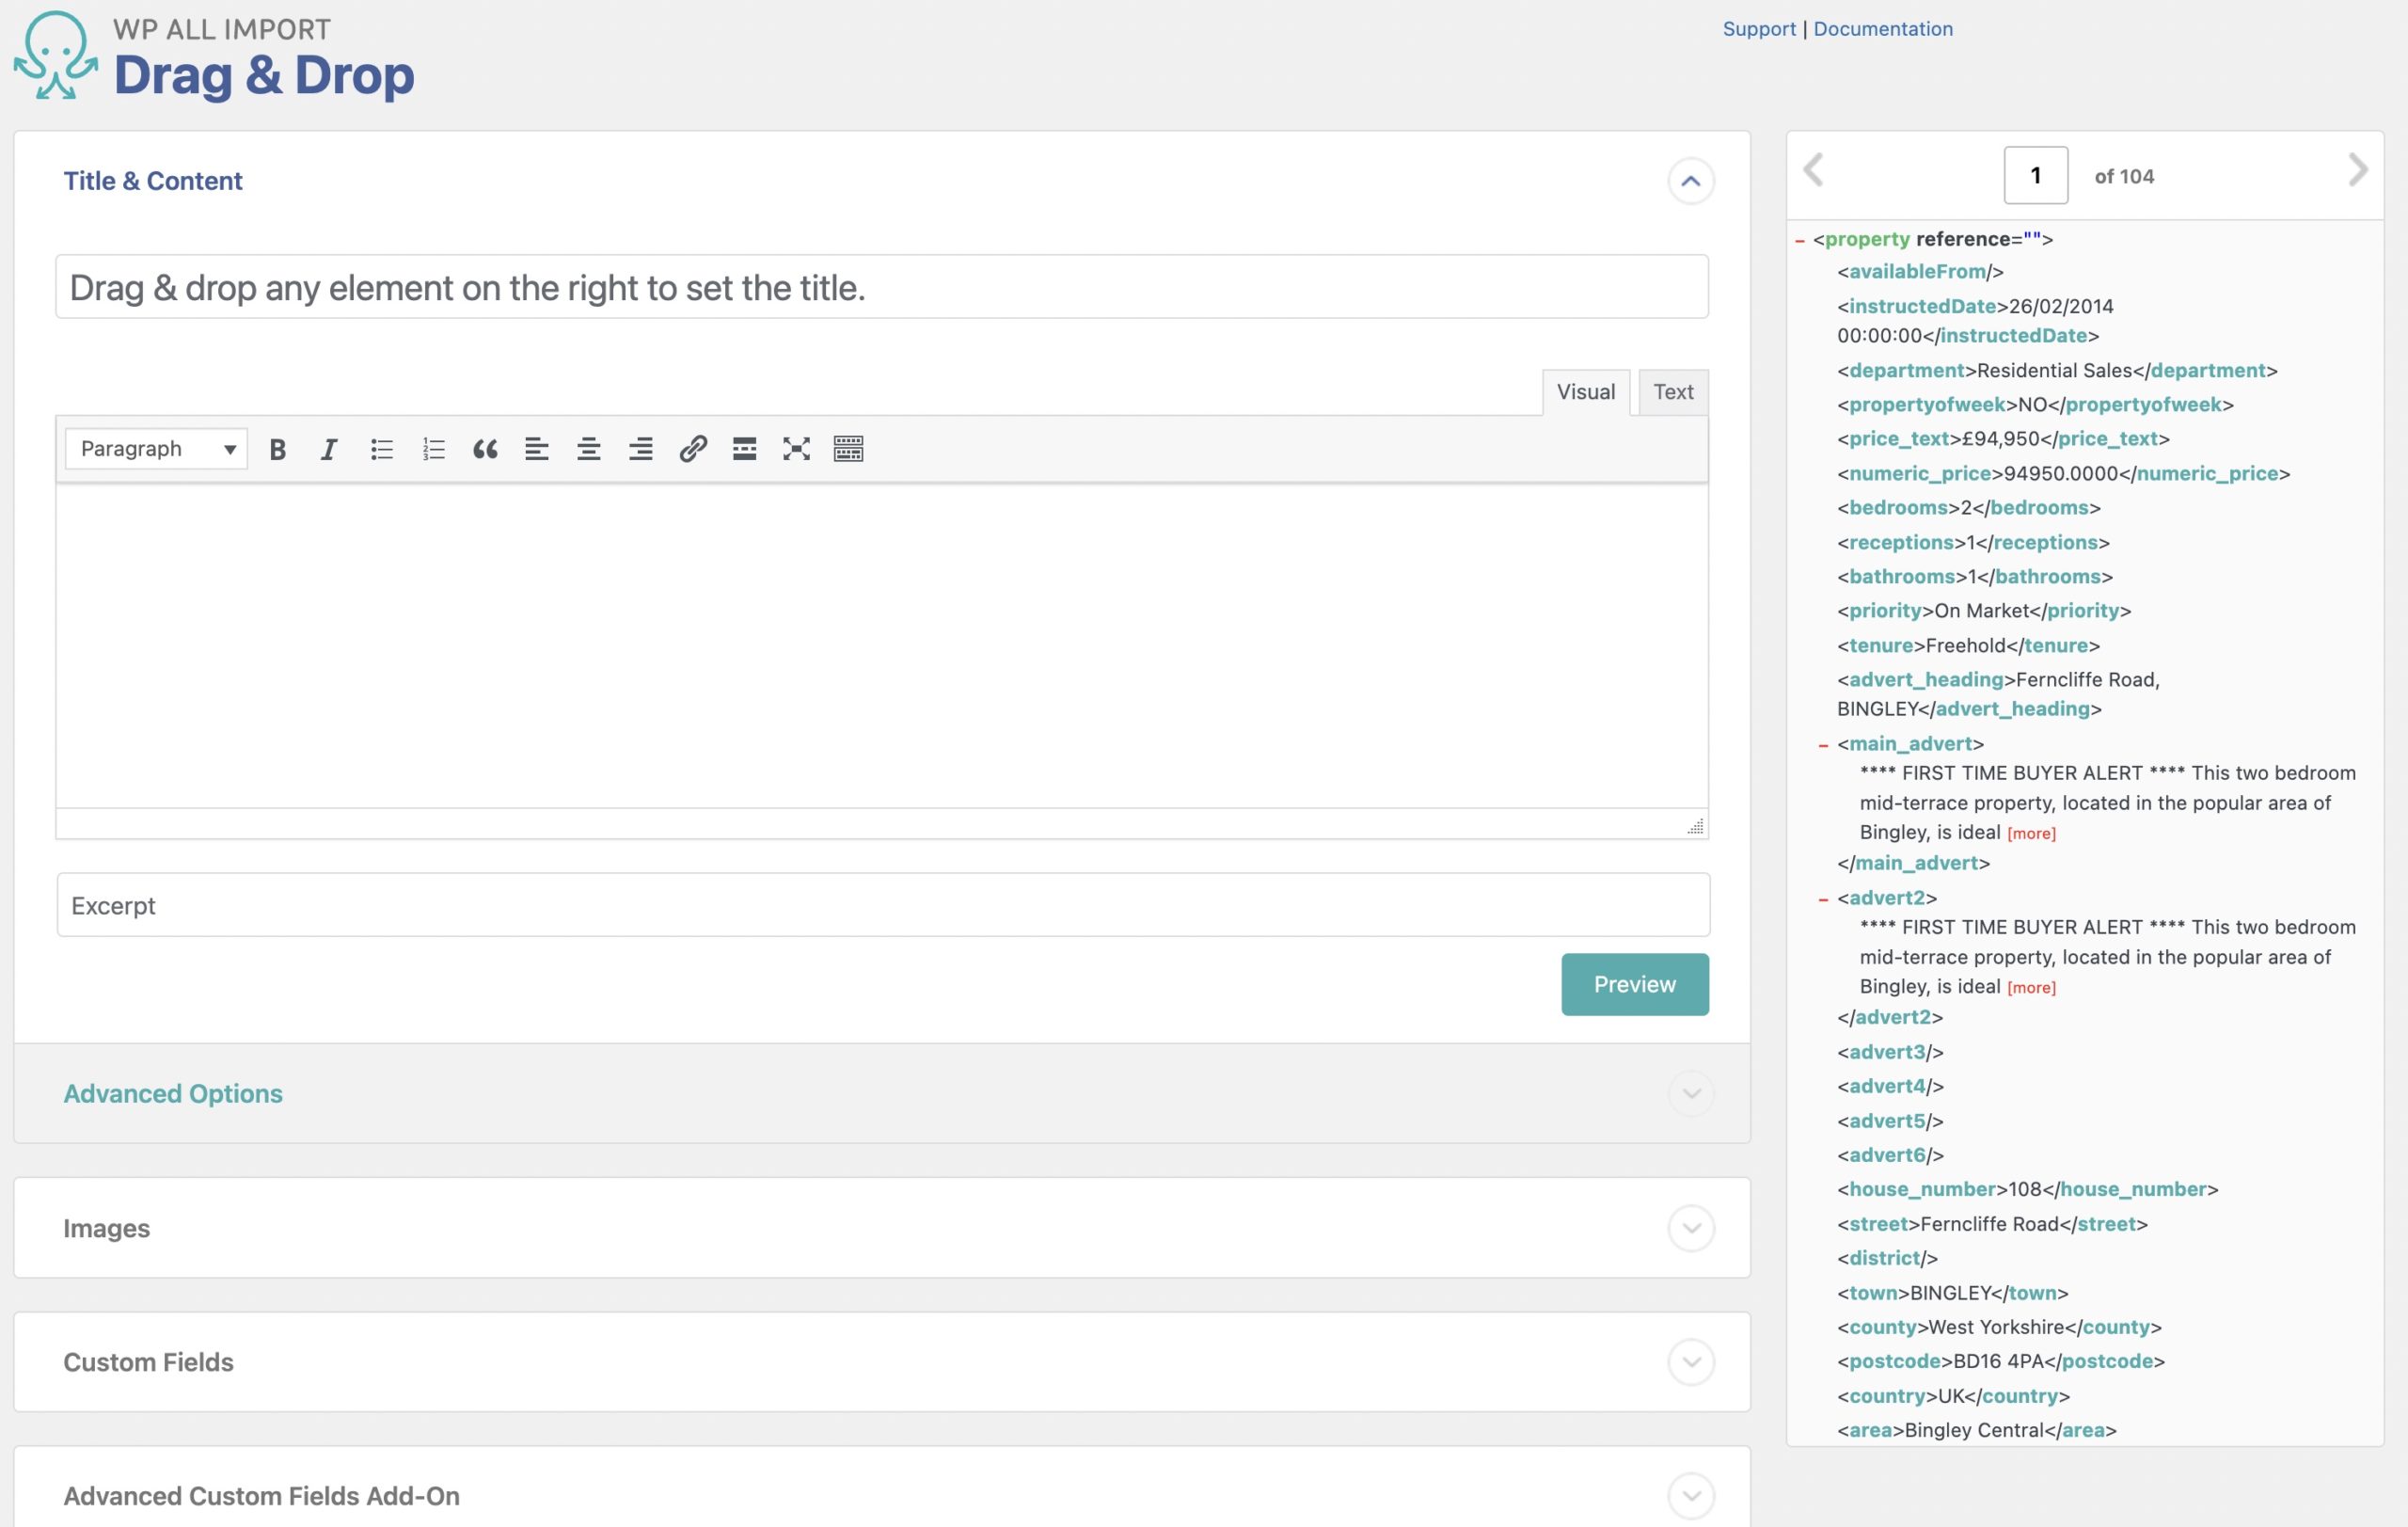
Every column or element from your import file will be displayed on the right. On the left, you have your import. WP All Import will create posts using the import template you create here. Simply drag your WordPress import data from right to left. You can fill in as many or as few of the fields as you like depending on your needs.
Step 4: Choose the WordPress Data to Update
Here you can tell WP All Import how to handle each specific piece of data. For example, you can have it only add new images to posts, or just update the stock and price for your products.
You can also configure this import to run on a schedule and other advanced options.
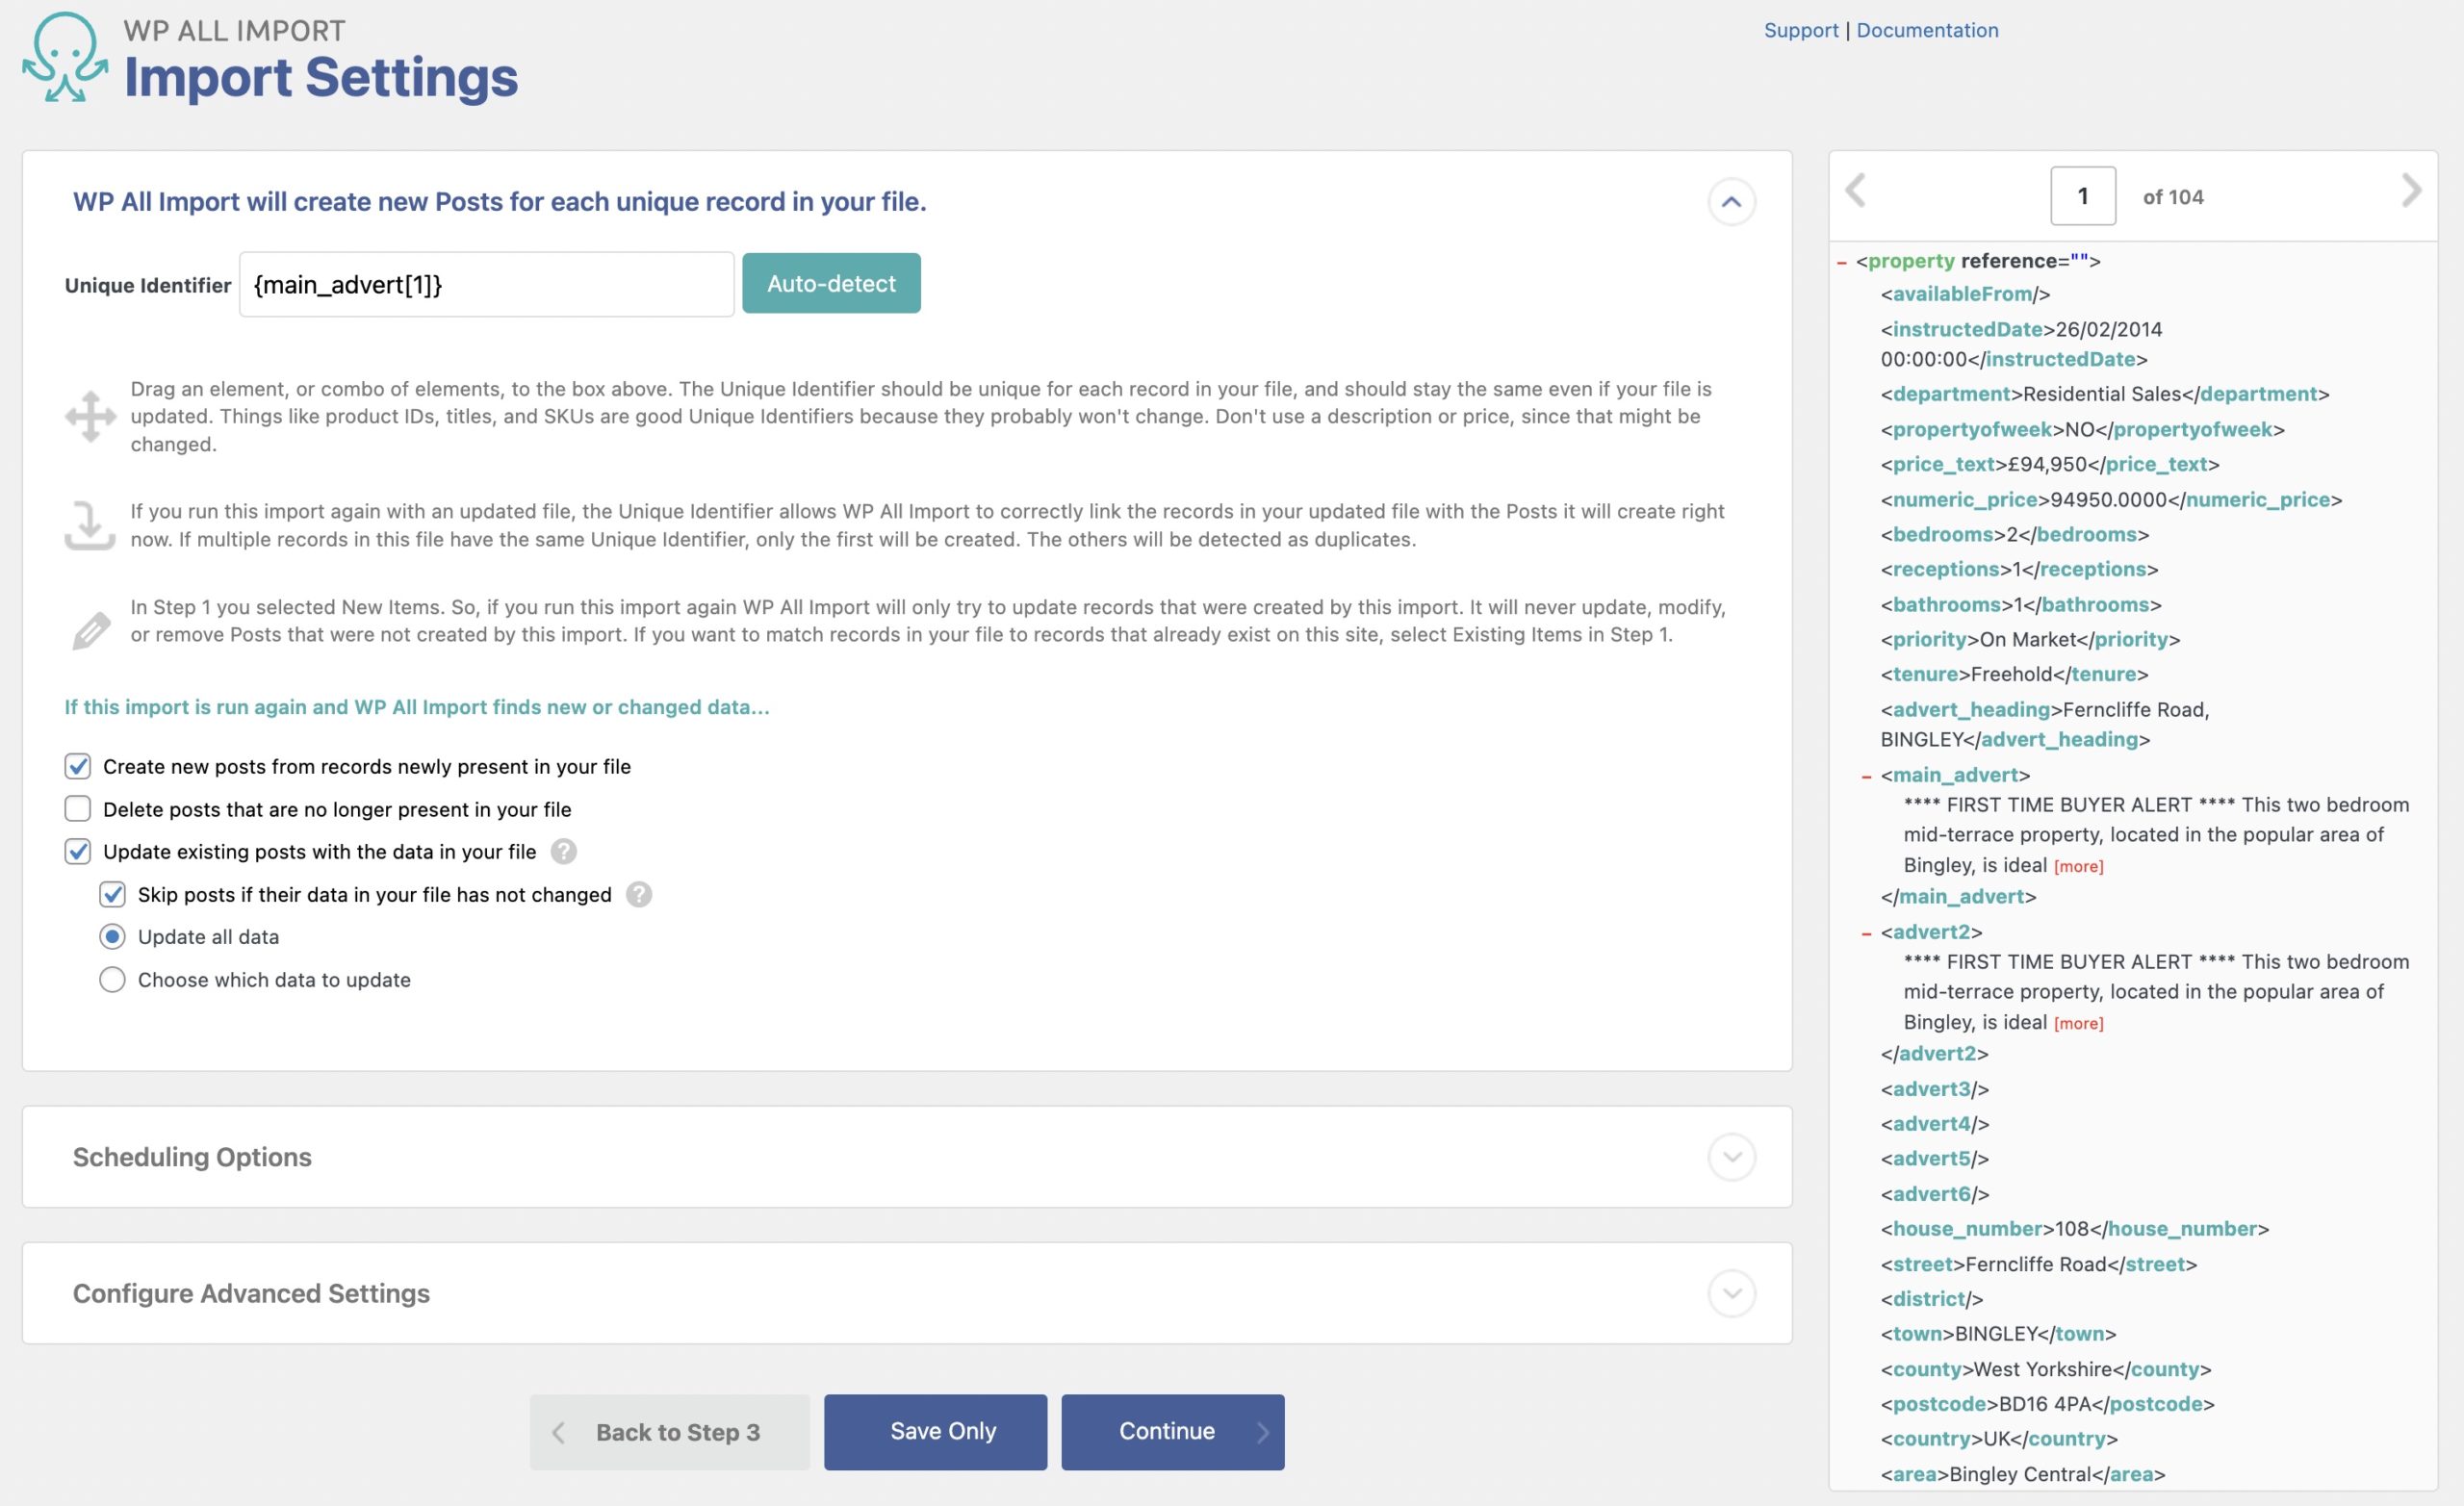
Click Continue at the end to run your WordPress import.
Step 5: Confirm & Run the Import
Now it's time to run your import. You will see an Import Summary section where you can review all import settings and a description of what will happen. To run the import, click on Confirm & Run Import.
Once the import is complete, you'll see an Import Complete! message.

Import Any CSV, XML, or Excel to WordPress
- Any theme or plugin
- Images & galleries
- Custom fields
- Categories & tags
- Woo, ACF, Meta Box, JetEngine
WordPress Import – Advanced Topics
Add Filtering Options to Control WordPress Import
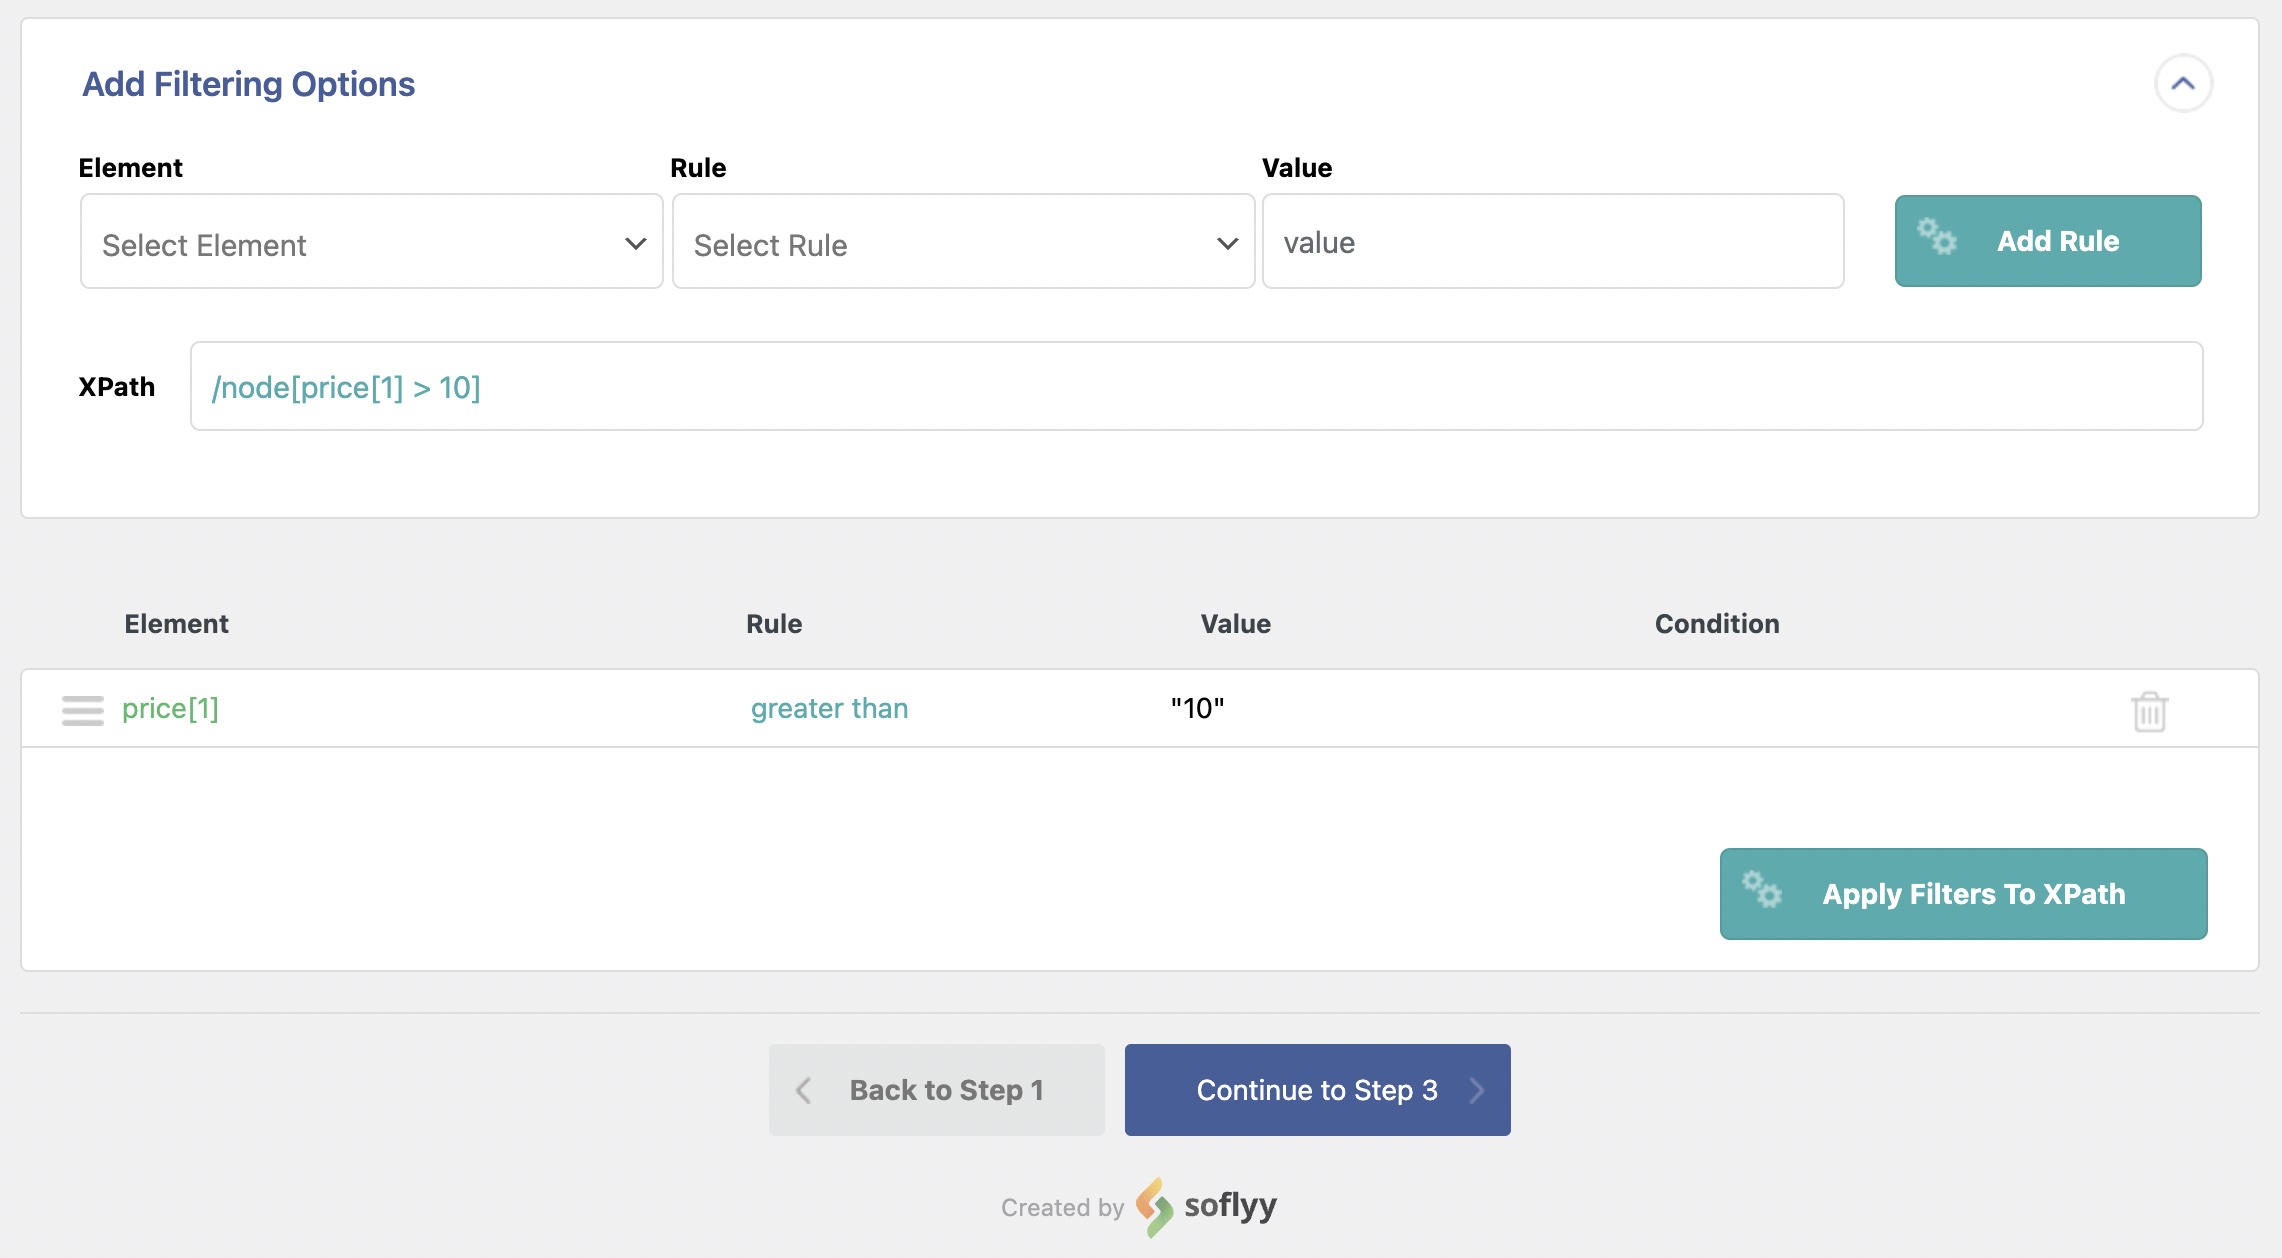
You can import WordPress data granularly using WP All Import with its visual built-in filtering options. This is done in Step 2 when reviewing the WordPress data to import, or in the Edit Template page when modifying an import. Here's what to do:
- Click on Manage Filtering Options
- Select the Element to filter from
- Select what Rule to use
- Assign a Value to match using the selected rule
- Click on Add Rule
- Click on Apply Filters To XPath
You can learn more about filtering here: Filtering with XPath.
Modify Filtering Options on Existing WordPress Import
Modifying the filter for an already existing import is done in the same way that you created the filter:
- Go to All Import › Manage Imports and locate the import to edit.
- Click on Edit Template.
- Under Manage Filtering Options, modify the existing filter.
- Once you modify or add your new rules, click on Apply Filters To XPath.
- That's it! You can save the import template, and the new filter will be applied.
Saving or Using a Saved Import Template
WP All Import provides full control over the WordPress import process. This means that there's also a way to save the existing import template and settings to apply to a different/new/future import process. To save an import template, do the following:
- While in Step 3 (as shown in this guide above), scroll all the way down and click to enable the Save settings as a template option.
- Input a name as the Template name.

That's it! The template will be saved once you continue to the next step or save/update the template.
To load a saved template, do the following:
- When in Step 3, scroll all the way down and locate the template section.
- Select the desired import template from the Load Template drop-down list.
- Once selected, the page will reload and apply all import mappings and settings.
You can manage saved import templates via All Import › Settings › Import/Export Templates.
Scheduling an Import to Run Automatically
You can schedule your WordPress import using WP All Import and its built-in options. Here's what you can do:
- Use manual cron jobs: these can be configured via your web server and allow total manual control to run the import in a schedule. See Manual Scheduling.
- Use Automatic Scheduling Service: this is an optional and paid service that comes built-in with WP All Import. It allows you to configure automatic imports directly from within its interface. See Automatic Scheduling.
Duplicate an Import Process
While we don't have a dedicated option to do this, the closest thing to duplicating the whole import is to visit the Settings page for the import, then download the Import Bundle from the Configure Advanced Settings section:
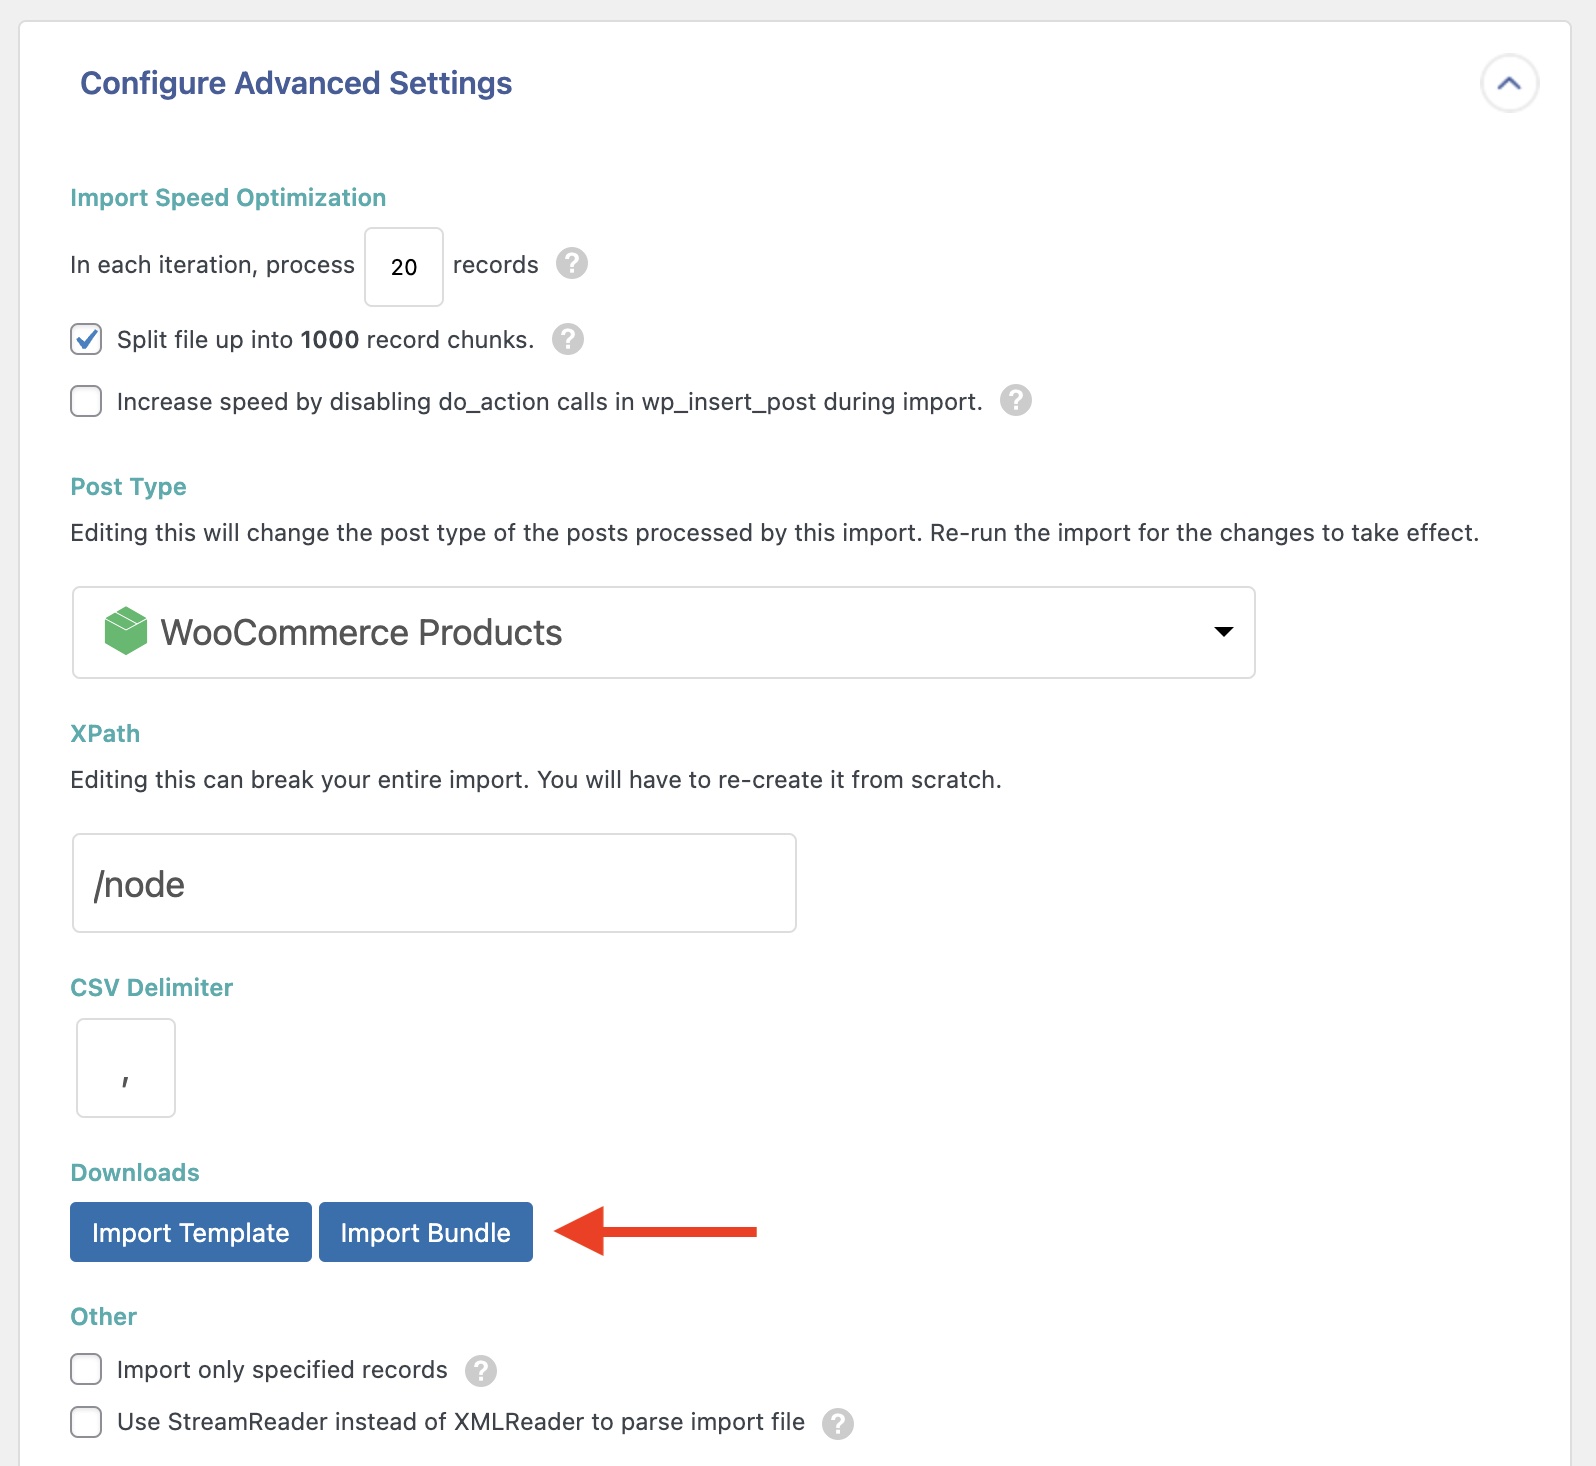
You can then upload that bundle in a new import. You will still need to set filtering rules in Step 2 (if you desire to filter records), but the rest of the fields are populated for you.
WordPress Import — Frequently Asked Questions
How Do I Import My Website into WordPress?
To import your website into WordPress, you need valid import files for all of the posts or custom post types to be imported. If you don't have them yet, you can generate those files using WP All Export. Then just import your data into WordPress by following the step-by-step process described in this tutorial.
How Does the Default WordPress Import Tool Work?
The default WordPress import tool works by using a brute-force approach. You basically import all or nothing. WP All Import is much more nuanced and lets you filter, modify, and map incoming data elements to more precisely populate WordPress target tables and fields.
Does My Data Have to be Specially Organized for WordPress Imports?
Not when you use our plugin. Our Drag & Drop interface allows you to map incoming data elements to any WordPress or WooCommerce target fields. You can even modify the incoming data as part of the import process.
How Do I Import a CSV File into WordPress?
To import a CSV file into WordPress, just specify the CSV file as your import source. Our plugin will automatically recognize the file type and adjust its interface accordingly. You don't need to do anything special to handle the CSV format.
Does WordPress Support XML?
WordPress does support XML as an import and export format, yes. The problem is that the built-in import/export tools do not offer you much flexibility. For unlimited flexibility, you need to use a plugin like WP All Import.
How Do I Import XML Data into WordPress?
- Go to All Import > New Import.
- Upload your XML file.
- Our plugin will automatically recognize the XML format.
- Choose your import target (i.e., Posts, Pages, etc.).
- Map the incoming data elements to the WordPress fields.
- Run the import and verify your imported data.
How Do I Import XML into a Custom Post Type in WordPress?
To import XML into a custom post type in WordPress, just follow the procedures in the preceding question but choose the custom post type in Step 4. Otherwise, the import process is exactly the same.
To learn more, see How to Import Custom Fields.
How Do I Import a Large XML File into WordPress?
To import a large XML file into WordPress, you can use our advanced settings to split the import into 1,000 records chunks, modify the batch processing size, and take a number of other steps to either speed up the import process or reduce its impact on the server.
Import Any CSV, XML, or Excel to WordPress
- Any theme or plugin
- Images & galleries
- Custom fields
- Categories & tags
- Woo, ACF, Meta Box, JetEngine
How Do I Import Data into a WordPress Custom Plugin?
Fortunately, our plugin automatically recognizes many WordPress custom plugins and themes, so you don't have to do anything special to import data into them. Just select the custom post type, and away you go. If a custom plugin stores its data in an unconventional manner, just contact our support staff for further guidance.
To learn more, see How to Import Custom Fields.
How Do I Import All Pages into WordPress?
- Navigate to All Import > New Import.
- Upload your import file.
- Select Pages as your import target (i.e., Posts, Pages, etc.).
- Map the incoming data elements to the WordPress page fields.
- Complete the import and check the imported data.
Can I Import WooCommerce Customers, Products, and Orders?
Yes. WP All Import is fully integrated with WooCommerce and offers complete support to import WooCommerce customers, orders, and all aspects of products, including categories, variations, images, prices, and stock levels. If it's in WooCommerce, we've got you covered.
For more information, see How to Import WooCommerce Data from CSV, Excel, and XML.
How Do I Bulk Import Data into WordPress?
Performing a bulk import just means that you are importing multiple records at once. Almost every import involves multiple records, so there is no special procedure for this when using our plugin. If you wish to perform an unusually large import, our plugin has advanced settings to help you do so.
Can I Use WP All Import On All of My WordPress Sites?
Yes. WP All Import and WP All Export come with unlimited licenses, which means that you can make unlimited installations on any number of your own websites. You can read and review the full license agreement here: www.wpallimport.com/license.
How Do I Export a WordPress Site?
- Go to All Export › New Export and select the export post type.
- Drag and drop to create the export file layout.
- Configure your export settings.
- Run the export and download the file.
- Review the export file's contents.
For more information on exporting data, please see How to Export WordPress to CSV, Excel, and XML.
WordPress Import — Related Docs
Learn to export your WordPress data to a CSV, Excel, or XML file with WP All Export.
Learn how to migrate data to a different site using WP All Import and WP All Export.
Learn to bulk edit your WordPress data with WP All Import and WP All Export.
Oxygen Builder's review of WP All Import.
