Are you looking to create advanced order exports for WooCommerce?
By default, WooCommerce allows you to export order data in CSV format. However, this basic export may not include all the information you need. This is where third-party plugins come into play. They enable you to create order exports with detailed data and offer advanced features such as:
- Combining multiple data points into a single column or presenting multi-value fields in separate columns.
- Manipulating and creating custom column data using PHP.
- Manually creating your XML structure.
- Using nested filter options to export precise order data.
- Exporting large volumes of orders without slowing down your website.
In this article, we will use the WP All Export plugin for our order export examples. To follow along, use our convenient sandbox feature and select WooCommerce Store as the demo type.
How to Create Advanced Order Export for WooCommerce
This article explains the advanced order export capabilities of the WP All Export plugin for WooCommerce. If you're interested in the general process of exporting orders, you can learn more in our article on WooCommerce export orders.
Once you're familiar with the basics, let's explore the advanced order export options.
1. Create Custom Order Export Columns Using PHP
WP All Export includes a feature that lets you create custom columns by combining two fields such as merging a customer's first and last names into a single column. This saves you from having to manually edit the file later on.
To combine column data, follow these steps:
In the Drag & Drop interface, click the Add Field button.
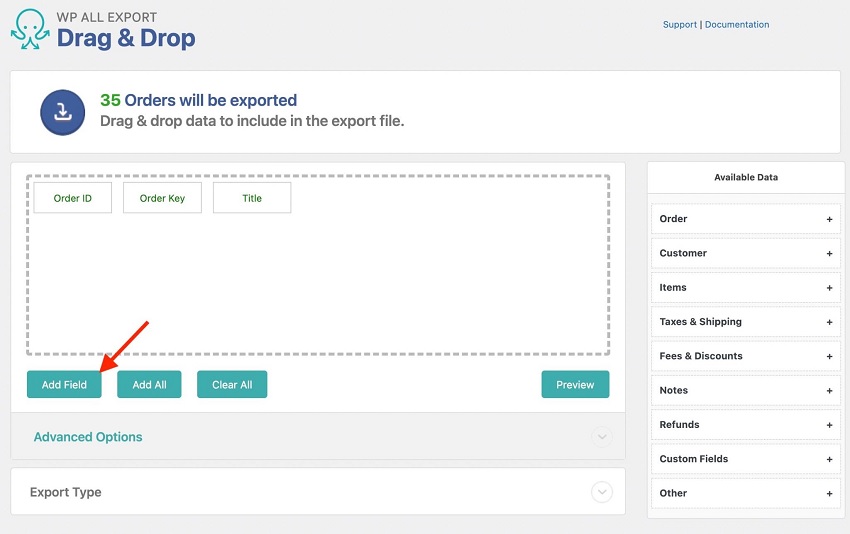
This opens a form that allows you to create a new order export field using these steps:
- Select the Custom export field option.
- In the text box below this option, drag and drop the “Billing First Name” and “Billing Last Name” fields from Available Data › Customer. Put a space between them.
- In the Column name box at the top, enter “Name”.
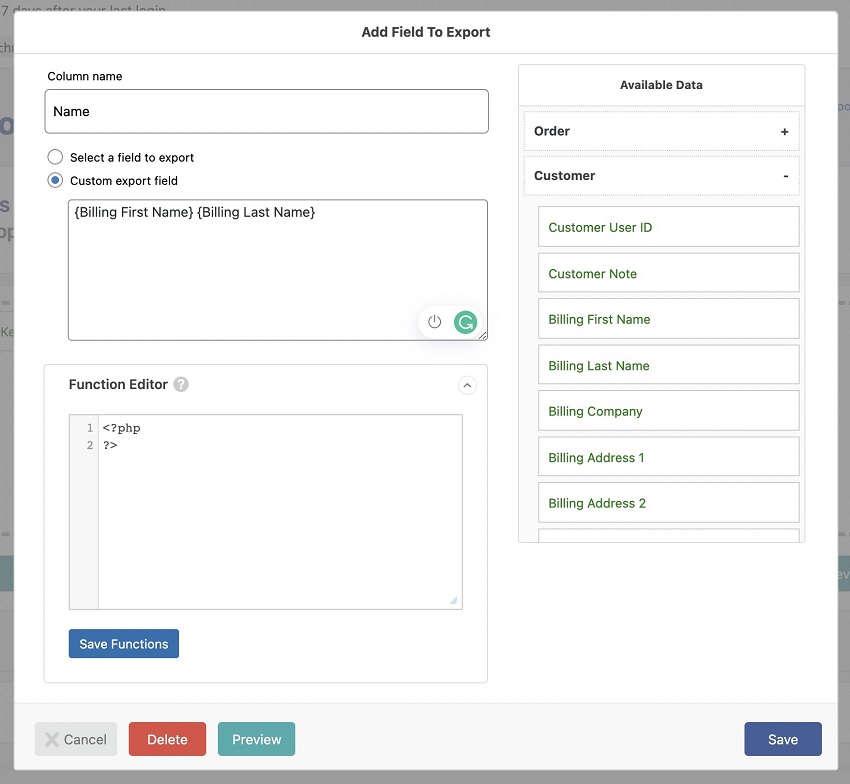
Your form should look like this.
If you click the green Preview button on the bottom, you will see that the Name field does indeed combine the first and last names. However, sometimes you need more advanced capabilities.
Dismiss the preview (if open), then click the blue Save button on the bottom right.
Let’s say that you want to add a shipping method to your orders based on their weight. If the weight is less than 10lbs, the order should be sent using 'USPS'. If the weight is between 10-30lbs, 'DHL' should be used. Finally, if the weight is more than 30lbs, then 'Knight-Swift Freight' will be used.
Here's how you'll achieve this using the WP All Export plugin:
- Click the Add Field button to re-open the Add Field to Export form.
- Select the Custom export field option.
- In the text box below this option, enter “[output_shipping({Weight})]” without the quotes. This is known as a function call. Note the reference to the field inside the curly brackets.
- In the Function Editor, enter the following PHP function:
function output_shipping($weight){
	if($weight <= 10) {
		return "USPS";
	} else if ($weight > 10 && $weight < 30) {
		return "DHL";
	} else if ($weight >= 30) {
		return "Knight-Swift Freight";
	}
}
- Click the Save Functions button near the bottom of the form.
- Enter “Shipping Method” in the Column name box near the top of the form.
The form should appear as follows.
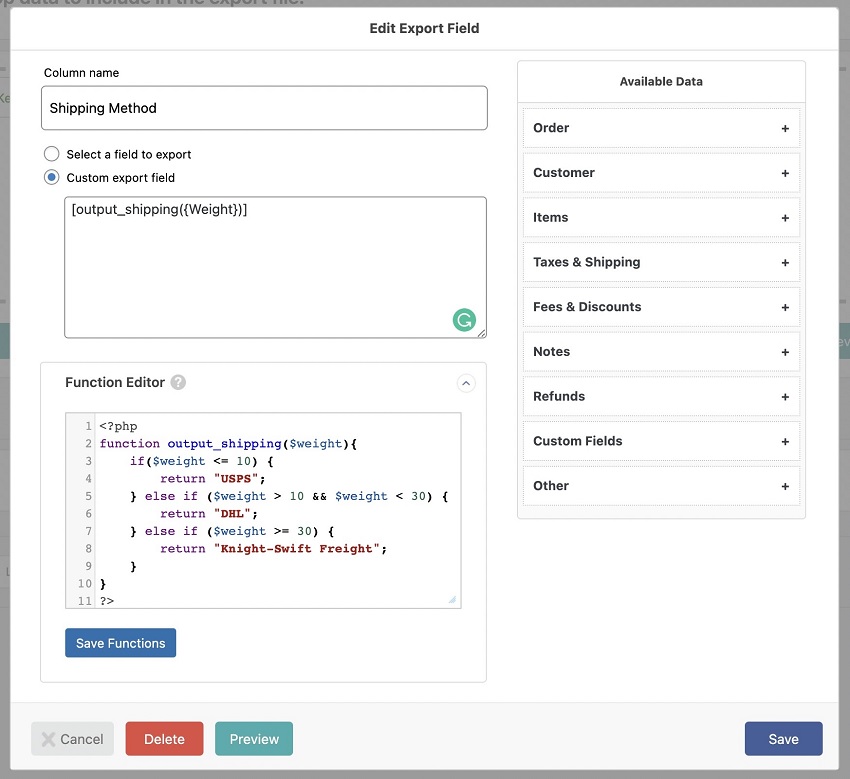
Click the Save button to save the field and close the form.
Back in the Drag & Drop interface, drag the Items -> Advanced -> Weight field from the Available Data panel into the column selection area, then click the Preview button.
As you can see in the Shipping Method column, the output_shipping function appears to be working correctly.
For more information on using PHP during an export, refer to our dedicated documentation article. We also have another article that walks you through creating custom export fields.
2. XML Feeds for WooCommerce Order Exports
WP All Export allows you to export WooCommerce orders in both simple and custom XML formats. While many other third-party plugins offer XML export options, they often just present a CSV file in XML format.
What truly sets WP All Export apart is its Custom XML feature. This enables you to create custom XML feeds, nest elements as deeply as needed, add elements outside of the main looping post element, create custom loops with PHP functions, and more.
Let's take a closer look at both XML feed options in detail.
Simple Order Export XML Feeds
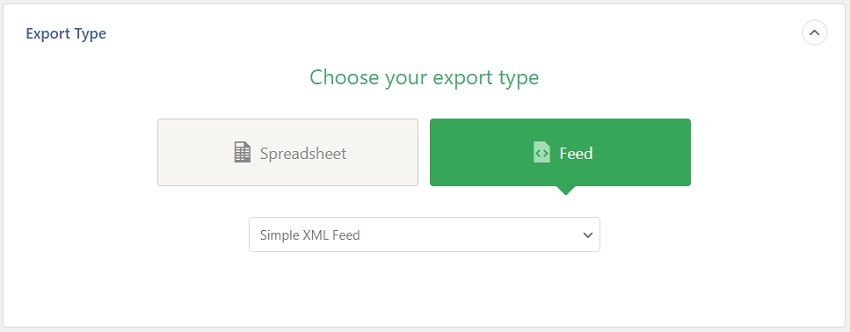
Creating a simple XML export is just as easy as generating a CSV or Excel export file. In the Export Type panel of the Drag & Drop interface, choose Feed instead of Spreadsheet, and then just specify Simple XML Feed, as shown here.
If you proceed to export the orders, the resulting export file will contain the default XML structure. For example, here is the output for three orders containing the three columns of OrderID, OrderKey, and Title.
<?xml version="1.0" encoding="UTF-8"?>
<data>
<post>
<OrderID>223</OrderID>
<OrderKey>wc_order_5e7596fb60908</OrderKey>
<Title>Order - March 21, 2020 @ 04:24 AM</Title>
</post>
<post>
<OrderID>224</OrderID>
<OrderKey>wc_order_5e7596fbcaa06</OrderKey>
<Title>Order - March 21, 2020 @ 04:24 AM</Title>
</post>
<post>
<OrderID>225</OrderID>
<OrderKey>wc_order_5e7596fc3c740</OrderKey>
<Title>Order - March 21, 2020 @ 04:24 AM</Title>
</post>
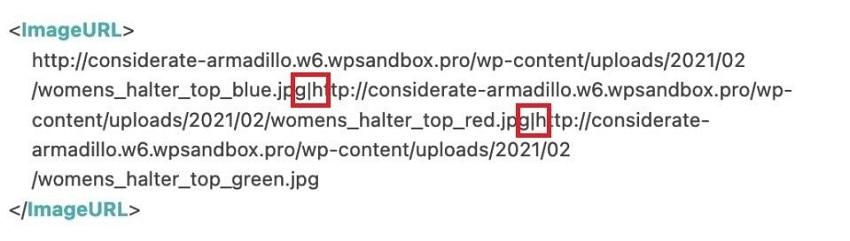
</data>If one of the fields you are exporting has multiple elements in the same field, those elements will be separated by a pipe delimiter (I). For example, here is what an image field looks like when it contains multiple images:
You have only a few options to change the output of a simple feed. The main way to do this is simply to add, delete, rename, and/or reorder the columns in the column selection editor, just as you would for a CSV or Excel export. When you do this, the resulting feed structure will change to match your column selection.
Advanced Custom XML Feeds for Order Exports
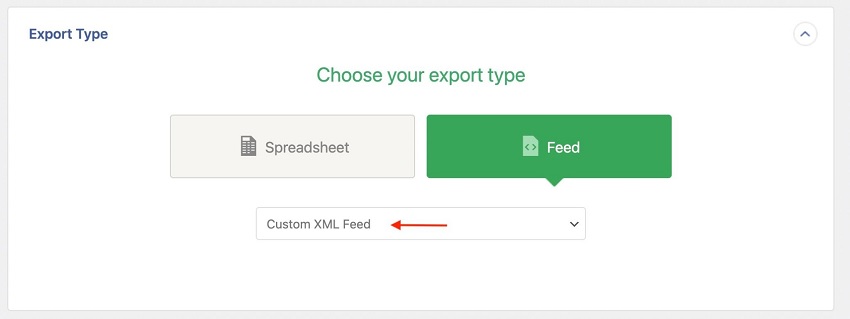
To gain complete control over your XML output for order exports, start by choosing Custom XML Feed as the Feed type.
WP All Export responds by opening its XML Editor.

This editor allows you to manually create your XML structure. You typically start this process by dragging fields from the Available Data panel between the <!-- BEGIN LOOP --> and <!-- END LOOP --> comments, which mark the beginning and end of the loop that will process all the orders that match your filters.
The <post> and </post> elements are the default way to mark the start and end of each record, but you don’t have to use them. For example, in the screenshot below, we have changed these record elements to <order> and </order> while including the order ID as an attribute named “id”. Using the Available Data panel, we also dragged over the Billing First Name, Billing Last Name, and Weight fields into the XML Editor:
<?xml version="1.0" encoding="UTF-8"?>
<data>
  <!-- BEGIN LOOP -->
  <order id="{Order ID}">
    <BillingFirstName>{Billing First Name}</BillingFirstName>
    <BillingLastName>{Billing Last Name}</BillingLastName>
    <Weight>{Weight}</Weight>
  </order>
  <!-- END LOOP -->
</data>
When we do this, note that WP All Export wraps each field in its own corresponding XML element, i.e. the Billing First Name field is automatically embedded between the <BillingFirstName> and </BillingFirstName> tags.
These element names are not set in stone. Just as we changed the record element to <order>, we can also remove the word “Billing” from our name elements.
We can also modify this schema in other ways. For example, by adding the quantity as an attribute to the Weight element in the XML Editor:
<?xml version="1.0" encoding="UTF-8"?>
<data>
  <!-- BEGIN LOOP -->
  <order id="{Order ID}">
    <FirstName>{Billing First Name}</FirstName>
    <LastName>{Billing Last Name}</LastName>
    <Weight quantity="{Quantity}">{Weight}</Weight>
  </order>
  <!-- END LOOP -->
</data>
This will result in the following XML output:
<?xml version="1.0" encoding="UTF-8"?>
<data>
  <order id="223">
    <FirstName>Abdel</FirstName>
    <LastName>Wolfendale</LastName>
    <Weight quantity="5"/>
  </order>
  <order id="224">
    <FirstName>Elonore</FirstName>
    <LastName>Goreisr</LastName>
    <Weight quantity="12"/>
  </order>
  <order id="225">
    <FirstName>Mike</FirstName>
    <LastName>Jones</LastName>
    <Weight quantity="6"/>
  </order>
</data>
…and so on through the rest of the orders.
Our ability to control a custom order feed doesn’t stop there, either. Remember the output_shipping function that we created in the Custom Export Columns Using PHP section of this article?
We can embed that same function in our custom XML template.

<?xml version="1.0" encoding="UTF-8"?>
<data>
  <!-- BEGIN LOOP -->
  <order id="{Order ID}">
    <FirstName>{Billing First Name}</FirstName>
    <LastName>{Billing Last Name}</LastName>
    <Weight quantity="{Quantity}">{Weight}</Weight>
    <ShippingMethod>[output_shipping({Weight})]</ShippingMethod>
  </order>
  <!-- END LOOP -->
</data>
Here is the XML output:
<?xml version="1.0" encoding="UTF-8"?>
<data>
  <order id="223">
    <FirstName>Abdel</FirstName>
    <LastName>Wolfendale</LastName>
    <Weight quantity="5"/>
    <ShippingMethod>USPS</ShippingMethod>
  </order>
  <order id="224">
    <FirstName>Elonore</FirstName>
    <LastName>Goreisr</LastName>
    <Weight quantity="12"/>
    <ShippingMethod>FedEx</ShippingMethod>
  </order>
  <order id="225">
    <FirstName>Mike</FirstName>
    <LastName>Jones</LastName>
    <Weight quantity="6"/>
    <ShippingMethod>USPS</ShippingMethod>
  </order>
</data>
The flexibility doesn’t end there, either. You can edit the XML header to define a specific schema. In fact, you can create any kind of custom XML feed that you want with these features. That’s the power of WP All Export!
3. Advanced Order Export Filters
WP All Export also offers advanced filtering options that allow you to select specific orders for export. These advanced options include combining multiple filters to create nested filters, using relative date and time formats in filters, and employing PHP for filtering orders.
Let's now look at these filtering features in detail.
Nesting Order Export Filters
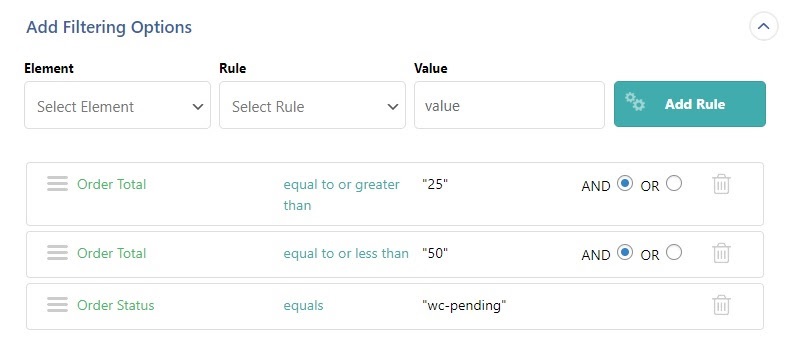
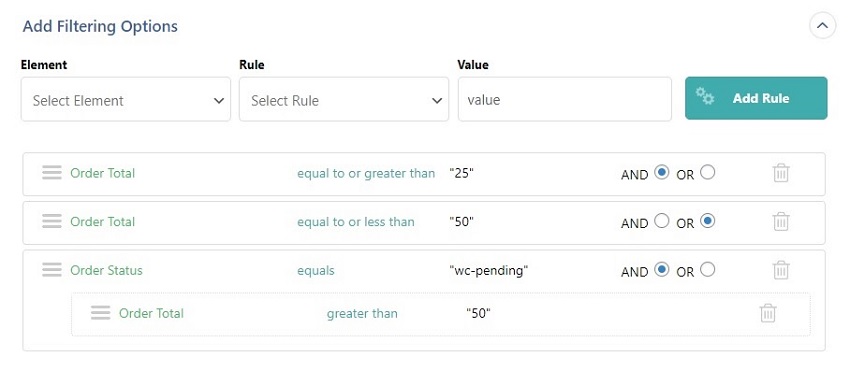
WP All Export allows you to create filter rules using three components: an element, a rule, and a value. You can also create multiple filters and combine them using AND and OR logic. This means that orders must meet all specified conditions (AND) or any one of the conditions (OR) to pass the filter.
For example, this filter selects orders with an Order Total between $25 and $50 and an Order Status of “wc-pending.”
But what if we want a more advanced filter, one that selects orders with an Order Total between $25 and $50, or an Order Status of “wc-pending” and an Order Total > 50?
This is how we would write this by hand:
Order Total >= 25 AND Order Total <= 50 OR (Order Status = “wc-pending AND Order Total > 50)
Note the round brackets after the OR condition.
How do we represent this pair of brackets in the interface? We simply drag the last Order Total filter rule inside the Order Status filter rule.
Relative Date Filters for Order Exports
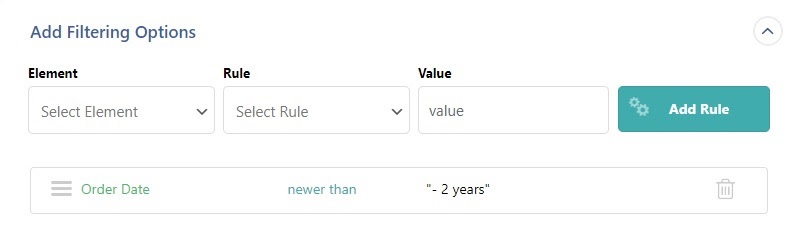
In many export situations, especially for recurring scheduled exports, we don’t want to have to specify exact date filters because these might have to change each time an export is run.
Instead, we want to specify relative dates. For example, this filter selects only those orders with an Order Date newer than two years ago.
This filter returns orders with an order date that equals last month.
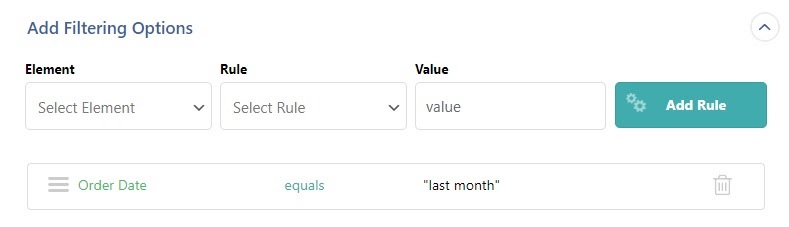
Note, that this won’t return any records for the sandbox data because it is too old for that, but terms like “last month” or “this month” are very common in export scenarios.
Filtering Order Exports With PHP
If you need even more advanced order filter capabilities, WP All Export allows you to create any filter imaginable using its API, which is a large set of WordPress hooks that you can find here.
Using these hooks requires PHP programming skills. For example, here is a filter that you might use to export only product variations whose parents are not set to 'draft'. This is especially useful for Google Merchant Center exports as they apply Status filters directly to variations by default.
function exclude_drafts_from_gmc_export($articles, $options, $export_id) {

    // Only filter GMC exports.
    if ($options["xml_template_type"] == "XmlGoogleMerchants") {

        // Process every exported product.
        foreach ($articles as $key => $article) {

            // If IDs aren't set to be exported, do nothing.
            if ( ! empty($article['id']) ) {
                $post_id = $article['id'];
                $parent_id = wp_get_post_parent_id($post_id);

                // Check the parent's Status.
                if ( get_post_status($parent_id) == "draft" ) {

                    // Don't export variation if parent is 'draft'.
                    unset($articles[$key]);

                }
            }
        }
    }

    return $articles;
}
add_filter('wp_all_export_csv_rows', 'exclude_drafts_from_gmc_export', 10, 3);
Walking you through this code is beyond the scope of this article. The point is, that WP All Export offers this kind of advanced capability. And, of course, the support team is always available should you need help!
4. Large WooCommerce Order Exports
WP All Export is capable of exporting a large volume of orders without slowing down your website. Large order exports typically cause two types of problems:
- Servers limit the amount of time a process can run. If a process exceeds this time limit, it is said to “time out”, meaning it will fail. This is necessary because long-running processes might consume all of a server’s resources, causing it to stop working. To avoid this problem, large WooCommerce order exports are typically broken down into batches. But if the batch size is too big, timeouts will still occur.
- Each server typically imposes a size limit for the creation of files. Otherwise, a file might use all the available disk space. If the WooCommerce store is big enough, a large order export might exceed the allowable size limit.
Fortunately, WP All Export makes it easy to solve both of these problems.
The Export Settings interface has an Advanced Options panel that contains the options you need to manage large WooCommerce order exports.
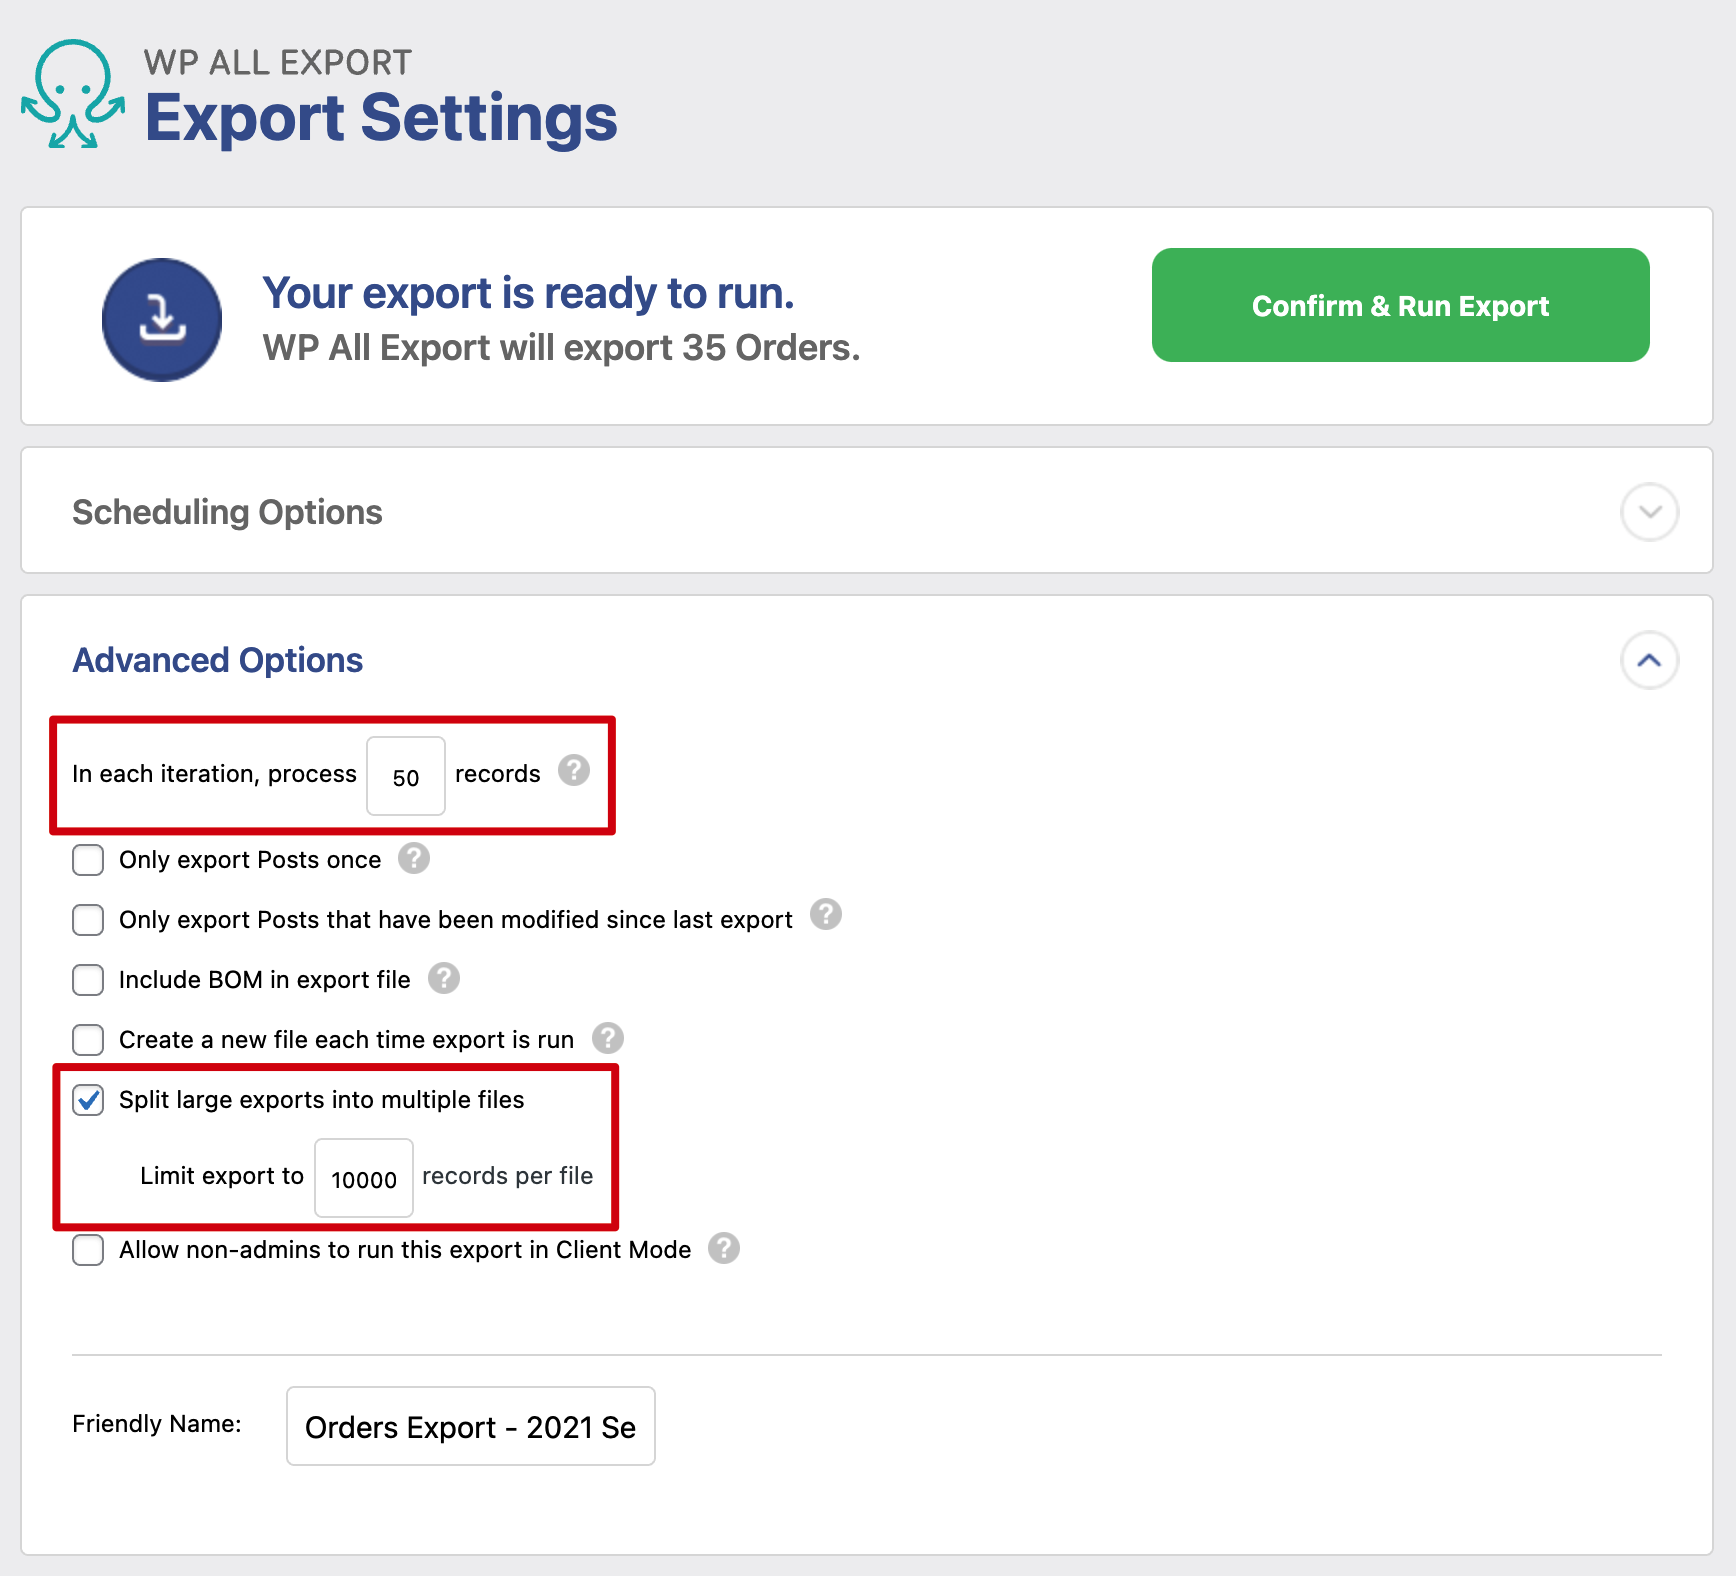
The first option manages the batch size used to process the order export. If your export process fails due to a timeout, lower this number and try again. Just be aware that there is typically a sweet spot for batch size. Set it too small and you will greatly increase the number of batches required to complete the export, which may increase the amount of time required to process the export. Set it too big and you’ll get the timeout error.
To avoid exceeding file-size limits, the second option lets you split your export file into multiple files consisting of a maximum record count. The sweet spot rule applies here, too. Set this number too low and you’ll end up with too many files. Set it too high and you may trigger the maximum file size limit.
But that's not all. WP All Export includes even more advanced features for WooCommerce order exports. Let's take a look at the complete list of these features.
5. Other Advanced Order Export Features
WP All Export takes pride in the fact that it can handle all simple export tasks quickly and easily, yet still has the tools to handle the most complex export tasks imaginable.
In addition to the topics described in this article, other advanced features include:
- The ability to use WP_Query to perform order queries that can’t be performed any other way, at least not efficiently
- Export your WooCommerce orders in different languages using WPML
- Full developer support including an Add-on API and WP-CLI
Related Information
WooCommerce Export Orders to CSV
WooCommerce Export Orders to Excel
Best WooCommerce Shipping Plugins
8 Best Photography Plugins for WooCommerce
Best WooCommerce Multilingual Plugins
WooCommerce How to Add Products
Advanced Order Export for WooCommerce

