This article is a guest post from Atanu Das at Webappick.
Overview
Looking to add Apple Pay to your WooCommerce store? Well, you are in the right place.
Apple Pay is a payment gateway that accepts payments from online businesses. It is also a digital wallet and mobile payment mechanism that makes use of the Near-Field Communication (NFC) technology. This payment gateway can bring additional conversions to your WooCommerce store.
If you are a WooCommerce store owner, you are already aware of several payment gateways. WooCommerce supports PayPal, Stripe, and a few other extensions for payment. But when it comes to Apple Pay, you will need to employ some tweaks to your site.
This article will show you how to add Apple Pay to WooCommerce.
Why Use Apple Pay for WooCommrece
Generally, WordPress does not allow the use of online payment systems that bypass its default payment collection methods. You can achieve this with Apple Pay but you will need to use a plugin.
Before learning the technical stuff, here are some key reasons why you should use Apple Pay:
- In recent years, the number of Apple Pay users has increased by more than 65 million.
- Apple customers will favor this approach because it is built on the iOS operating system.
- You can minimize cart abandonment and increase purchase frequency by enabling Apple Pay on your website.
- NFC integration makes the Apple Pay method unique and more acceptable.
- The charge for using Apple Pay is minimal (3% on credit cards and free on debit).
- There are no extra or hidden charges.
In this era of multichannel marketing, Apple Pay plays a vital role. Let’s say that you are using WooCommerce product feed manager to transfer your product information in multichannel. Also, you have successfully transferred your feed file using the product feed plugin. All your products are available in multiple channels such as Google, Facebook, Instagram, and Pinterest.
If your site visitors are using Apple devices, they will prefer the Apple Pay option. If you do not have this option, they may leave your site at the last stage of the purchase process. In this scenario, having your products in multiple sales channels and getting all the additional traffic won’t matter when many of your customers can't use their preferred payment method.
Apple Pay will help you better capitalize on these sales opportunities.
Add Apple Pay to WooCommerce
You can extend your WooCommerce store’s functionality anytime by adding plugins or extensions. Apple Pay integration follows the same process.
There are many plugins available that make it easier to add payment gateways to your WooCommerce store. But don’t be overwhelmed because the process of adding Apple Pay is not complicated.
First, you must have WooCommerce installed on your WordPress website. While searching for plugins, you will see various Apple Pay WordPress plugins. Here are the most popular options:
- Stripe: Allows almost all the debit/credit cards and includes Apple Pay.
- WooCommerce Payments: Accepts payments securely, analyzes cash flow, and tracks recurring revenue — all from your dashboard with no additional fees.
- Square: This tool makes it simple to accept payments. It offers clear rates and quick deposits (1-2 business days). Sell online and in-person, and keep all payments, merchandise, and inventory in line.
- Braintree for WooCommerce: Accepts payment methods including credit cards, PayPal, Google Pay, and Apple Pay.
Because Stripe's setup process is simple, we're going to show you how to add Apple Pay using the Stripe with WooCommerce extension.
Step 1: Install Stripe for WooCommerce
Keep in mind that to make Stripe functional for your WooCommerce store, you must first activate SSL on your WordPress site.
When installing WooCommerce, the setup wizard will automatically take you through the setup process, which includes an option to enable Stripe payment on your site:

If you did not enable Stripe through the setup wizard, no need to worry because you can also enable it using a plugin.
Simply go to Plugins > Add New section and search for "WooCommmerce Stripe payment gateway":
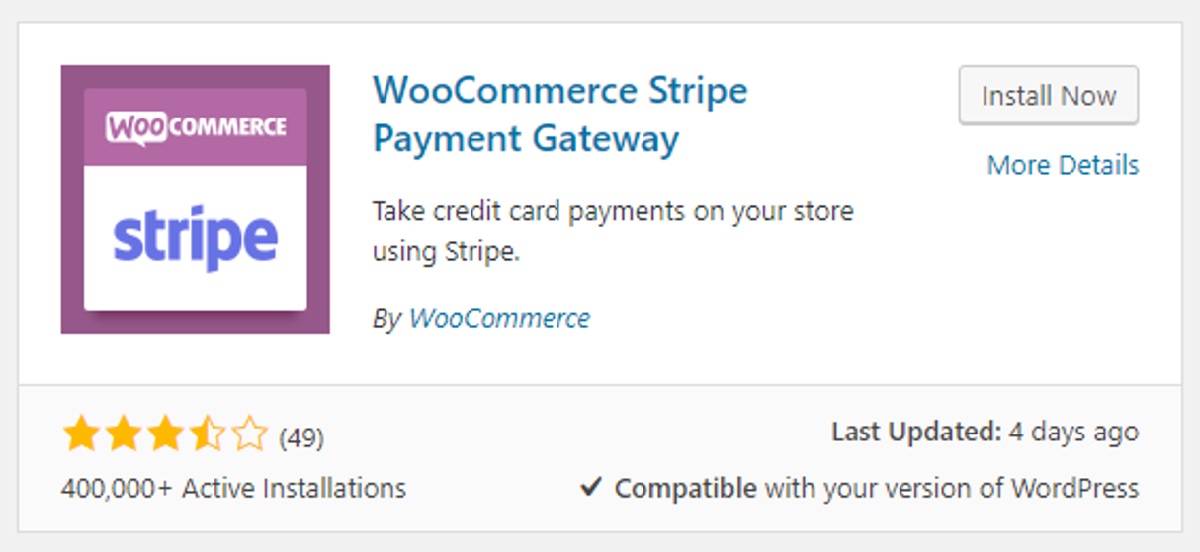
When the plugin appears, click Install Now and activate it.
Step 2: Enabling Apple Pay Payments
You'll need to complete two tasks before you can accept Stripe and Apple Pay payments. The first step is to connect your Stripe account credentials to WooCommerce, followed by enabling Apple Pay payments.
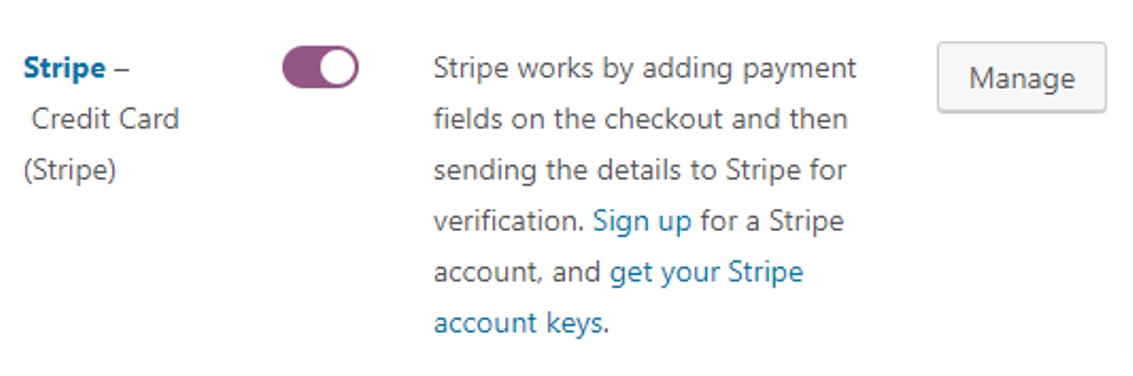
Thankfully, you can do both on the same screen. Go, to WooCommerce > Settings > Payments and seek the Stripe setting to discover the appropriate choices. Once you've located it, select Manage:
The following screen contains two fields labeled Live Publishable Key and Live Secret Key:

Both of these keys are available through your Stripe account. Copy and paste them into the appropriate fields. After that, scroll down to enable the Payment Request Buttons option:

When someone attempts to pay with Stripe in Safari, this option immediately enables Apple Pay. All you have to do now is save the modifications to your WooCommerce settings and you're done!
Step 3: Use the API Key to Link Stripe
The previous process was short and precise but we want to elaborate by showing you the following steps to integrate Stripe into your website.
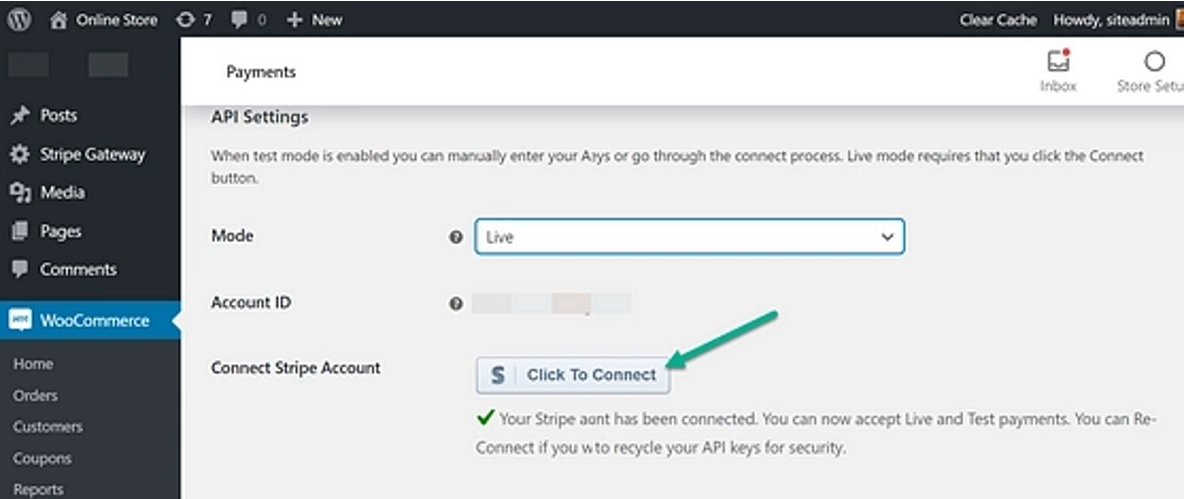
Head to the API settings section by clicking WooCommerce from the dashboard. When you are ready to start collecting payments, change the Mode to Live. Otherwise, stay in Test Mode.
In the Connect Stripe Account area, click the Click to Connect button. This will take you to a new page where you may enter into your Stripe account and link it to WordPress.
As long as you're signed in, WordPress simply takes you to the third-party connection page, which pulls up your Stripe account. Sign in if required.
After you've signed in, choose the Stripe account you wish to link to your WooCommerce store. Connect by clicking the Connect button:
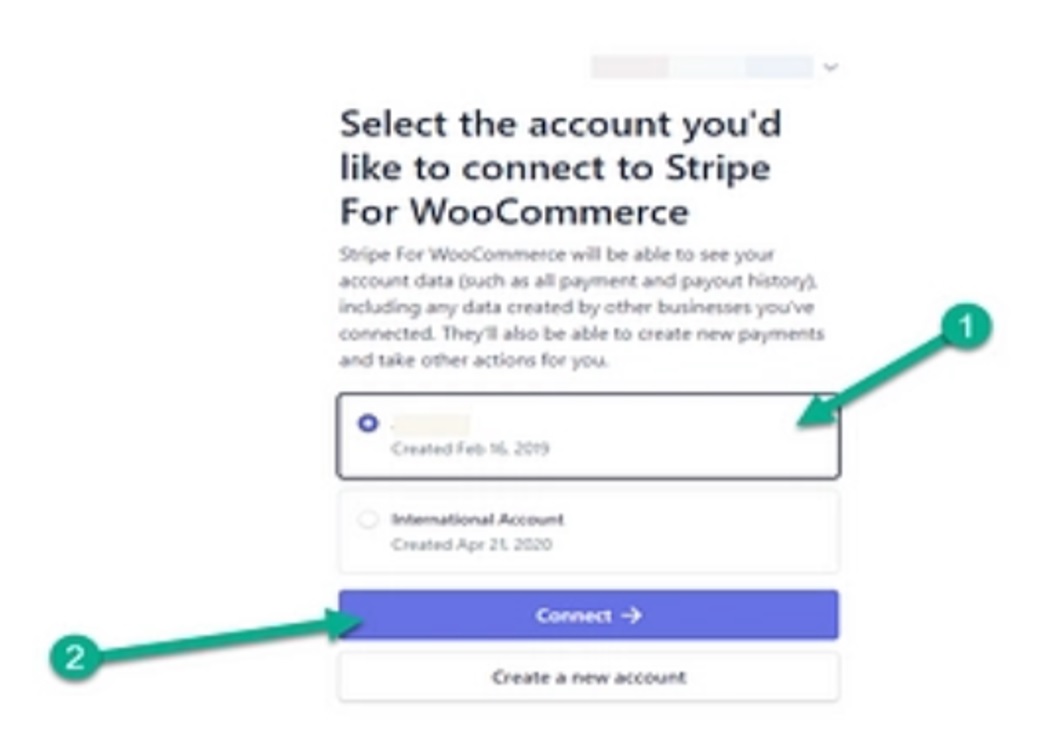
A green checkmark and a notice stating that the Stripe Account Has Been Connected should appear. This creates a Publishable Key and a Secret Key, which are both added to the proper areas in the WordPress dashboard immediately.
If you require the keys, you may go to the Stripe dashboard. If the automated procedure fails, it's also an ideal way to re-generate keys.

On the WooCommerce Payments page, you have to scroll down and click the Save Changes button. This ensures that WordPress saves your Stripe keys and prepares them for processing transactions.

Step 4: Activate the Apple Pay button in WooCommerce
Currently, the Stripe connection with your WordPress site allows credit card processing. Therefore, when a consumer completes the store's checkout procedure you will receive payments.
Although this is a crucial step toward adding the Apple Pay button, there are still a few more steps to complete.
Return to the WordPress dashboard and navigate to WooCommerce > Settings > Payments.
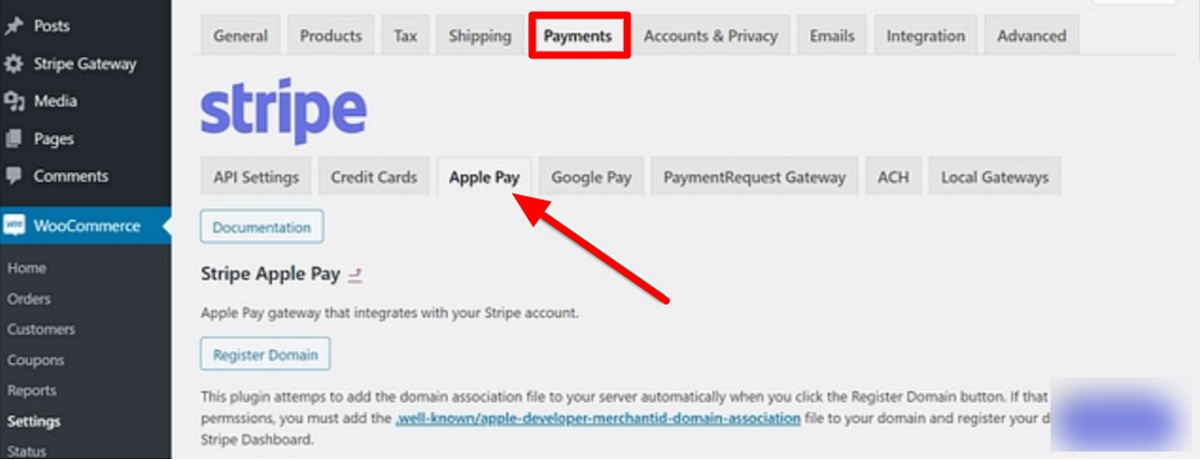
To verify the ownership of your domain, Apple Pay needs Stripe. Therefore, you need to submit the verification document.
Don’t be overwhelmed because the process is not manual. Click the Register Domain option in the Apple Pay section and it's done! Finally, you’ll get a message saying "Domain Registered Successfully".
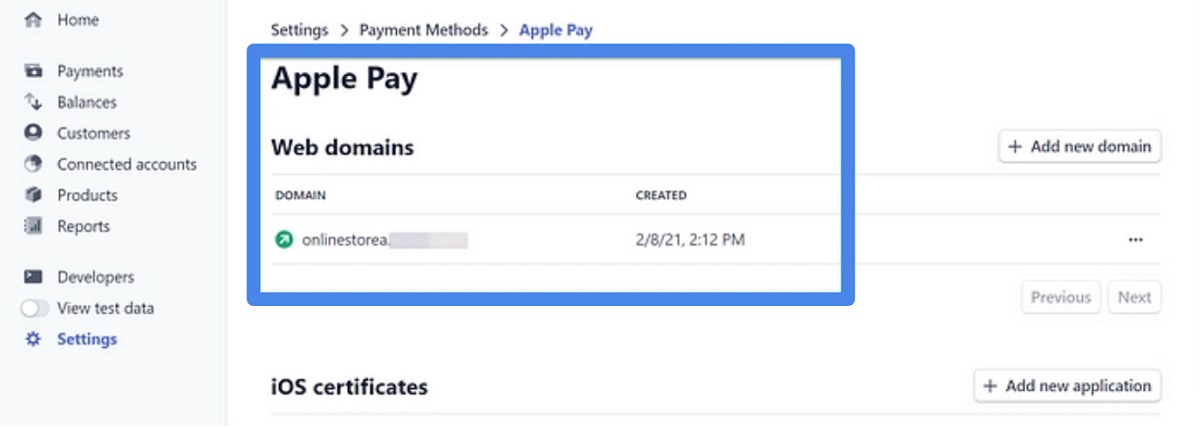
If you want to be sure that everything is operating correctly, simply go to the dashboard area of Stripe and click Settings > Payment Methods > Apple Pay. Also, don't forget to check the Web Domains list to check your domain name:
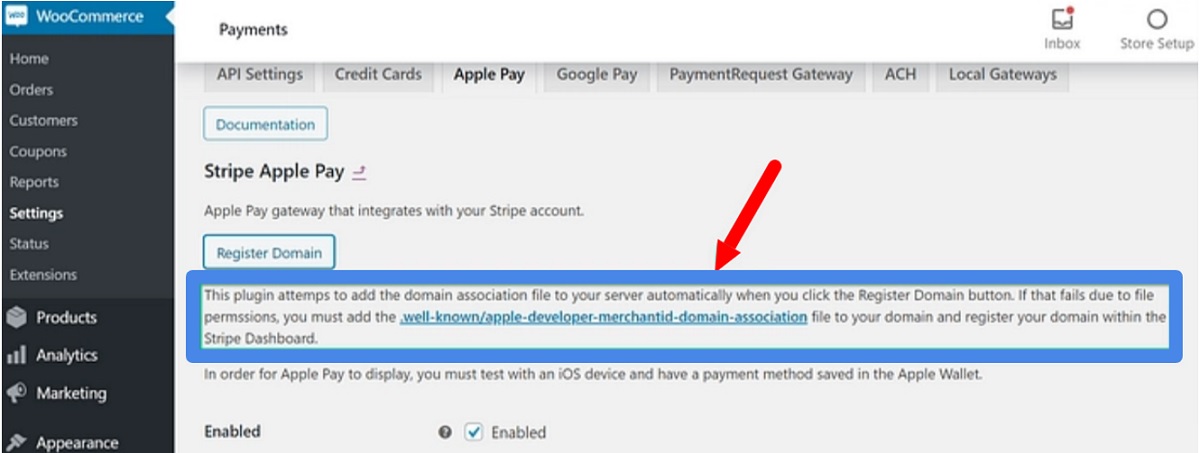
If a failure occurs or you’re unable to discover the linked web domain on the dashboard, follow the instructions in the WooCommerce Apple Pay settings. Next, you just need to submit the proper verification documents manually.
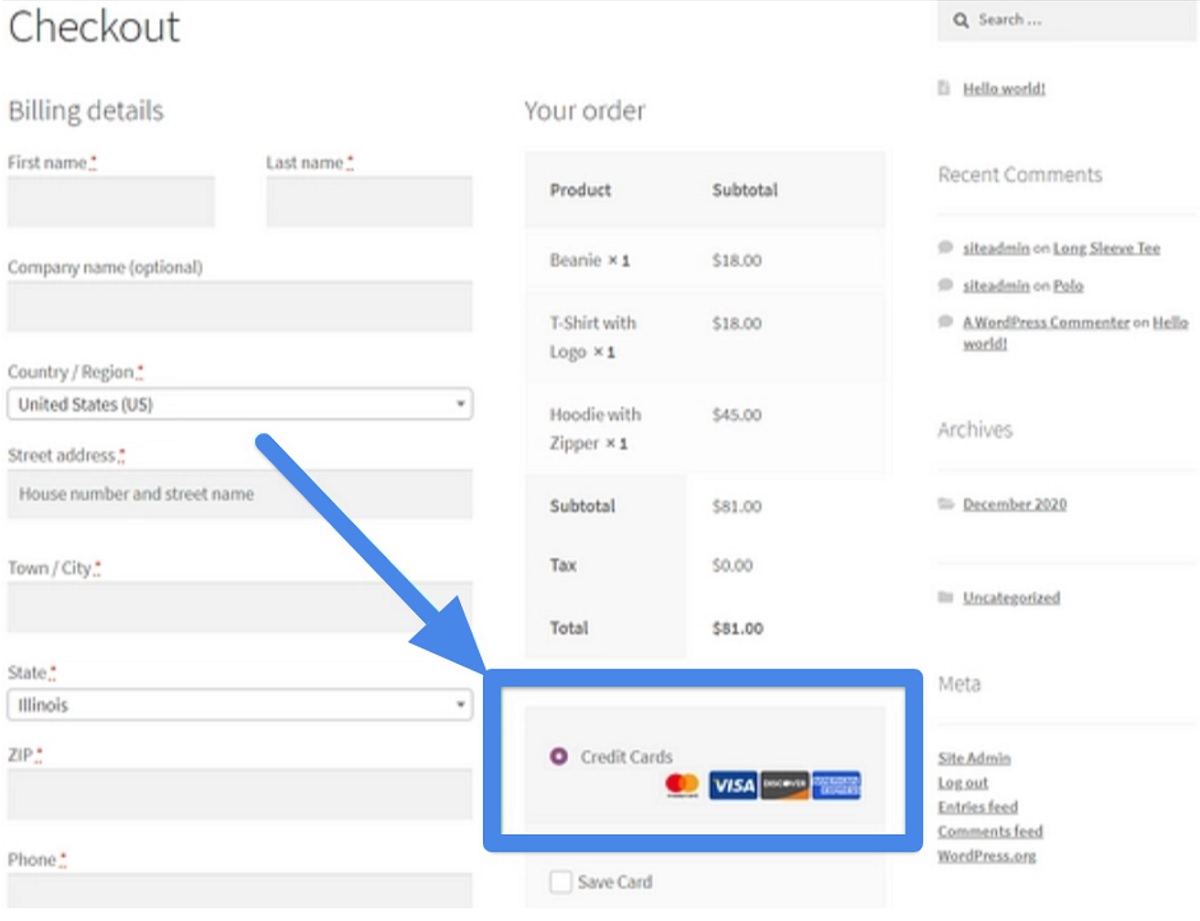
When the domain name verification process is complete, the Buy with Apple Pay button will appear in the checkout module. This button will also appear for mobile device users.

So, there you go! Now you have learned how to add Apple Pay to WooCommerce. Now we will describe some tweaks for the WooCommerce Apple Pay button.
Tweaks for WooCommerce Apple Pay Button
Now that you know how to add Apple Pay to WooCommerce, you need to learn how to fix issues. If you’ve encountered issues or you believe the procedure went successfully but you’re still not seeing the Apple Pay button on your site, investigate the following common issues:
- You must have an Apple Pay account active and running on your device. Otherwise, it won’t work. You can link your credit card to your Apple Pay app on your phone. Next, you can test the button activity on your WooCommerce site.
- Different API keys are generated for the live vs test WooCommerce sites. The Apple Pay button only appears if you are running a live site.
- You must have an SSL certificate and the site should be using HTTPS. Stripe won’t allow payments if your site does not have an SSL certificate. Also, the URL format should be “https://”.
- Sometimes the plugin will be unable to create the API Key for you. At that moment, you need to go to the API area of the Stripe website to retrieve the key manually.
Final Thoughts
You can add significant value to your online store by adding Apple Pay to WooCommerce. This is because Apple Pay creates a win-win situation for both customers and store owners. How? Well, Apple Pay is a more secure and mobile-friendly payment option.
Moreover, adding more payment gateways to your store means opening doorways for more customers. As a result, customers will frequently buy from your store because it includes the payment option they prefer.
We’ve mentioned easy approaches for adding Apple Pay to WooCommerce stores. Now it's your turn to follow those steps and activate Apple Pay on your store.
About the Author

Atanu Das is a professional content writer who is actively writing SEO-optimized content. For the last four years, he has been writing creative content on WordPress, WooCommerce, Google Merchant, eCommerce, and other topics. He is currently working as a content writer at Webappick — a large WordPress Plugin development company.
Related Information
Best WooCommerce Shipping Plugins
8 Best Photography Plugins for WooCommerce
Best WooCommerce Multilingual Plugins

