If you want to monetize your audience, creating a paid membership site is the easiest way. It requires very little time, and you don’t have to quit your job to do it. You also don’t require any technical knowledge or coding skills.
In this article, we'll show you the easiest way to create a paid membership site with WordPress.
Why You Should Create a Paid Membership Site
A paid membership site allows visitors to view some of its content for free but requires them to purchase a paid membership to view its premium content. This is what news sites like The New York Times, The Guardian, and Business Insider do. They let you read a few stories for free but require a monthly membership if you want to keep reading.
The best part about this business model is that it doesn’t require much work, and once you set it up, it doesn’t require much maintenance.
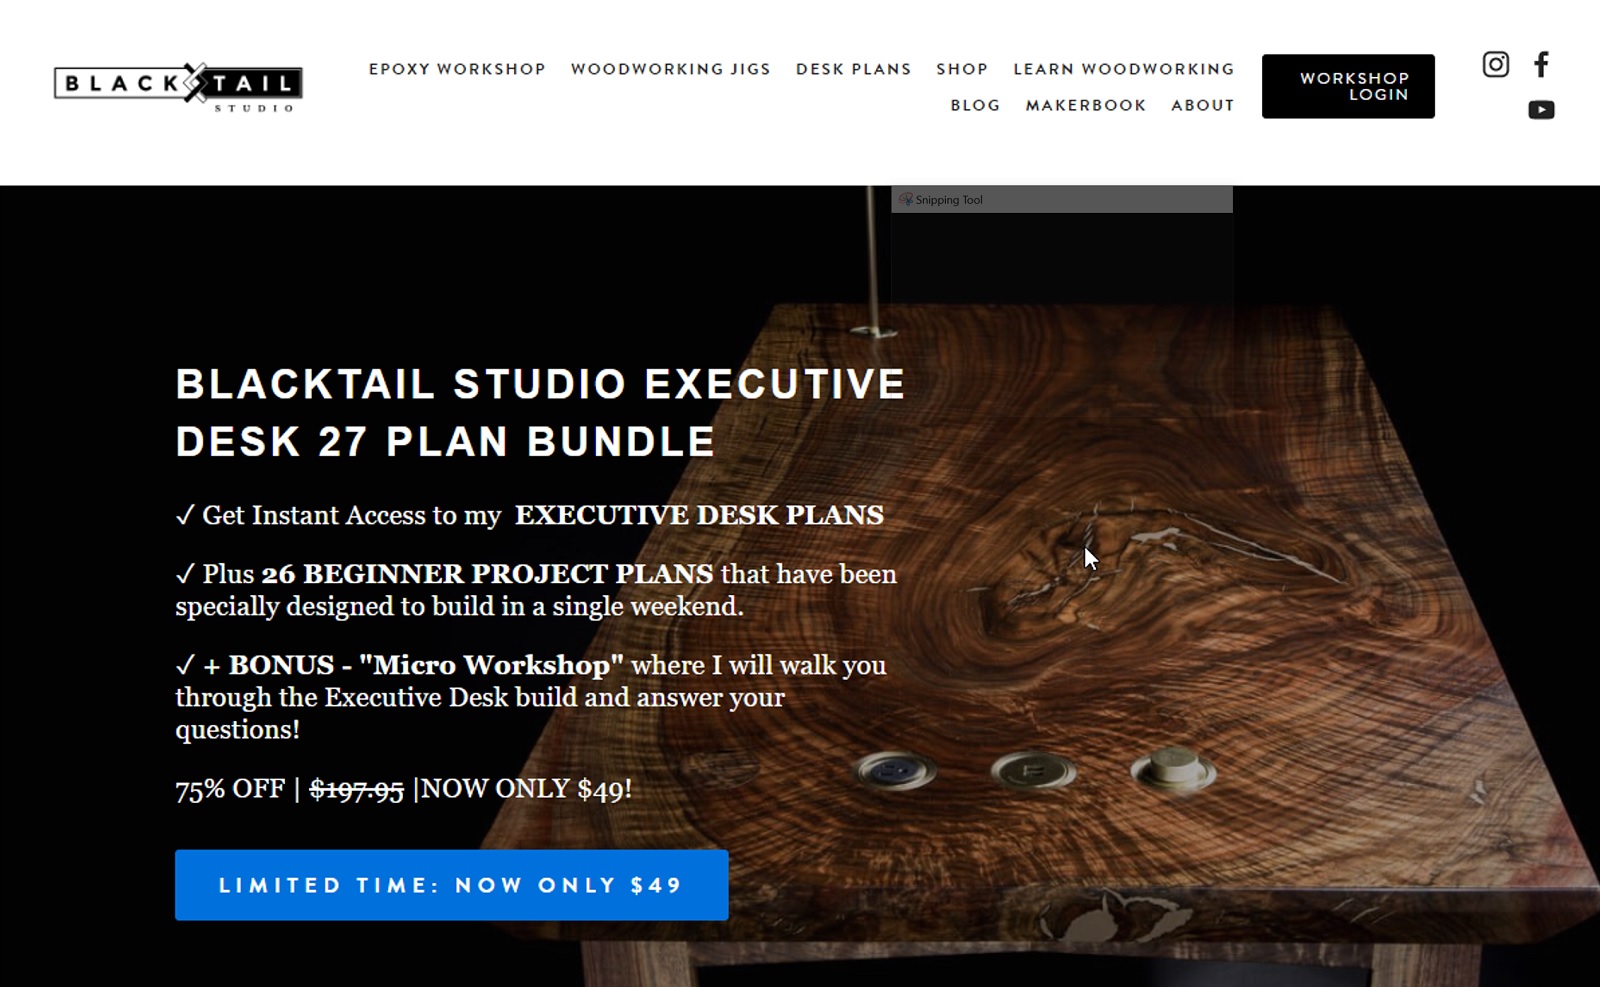
This approach works so well that many big YouTube channels have started using it. For example, Blacktail Studio, a YouTube channel that uploads videos about woodworking, sells its woodworking plans for beginners on its site. To download these plans, you need to become a paid member. This paid membership requires only a one-time payment of $49:
Charging a one-time fee is a great place to start if your membership site doesn’t have a lot of content to offer. But as you add more and more content to your membership site, you can start charging more. An excellent example of this is Ness Labs:

Their membership gives you access to their premium content and many other benefits:
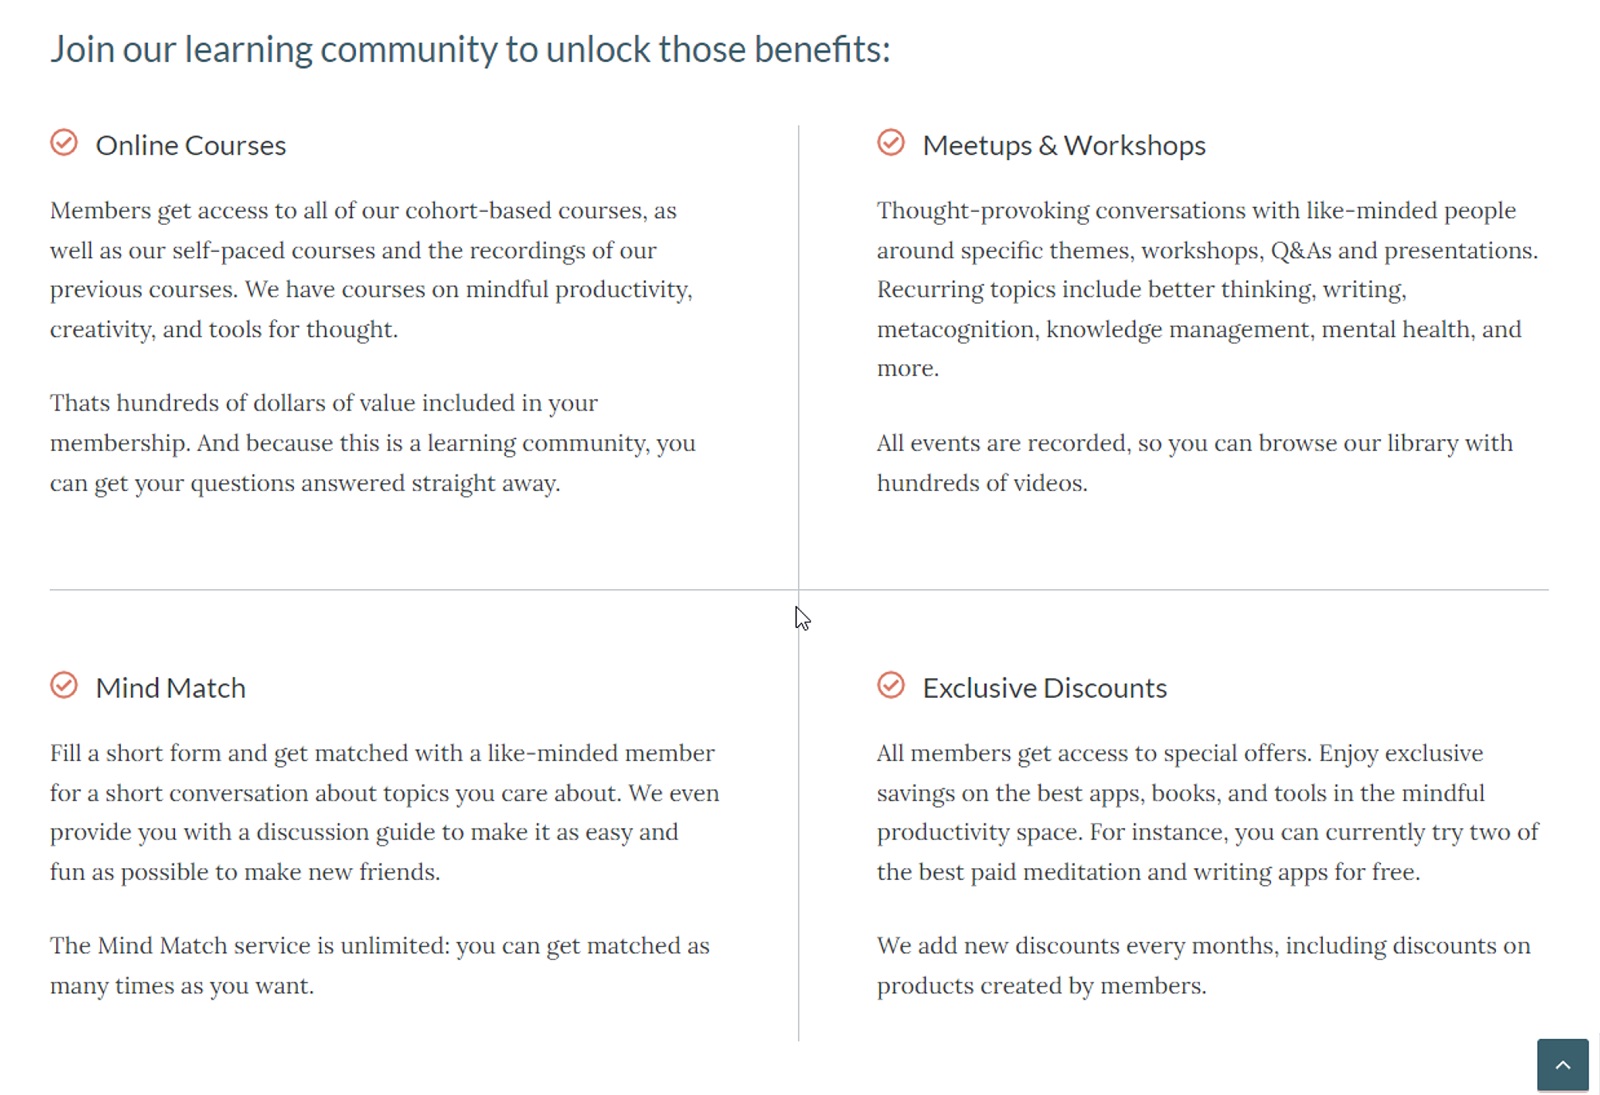
One of the most significant benefits they offer is called Mind Match. Once you join, you can fill out a short form, and they will introduce you to someone else in the community who is similar to you.
How much you can charge for a paid membership depends on how much you have to offer. You don’t have to start with dozens of features and hundreds of pages of content. Instead, you can start small and add new features and content over time.
There are a lot of different platforms that let you create a membership site, but most of them are limited. WordPress, on the other hand, offers numerous high-quality plugins for paid membership sites.
One of these is ProfilePress. It’s an all-in-one tool for creating membership sites and selling digital downloads. It's also built for beginners who don't have technical knowledge or programming skills. If you can use Facebook, you can learn to use ProfilePress.
Let's show you how!
How To Create Paid Plans For Your Membership Plans
ProfilePress allows you to create both one-time payment plans and recurring subscription plans.
How To Create a One-Time Payment Plan
This is the type of plan that Blacktail Studio offers its audience.
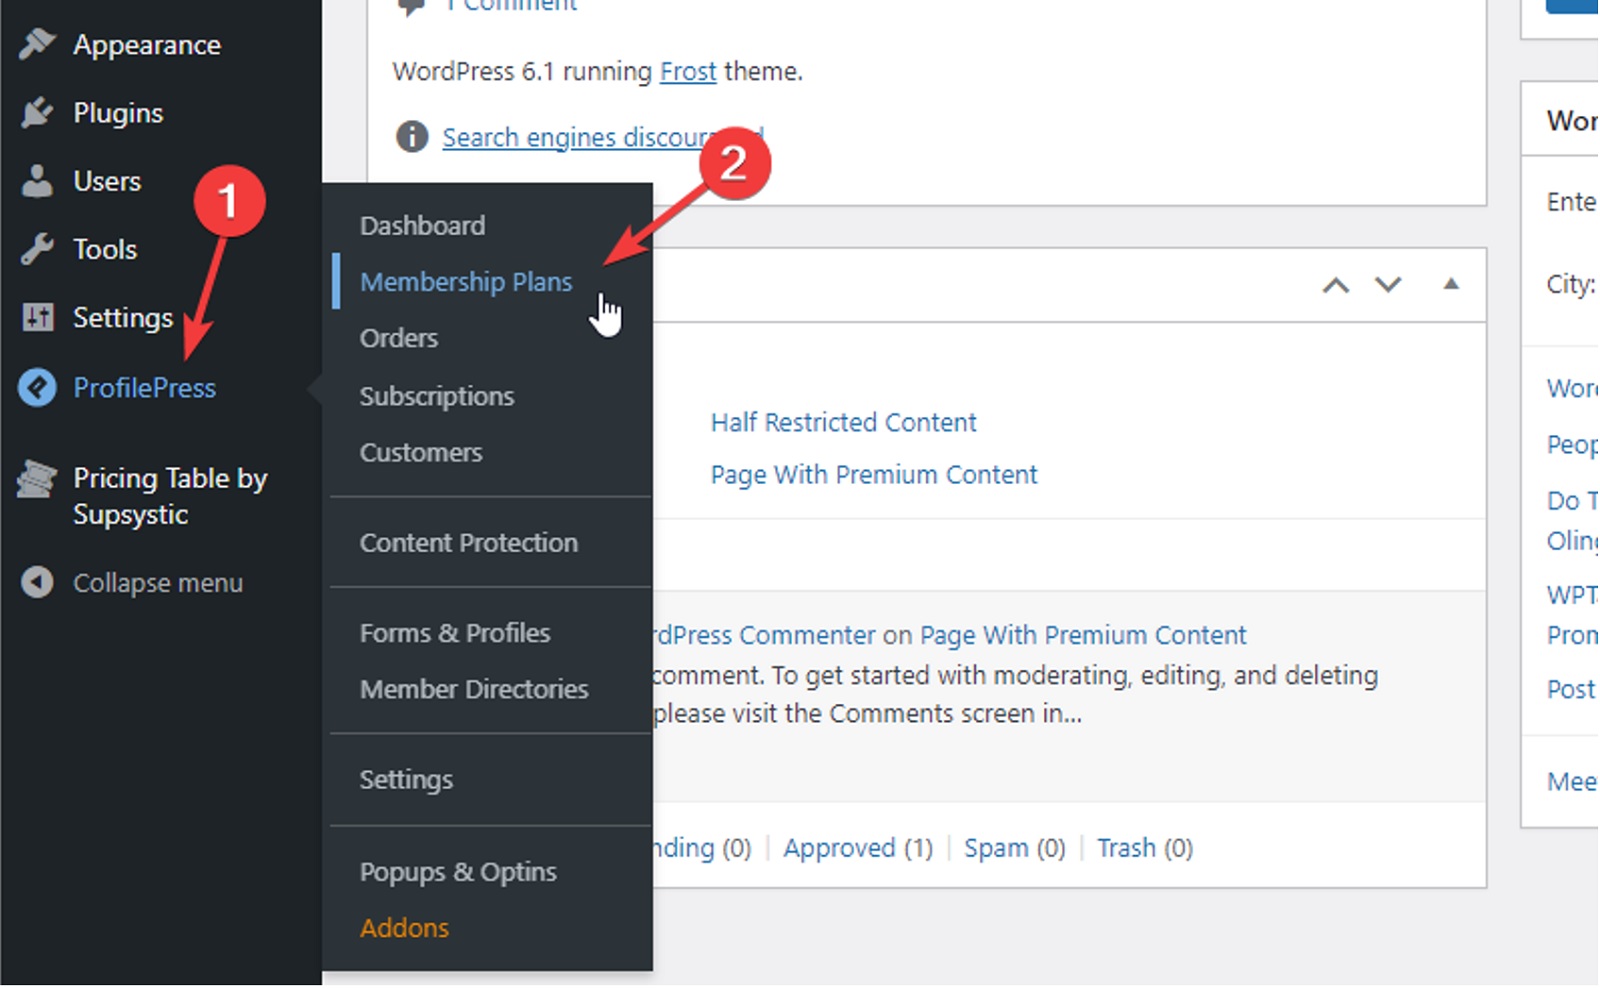
To create a one-time plan, log into your WordPress website’s dashboard and navigate to the Membership Plans section of ProfilePress:
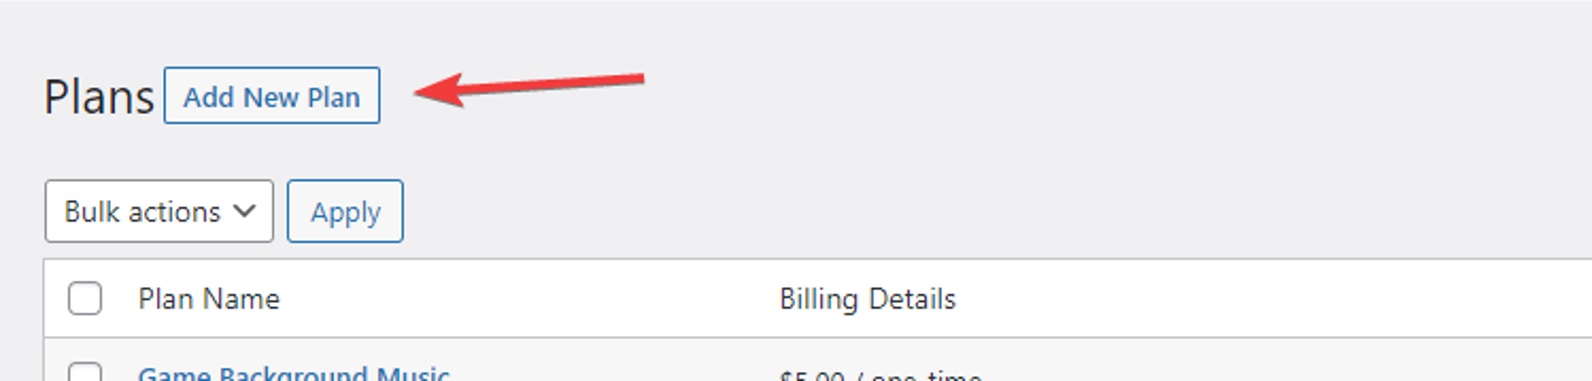
Click the Add New Plan button:
This will take you to the ProfilePress new plan creator:
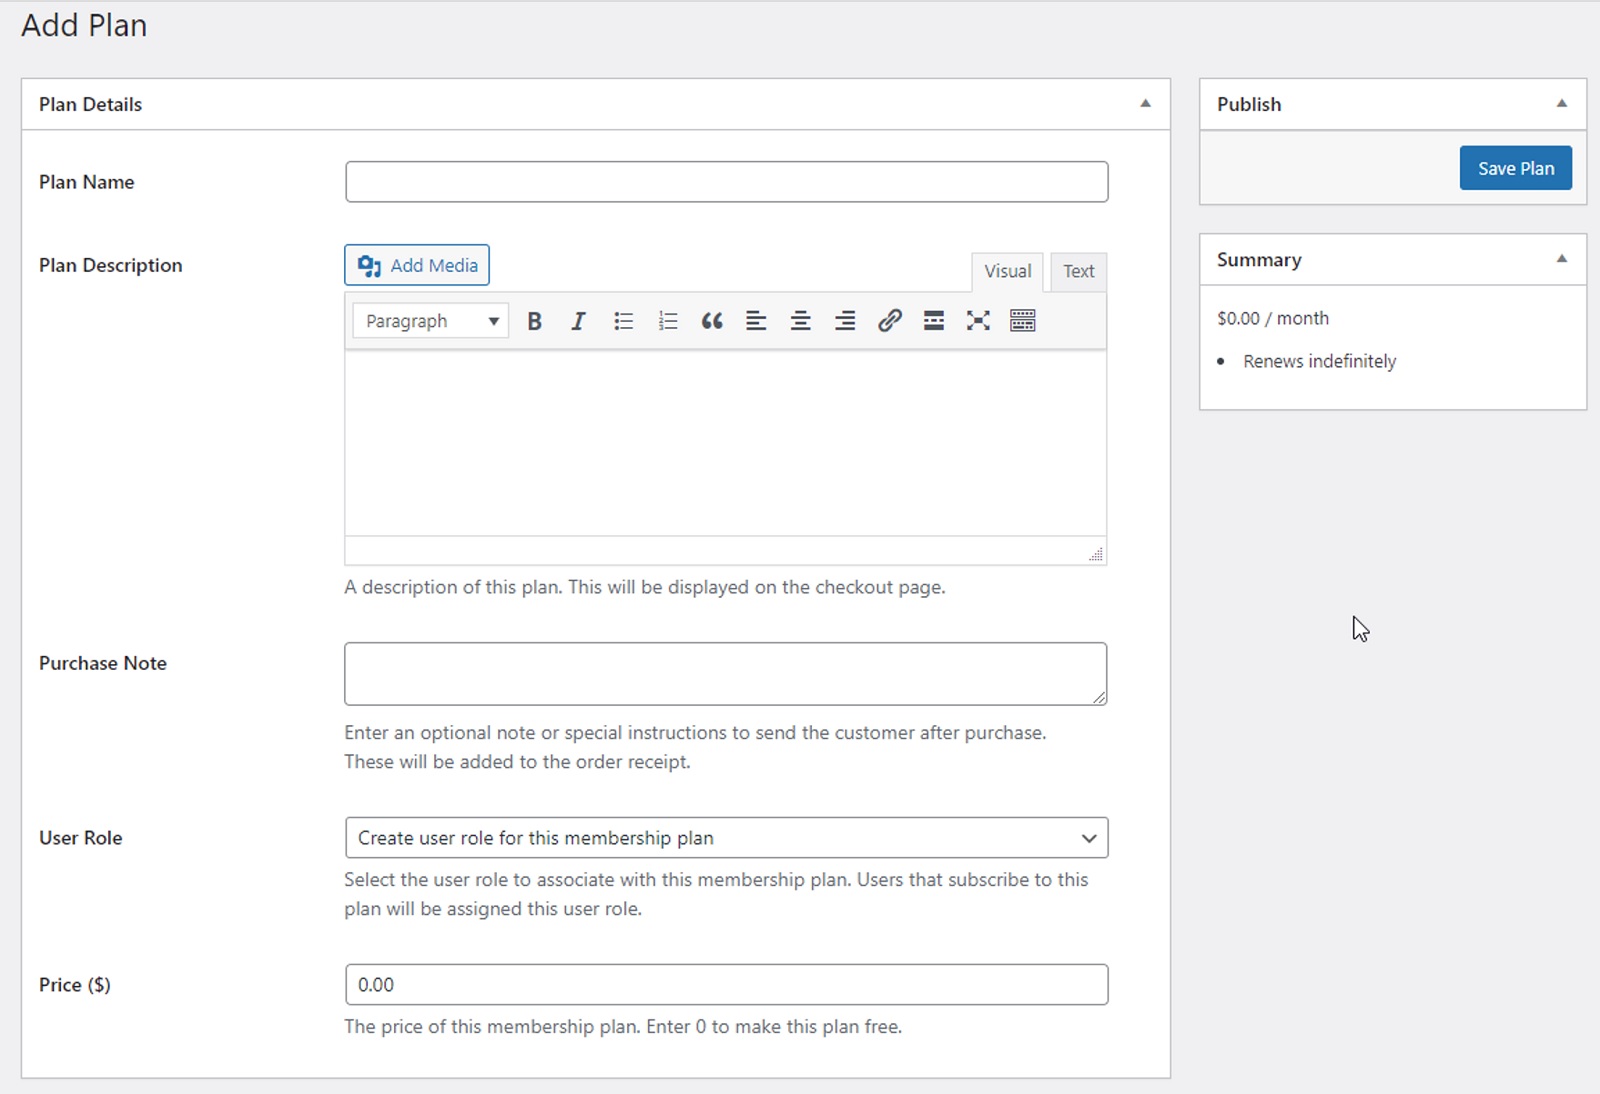
In the first section, called Plan Details, fill out a name and description. You can also enter a purchase note if you want. This note will be emailed to your customers along with the order receipt when they buy this plan.
Next, enter a price for this plan. This is how much a user will have to pay to buy this plan.
Scroll down and you’ll see a section called Subscription Settings:

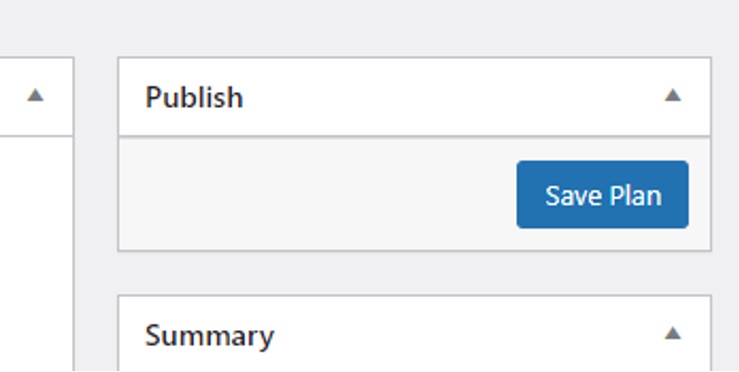
Change the Billing Frequency to one-time to create a one-time plan. Then, click the Save Plan button:
How To Create a Recurring Payment Plan
If you have a lot of content on your website, you can create a recurring plan that charges your customers monthly or yearly. Recurring plans are perfect for online courses and membership sites with a lot of content.
To create a recurring plan, create a new plan by following the first few steps in the previous section. Then, scroll down to the Subscription Settings section:
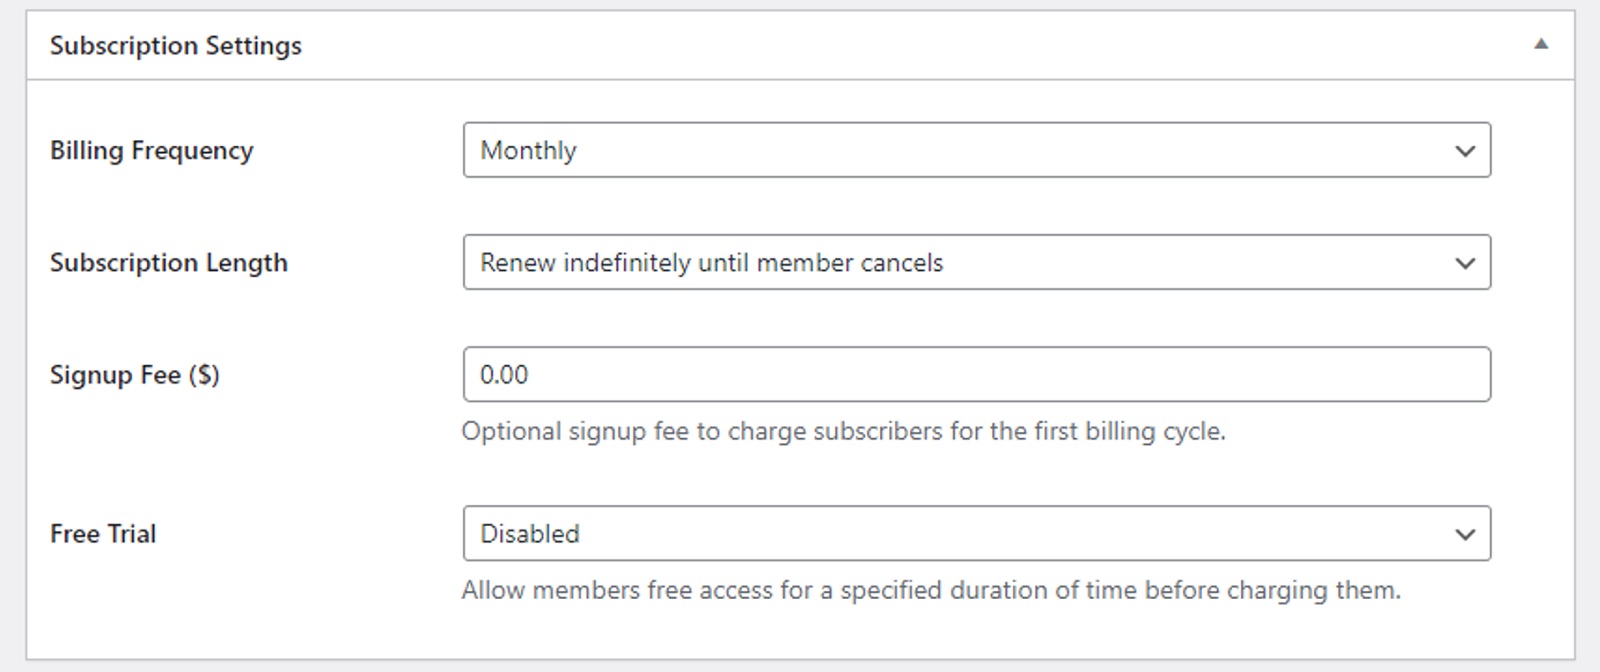
First, use the Billing Frequency field to select how frequently your customers are charged for this plan. You can choose Daily, Weekly, Monthly, Quarterly, Bi-Annually, or Annually.
You can charge your customers a sign-up fee by entering the amount in the Sign-Up Fee ($) field. Your customers will be charged this fee in addition to the first month’s charge when they sign up. This fee is only charged once.
If you want, you can offer your customers a free trial. They won’t be charged until the trial period is over, and they won't get charged at all if they cancel before the trial runs out.
Finally, click the Save Plan button (not shown) to publish this recurring subscription plan.
IMPORTANT: The Checkout Page
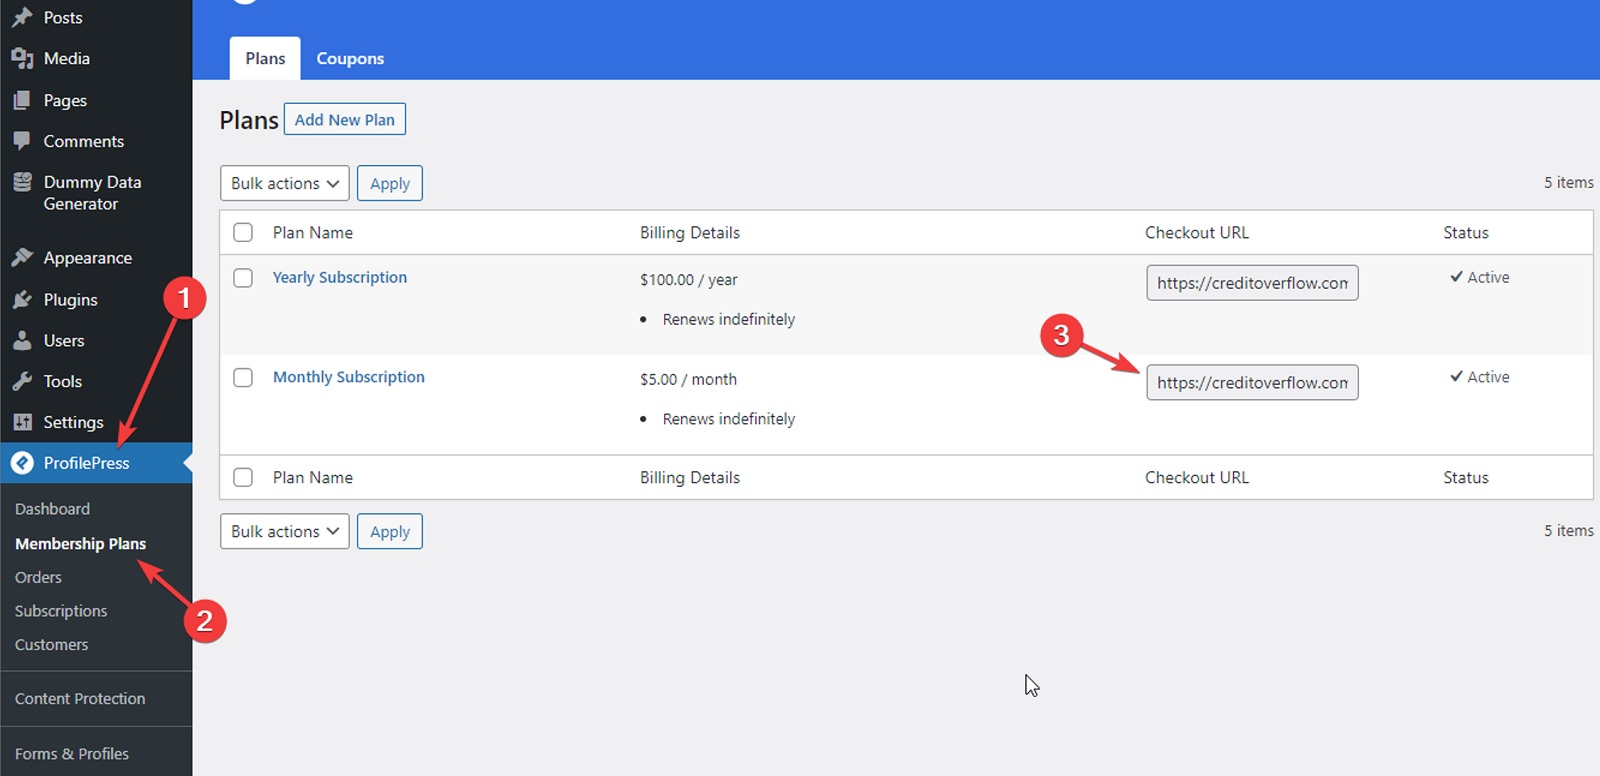
For every plan (recurring or one-time) that you create, ProfilePress will create a checkout page. You can get the link to this checkout page from the Membership Plans section:
If you open the checkout link, you’ll see a checkout page similar to this:

You can now link to this checkout page from any of your pages. For example, you can link to it from a pricing page or your website’s navigation menu.
If you visit your checkout page right now, you won’t see any payment methods. That’s because you haven’t connected a payment platform to your WordPress site. We'll show you how to do this later in this article.
How To Restrict Access To Your Premium Content
ProfilePress offers a lot of ways to restrict user access to your content. Here are two of them that you’ll find handy:
How To Restrict Access To Your Premium Posts and Pages
First, navigate to the Content Protection section under ProfilePress:

You’ll now see the Add Protection Rule page:
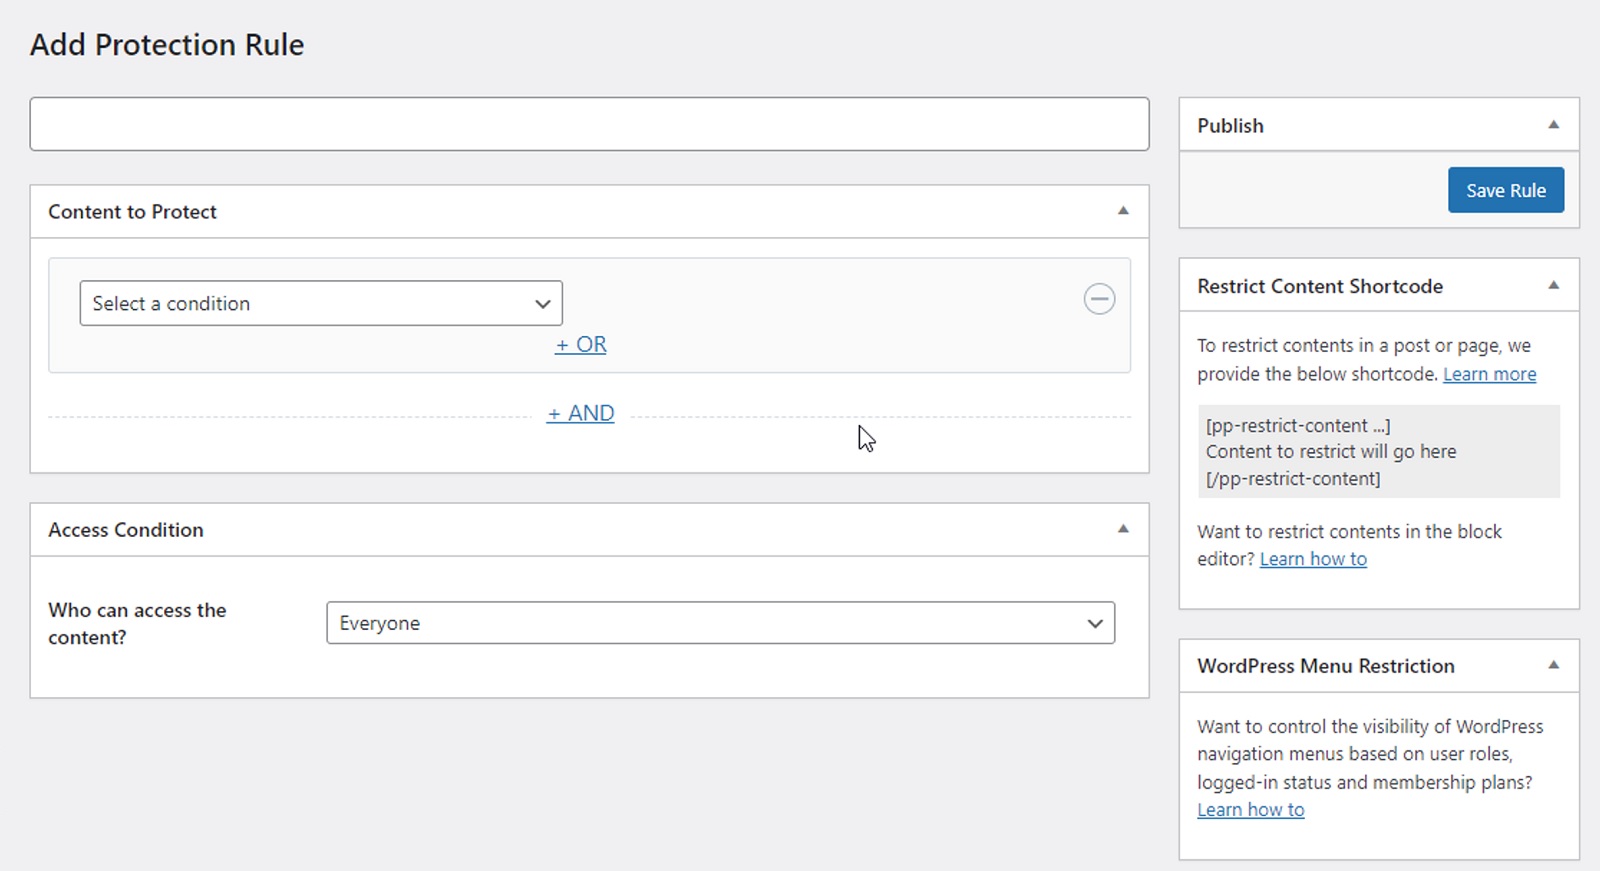
First, enter a name for the protection rule. This name is only for your reference.
Next, select a condition for the rule:
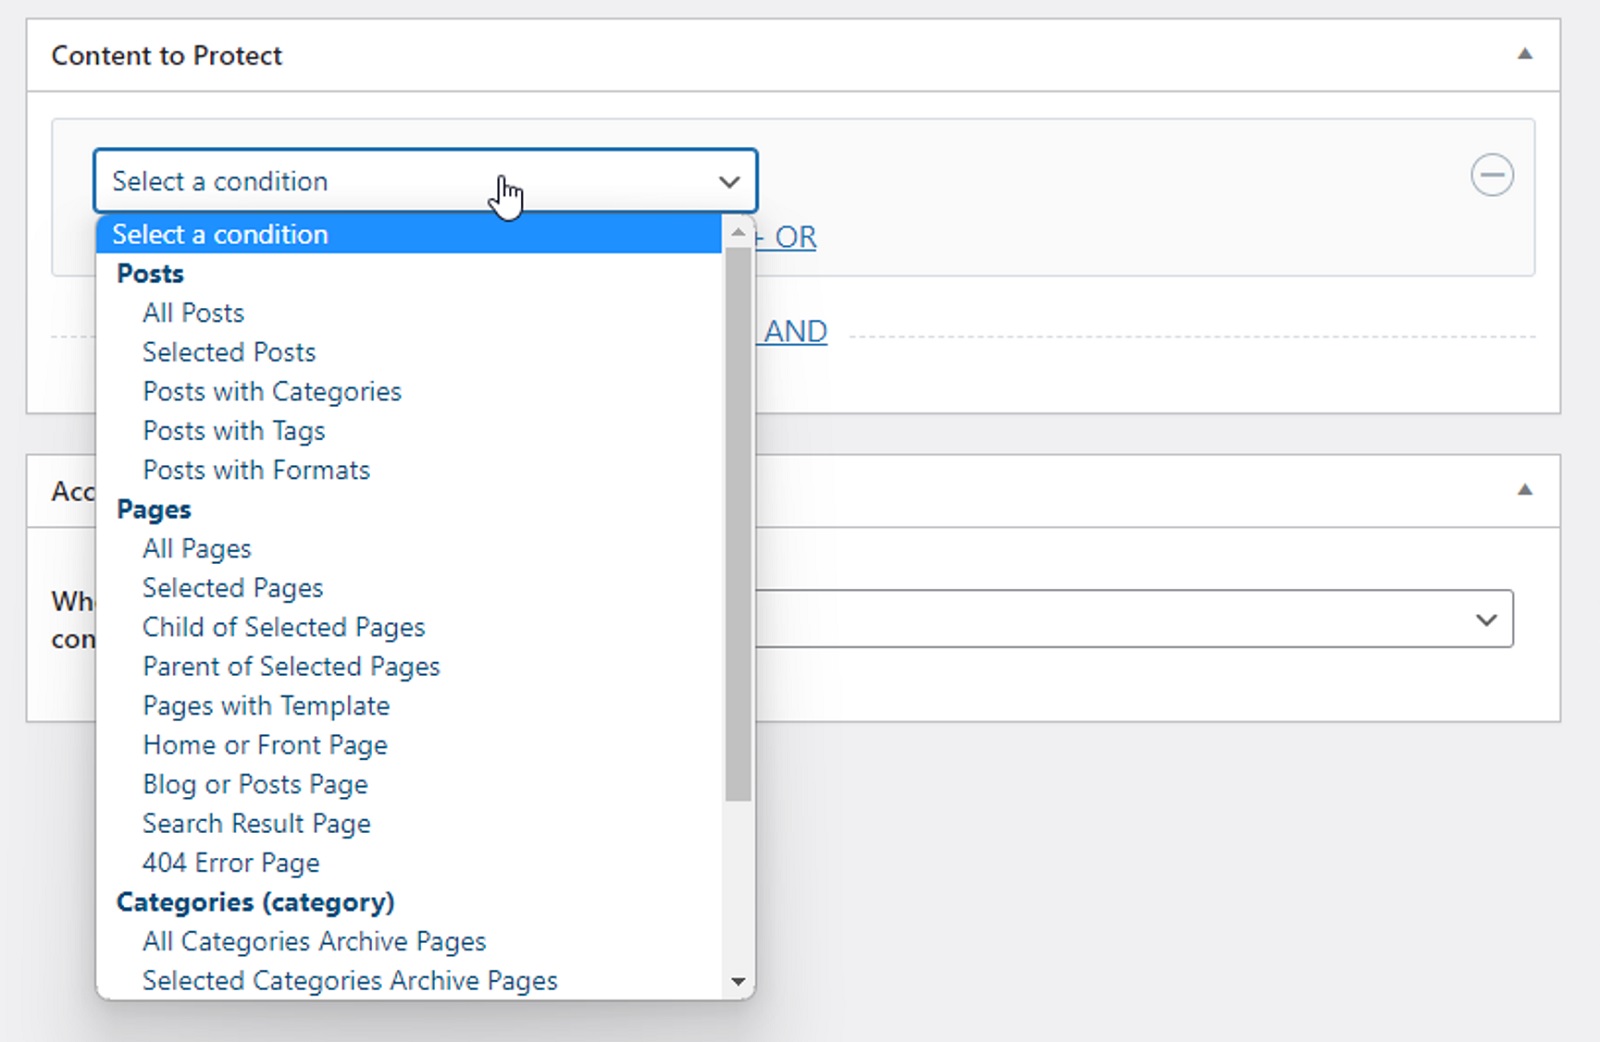
ProfilePress lets you choose from many different conditions. These conditions allow you to restrict access to posts, pages, and categories. The easiest is the Selected Posts condition and its counterpart Selected Pages. These conditions allow you to enter the names of posts or pages that you want to restrict access to:

You can add as many conditions as you want by clicking and +AND link:

If you want to restrict access to a lot of posts, create a new category called "Premium Posts" (you can name it whatever you want). Then, select Posts With Categories as the condition and select the new Premium Posts category:
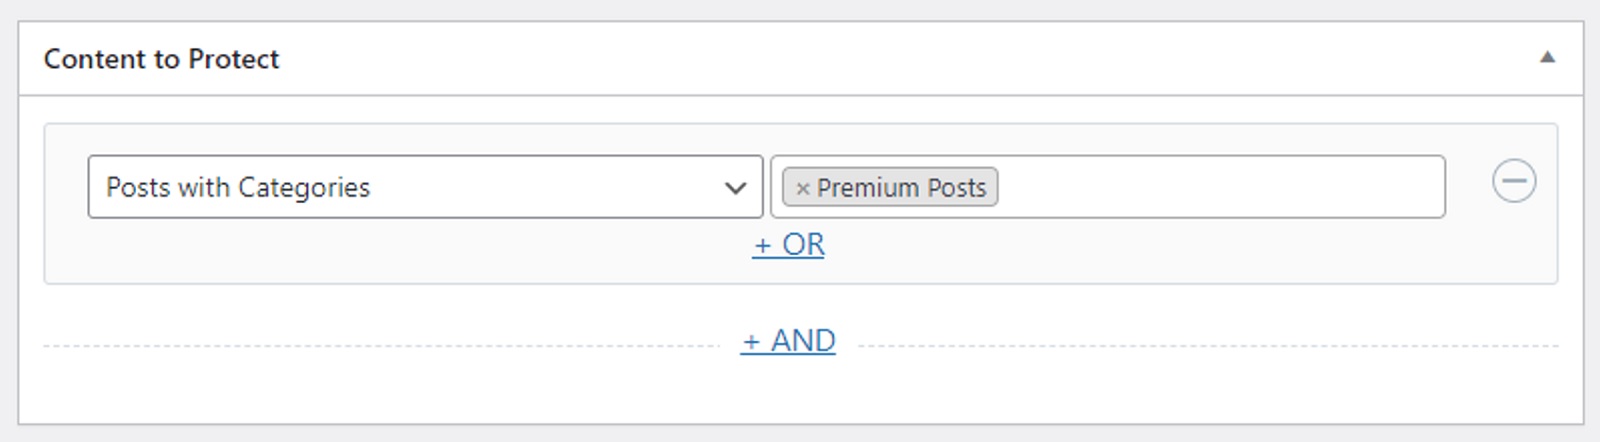
This way, you won’t need to edit this content rule whenever you publish a new post that you want to restrict access to. Instead, you can just add the Premium Posts category to that post.
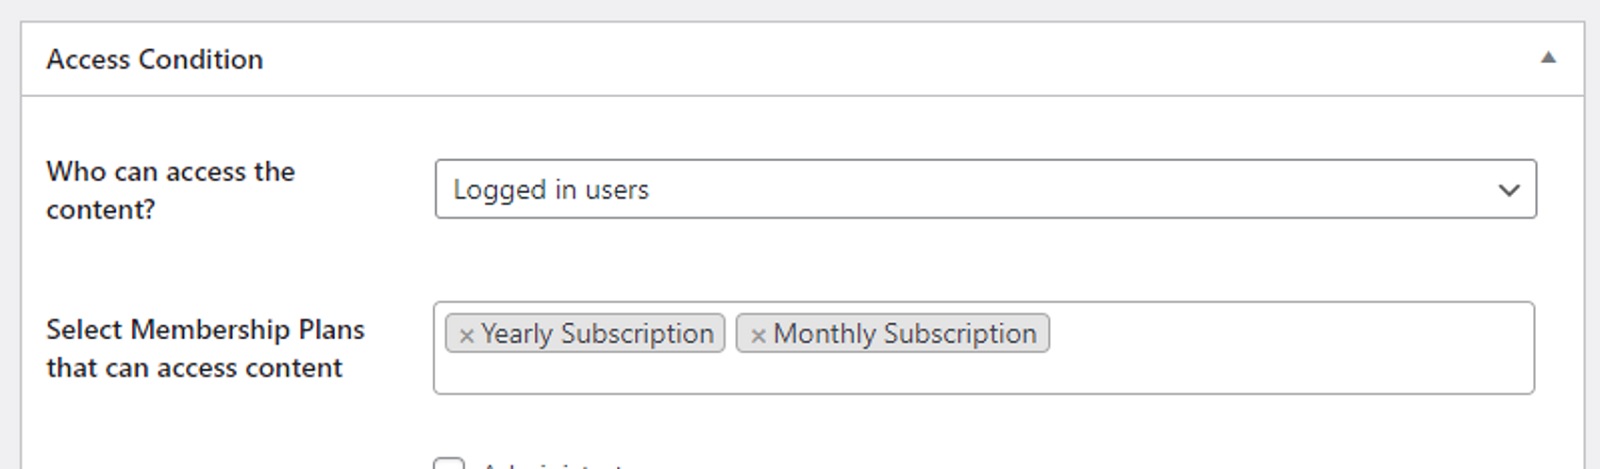
Now, scroll down to the Access Condition section and select Logged In Users from the drop-down menu, then enter the names of the Membership Plans that you want to grant access to:
Finally, click the Save Rule button (not shown) to publish this content protection rule.
Now, log out of WordPress and visit any posts or pages you selected in this content protection rule. Anyone who isn’t logged in or doesn’t have an active subscription will see this error message:

You can edit the message from ProfilePress settings.
How To Restrict Access To Parts of a Page’s Content
ProfilePress lets you restrict user access to parts of a page’s content. This allows you to tease your website visitors with sample content. This is what sites like The New York Times do. They let you read a couple of paragraphs and then ask you to subscribe if you want to read the rest.
The easiest way to do this is to use ProfilePress’ content restriction shortcode. Whatever you put between the opening and closing tags of this shortcode will be hidden from your users who don’t have an active subscription:
[pp-restrict-content]THIS CONTENT WILL NOT BE VISIBLE TO FREE USERS[/pp-restrict-content]
Every plan that you create in ProfilePress gets a unique ID. You can check this ID on the Membership Plans page under ProfilePress settings:

You can enter the IDs of all the plans that are allowed access to this content like this:
[pp-restrict-content plans=”1”]THIS TEXT WILL NOT BE VISIBLE TO FREE USERS[/pp-restrict-content]
In the above example, 1 is the ID of the plan that offers access to this content. You can enter more than one ID separated by commas.
If you find this too confusing or complicated, there’s an easier way to restrict parts of your content. You can use the free Conditional Blocks plugin. It has a built-in ProfilePress integration making it easy to restrict access to content. Read this guide to learn how to use it.
ProfilePress has a lot of other options for restricting access to your content. You can:
- Restrict visibility of navigation menus
- Restrict visibility of contents in Beaver Builder
- Check if a user has an active subscription in your PHP code
- Restrict access to your entire website with one click
- Restrict visibility of Elementor’s contents
How To Connect a Payment Gateway
To start accepting payments on your website, you’ll need to connect a payment gateway to ProfilePress. ProfilePress supports PayPal, Stripe, and Mollie.
If you don’t already have a payment platform account, we recommend signing up with Stripe. It’s the easiest one to sign up for.
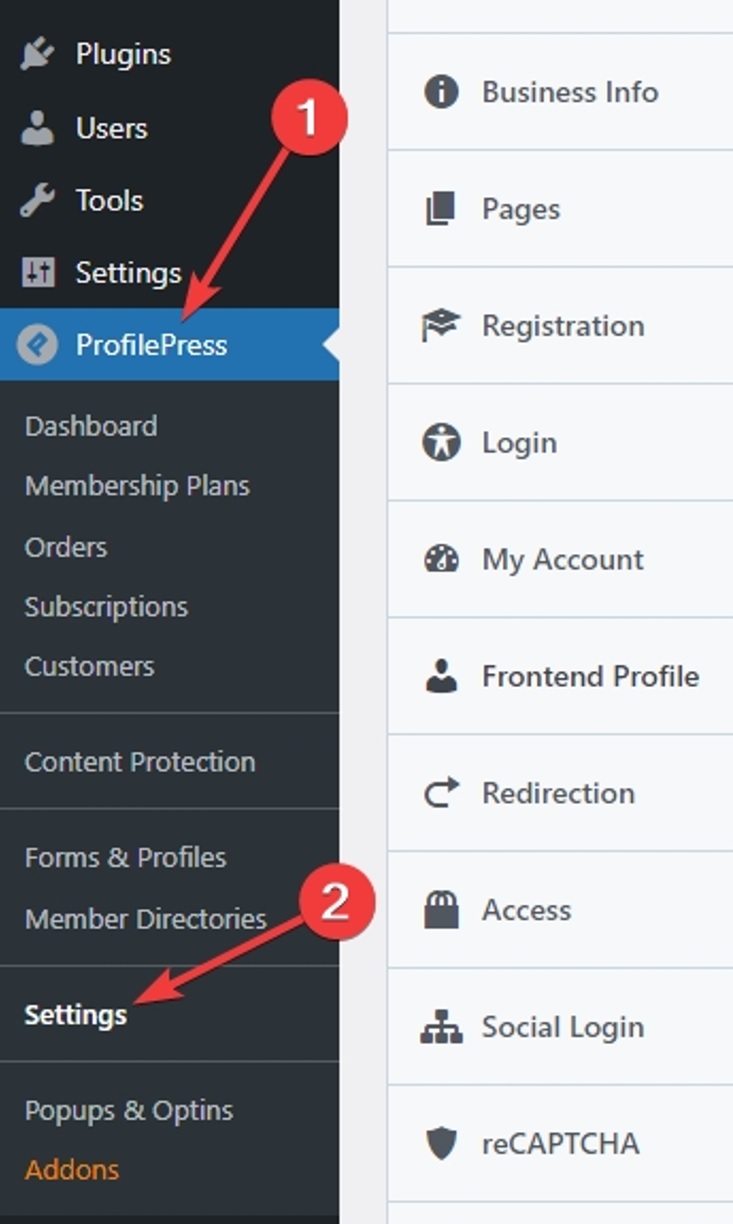
Once you have signed up for Stripe, navigate to the Settings page under ProfilePress:
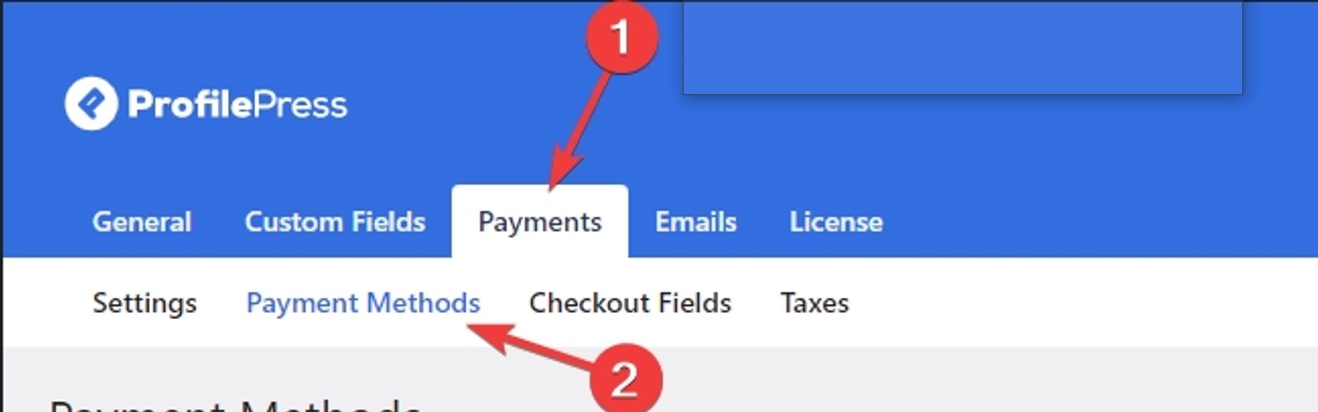
Next, click the Payments tab and then the Payment Methods sub-tab under it:
Click the Configure button next to Stripe:

Now, click the Connect with Stripe button:

You’ll now see Stripe’s login page. Once you are logged in, Stripe will show you all of your payment accounts:

Select the one that you want to use. If you’ve just signed up, you’ll only see one account. Select it and click the Connect button. This will take you back to the ProfilePress Settings page:
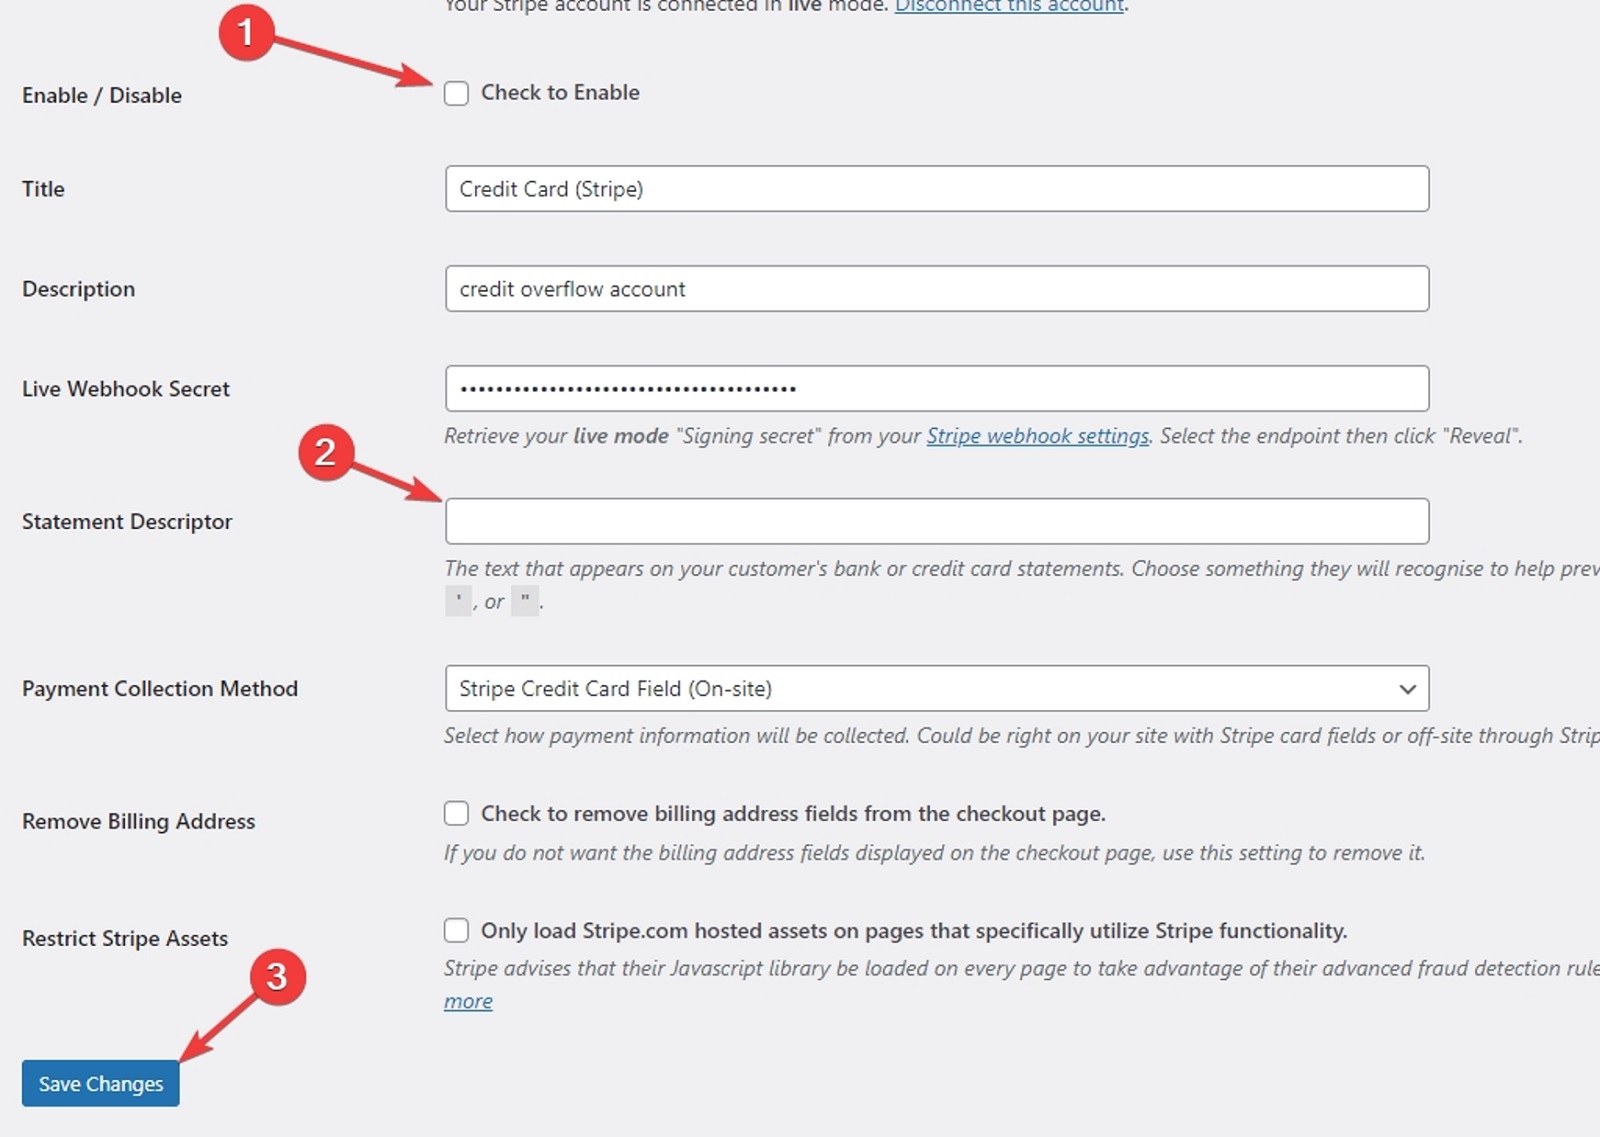
Select the Check to Enable checkbox. Then enter a Statement Descriptor – the business name that you want to appear on credit card statements. Finally, click the Save Changes button.
Bonus: How To Sell Digital Downloads
If you are building a membership site, you might not want to offer all your content under the same paid subscription. For example, you can sell your eBooks separately.
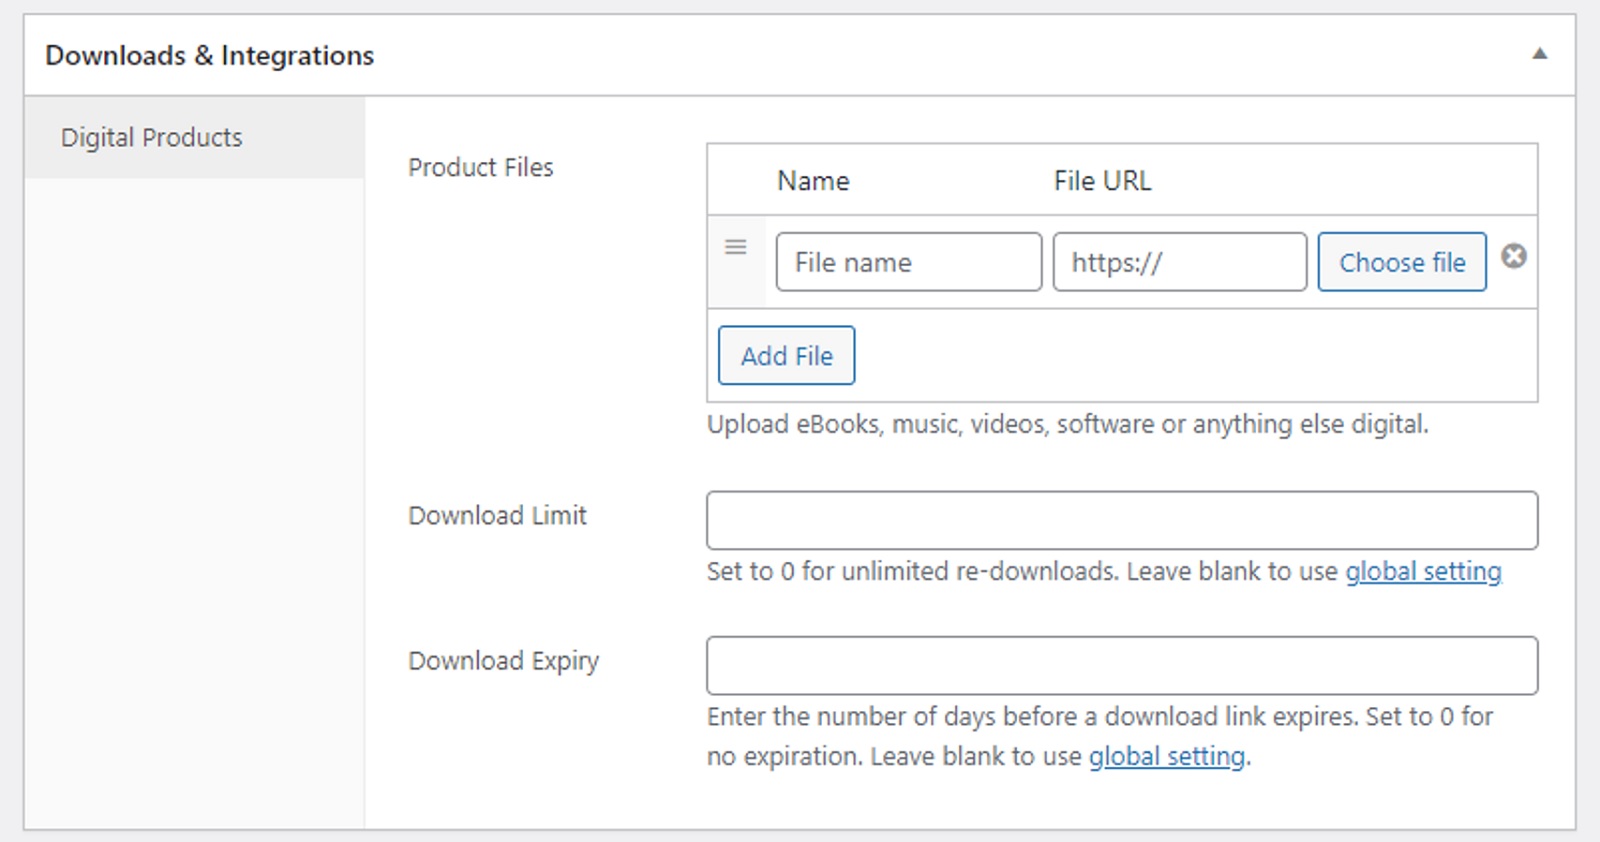
ProfilePress makes it easy to sell digital downloads. Just create a new one-time payment plan, then upload your downloadable files in the Downloads & Integrations section at the bottom:
Save this plan once you’re done configuring it, and that’s it! Your website’s visitors can now buy your digital download from the checkout link created for this plan.
Conclusion
Creating a paid membership site is a no-brainer if you already have an audience (big or small). It doesn’t require a lot of work or maintenance. It’s also the fastest way to start making money from the audience you’ve already built. For example, a lot of prominent YouTube creators have their own paid membership sites for their premium content. This is because most people don’t mind paying their favorite content creator a couple of bucks monthly, especially if they get something in return.
To set up your paid membership site, check out ProfilePress today!
Related Information
How to Create a WordPress Paid Membership Site
Best WooCommerce Shipping Plugins

